Tripod mounting adapter for Cisco Meraki MR outdoor access points

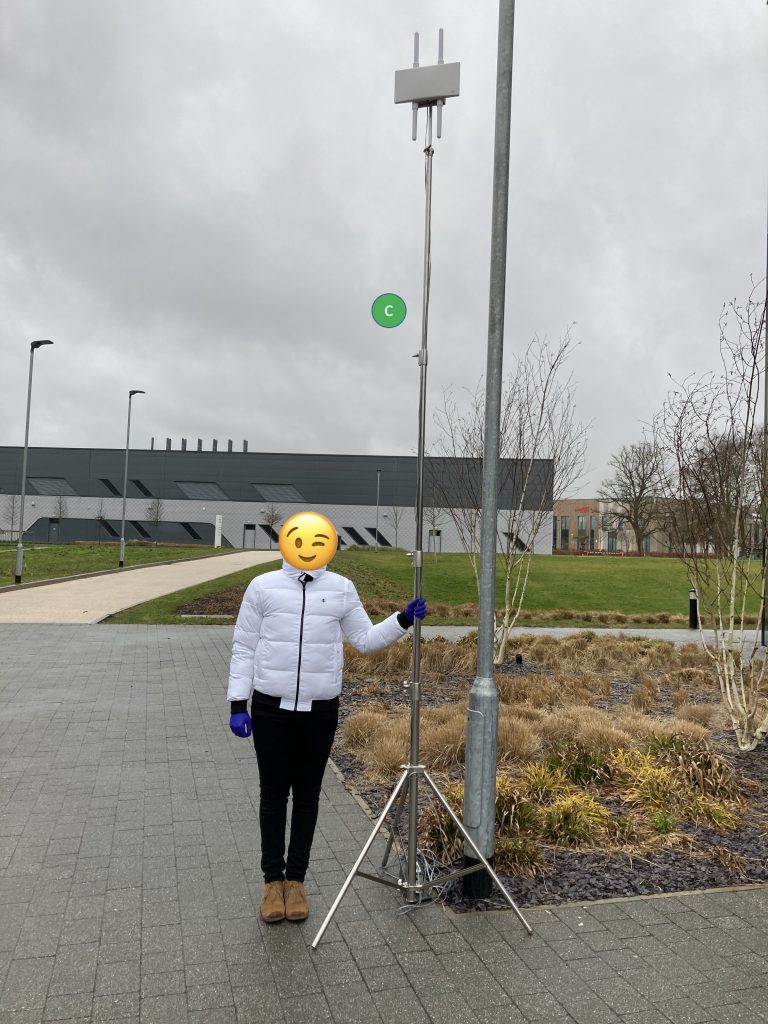
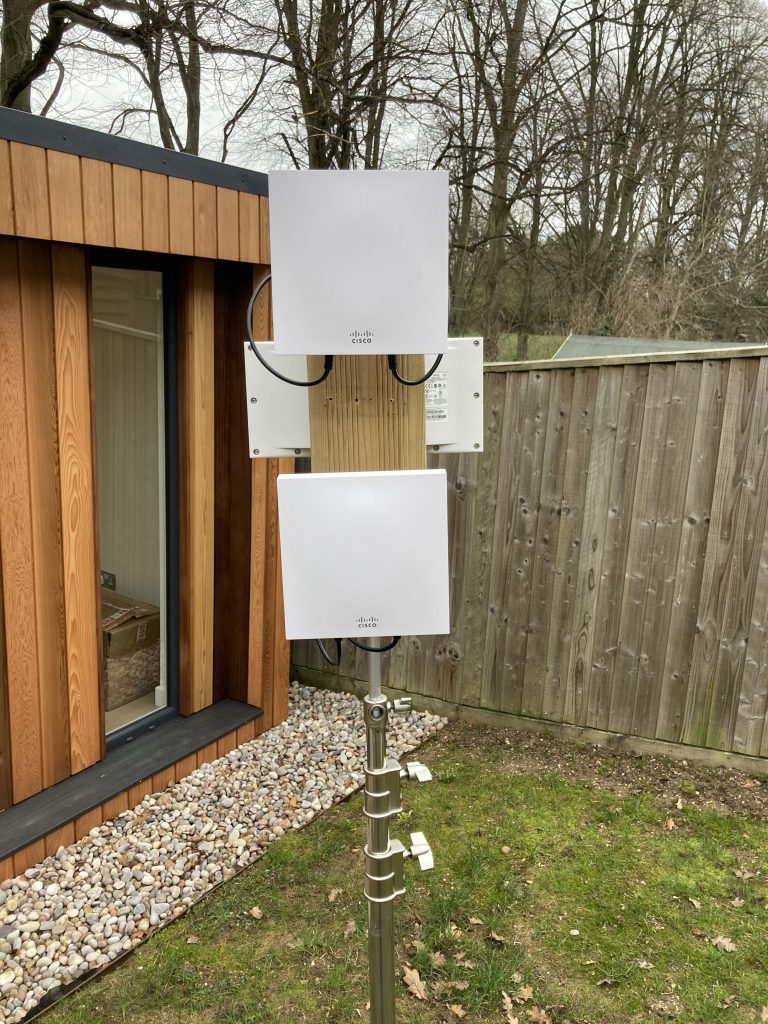
I needed to find a solution to swapping multiple outdoor AP and antenna combinations on the same tripod. Specifically MR86 with MA-ANT-20 dipoles and MR86 with two MA-ANT-25 directional antennas. Quick swapping was a key requirement. Some coverage areas required directional pattern while other locations with low traffic and low client density would really benefit from omnidirectional coverage.

MRs ship with standard pole mounting hardware, which is great for permanent installation, but it didn’t allow fast swapping of the AP and antenna sets. Also, pole mounting kit requires tools, which is not practical as it add additional weight to your survey backpack.

Please excuse the DYI approach. I did this during UK’s second COVID-19 lockdown. Shops were closed, tools were limited and I had no access to my lab.

You are smart people, so I don’t need to stress this point, but please don’t take this write-up as Cisco’s official guide or recommendation. This is just me trying to find a solution to a problem.

So, what’s the solution?

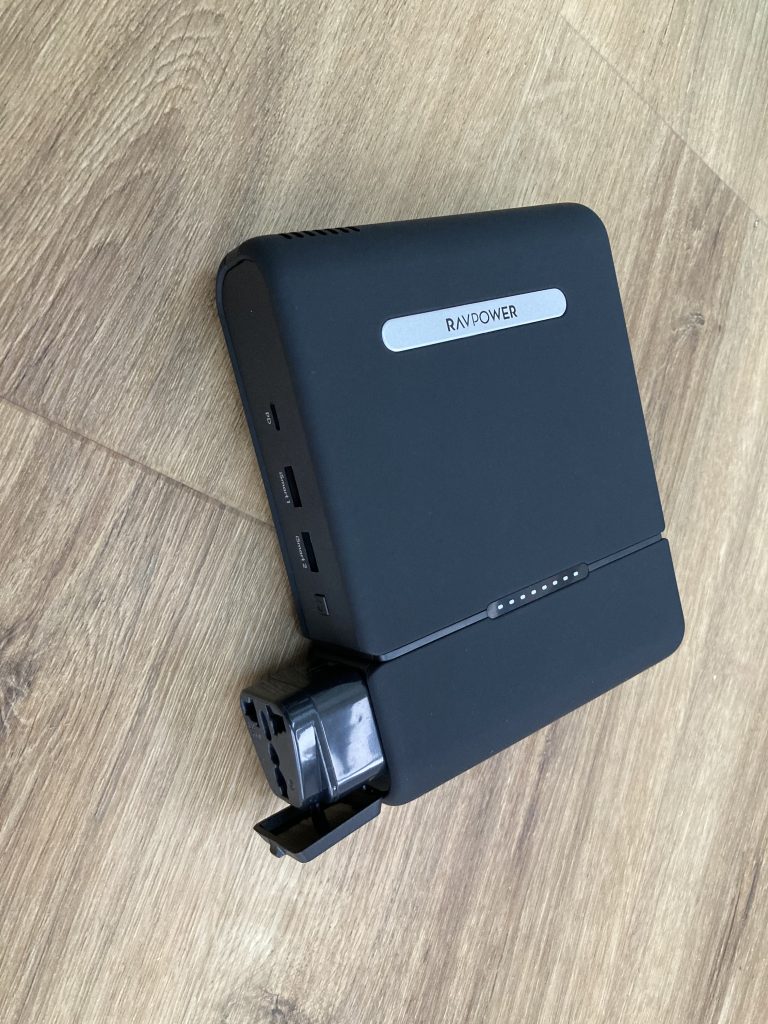
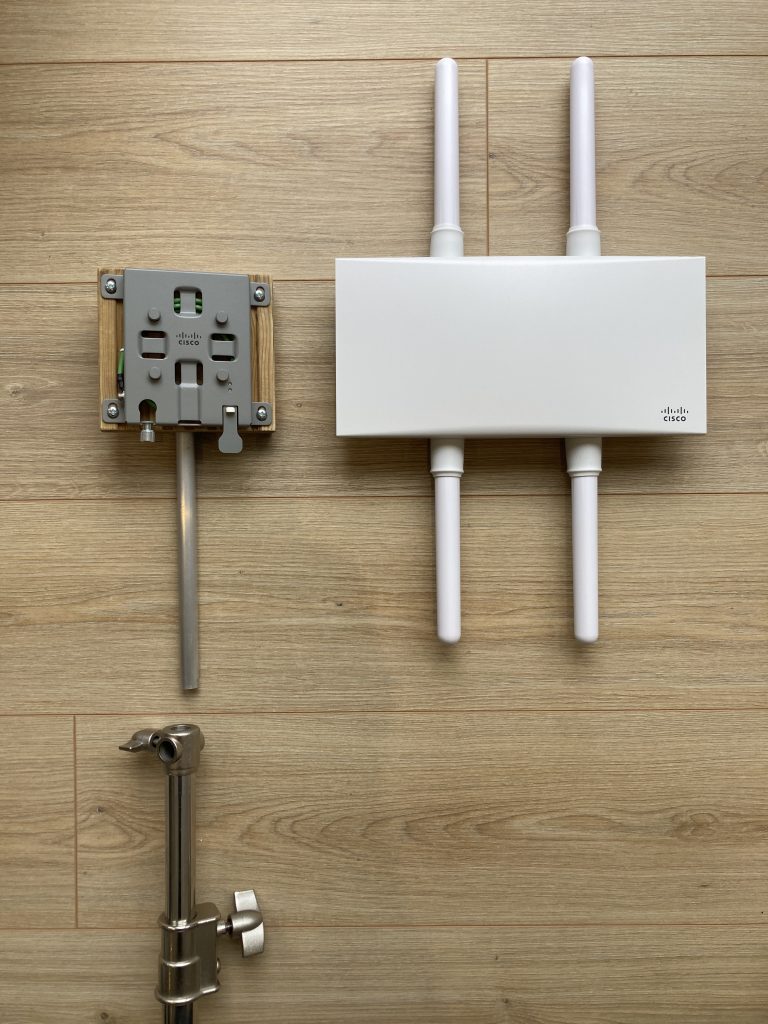
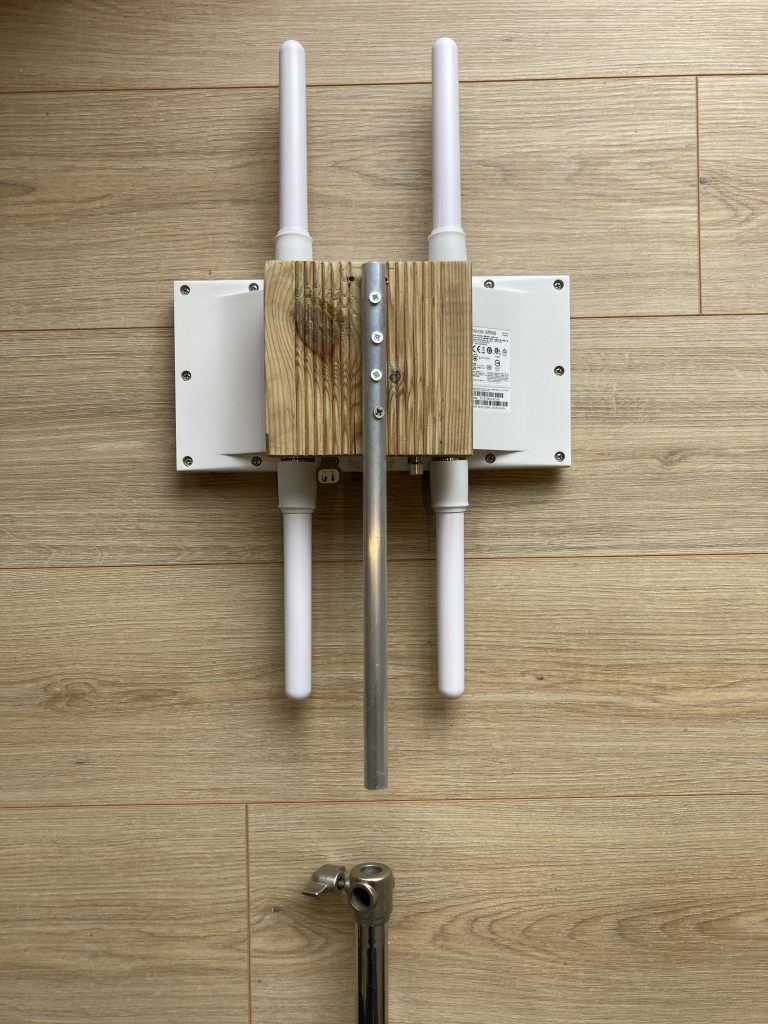
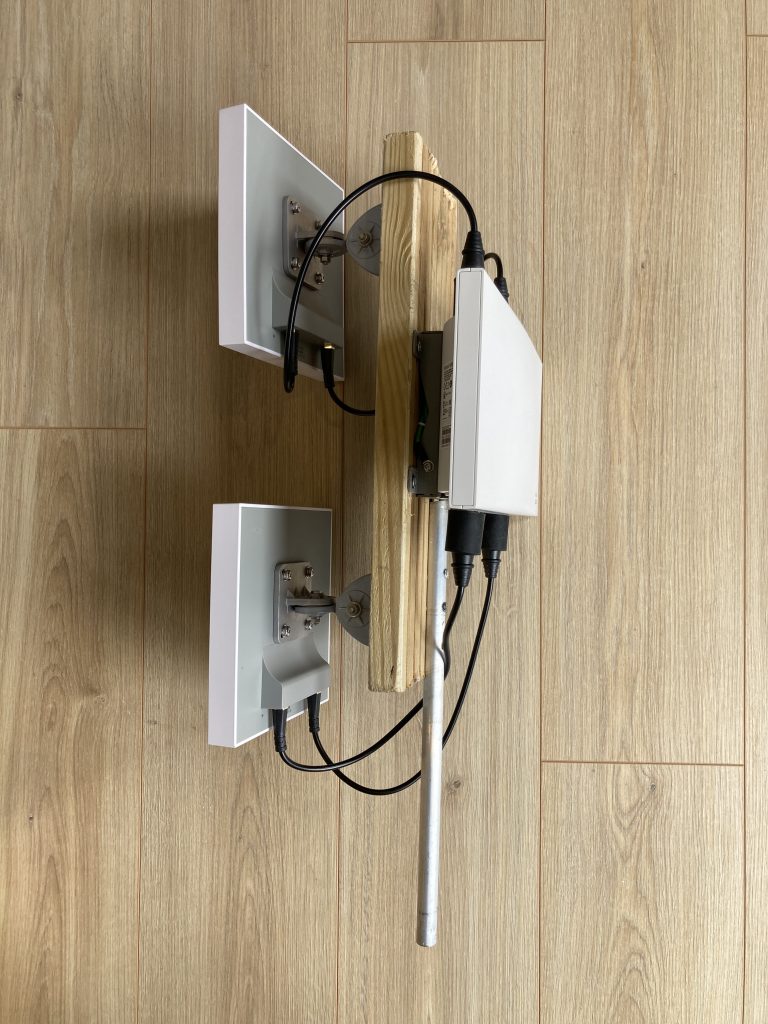
Let me show you the final adapter and we can then look into the detail.
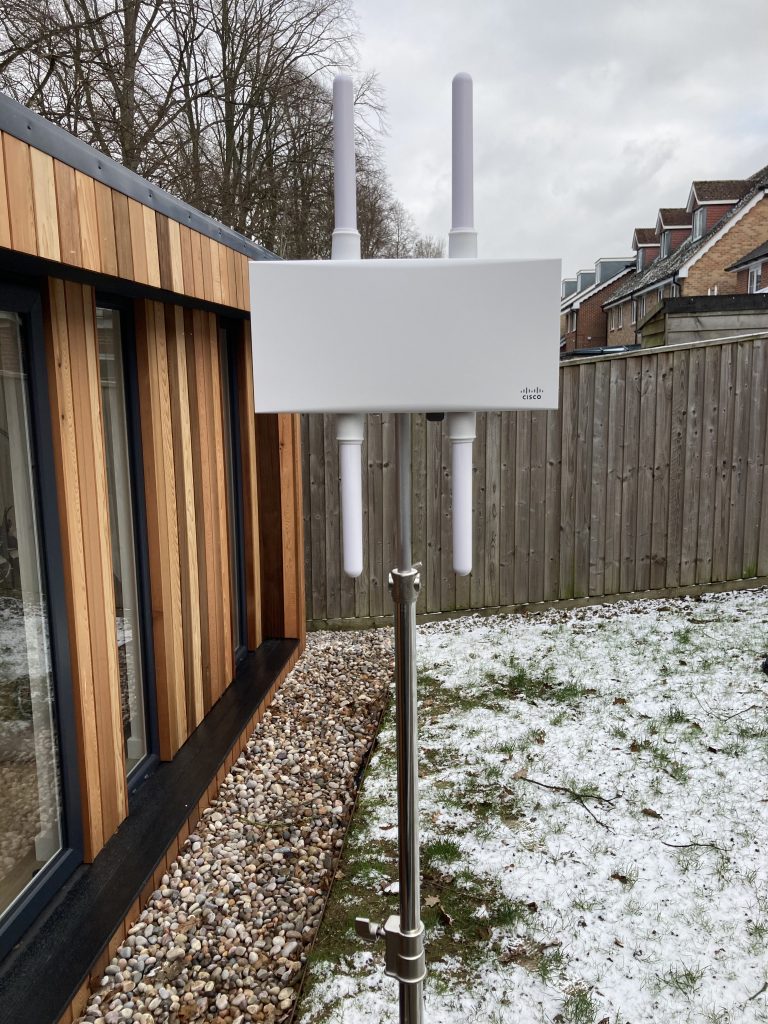
MR86 with MA-ANT-20 dipoles and we also had some snow here down south;-)
MR86 with MA-ANT-25 antennas

Under the hood

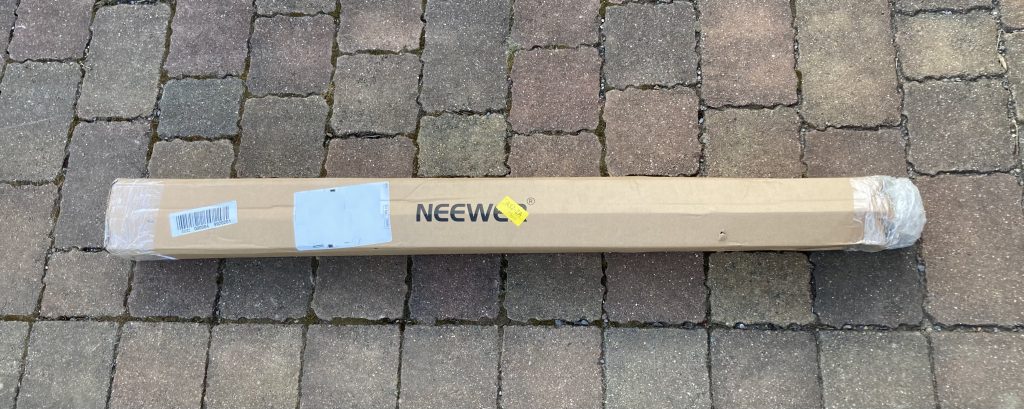
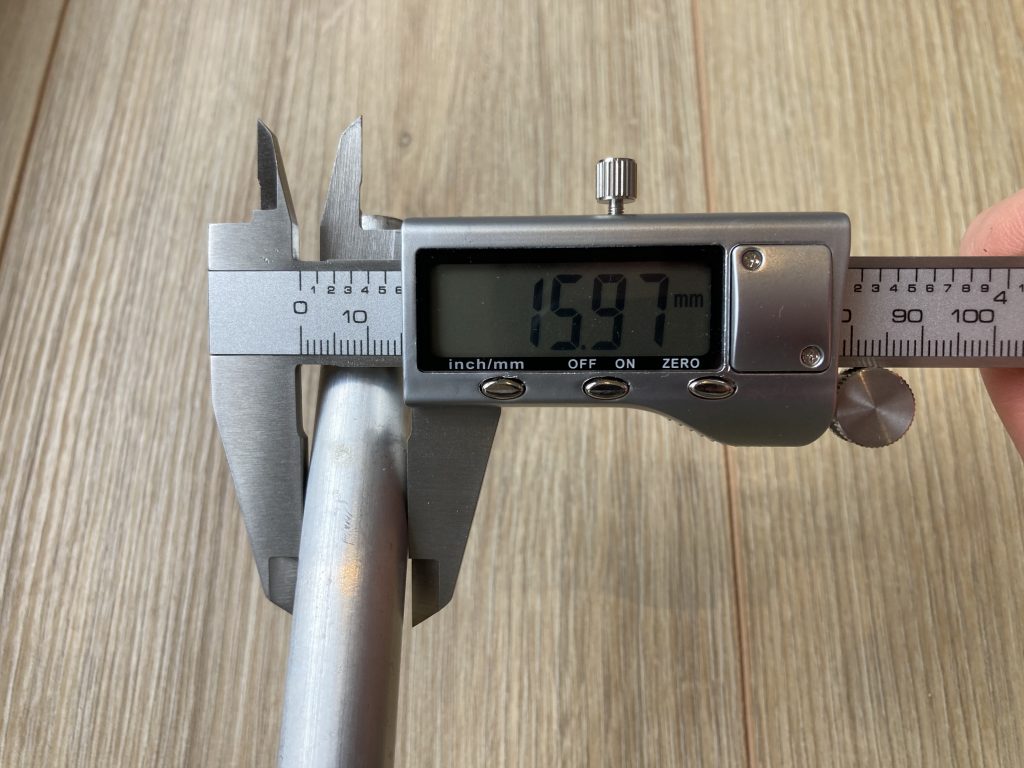
It all started when I spotted my wife’s aluminium 16 mm gardening tubes;-) I realised they were perfect fit for my tripod. They slide nicely inside the top tripod tube about a couple of inches (5 cm) or so.

16 mm aluminium tube
Tripod and mounting adapter with the standard AP bracket
Grooves in the decking board helped me align the tube
Two drill bits later: Directional adapter with AP mounted on the back for stability

What would I improve?

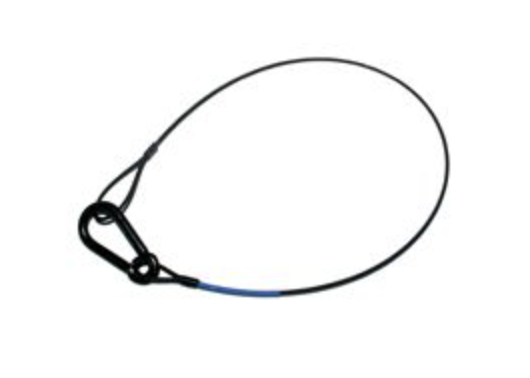
If I were to build a second iteration of this adapter, I would add a safety wire and attach the AP mounting bracket to the tripod. I would call this mandatory, especially if you are not the only user of these adapters or if there is going to be a person stood underneath the tripod.

Safety wire

Apart from that, it works really well, it is rock-solid, and allows me to swap the MR with omnis and MR with directional antennas in less than 10 seconds.

Apple AirTag from iPhone SE user’s perspective

Many people are talking about the Ultra Wide Band (UWB) precision finding supported by AirTags and the last two generations of iPhones. It is possible thanks to Apple’s U1 chip. This feature on its own might quite likely be a good enough reason for many users to upgrade to the latest iPhone.

Since I don’t own iPhone 11 or 12, I was curious what the experience was from iPhone SE or XR user’s perspective. Due to the lack of the U1 chip, these phones don’t support UWB and “Precision Finding”. Instead, they use Bluetooth and “Proximity Finding”.

“With You” Bluetooth accuracy and audible alarm

When the tag is “With You”, that means that your iPhone or macOS device can hear the Bluetooth signal beaconed by the AirTag. In this mode, location accuracy seems to be around 10 meters (depending on where it is and if indoors or outdoors). The lack of the UWB support means that the SE or XR can’t detect the direction you or the AirTag is moving in.

Since the AirTags is “With You” (shown in the screenshot above) and is reachable via Bluetooth, you can activate the audible alarm and find its exact location this way.

Active Bluetooth connection to the tag is required to activate Play Sound

Detached mode accuracy and refresh rate

When the AirTag becomes detached from your iPhone or macOS device (tag’s Bluetooth signal is lost), the tag then relies on other people’s iPhones and macOS devices. As soon as their device hears the Bluetooth signal of your lost AirTag, it relays (or reports if you will) the tag location to iCloud. Thanks to the crown-sourced relayed location, you will be able to see your tag’s current location in the Find My app although you are not anywhere the tag. The AirTag does not even have to be in the Lost Mode. Location finding works in its standard mode.

Location in the Find My does not update instantly. Based on my tests, it refreshes every 5 to 15 minutes.

When it comes to location accuracy relayed by other people’s iPhones and macOS devices, it ranges from approximately 10 meters to 110 meters.

Relayed location – accuracy around 10 meters
Relayed location – accuracy around 110 meters

Can Wi-Fi-only iPads relay location?

No, they can’t. I tested a couple of iPads connected to Wi-Fi with Bluetooth enabled and placed them in close proximity of the AirTag. They did not relay location. As far as I can tell, only iPhones and macOS devices can relay location of a tag.

Can cellular iPads relay location?

I don’t know. Please test it if you have one and tell me;-)

Lost mode

In the unfortunate event of losing your item, you can switch the tag to the “Lost mode” and receive a push notification whenever the AirTags gets automatically reported by someone’s iPhone or macOS device.

Activate Lost Mode and push notification

When that happens location, you receive a notification. Currently, there seems to be a cosmetic bug as the text of the notification does not show the latest location of the tag, but its previous location. When you open “Find My” app, you will see the correct and latest location though.

Item found notification received on Apple Watch

My test setup

  • iPhone SE 2nd generation running iOS 14.5
  • MacBook Pro running Big Sur 11.3.1
  • iPad Mini 5th generation running iOS 14.5
  • iPad Air 2nd generation running iOS 14.5

What is your experience with AirTags?

I am curious what your experience was. Have you tested any other scenarios? Have I missed anything. Please do let me know in the comments and I will update the post.

Affordable tripods for occasional Wi-Fi site surveys

As I mentioned in my battery pack review, I am fortunate to rely on our field engineers and partners when it comes to predictive design validation, wall measurements and AP on a stick surveys. Having said that, I enjoy going on site a few days a month and staying close to our projects. Which leads me to yet another blog post from the “affordable series”;-)

This time I tested 3 tripods. Key factors I considered were value for money, build quality, and suitability for outdoor surveys ability to hold anything from an indoor or outdoor AP to a camera.

Tripods

Left to right/up to down:
(A) Neewer Stainless Steel Heavy Duty Light Stand 118″/300CM
(B) Phot-R 4m Heavy Duty Photo Studio 2-in-1 Combi Light Boom Stand
(C) Neewer Heavy-Duty Light Stand 13 Feet/4 Meters Spring Cushioned Aluminum Alloy Pro Tripod

Maximum height comparison
Collapsed length comparison
Width of the base is comparable, see the slabs

The numbers don’t lie

Tripod ATripod BTripod C
Collapsed length104 cm112 cm115 cm
Measured max height283 cm366 cm393 cm
Weight2.45 kg2.55 kg5.9 kg
Price£65£70£68
Short summaryVery good, not tall enough for outdoor surveysUnstable, too light, loose locking mechanism, unsuitable for holding APsGreat value for money, rock-solid, tall, heavier

Summary

I decided for tripod (C). It is high enough for outdoor surveys, rock-solid, and very stable. I also built an adapter that allows me to easily mount any outdoor Cisco AP (Catalyst, Aironet or Meraki MR). Here is more about my outdoor Meraki MR universal tripod adapter. Stay tuned for the Aironet and Catalyst one.

The only downside is its weight. Also, watch out for packaging. The first one I ordered arrived with the bottom of the box open and the head, where you insert the 1/3″ and 3/8″ adapter, was damaged. So, it took one return to get an undamaged one.

 All three tripods are supplied with 1/4″ to 3/8″ adapter.

Neewer 4-meter tripod in the wild
Even the replacement one had some extra tape applied, fortunately undamaged this time

Affordable battery pack for occasional Wi-Fi “AP on a stick” site surveys

Since I don’t survey every day, I could not justify the purchase of a full-blown battery pack. My goal is to get a universal battery pack, which would allow me to survey for 5 hours and provide power to my laptop or USB device (like the WLAN Pi) at the same time.

A quick research made me to test the RAVPower AC 27000 mAh Power Bank. Here is what I’ve learned after using it for a few days:

  • The 2 built-in fans kick in when AC device starts drawing more than 20 Watts. Below this threshold, the fan is off. With the fan on, it actually becomes annoyingly loud (watch this video).
  • The AC inverter seems to operate with 82% efficiency
  • MacBook Pro 61 Watt power brick charges the battery using USB type C port
  • It powers USB devices and 230V AC devices (power injector in my case)
  • Capacity of 99.9 Wh

Things I like about this battery pack:

  • It is universal and power USB and AC devices
  • Its size and capacity are great

Things I don’t like:

  • When AC load exceeds 20 Watts, the 2 fans become generate significant noise
  • The adapter from its AC socket to UK socket is really poor, does disconnect very easily and cuts power. This is a huge downside.
  • AC power automatically switches off when the connected device draws less than 8 Watts or so. If you need to power a very low power device, use the USB port or plug one more device in to increase total load.

Battery life tests

I tested a few access points powered by a PoE+ 802.3at injector:

Cisco Catalyst 9115 in site survey Embedded Wireless Controller mode stays powered for 6 hours and 24 minutes and draws around 13 Watts.

Cisco Aironet 1560I (in 2SS only mode) in Mobility Express site survey mode stays powered for 5 hours and 28 minutes and draws around 15 Watts.

Formula to estimate battery life

Cisco Aironet 1540I draws around 8 Watts (measured by a smart plug) and estimated battery life is:

Run time = Battery capacity in Wh * Battery inverter efficiency / Power drawn by device in Watts = 99.9 * 0.82 / 8 = 10.2 hours

Tested devices powered by AC power

MacBook Pro (13-inch, 2019, Four Thunderbolt 3 ports) powered using MacBook 61W USB-C power adapter connected to the battery pack charged the laptop with no problem. The only annoyance is the battery fan noice. I can’t imagine using this in an open plan office as it would disturb others. Charging while on site or in a car is not a problem.

I was able to power Cisco WLC 2504 and 3504 with no problem at all and they drew around 25 Watts. You can use the above formula to calculate estimated battery life.

Cisco Catalyst compact switch WS-C3560CX-8XPD-S is not able to be powered by this battery, the battery goes into overload mode and cuts power. I suspect the AC wave output of the inverter is far from “perfect sine” and it prevents some devices to be powered. A different battery pack with better filters would be my suggestion if you need to power a device like this.

Another Cisco Catalyst compact switch WS-C3560CG-8PC-S works perfectly fine and draws about 17 Watts with no Ethernet ports connected and no PoE provided to its downstream devices.

Maximum AC load test

It tried connecting as many devices to the battery pack and power them using the inverter. These devices can be powered concurrently just fine:

  • Cisco Meraki MS220, Cisco Small Business SF100-08P switch, Aironet 3800 AP, Catalyst 9105AXI AP, Aironet 1800S Wi-Fi active sensor, Aironet 1560I, MR32 AP, MR20 AP, Aironet 1815W, a Bluetooth speaker and Raspberry Pi 4

How I fixed the supplied AC adapter issue

As I mentioned, the provided power adapter is a joke and not fit for purpose if you want to connect a device using a UK power plug. Just the weight of the power cable itself pulls the adapter from the battery pack socket and stops power supply to the connected device.

I decided to keep the battery pack as everything else works quite well and I replaced the provided adapter by a power cable with European plug and IEC C14 to UK socket “UPS” power adapter. This on its own stays connected in the battery inverter’s socket quite nicely and I added a couple of velcro straps to keep it securely in place at all times.

Fan noise

Introducing Telegram Bot for the WLAN Pi

Up until now, you could only use the WLAN Pi display to see its IP address and other IP details. If you are on the same subnet you could do ping wlanpi.local. Alternatively, your DHCP server log or show ip arp on the access switch could tell you.

Telegram Bot for the WLAN Pi automates the whole process and it sends you the IP details of your WLAN Pi whenever the Pi comes online. You can then easily and remotely skim through the details, check its IP address, public IP address, current mode, uptime, switch and port details the WLAN Pi is connected to, or double-check that its Ethernet adapter successfully negotiated 1 Gbps Full Duplex.

And you can do all this from you wrist, phone, tablet or laptop.

How to enable Telegram Bot

  1. Download WLAN Pi image 2.0.1 or newer. Flash it onto an SD card. Boot up from this SD card.
  2. Create a new Telegram account if you do not have one already. Start the Telegram app.
  3. Let’s create a new Telegram bot. Find a person called Botfather and send them a message saying /newbot.
  4. Follow the instructions to create a new bot.
  5. After the new bot is created, copy the API key to a text editor.
  6. Start a new chat with the newly created bot and say Hey, Hi or something like that and welcome them to the blue planet. This is mandatory and you can send more than one message.
  7. Now SSH to the WLAN Pi and run this command with root privileges sudo telegrambot
  8. It will complain about missing API key and tell you where to paste it.
  9. Edit the configuration file, uncomment the second line and paste your own API key from step 5 using sudo nano /etc/networkinfo/telegrambot.conf.
  10. Save the file using CTRL+o (letter o) and exit the editor using CTRL+x.
  11. Make sure you sent a Telegram message in step 6 to your new bot.
  12. Connect your WLAN Pi to the internet.
  13. Finally, reboot by sudo reboot

Multiple Pi’s can use the same API key and send their IP configurations to the same chat or you can have 1 chat per WLAN Pi (my preferred option). It is completely up to you.

How often are Telegram messages sent?

Every time the WLAN Pi reboots and has internet access, it will send a new message to you.

If internet connection goes down (for example when you disconnect the Ethernet cable, DNS server stops responding or something breaks at your ISP while eth0 still remains up) for more than 10 seconds, the WLAN Pi will send you a new message with its fresh details after the internet connection goes up again.

Send a new message manually

Assuming you have completed the setup using the above instructions, you can SSH to the WLAN Pi at any time and send a new Telegram message manually using sudo telegrambot.

How to troubleshoot

If you are not receiving any message from the WLAN Pi, send another message to the Telegram bot using the Telegram app and reboot the Pi.

You can also check the logs and grep for telegrambot:
sudo cat /var/log/messages | grep telegrambot

Apple iOS 14 Private Address feature, per SSID Wi-Fi MAC randomisation and how it actually works

Apple published a brief summary of the newly introduced “Private Address” Wi-Fi feature. Since it does not go into the detail, I tested the public iOS 14.0 release on an iPhone SE and iPad Mini in my lab. Here is how it actually works.

New Wi-Fi networks

For SSIDs you have not connected to before, iOS 14 devices generate a random MAC “Private Address” and they use this MAC address permanently for this SSID. This address does NOT change over time. This works as expected.

Previously used Wi-Fi networks

Known Wi-Fi networks you have already connected to at least once before the upgrading to iOS 14 get a different treatment though. And this is where things are not as straightforward as the documentation suggests.

After upgrading to iOS 14, I connect to a known network which I have already used before the upgrade. The MAC address that is used is actually the real hardware MAC address of the Wi-Fi adapter for 24 hours. Note that the “Private Address” feature is enabled. This could potentially be considered a UI bug.

24 hours after first connecting from an iOS 14 device to this known SSID, the “Private Address” feature kicks in and the MAC address for this SSID automatically switches from the real MAC address to a randomly generated MAC address. Personally, I assume that this 24-hour period has been developed to allow enterprises to disable Private Address feature on their managed iOS devices using MDM, but I may be wrong.

From this point onwards the same randomly generated Private Address is permanently used for this SSID and does NOT change over time.

Schedule WLAN availability on Catalyst 9800 Series Wireless LAN Controllers

Catalyst 9800 controllers come with built-in support for WLAN availability scheduling. When a WLAN becomes disabled, APs do not broadcast the SSID and channel utilisation decreases. Also, it can be implemented as a security enhancement to prevent client devices from connecting during specified hours.

At the time of writing IOS-XE 17.3.1 does not yet offer a GUI for this capability, but there is a couple of options how to schedule WLAN availability.

Before we start, please double-check time settings on the controller, enable NTP client and set a correct timezone.

Option 1: Built-in Calendar Profile

The configuration is self-explanatory, so let’s start with that. My example enables all WLANs mapped to the “default-policy-profile” from 9 am to 5 pm every week day. Outside of these times, the SSIDs will not be available for clients to join.

configure terminal
!
wireless profile policy default-policy-profile
shutdown
!
no wireless profile calendar-profile name WEEKDAYS-9-TO-5
!
wireless profile calendar-profile name WEEKDAYS-9-TO-5
day monday
day tuesday
day wednesday
day thursday
day friday
recurrence weekly
start 09:00:00 end 17:00:00
!
wireless profile policy default-policy-profile
calendar-profile name WEEKDAYS-9-TO-5
action wlan_enable
no shutdown
!

Verification

You can verify using a Wi-Fi client. If you do “show wlan summary”, the WLANs will still appear as “Enabled” and this is expected. To verify current status of WLANs controlled by the Calendar Profile, please use “show logging | include SCHEDULED_WLAN”.

Reference

Official documentation explaining Calendar Profiles.

Option 2: EEM Script

If you like flexibility, an EEM script running on the controller triggered by CRON might work even better for you. Special thanks to Federico Ziliotto for this.

event manager applet EEM_SCHEDULE_WLAN_UP
event timer cron cron-entry "0 9 * * 1-5" name 9_AM_MON_TO_FRI
action 1.0 cli command "enable"
action 2.0 cli command "conf t"
action 3.0 cli command "wlan MY_SSID"
action 4.0 cli command "no shut"
action 5.0 cli command "end"
action 6.0 syslog msg "Scheduled WLAN_SSID has been enabled"

event manager applet EEM_SCHEDULE_WLAN_DOWN
event timer cron cron-entry "0 17 * * 1-5" name 5_PM_MON_TO_FRI
action 1.0 cli command "enable"
action 2.0 cli command "conf t"
action 3.0 cli command "wlan MY_SSID"
action 4.0 cli command "shut"
action 5.0 cli command "end"
action 6.0 syslog msg "Scheduled WLAN_SSID has been disabled"

Reference

Here and here are some useful and practical EEM examples for your reference.

How to convert hundreds of Cisco Aironet or Catalyst APs from Mobility Express or Embedded Wireless Controller to Lightweight mode using Option 43

You may have used DHCP Option 43 to point an AP to its controller before. But only very few people know that Cisco APs can automatically convert themselves from the built-in controller mode (think Mobility Express or Embedded Wireless Controller) to Lightweight mode after they receive a special Option 43 from a DHCP server.

If you have a pallet of access points (or routers with built-in Wi-Fi in Mobility Express mode) next to your desk and need to convert all of them to Lightweight mode, simply configure DHCP Option 43 in the following format on your DHCP server and plug them into a PoE capable switch. After the APs boot up and receive the option from DHCP server, they automatically switch to the Lightweight mode and attempt to join the configured controller (192.168.130.2 in our case).

Option 43 format used for AP conversion

f2:05:c0:a8:82:02

“f2” tells the AP that we want it to switch to Lightweight mode

“05” means that only one controller IP address will follow

“c0:a8:82:02” is the controller IP address (192.168.130.2 in this case) in hexadecimal format, search for “IP to Hex Converter” if you do no want to do the math

Cisco IOS/IOS-XE DHCP server configuration

You can run DHCP server on a Catalyst switch. The DHCP scope configuration is straightforward.

ip dhcp pool <pool name>
network <ip network> <netmask>
default-router <default-router IP address>
dns-server <dns server IP address>
option 43 hex f205c0a88202

WLAN Pi, Raspberry Pi and any other Linux ISC DHCP server configuration

Special thanks to Nicolas Darchis, who helped me find the “vendor-encapsulated-options” option. It lets you enter Option 43 in the hex format and all it takes is a single line of DHCP server configuration.

# eth0 DHCP scope on ISC DHCP server
subnet 192.168.130.0 netmask 255.255.255.0 {
interface eth0;
range 192.168.130.100 192.168.130.200;
option routers 192.168.130.1;
option domain-name-servers 208.67.222.220, 208.67.222.220;
default-lease-time 86400;
max-lease-time 86400;
option vendor-encapsulated-options f2:05:c0:a8:82:02;
}

DHCP server on Cisco Meraki MX appliance

If your DHCP server runs on a Cisco Meraki MX appliance, you can easily configure Option 43 using Dashboard. Here are the instructions.

Packet capture or it did not happen

Here is the DHCP Offer packet with the special Option 43 value sent from DHCP server to the APs. They will start the conversion automatically after receiving it.

Option 43 which converts the AP from ME or EWC mode to lightweight

Verify successful AP conversion to Lightweight mode

Console to one of the APs and you will notice this message:

[*08/25/2020 23:24:39.5620] Last reload reason : 2: AP type changed from ME to CAPWAP

Or you can let the AP finish its job. And then verify successful conversion to Lightweight mode whenever you are ready using the “show version” command.

9120#show version
<output omitted>
9120 uptime is 0 days, 0 hours, 5 minutes
Last reload time : Tue Aug 25 23:24:39 UTC 2020
Last reload reason : AP type changed from ME to CAPWAP
<output omitted>