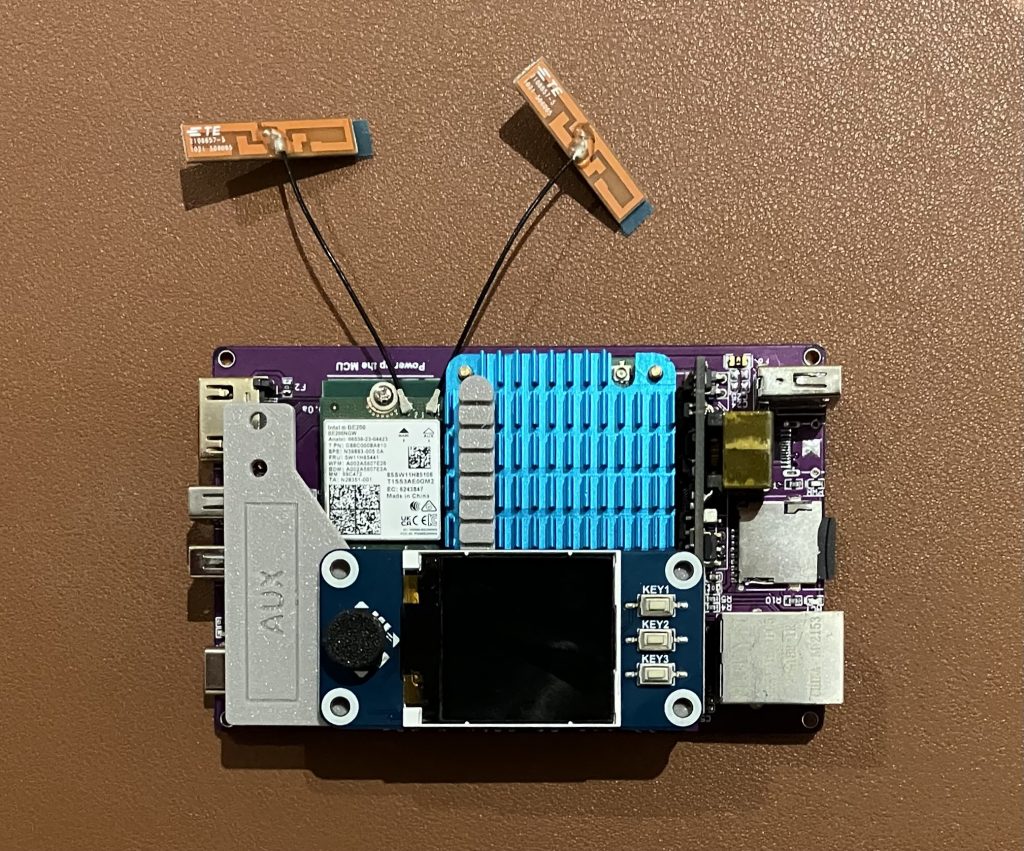
With the WLAN Pi team, we have designed and launched a M.2 adapter from A-key to E-key, which allows you to install a certified Wi-Fi 7 adapter Intel BE200 to your current WLAN Pi M4.
Is WLAN Pi selling ‘keys’ now? 😉
What is a ‘key’? It is formed of the notch on the Wi-Fi adapter PCB, and plastic blob separating pins inside the M.2 slot. The idea is to prevent users from plugging incompatible cards to the slot, and avoid any ‘magic smoke events’. Here is more about M.2 and the individual key types if you are interested.
WLAN Pi upgrade kit
Since Intel adapters use E-key and WLAN Pi M4 uses A-key, we needed to build an adapter. Badger Wi-Fi has the upgrade kit in stock. It comprises of the Oscium M.2 A-key to E-key adapter, Intel BE200 Wi-Fi 7 adapter, and 2 little bolts to secure the adapter and the Wi-Fi module.
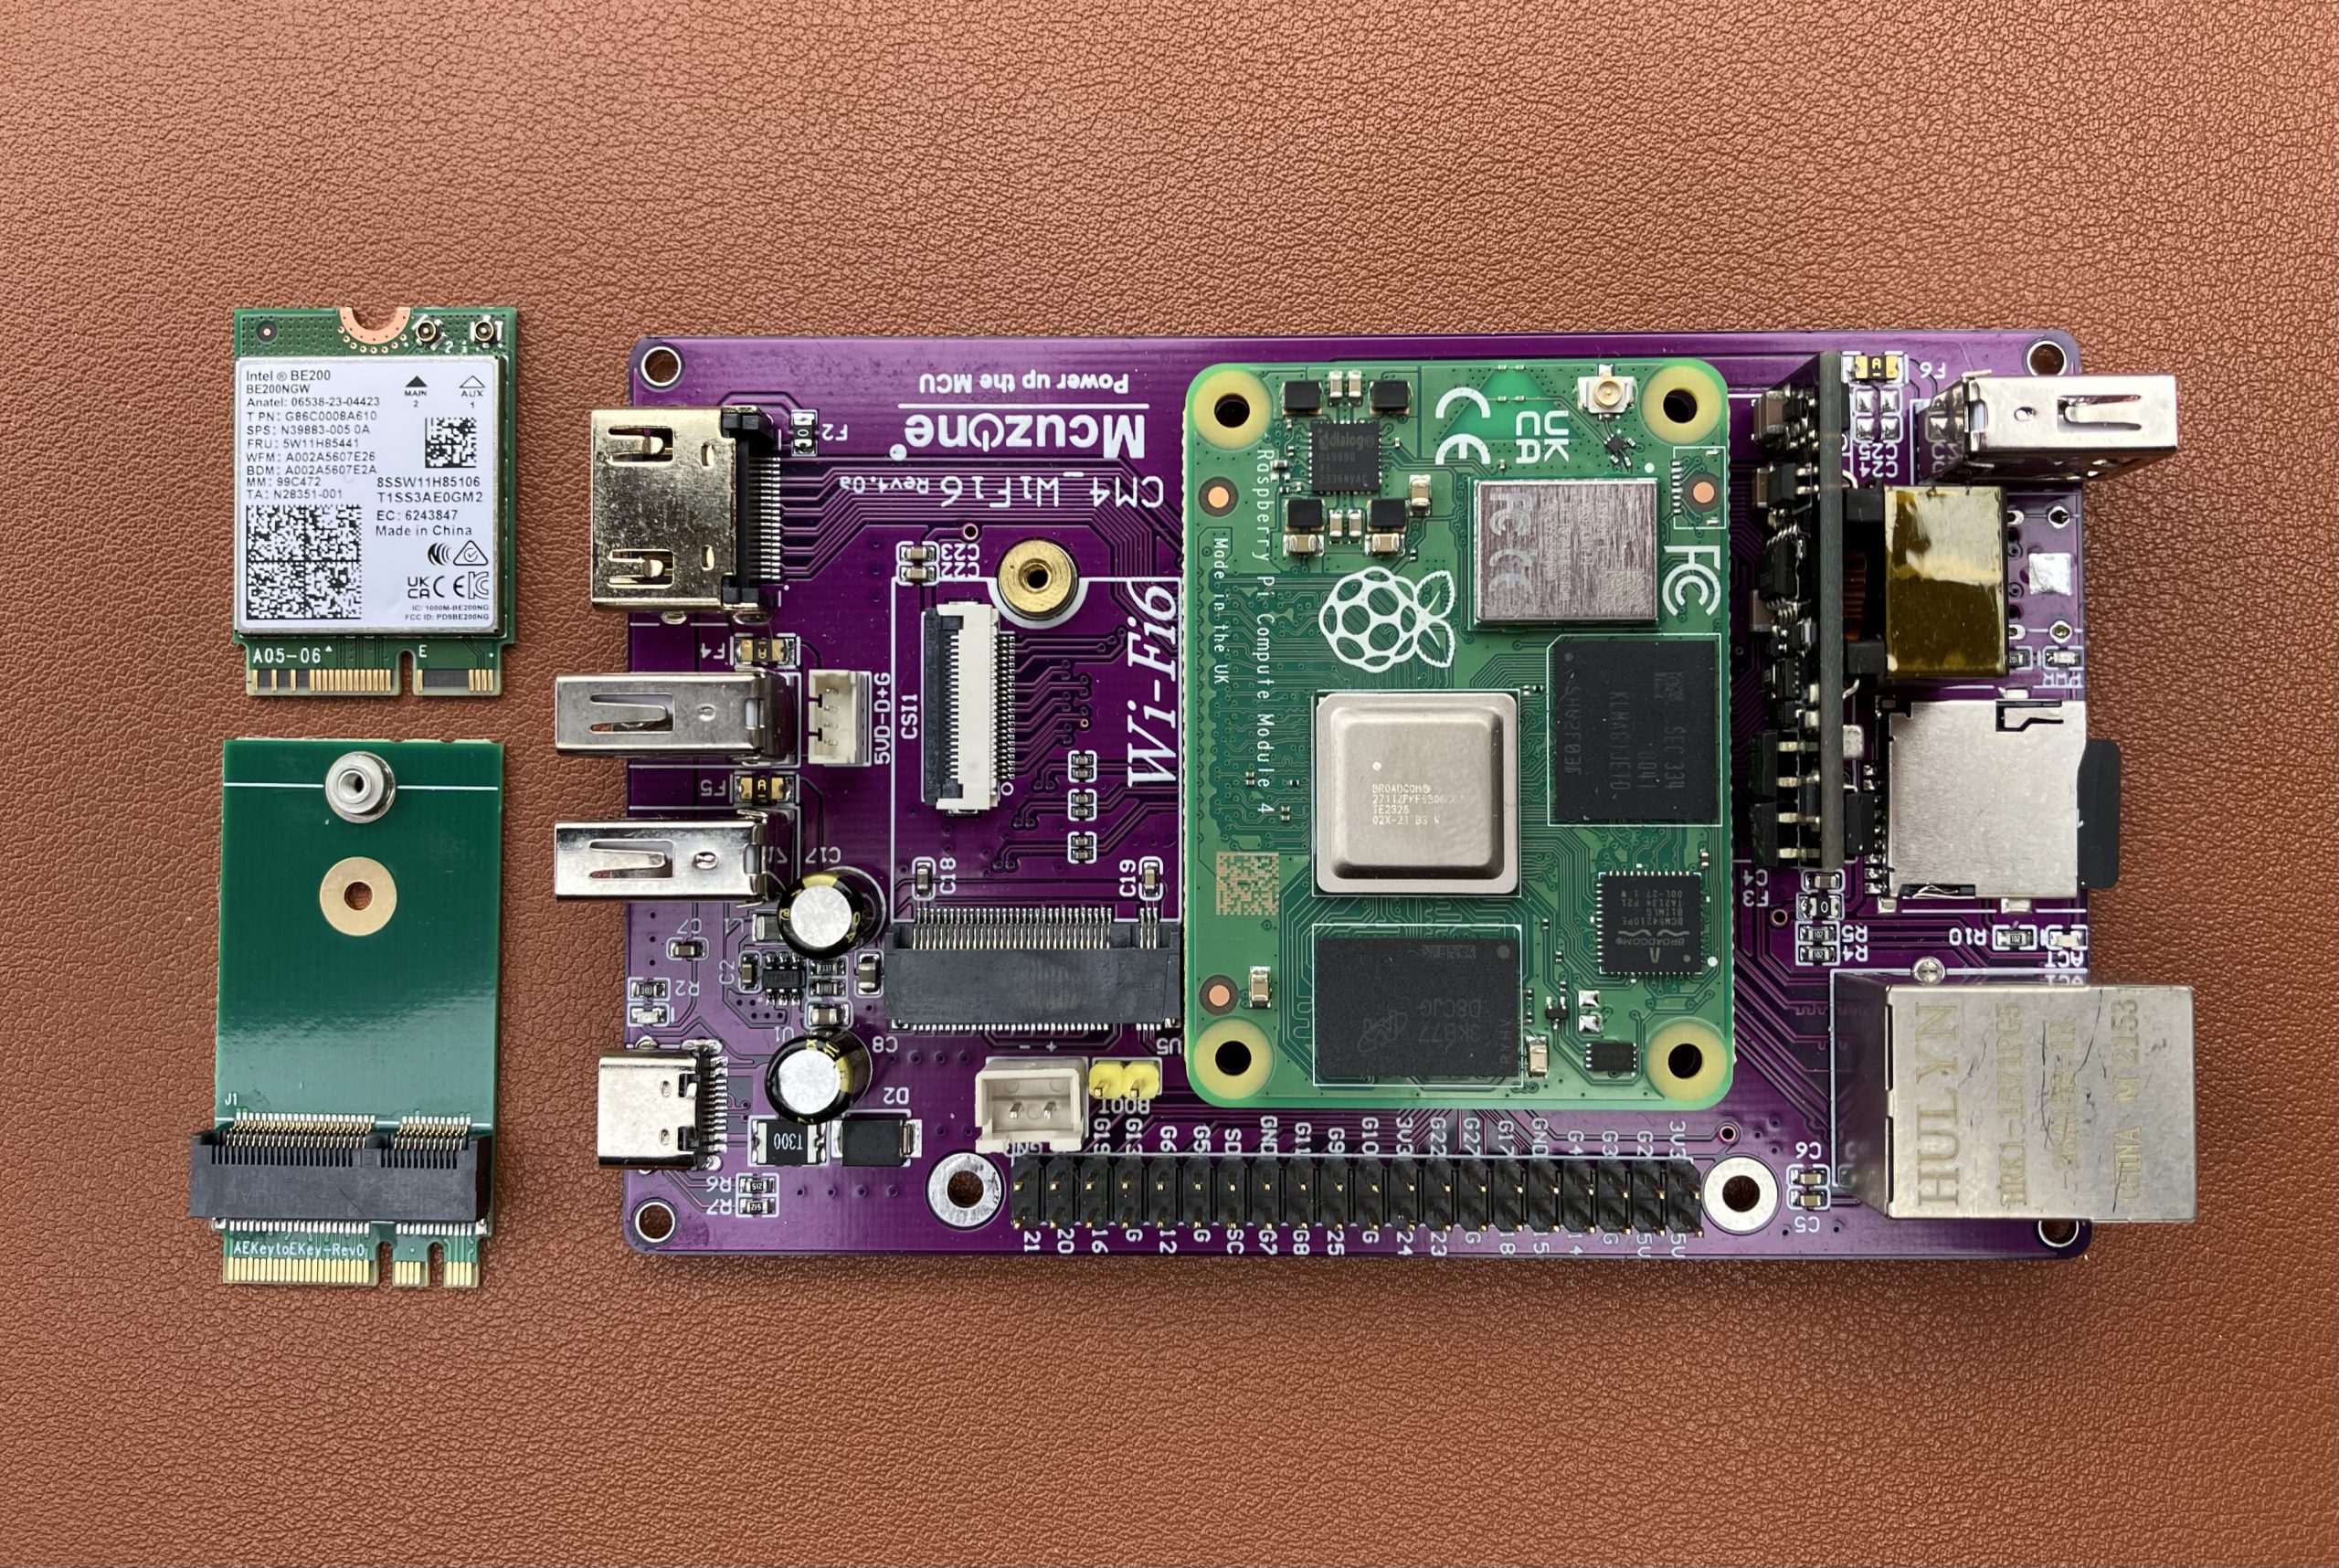
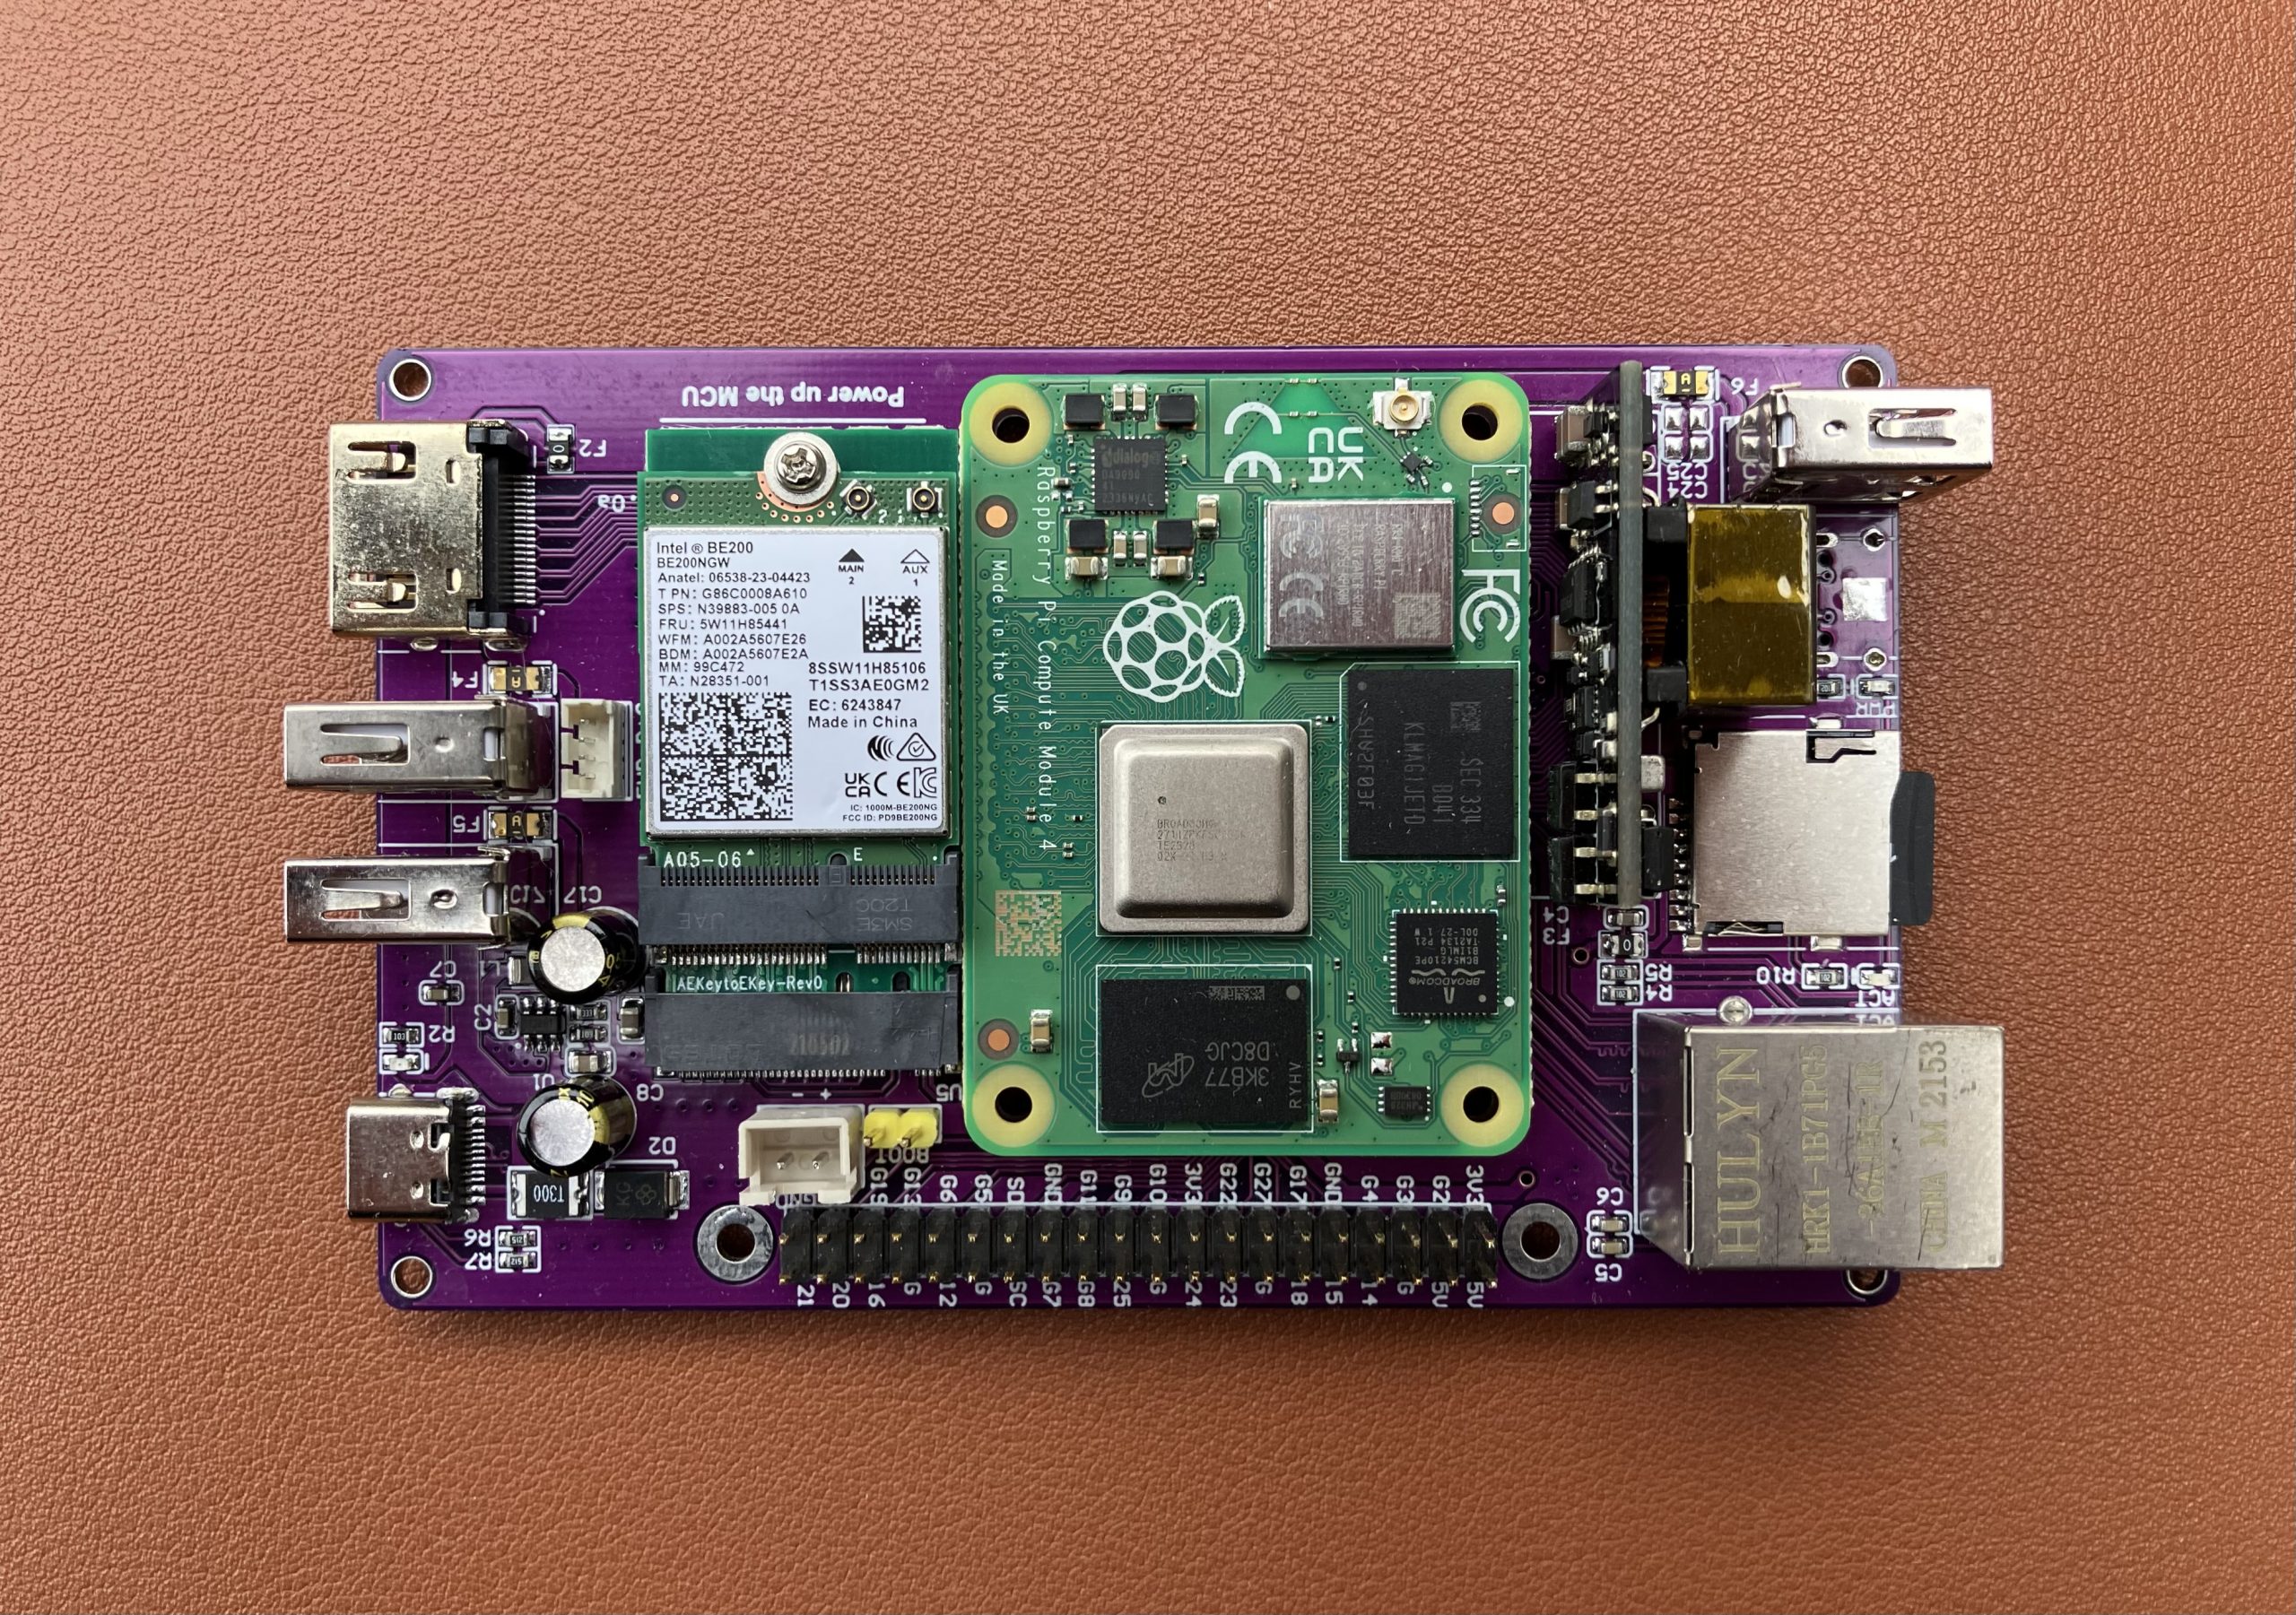
Here is how the ‘butterfly’ setup looks like. Intel BE200 sits onboard of the A-key to E-key adapter, installed in the M.2 slot.

We are ready to connect existing tri-band antennas, and assemble the unit.
Software support
Make sure to either upgrade Linux packages to their latest versions using sudo apt update && sudo apt upgrade command, or download and flash the latest WLAN Pi software image on your SD card. Release 3.2.0 supports Wi-Fi 7 Intel BE200 adapter out of the box with no effort whatsoever on your part.
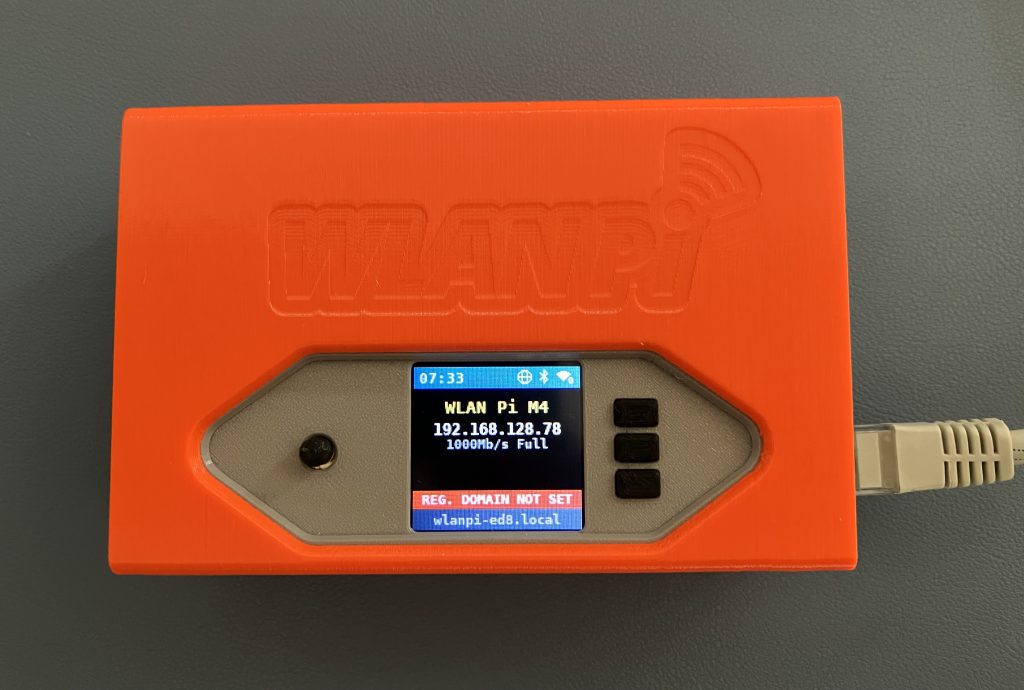
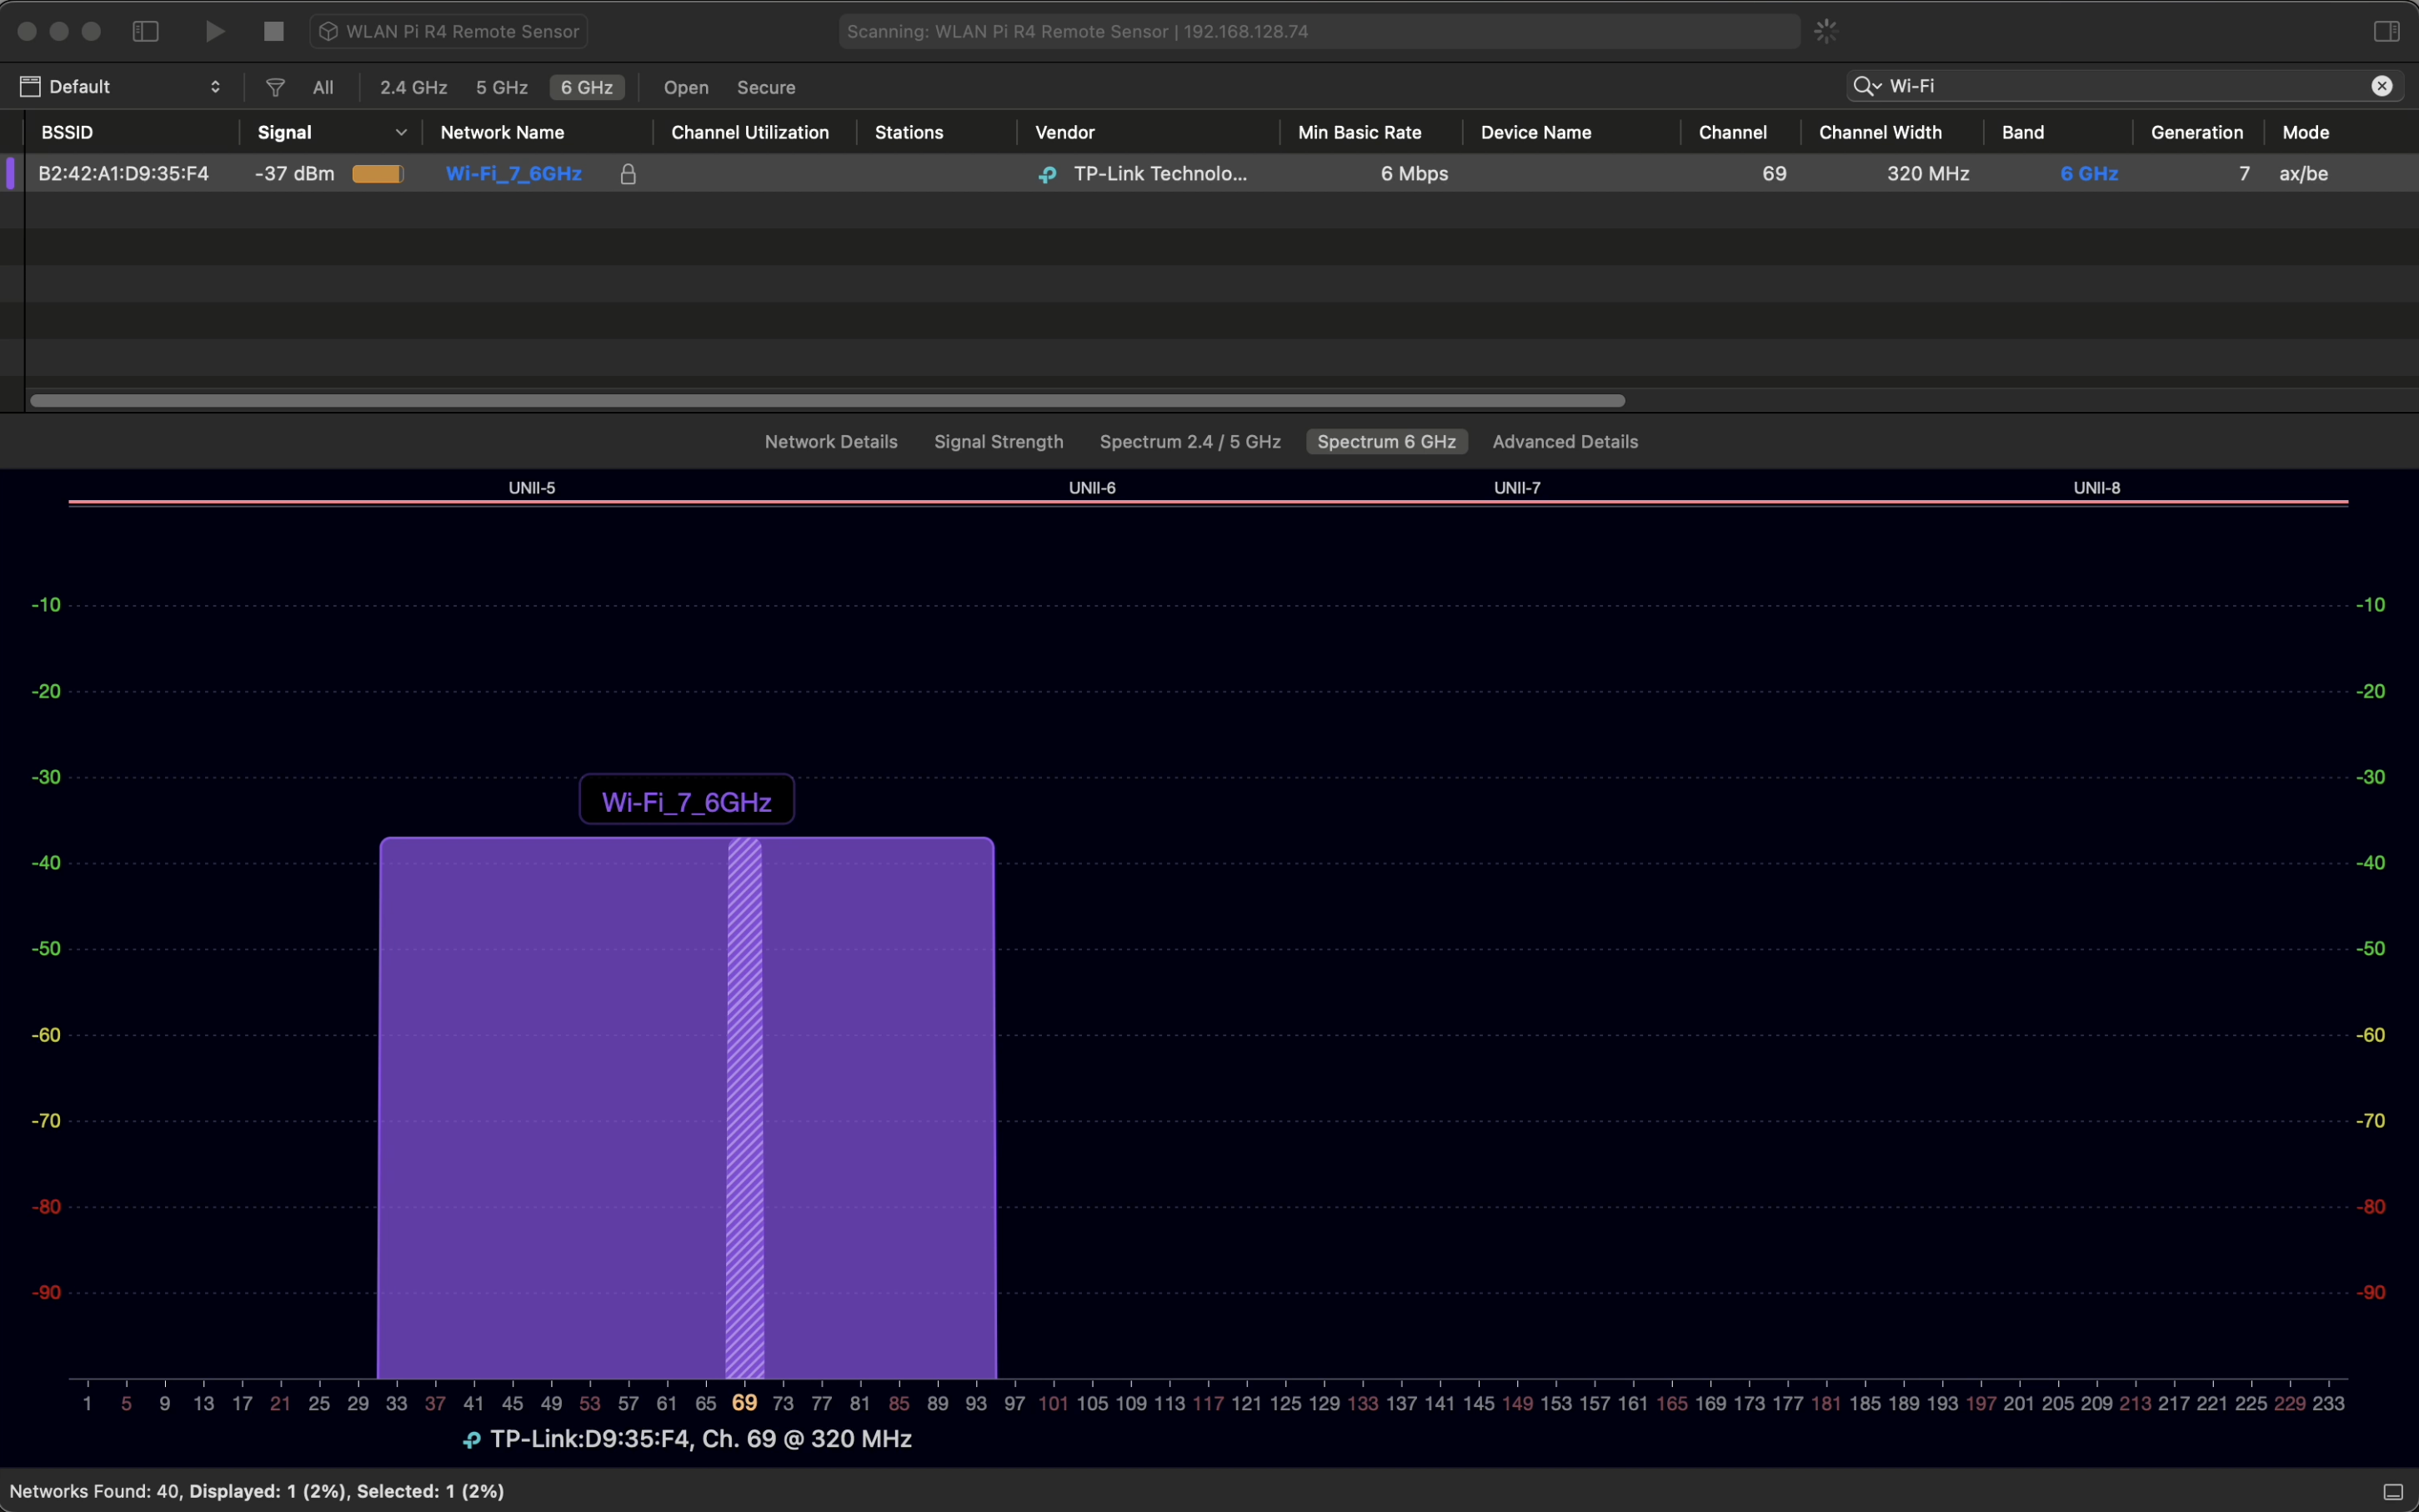
Wi-Fi 7 in action
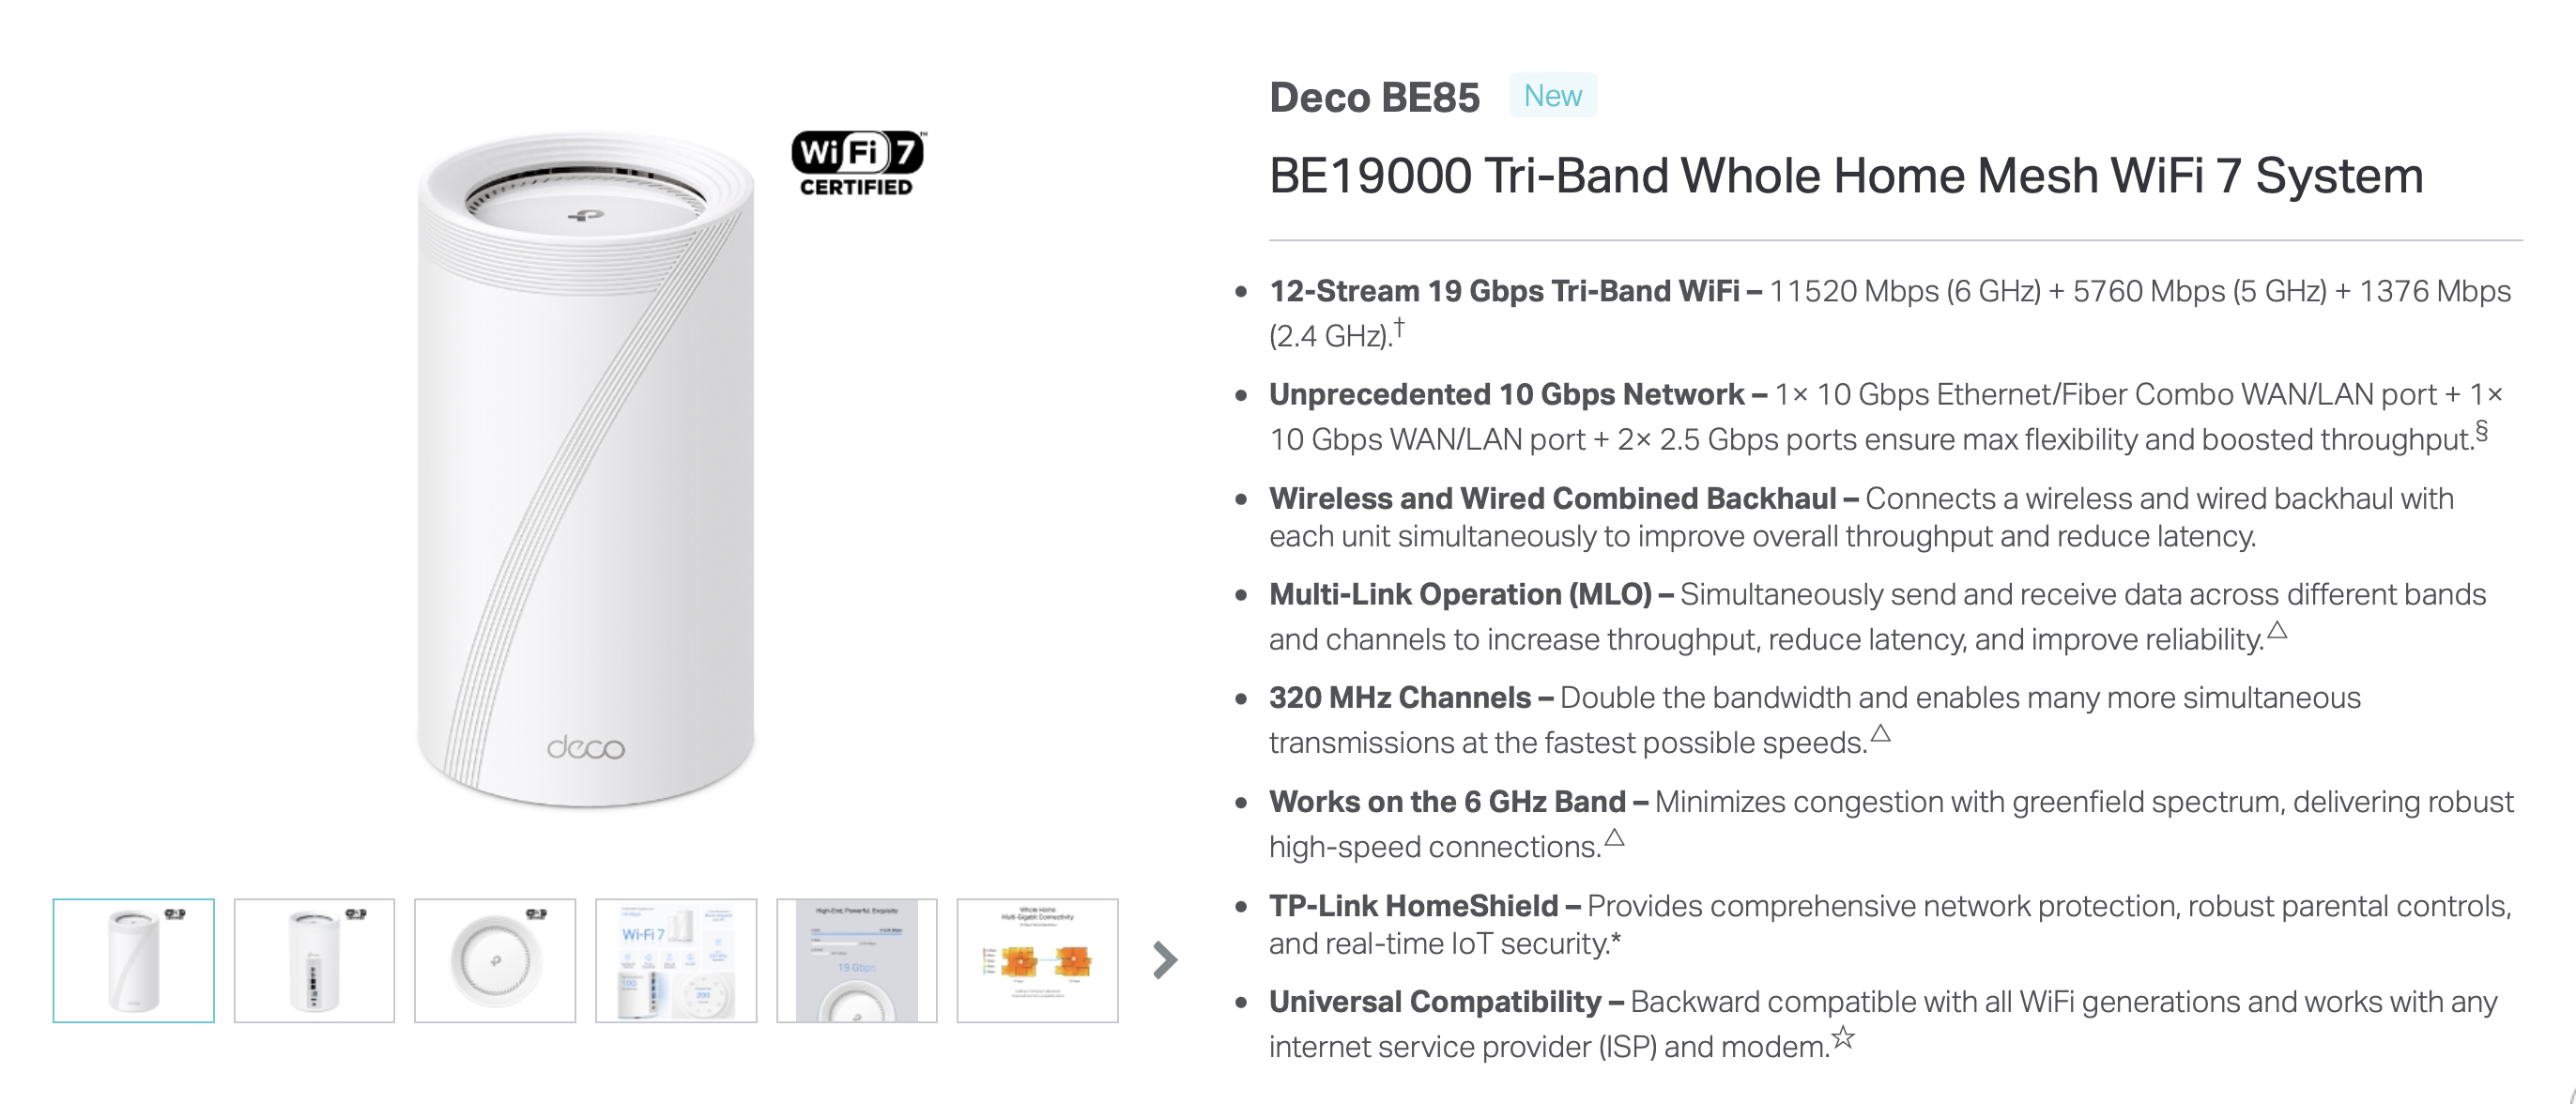
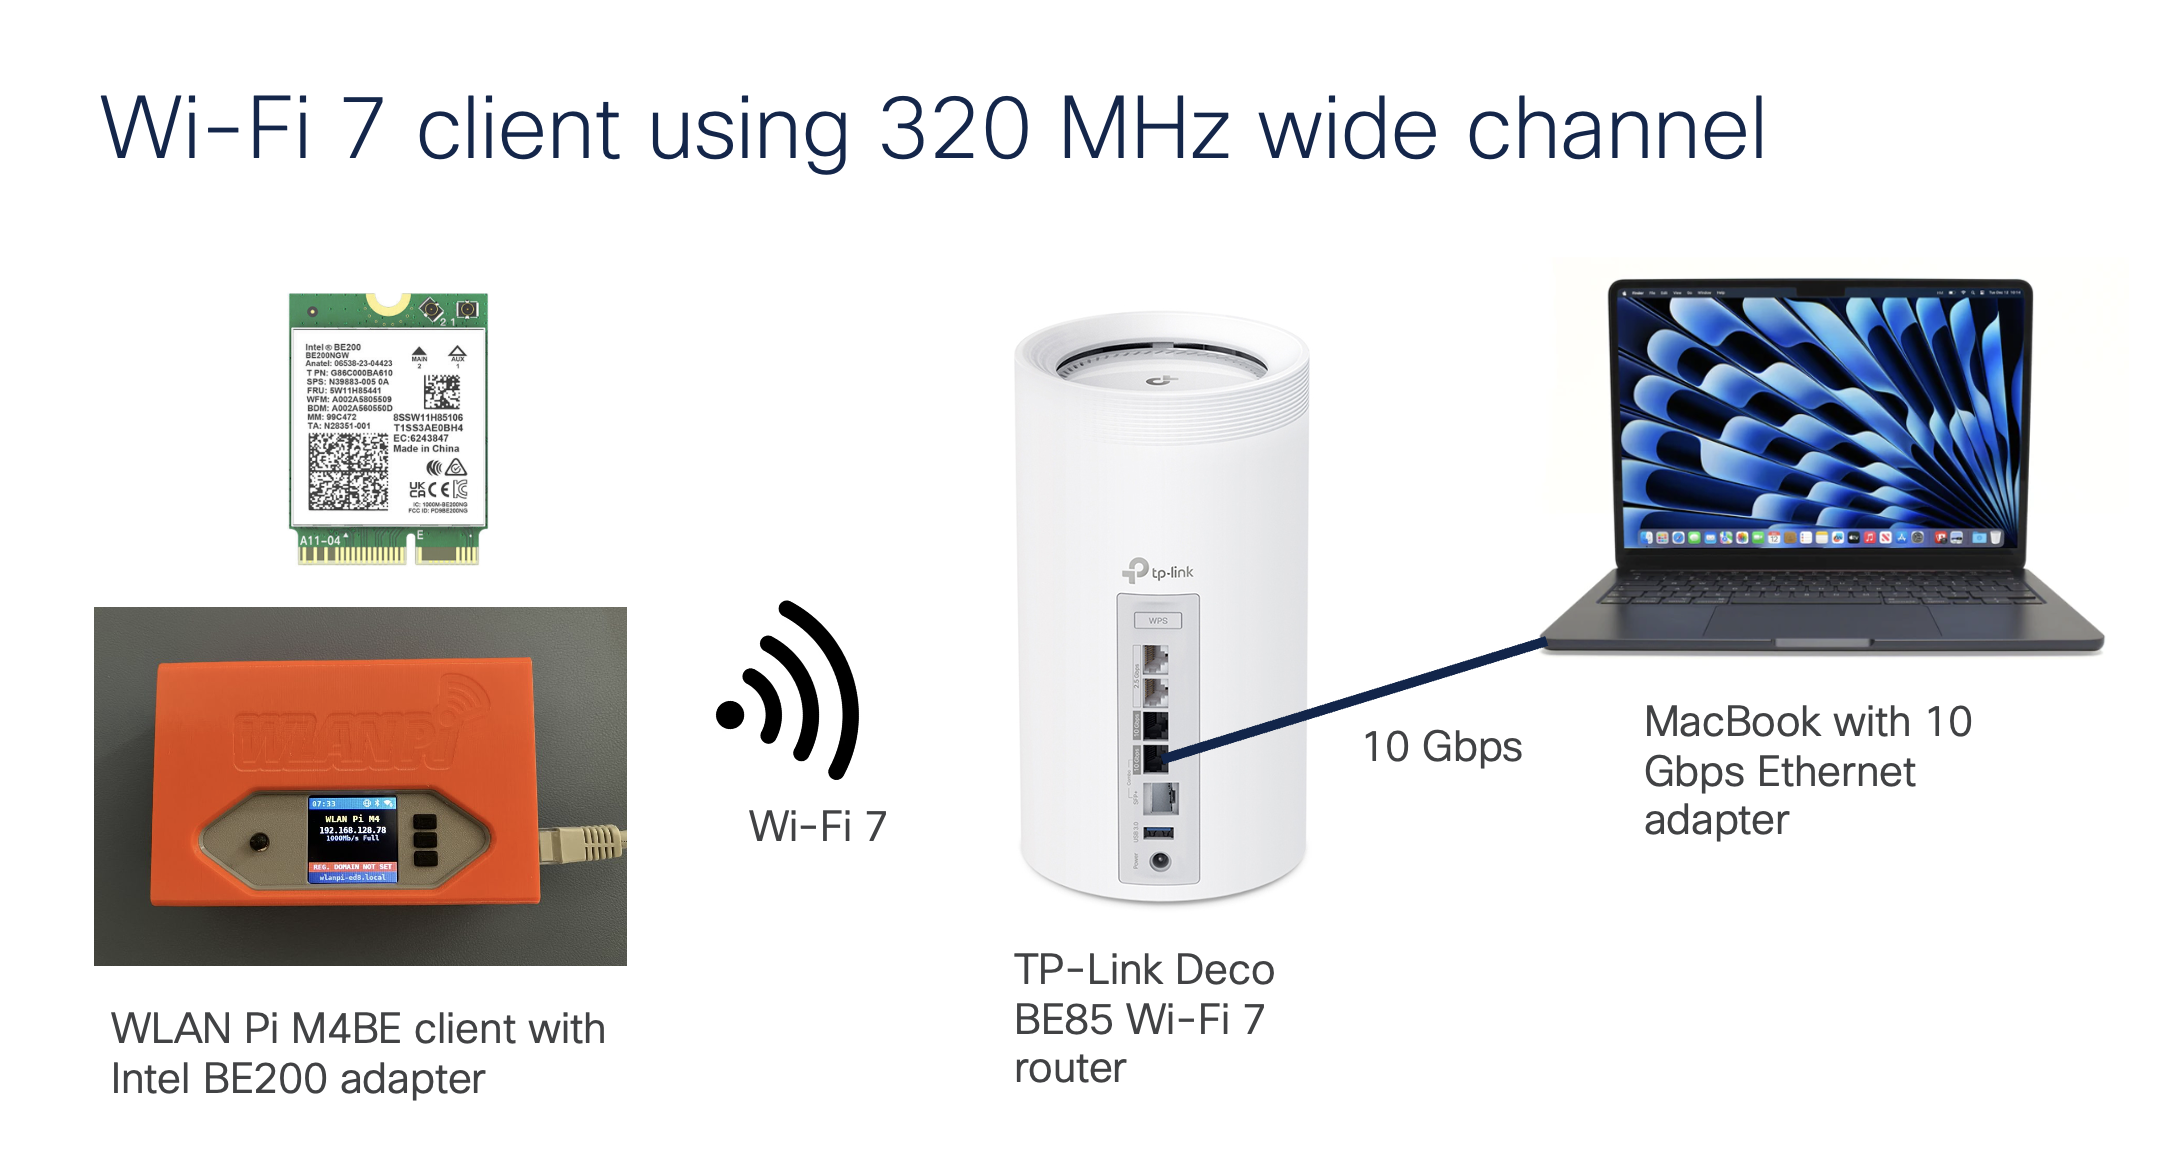
For this demonstration I use a consumer Wi-Fi 7 router TP-Link Deco BE85 BE19000. Simply because it is available, Wi-Fi 7 certified, and it supports 320 MHz channel width – not that one would deploy that in an enterprise environment, but mainly to test the maximum Wi-Fi throughput of the Pi.
A bug in macOS doesn’t allow Macs to correctly recognise Wi-Fi 7 networks. Instead of Wi-Fi 7 320 MHz wide network, my MacBook reports Wi-Fi 6 and 160 MHz wide channel. So, we will use another WLAN Pi and its Wi-Fi radio as a Remote Sensor in WiFi Explorer Pro – you need the Pro version to do this.
Nice, Wi-Fi 7 AP!
Connecting the WLAN Pi as a Wi-Fi 7 client only takes few lines of wpa_supplicant config.
sudo nano /etc/wpa_supplicant/wpa_supplicant.conf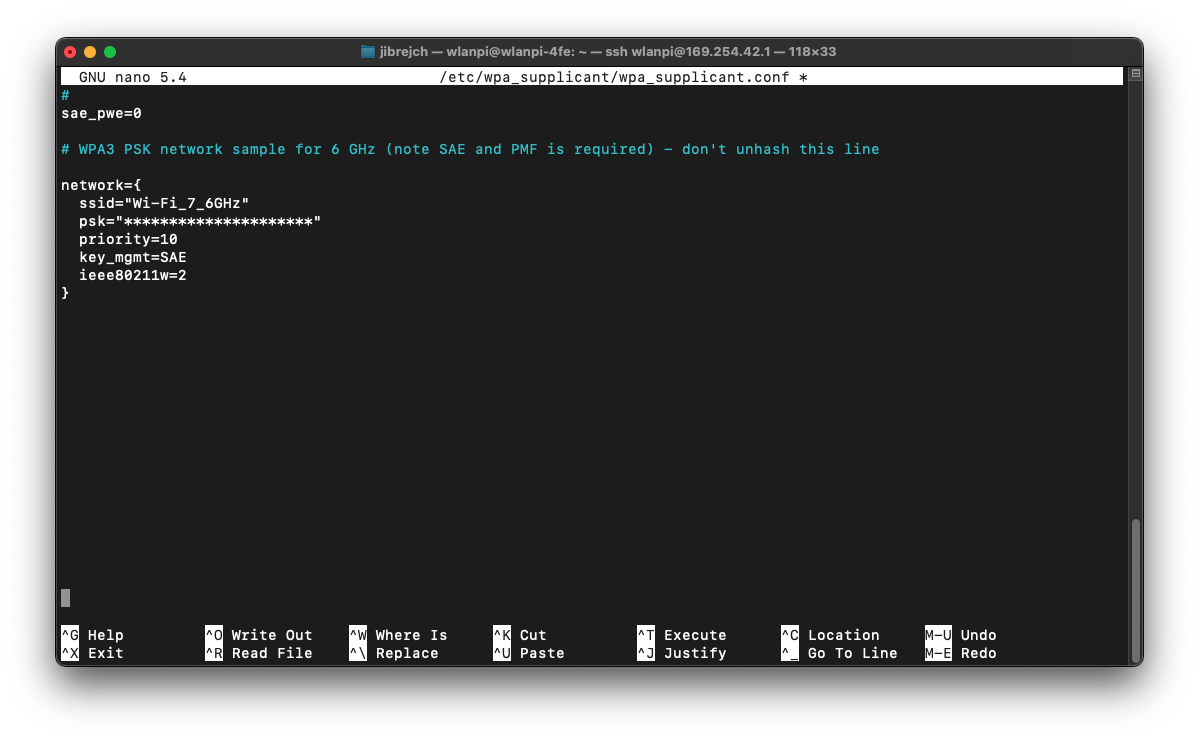
And we have successfully connected the WLAN Pi as a Wi-Fi 7 client to the AP using this command.
sudo wpa_supplicant -c /etc/wpa_supplicant/wpa_supplicant.conf -i wlan0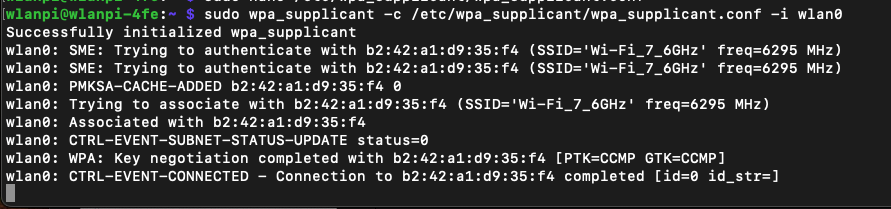
Run this command to make sure the WLAN Pi requests an IP address from DHCP server running on the router:
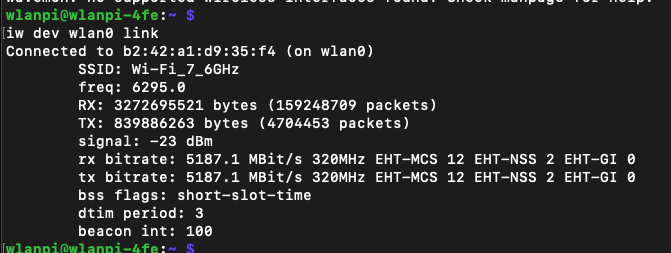
sudo dhclient -i wlan0 -vWhat channel are we using? 320 MHz channel width? Indeed.
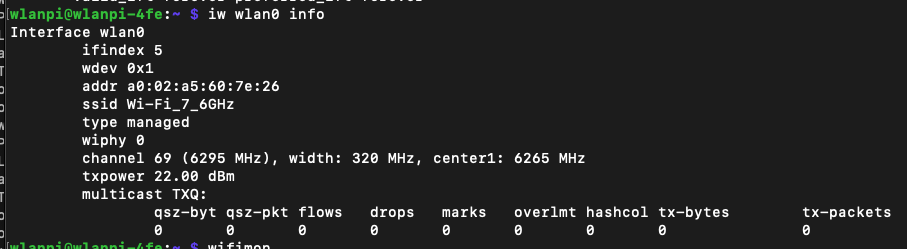
Before you ask, distance between the Pi and the router is sub 1 meter. What is the Wi-Fi data rate? We are using Wi-Fi 7 (EHT), 2 spatial streams, MCS 12 and 4096-QAM and short guard interval of 0.8 µs.
We can refer to Francois Verges’ MCS index tool to check how we are doing. Yes, I have tried, but I have only been able to achieve MCS 13 extremely rarely.

How far from the AP can we maintain 4096-QAM?
I hardly ever achieved MCS 13. To maintain MCS 12, I had to stay within about 1.5 meter distance from the router. I got best results with antennas position in this ‘V’ pattern.
With a different client device designed for Wi-Fi 7 from the ground up (with professional quality antennas and placement), I would hope for slightly longer MCS 12 and MCS 13 range.
It’s throughput test time
It’s time to run an iperf3 test and see how much traffic we can actually push over the air and also how much the WLAN Pi M4 can handle. Here is our test setup. I recommend the OWC 10 GbE Thunderbolt adapter (it uses Thunderbolt protocol, not USB) connected via USB-C to your Mac.
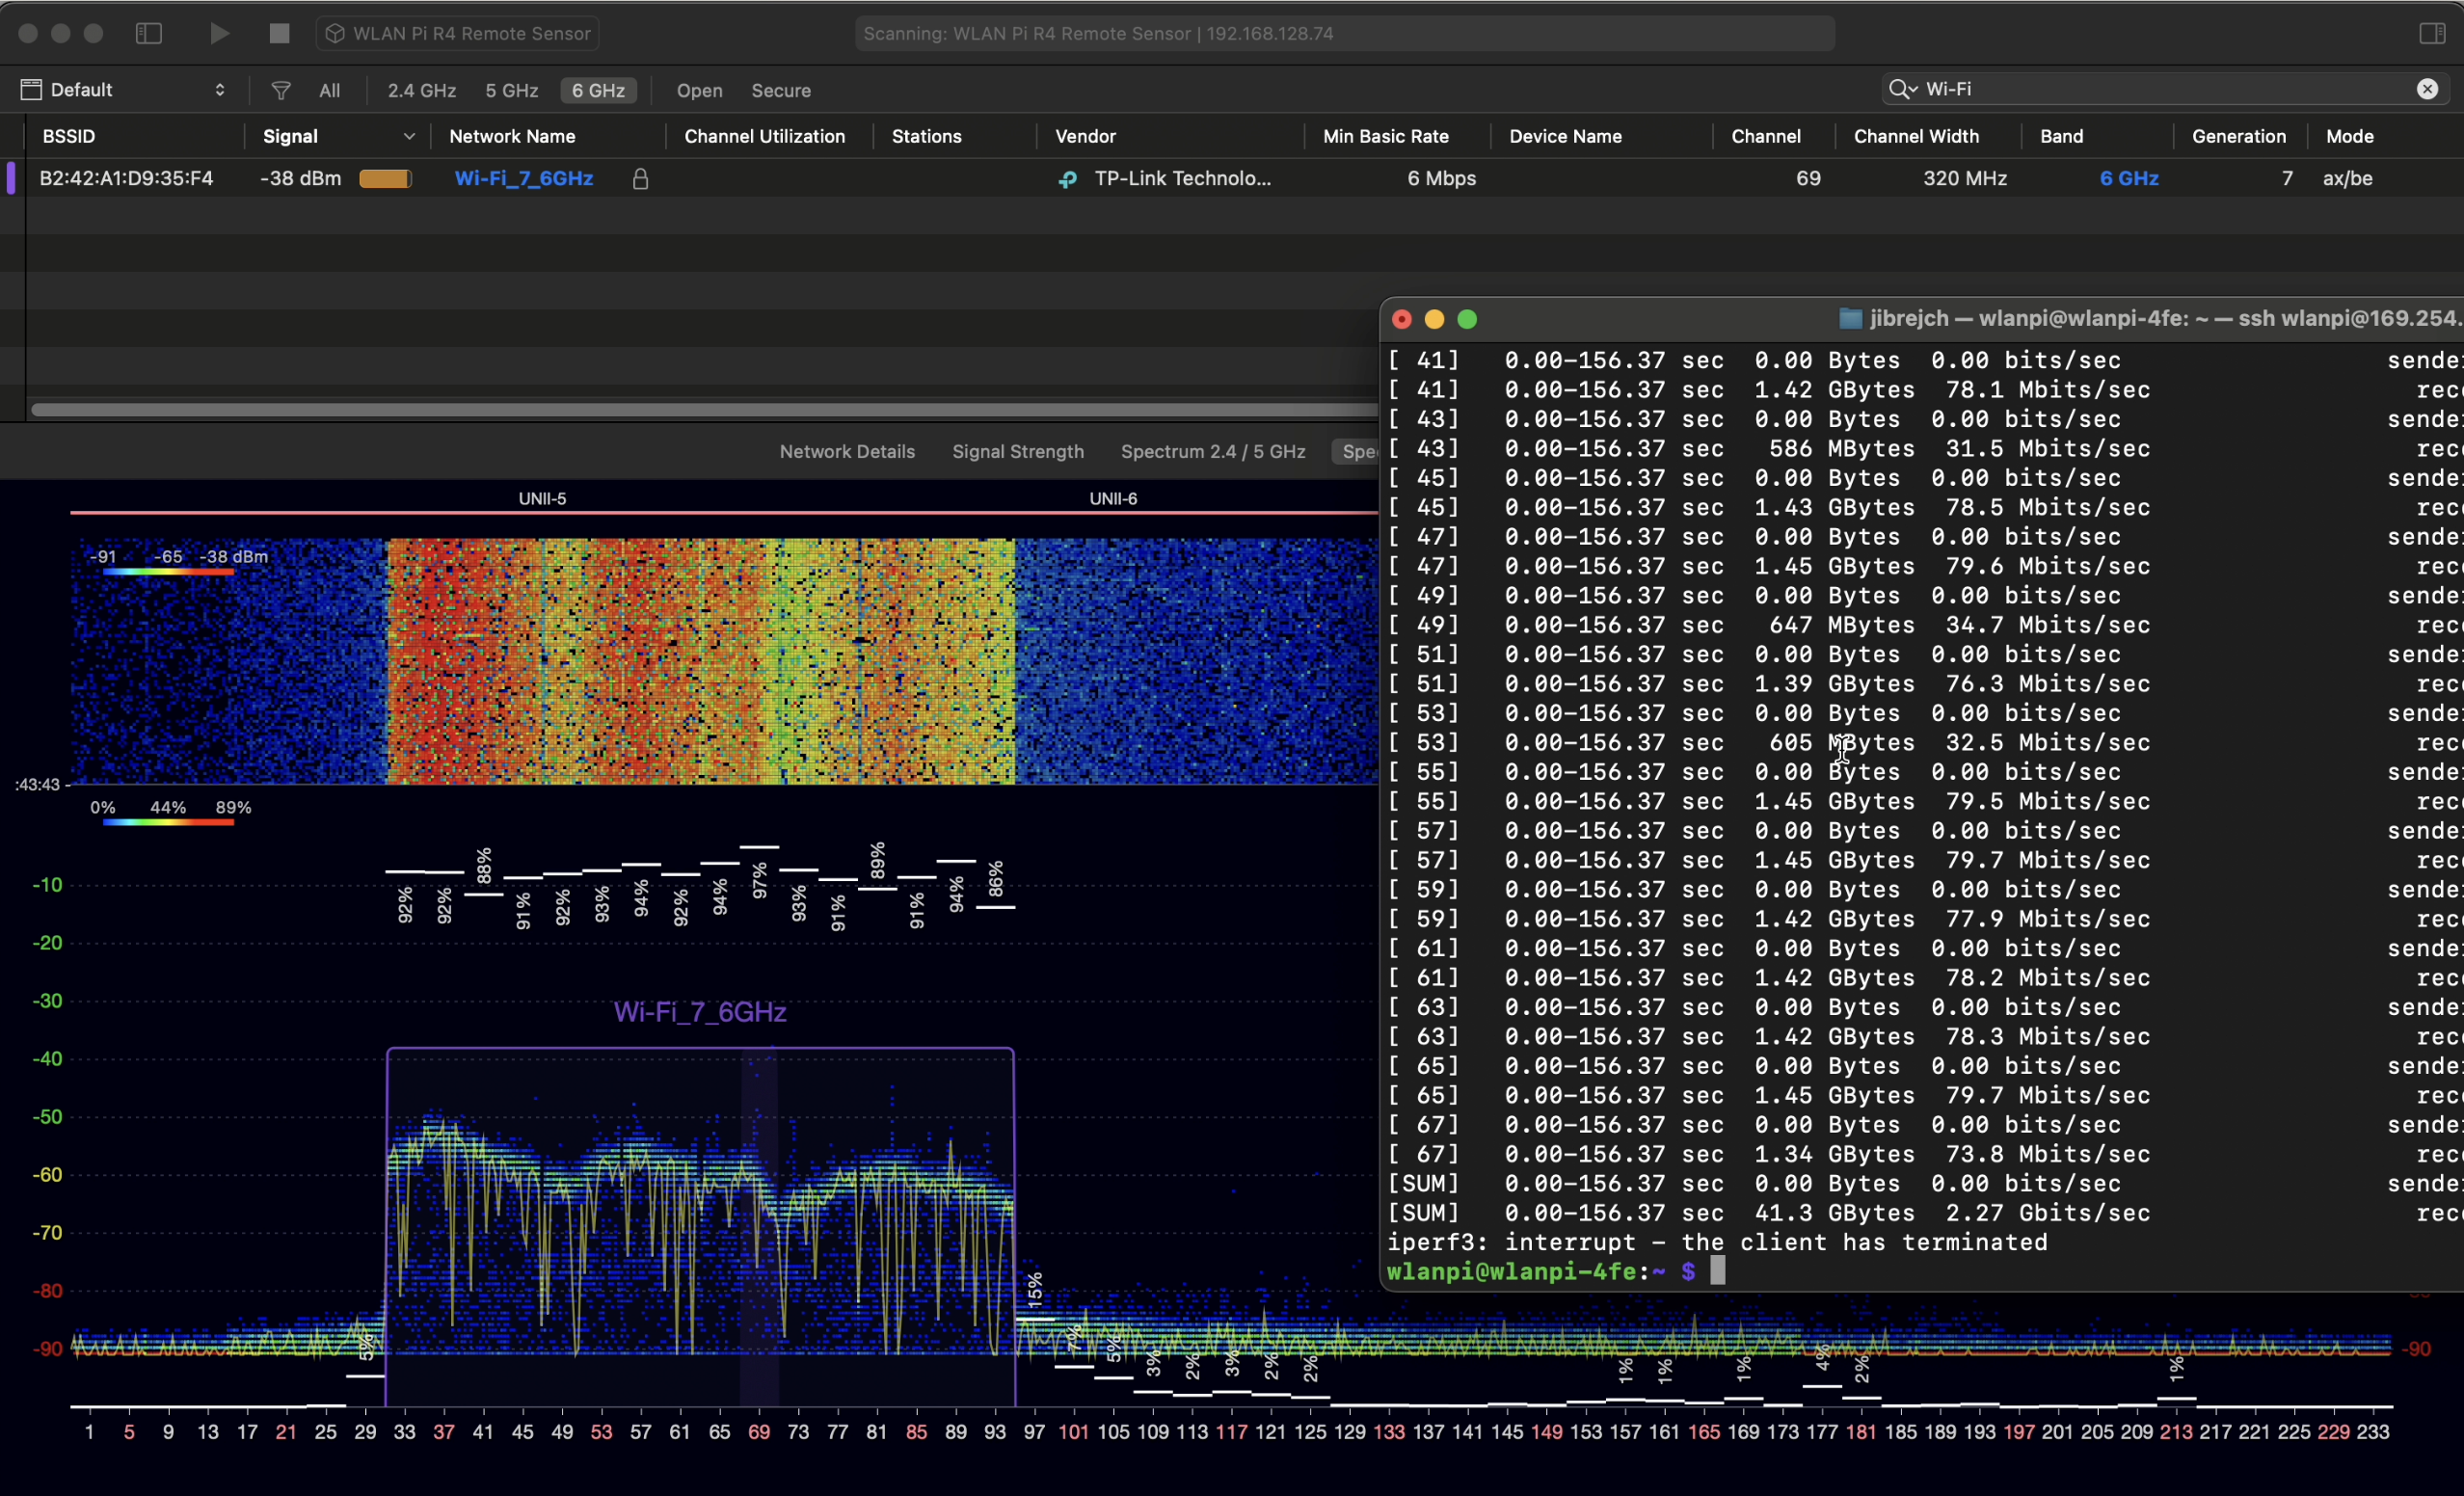
With the help of Oscium WiPry Clarity 6 GHz spectrum analyser connected to another WLAN Pi, we can monitor the life spectrum and see how much red the iperf3 test introduces. We are able to achieve download TCP speed of 2.27 Gbps and upload speed of 1.74 Gbps.
I used iperf3 -c 192.168.68.51 -P32 -R to test download speed, and iperf3 -c 192.168.68.51 -P32 for upload. Number of parallel streams set to 32 provided the best performance.
Summary
Wi-Fi 7 works well on the WLAN Pi M4. In fact, it works better than Wi-Fi 7 on Windows 11. We have covered Intel BE200 on Windows 11 in this blog posts.
I was expecting 2.5 Gbps-ish throughput, which we have got quite close to. During the test, CPU of the WLAN Pi was running around 80 % utilisation, and interrupts were reaching 100 %. So, hardware of the WLAN Pi itself posed a bottleneck.
mpstat 1 300 -P ALL
Orientation of the antennas mattered more than I expected to. Best position was a ‘V’ shape with antennas positioned away from the board. With AUX antenna placed 90 degrees relative to the Main antenna, data rates and throughput dropped. Perhaps there is RF noise from the board itself coming into play.
May I inquire what CM4 specifications you are using?
Also, please suggest where I can find those antennas.
Is there any AP yet supporting MLO? Does the Intel NIC support MLO?