We have already converted a Cisco Meraki access point to Catalyst/DNA mode the other week.
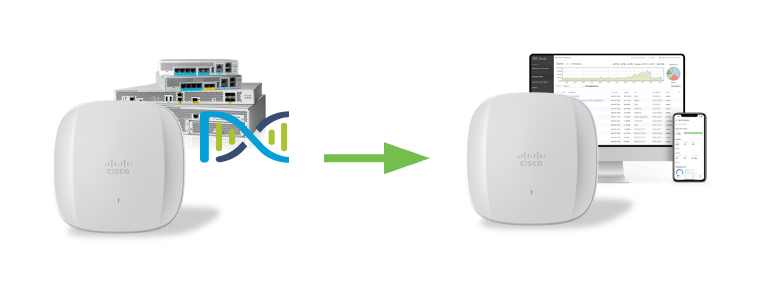
Access point conversion from Catalyst/DNA mode (managed by Catalyst 9800 controller) to Meraki mode allows you to add a Catalyst Wireless AP to Cisco Meraki Dashboard, and fully monitor, and fully manage it from there.
Order the AP in the right mode
Order your access points in the right mode out of the box, and don’t worry about conversion. That’s the “-MR” SKU for cloud-management/SaaS model. If you wish to manage the APs by a Catalyst 9800 controller, simply find the right access point SKU and regulatory domain based on your coutry using this tool and reach out to your favourite Cisco Partner or distributor for a quote.
What do we need?
- Catalyst Wireless CW9162I, CW9164I, CW9166I, CW9166D1, or CW9163E access point joined to a Catalyst 9800 series controller (hardware appliance, cloud instance, or virtual machine)
- Cisco Meraki MR access point license
Let’s start the conversion
1. Make sure the access points you want to convert have successfully joined the Catalyst 9800 controller. Head over to Configuration > Wireless > Migrate to Meraki Management Mode.
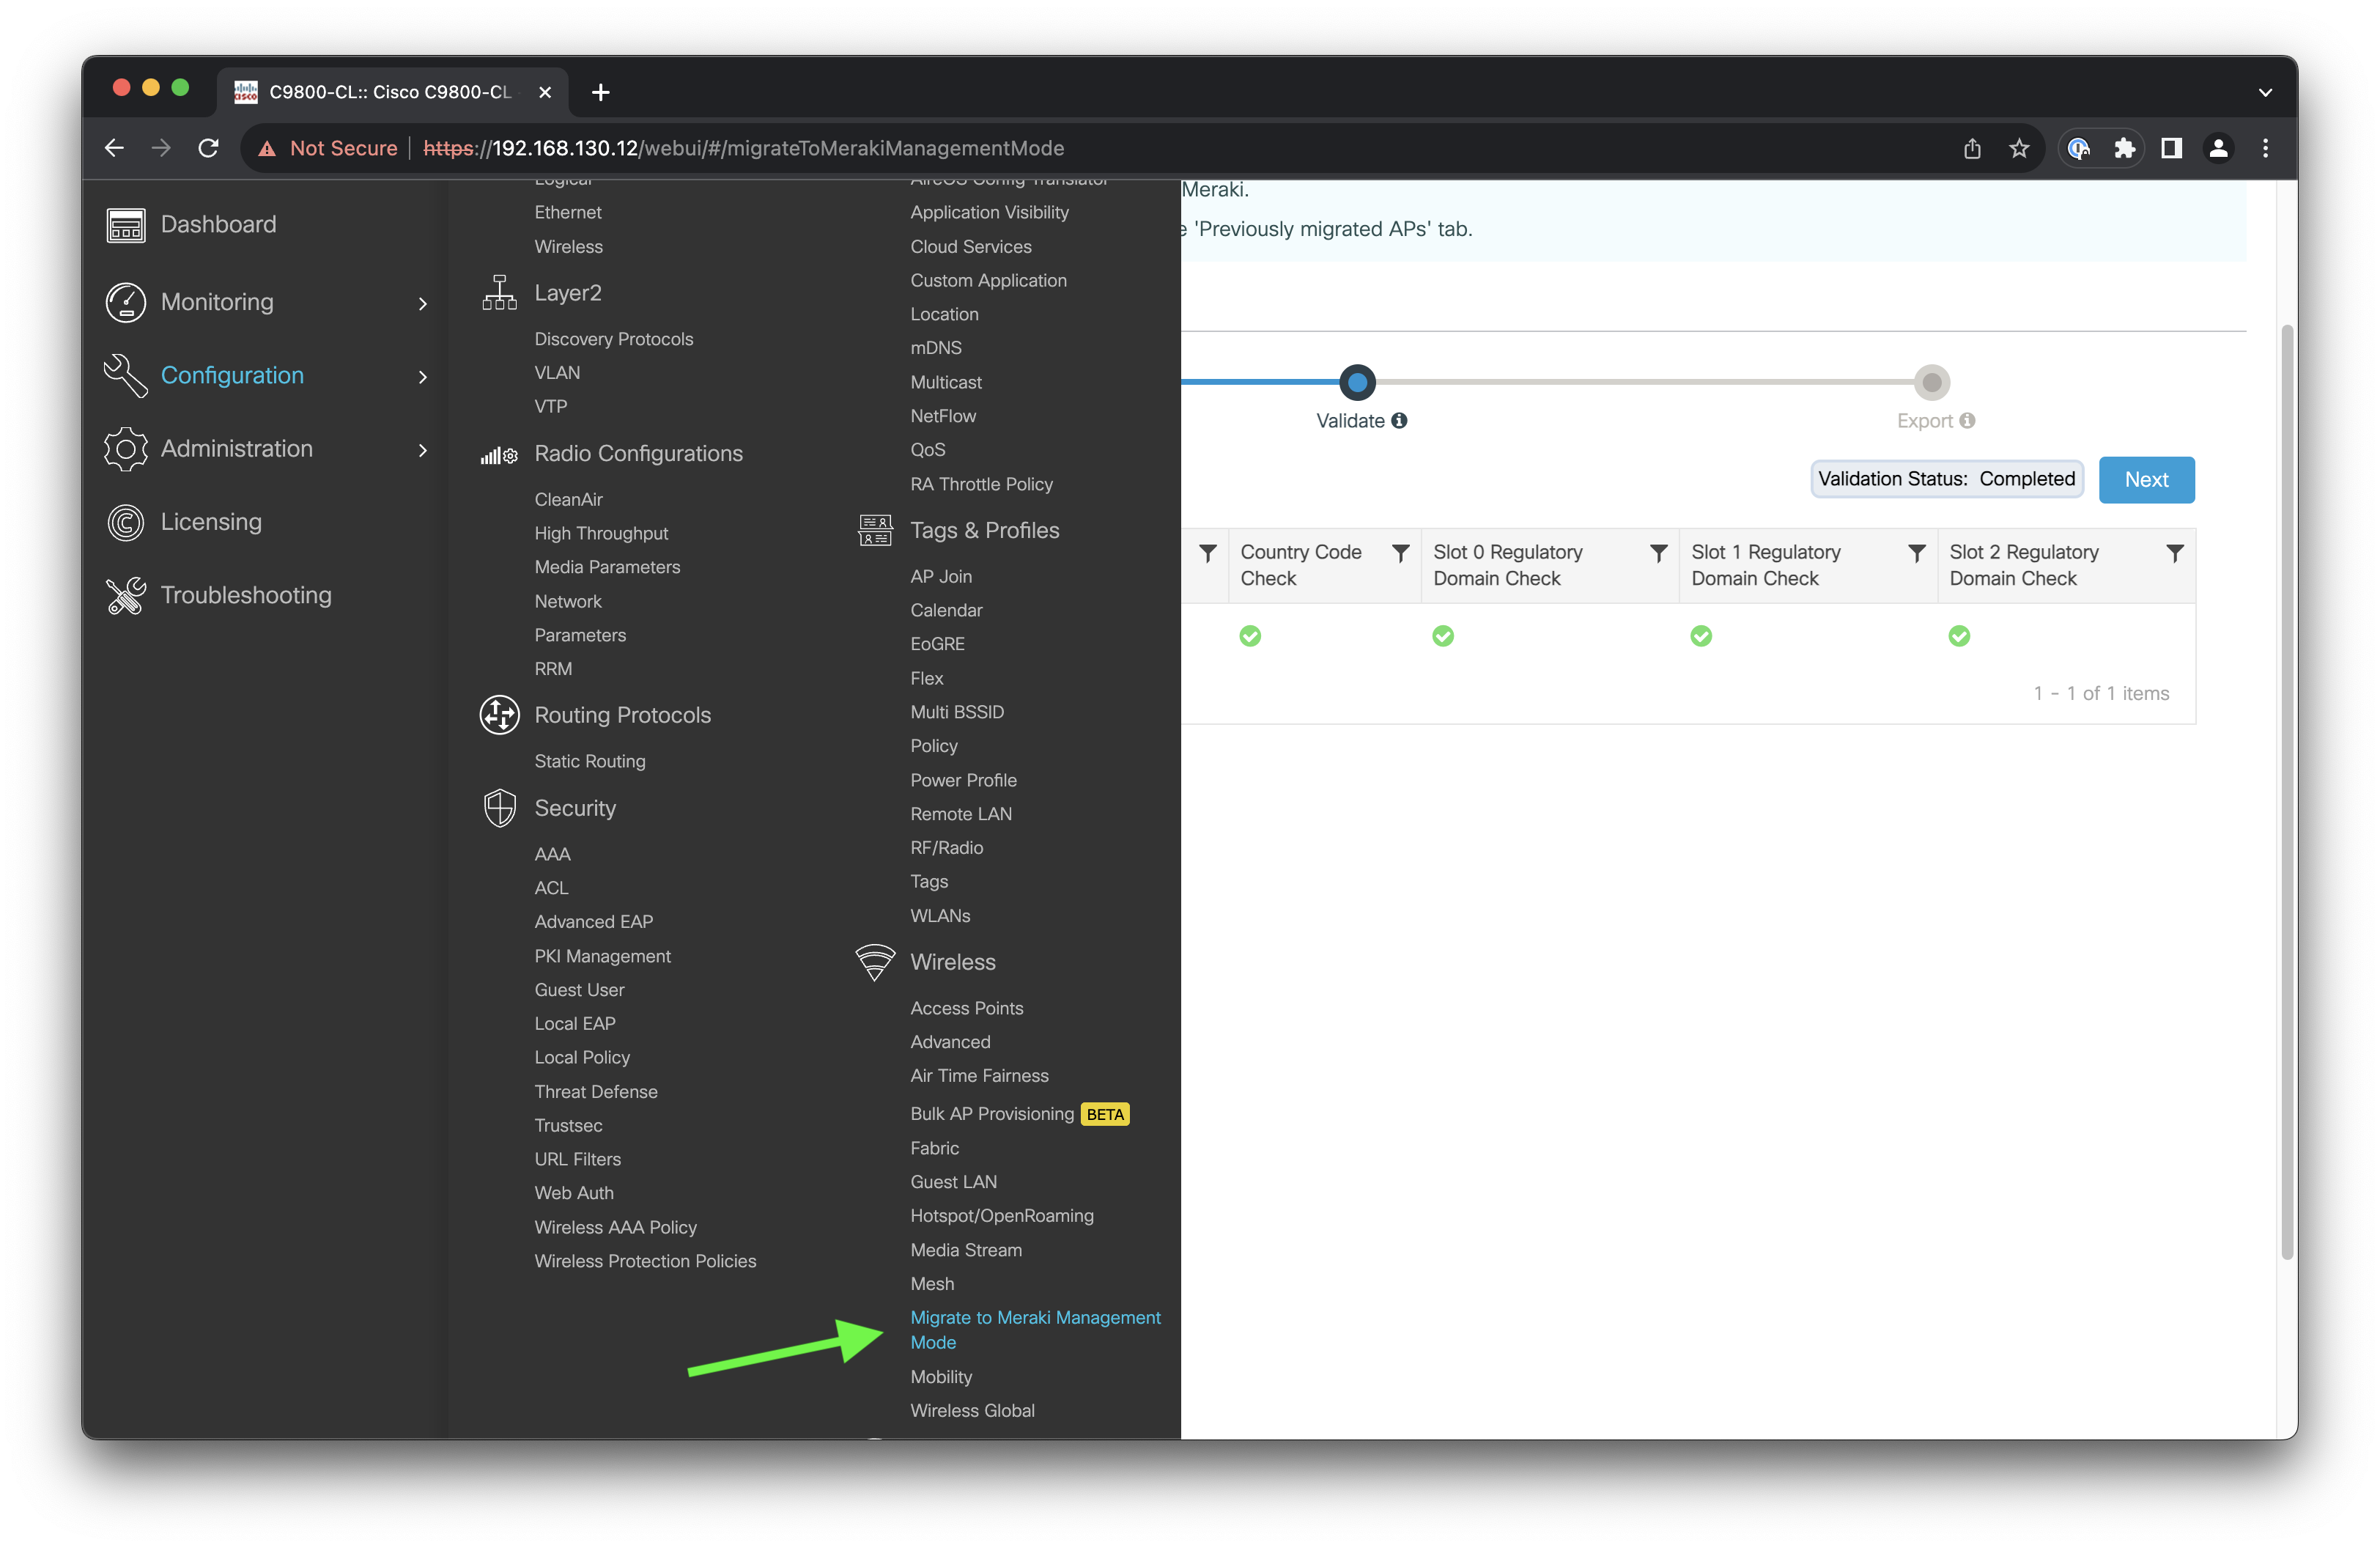
2. Select one or more APs you wish to convert and click the Migrate to Meraki Management Mode button.

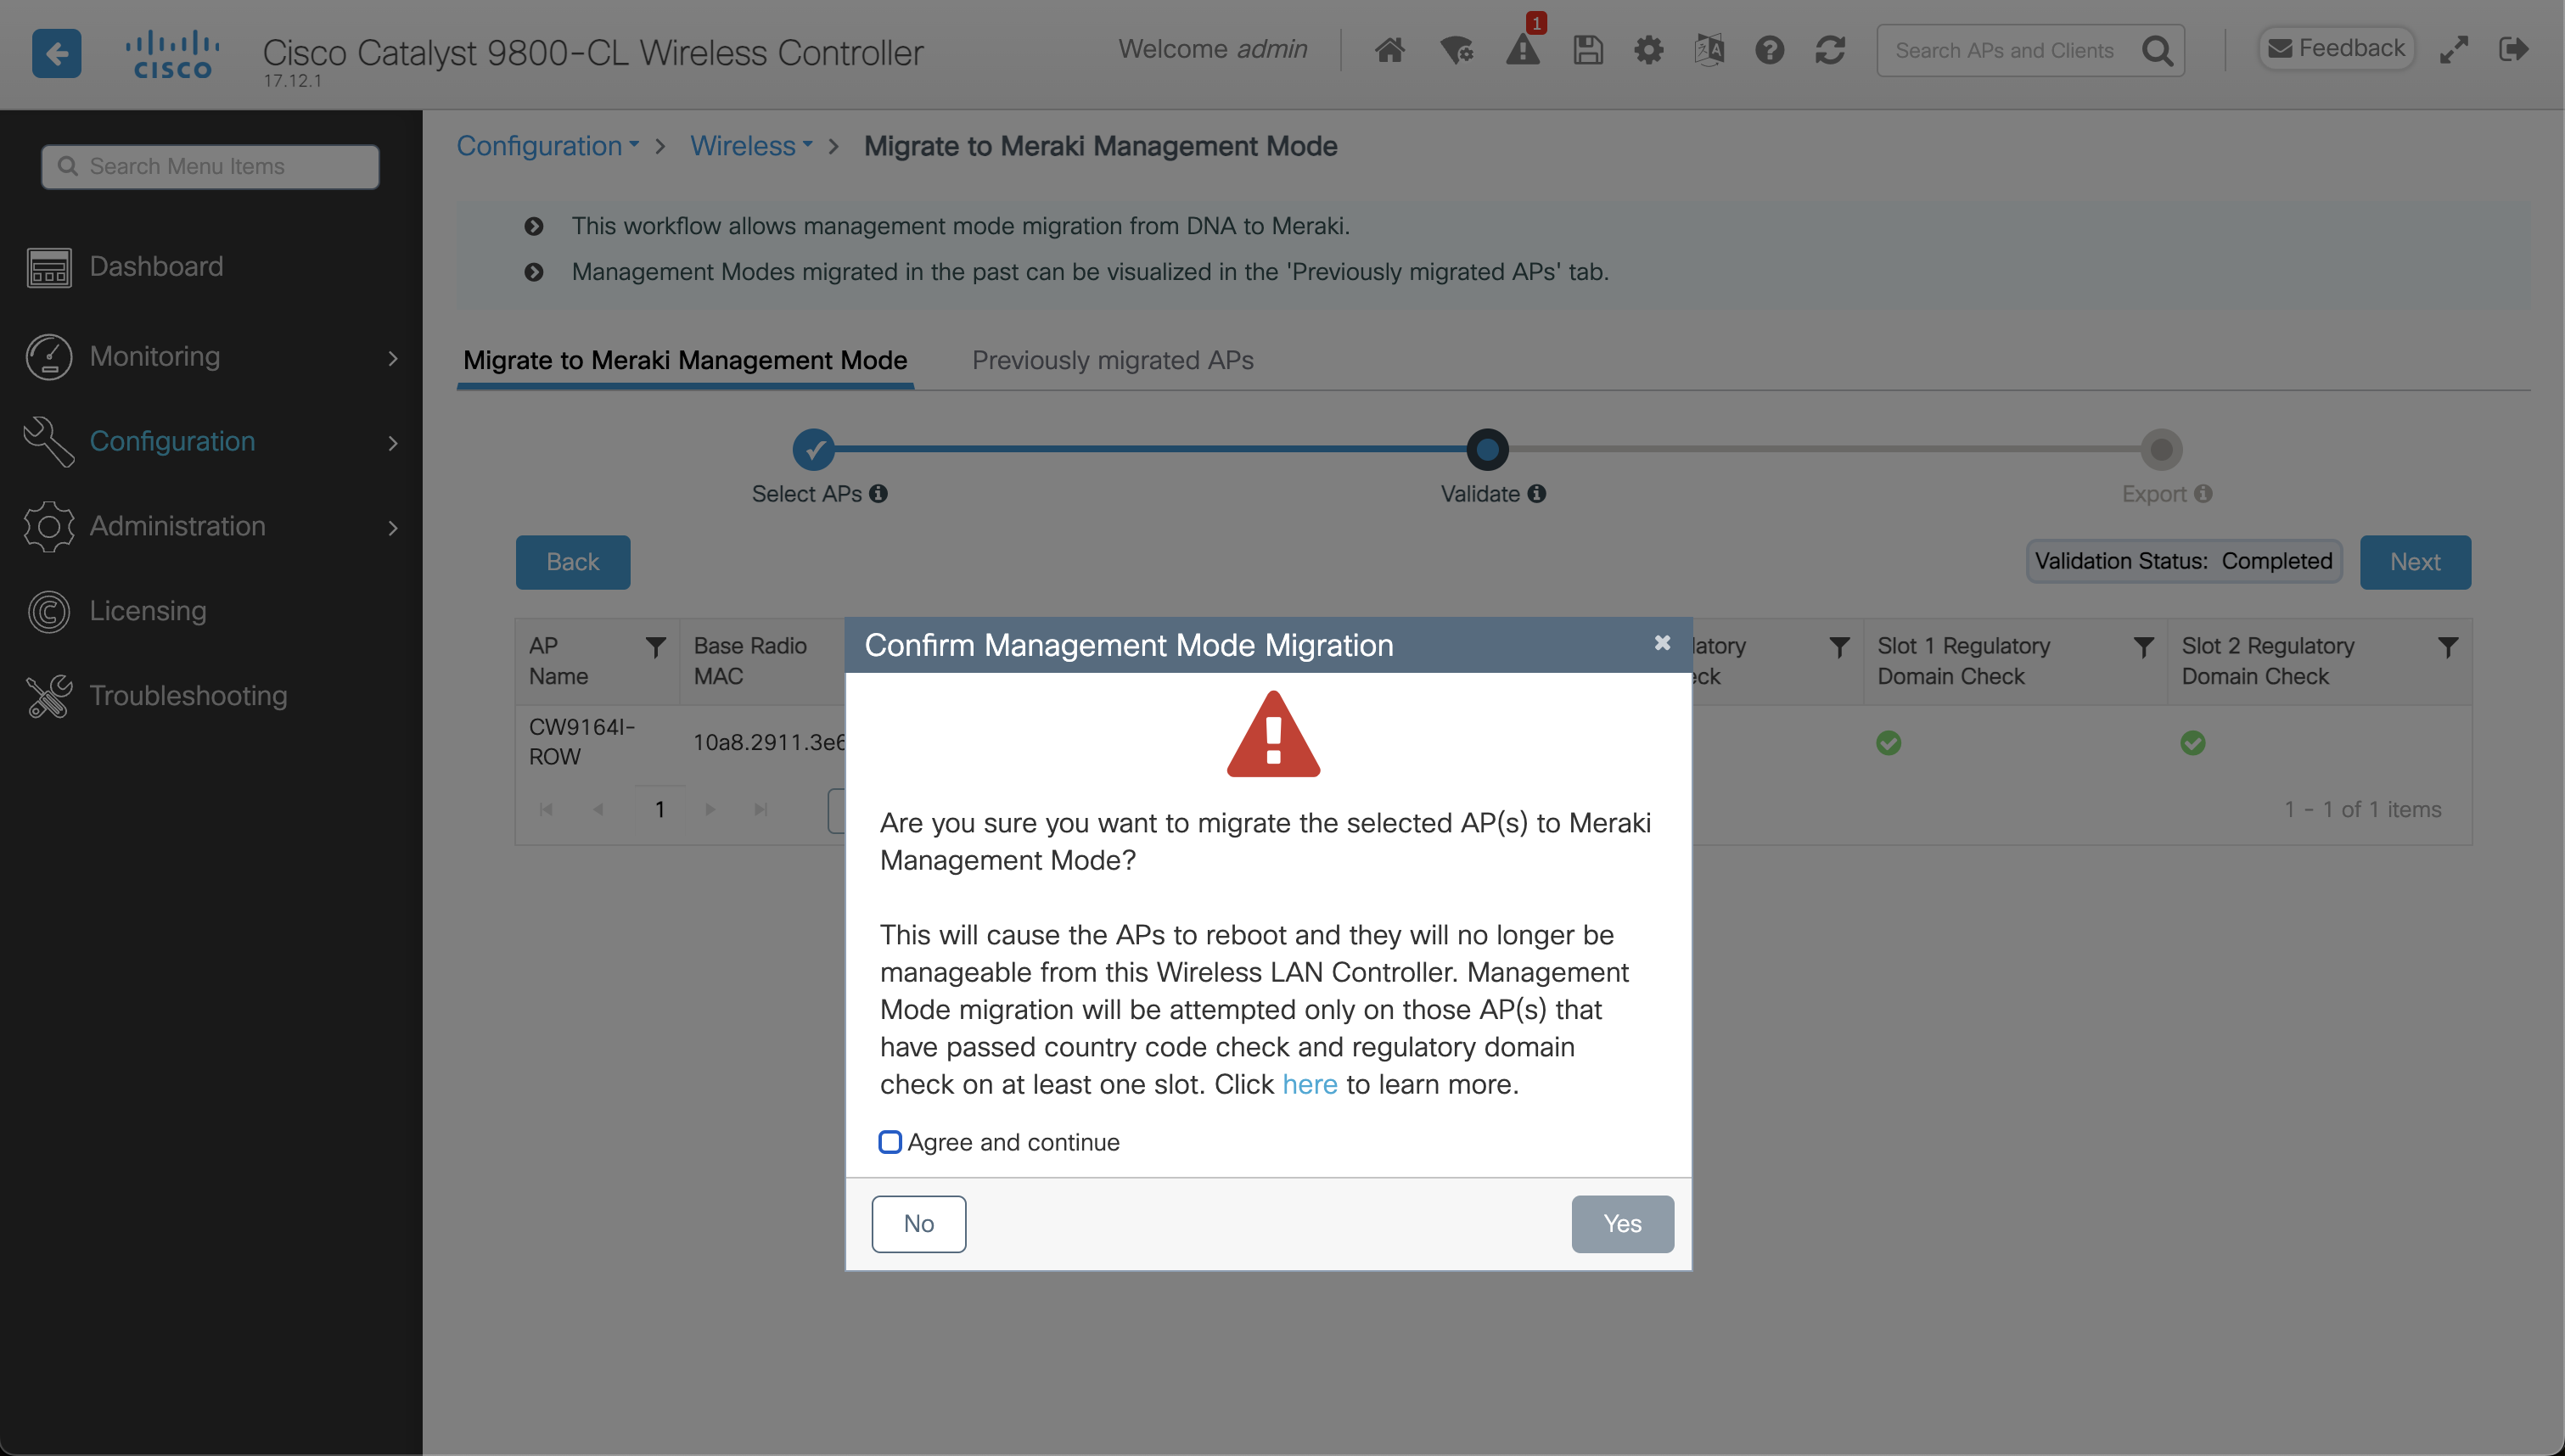
3. Wait for validation to complete. Click Next.

4. Tick Agree and continue and click Yes.
5. Conversion has now finished. Note that each AP has a Cisco Serial Number and Meraki Serial Number. Copy the Meraki Serial Number.
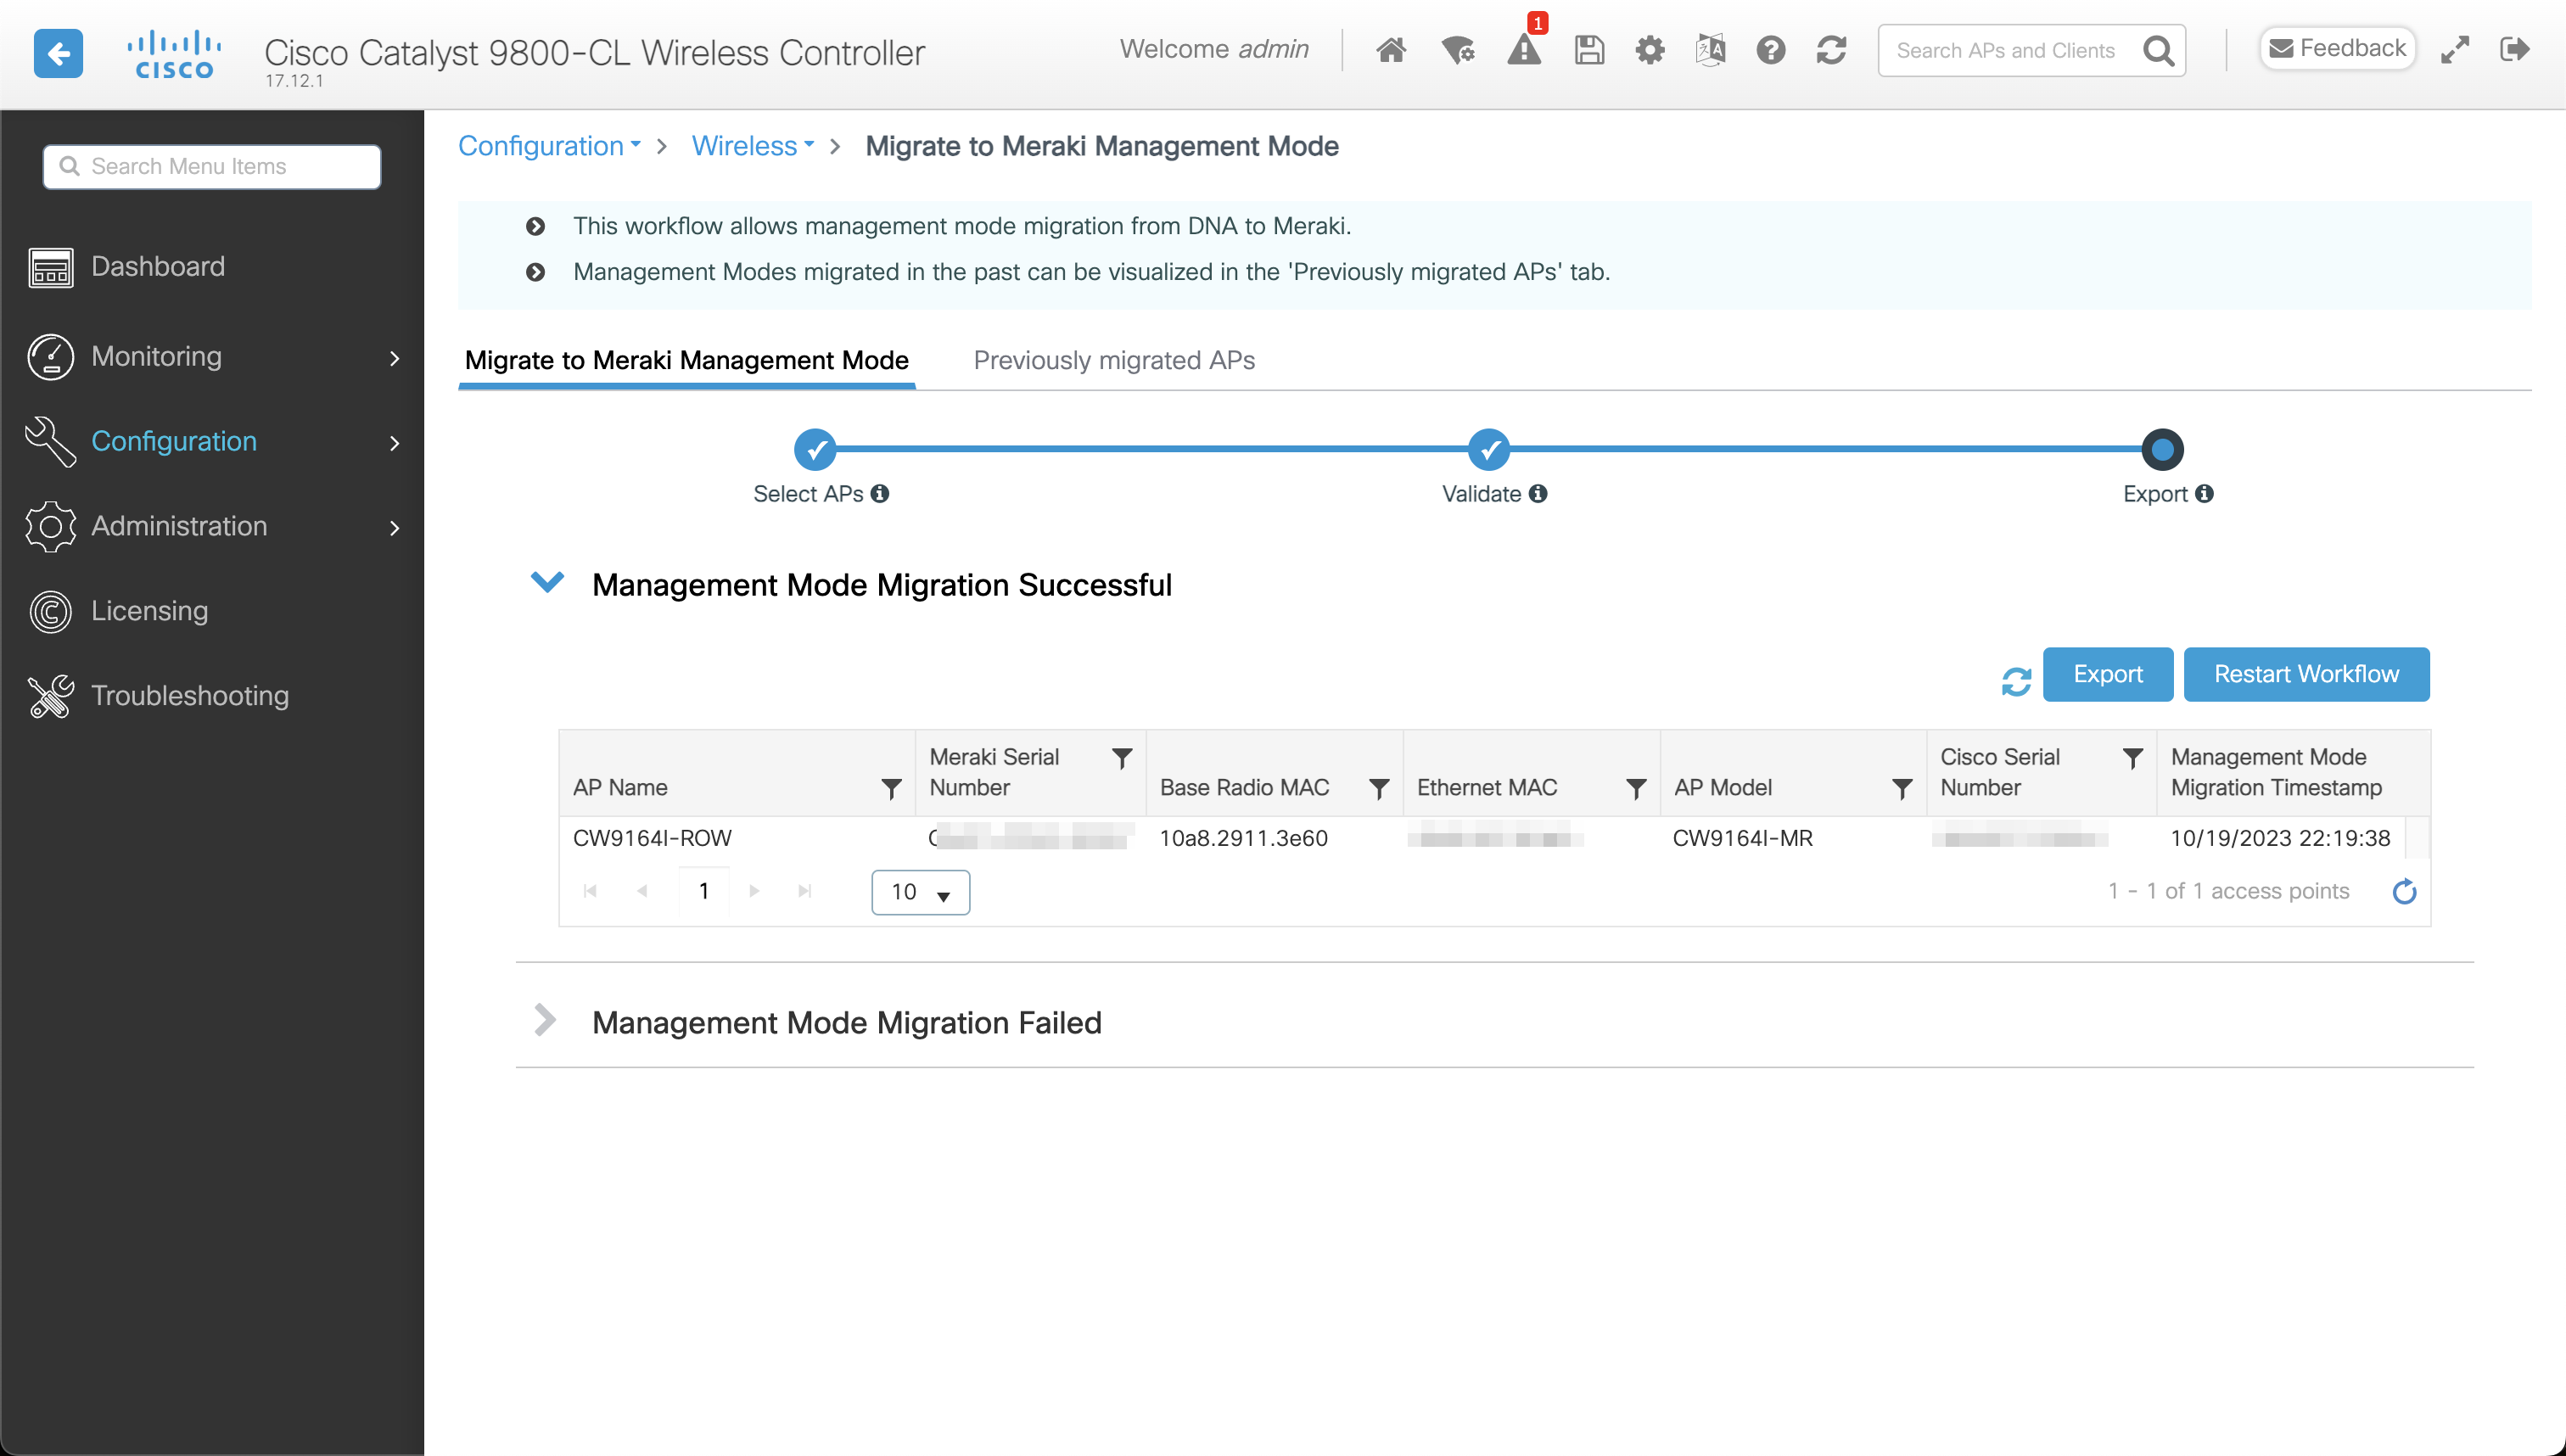
6. While you are doing that, the AP rebooted and started the Meraki image.
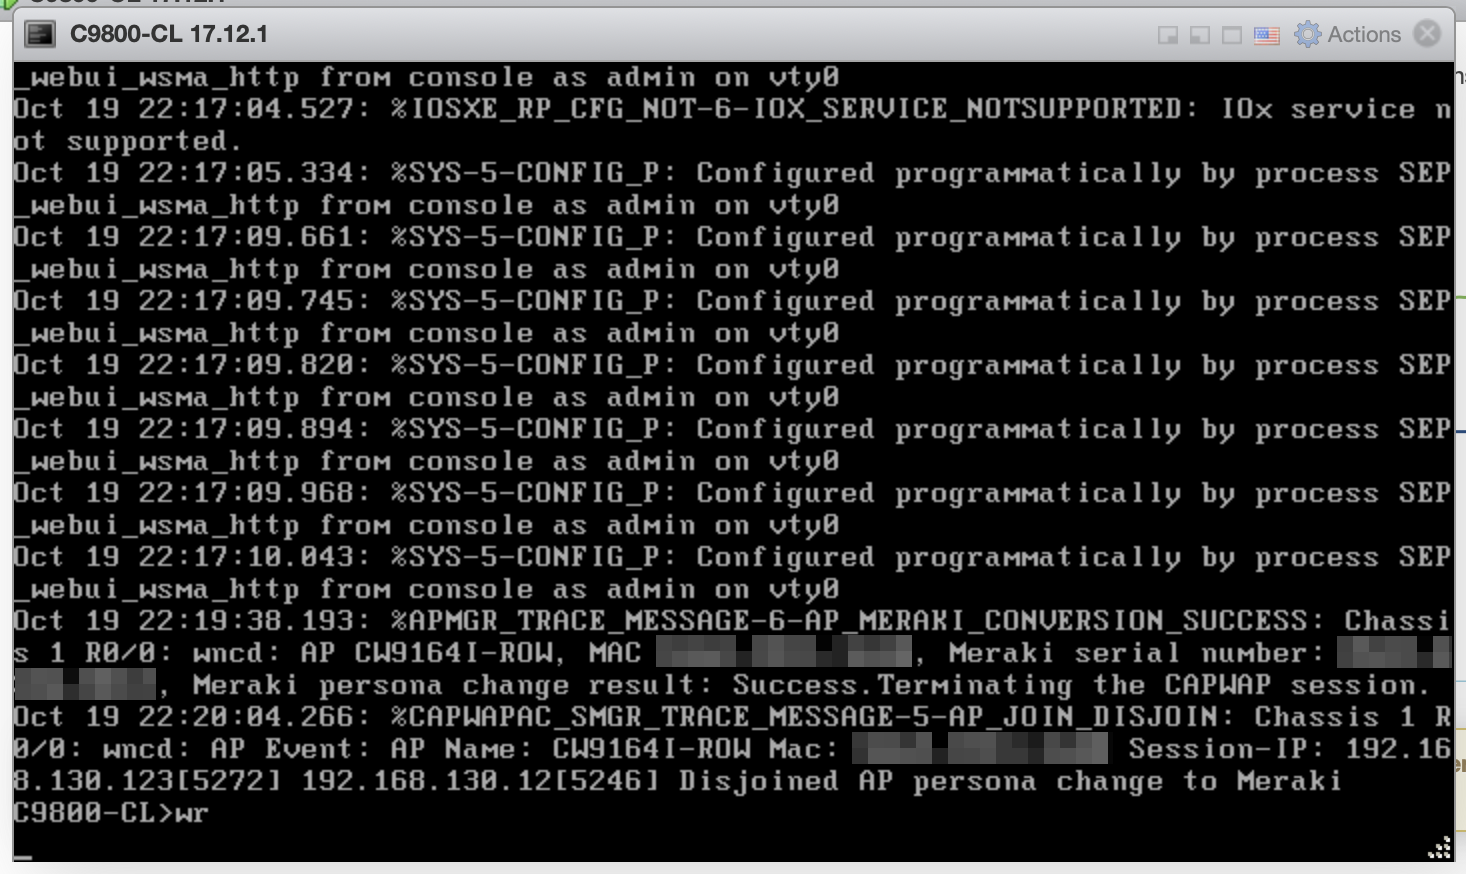
During the boot process, the AP logs a message about the mode change.
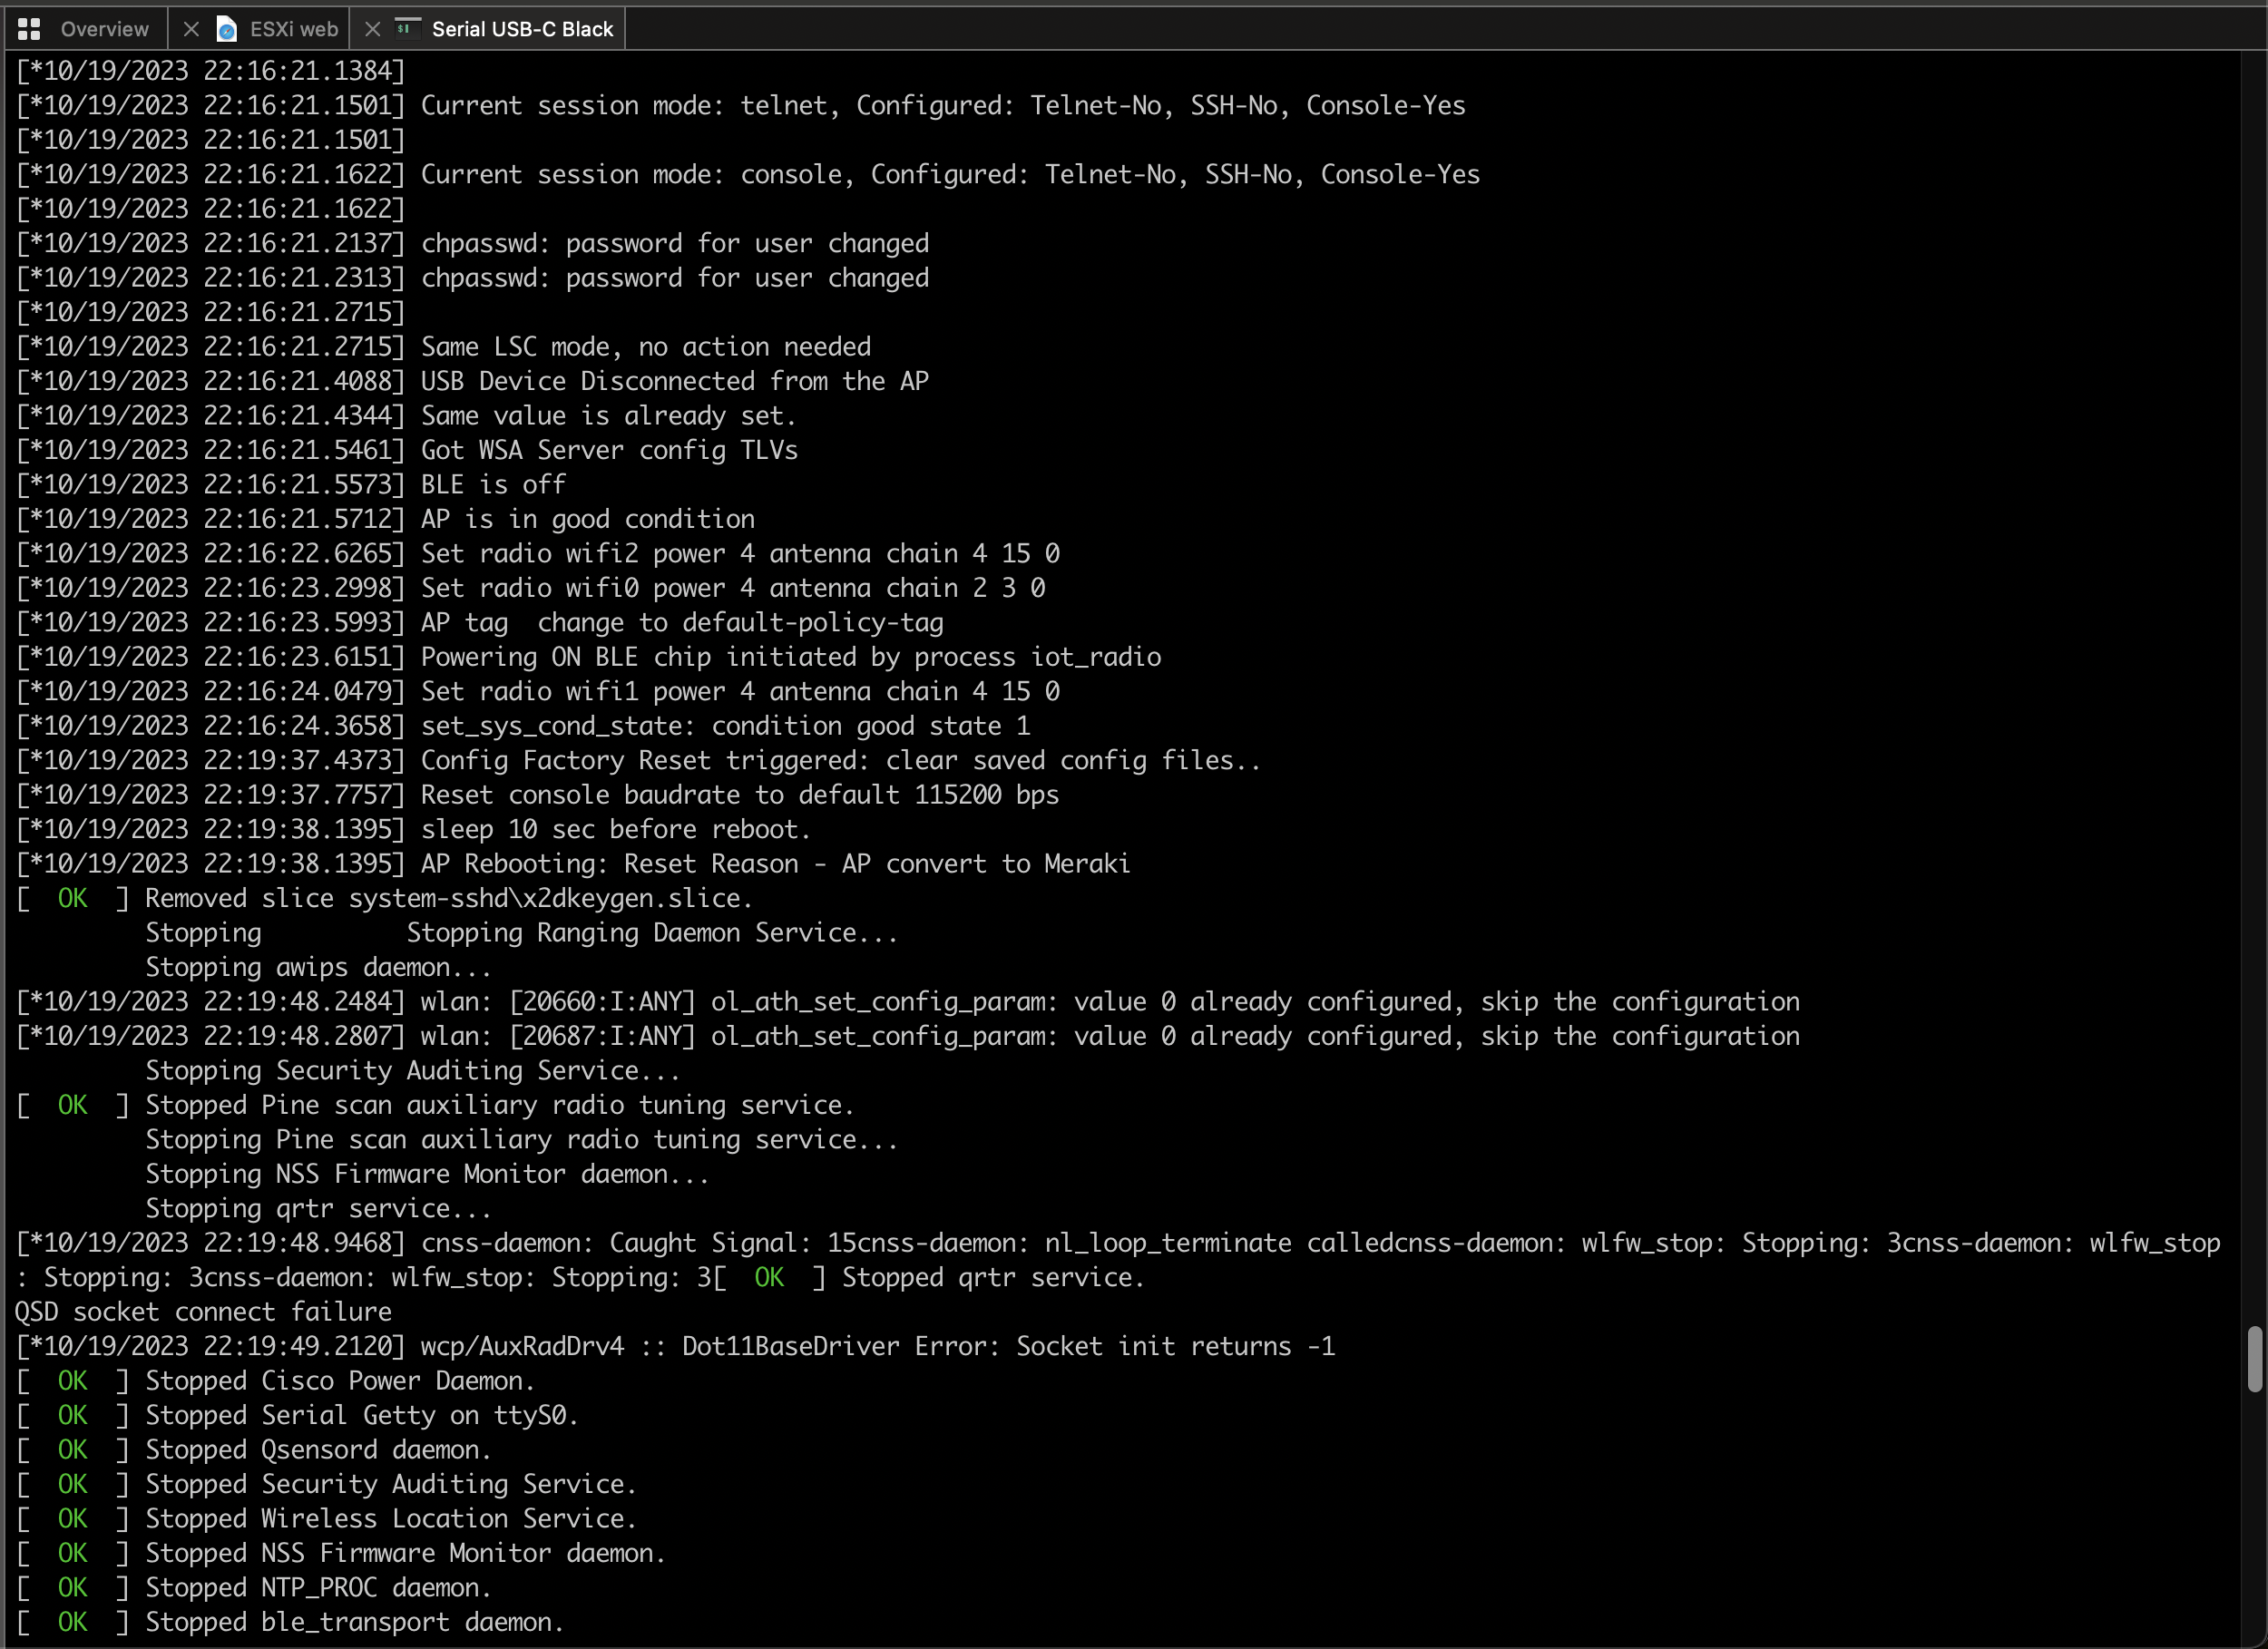
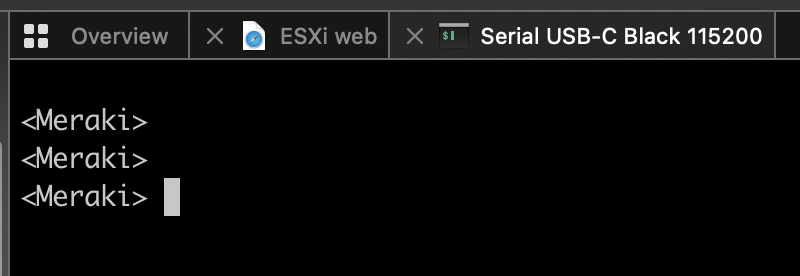
And you will no longer have access to its Console port. If you connect a console cable, <Meraki> output will appear with no option to type any commands.
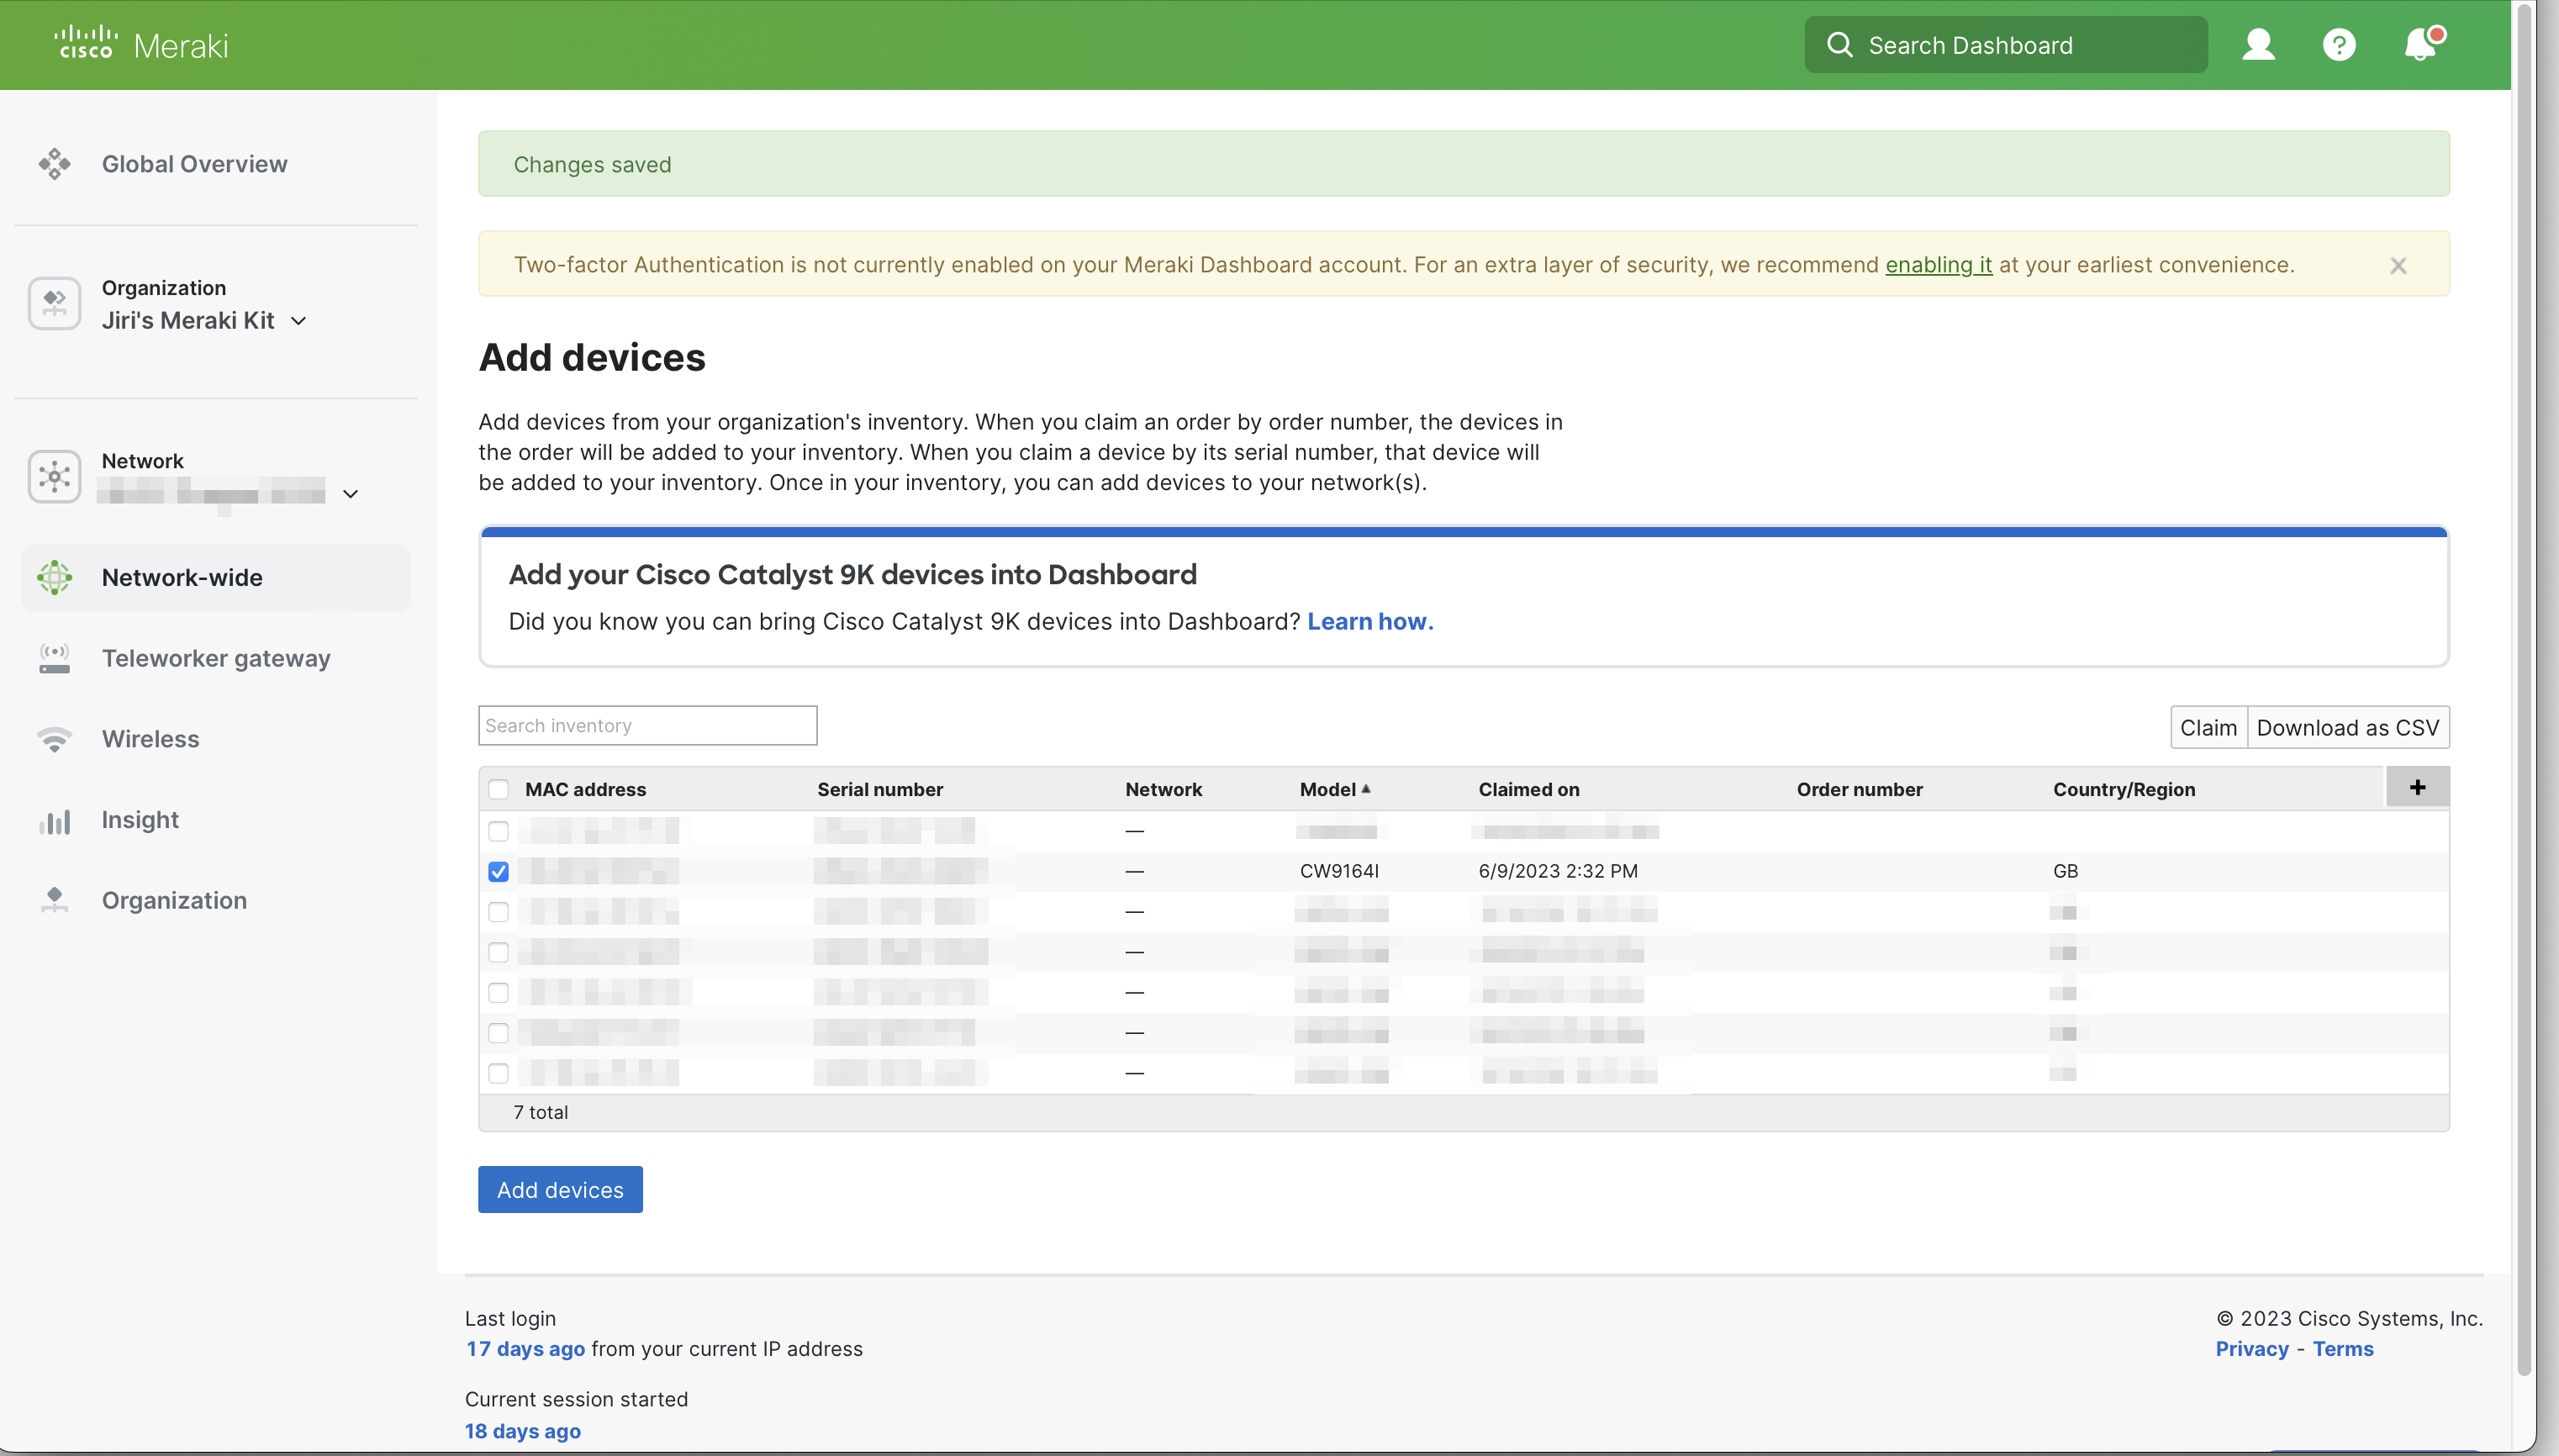
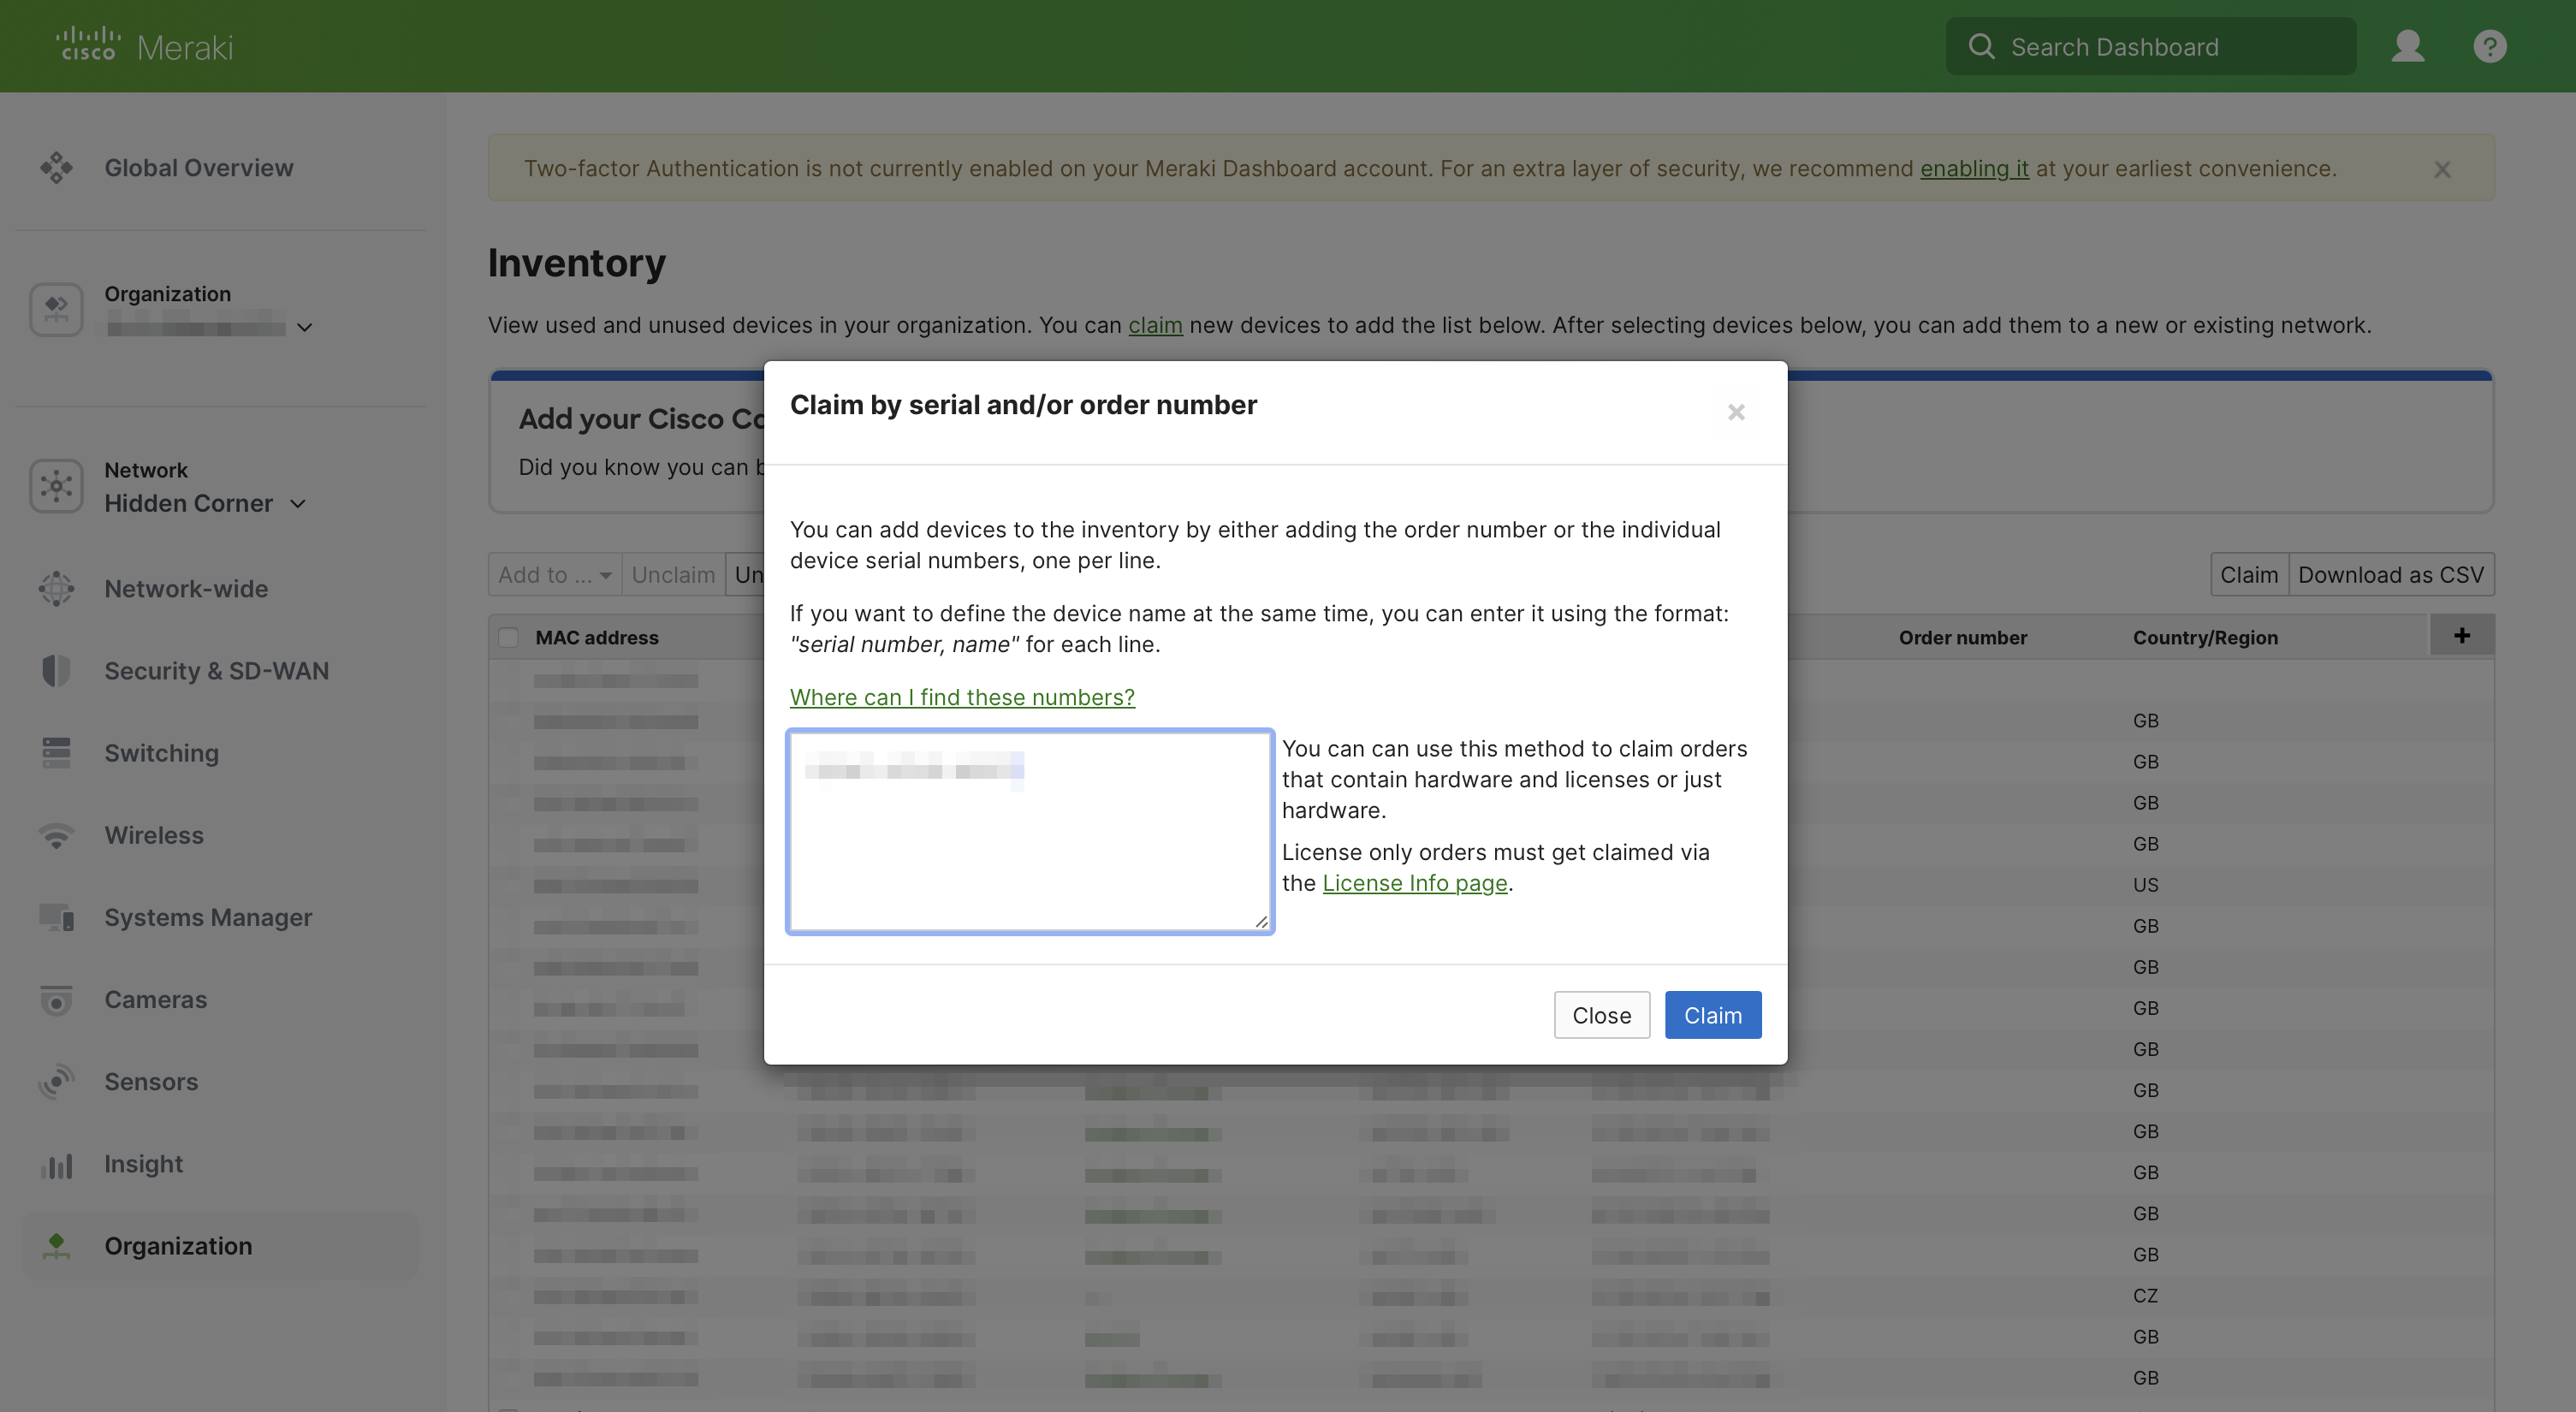
7. Copy the Meraki Serial Number and log in to Cisco Meraki Dashboard. Open Organization > Configure > Inventory. Click Add devices, and paste the Meraki Serial Number of the AP.
8. From now on, the AP now behaves like any other Meraki cloud-managed access point. All monitoring and management features of the Dashboards are available. If you ever change your mind, and wish to convert it back to Catalyst/DNA mode, here is my step-by-step guide.