Cisco Catalyst Wi-Fi 6E access points in DNA persona support a new Site Survey mode. It allows you to perform AP-on-a-stick survey, it comes with a fresh web interface, and it supports 6 GHz. This new mode is included in the Lightweight access point software image.
Unlike the Embedded Wireless Controller (EWC) mode, which was available on previous generation of APs, this new Site Survey mode doesn’t require any extra software image download or reflash of the AP.
What do we need
- Either of C9136I, CW9166I, CW9164I and CW9162I APs in DNA persona (controller-managed AP running Lightweight software image) works. We are going to use CW9162I-ROW DNA persona AP running 17.9.3 or newer release.
- Console cable connected to the USB port of your laptop and the RJ45
Consoleport of the AP - PoE injector, PoE-capable battery pack, or switch with PoE support. To power CW916x APs, PoE+ (802.3af) is sufficient. You will need UPOE (802.3bt) to leverage full radio capability of C9136I.
Why the 17.9.3 or newer release
Why am I insisting on 17.9.3 or newer release? There was an issue, which prevented Site Survey mode from working on ROW regulatory domain APs used in the UK. The AP simply won’t accept the GB country code, and it won’t enable 5 GHz and 6 GHz radios. This is fixed in 17.9.3.
How to upgrade the AP to 17.9.3
Simply join the AP to an existing Catalyst 9800 controller running 17.9.3 release. During the join process, the AP will automatically upgrade its software to 17.9.3 to match your controller’s release.
If you don’t have a controller by hand, download and spin up C9800-CL 17.9.3 virtual machine controller on your favourite hypervisor or cloud service and join the AP to it.
How to activate and use the Site Survey mode
- Console into the Lightweight AP. Please note Catalyst APs used 9600 baud rate by default, which has recently in 17.12.1 release changed to 115200 bauds.
Switch the AP to Site Survey mode using this command, press y, and wait for it to reload:ap-type site-survey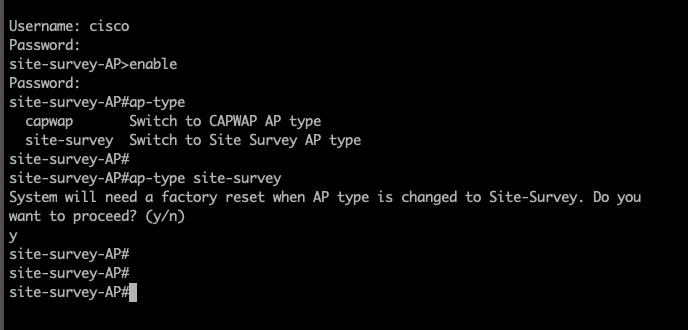
Note: Mode change to Site Survey mode erases the AP settings and resets Console port credentials to cisco/Cisco. - After it reloads, ROW domain AP will only broadcast 2.4 GHz survey SSID. No 5 GHz. No 6 GHz. That’s because we haven’t configured any country code yet and it doesn’t know what regulatory to follow. Note the
Country NONEvalue.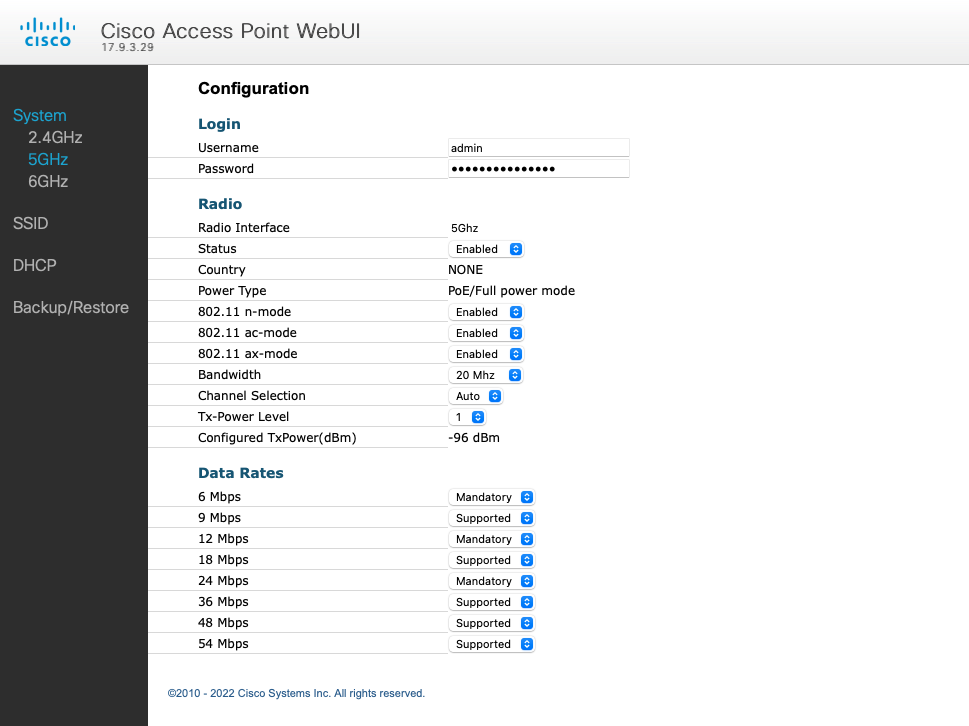
- If you are using ROW (Rest Of World) domain AP, configure country code using this command using Console connection and reload:
configure ap country-code GB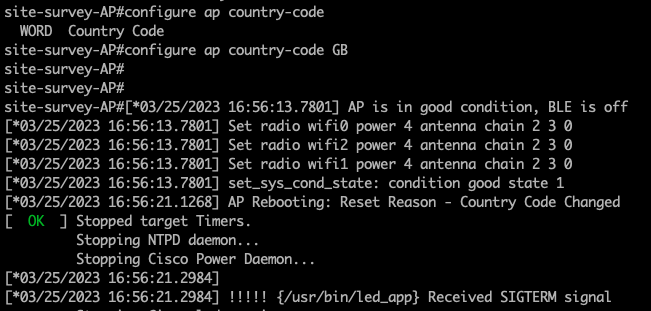
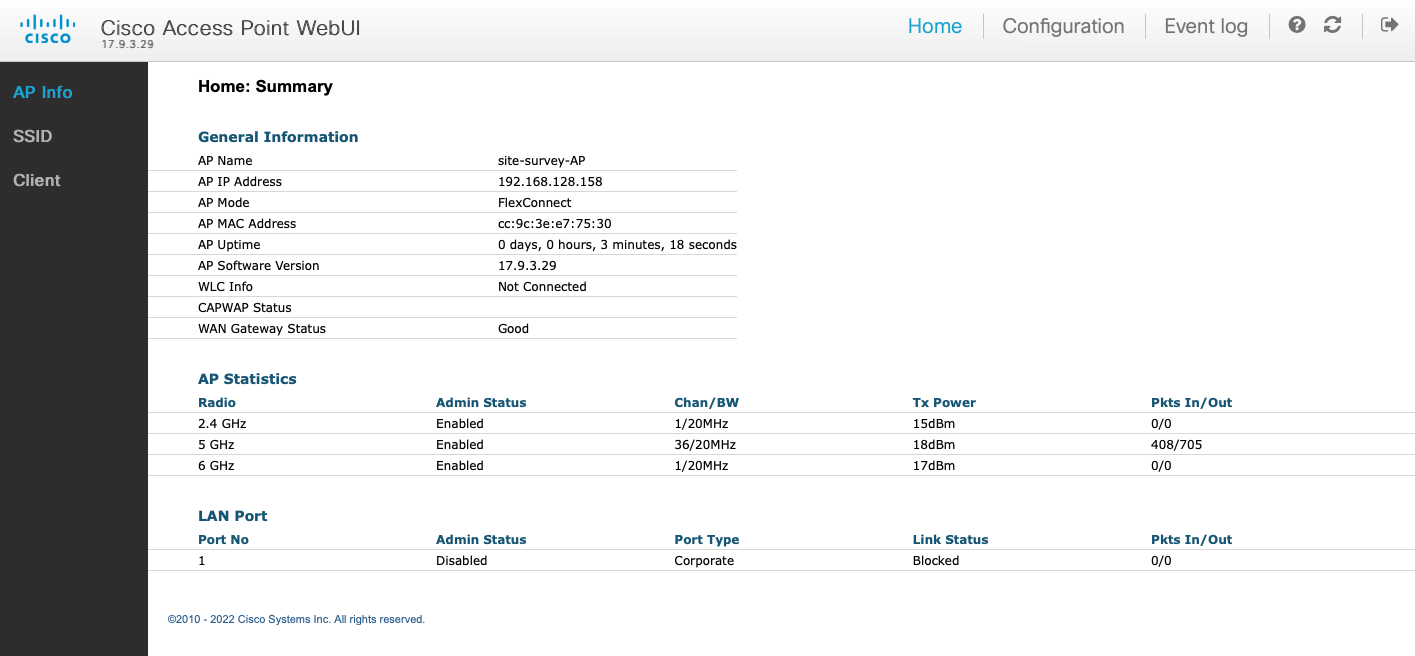
- The AP will boot up and broadcast the survey SSID on all 3 bands.
- Connect to the survey SSID wirelessly. It is an open SSID, no passphrase needed.

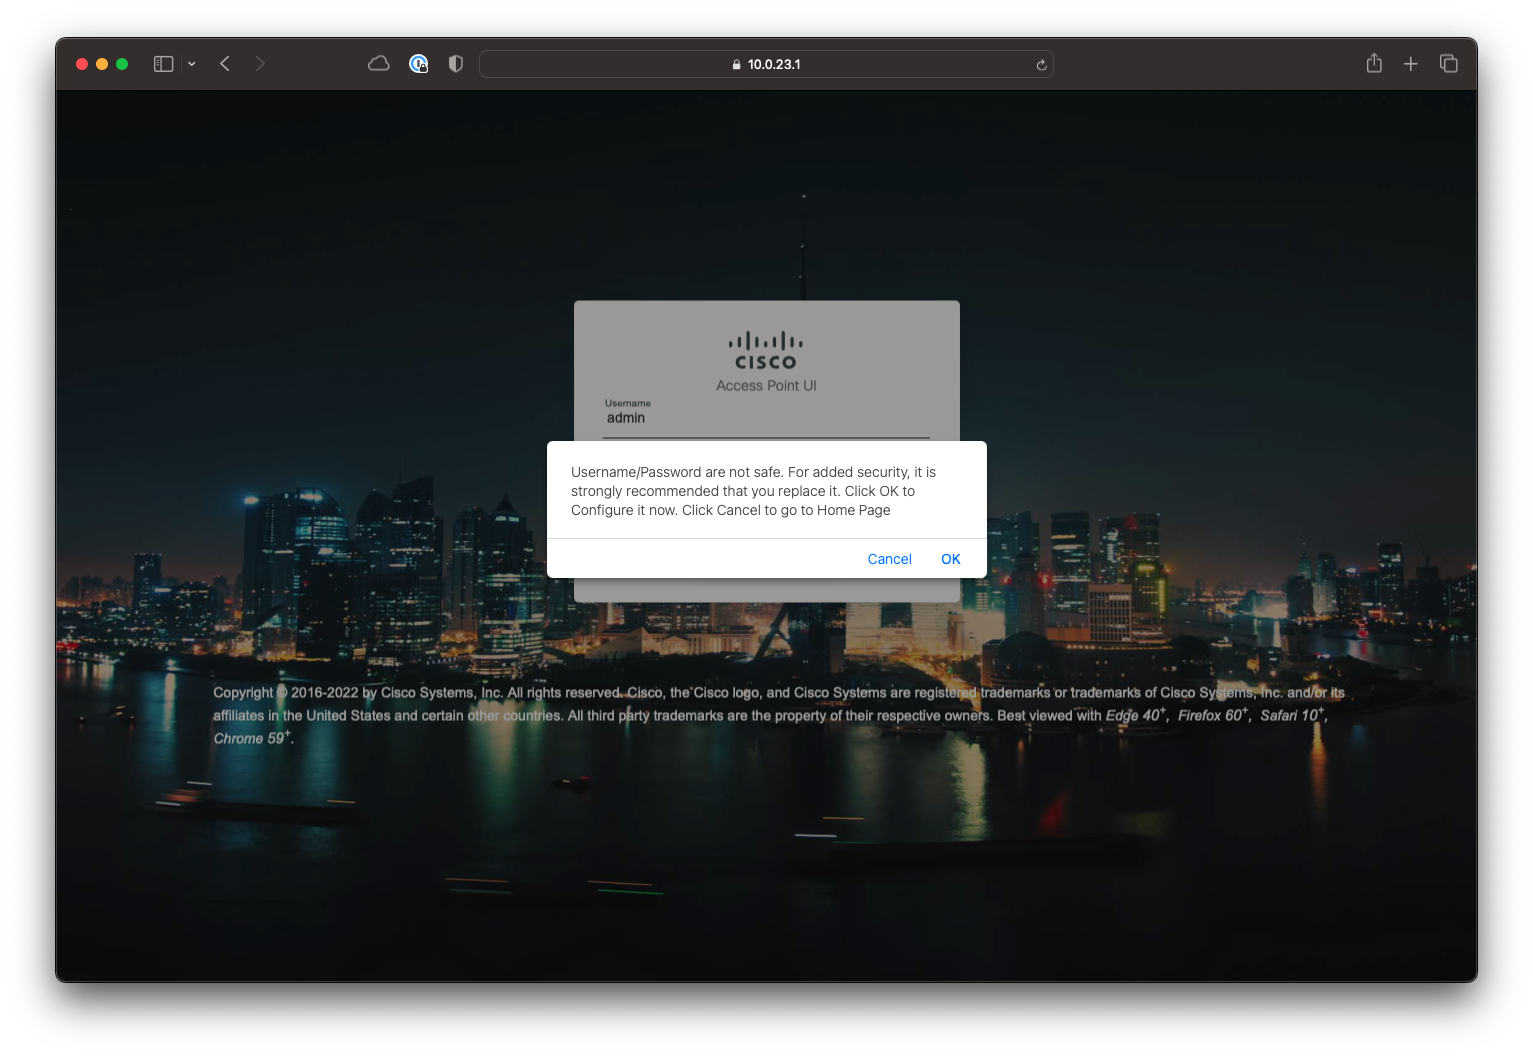
- Access the access point’s web interface on https://10.0.23.1. Default credentials are admin/admin. Click OK, and change default credentials.
- Using the web UI, customise the RF settings to fit your survey needs. Default 6 GHz channel setting is set to
Auto, which results in channel 1, which is not a Preferred Scanning Channel (PSC).
Let’s change it to channel 5 or other PSC channel.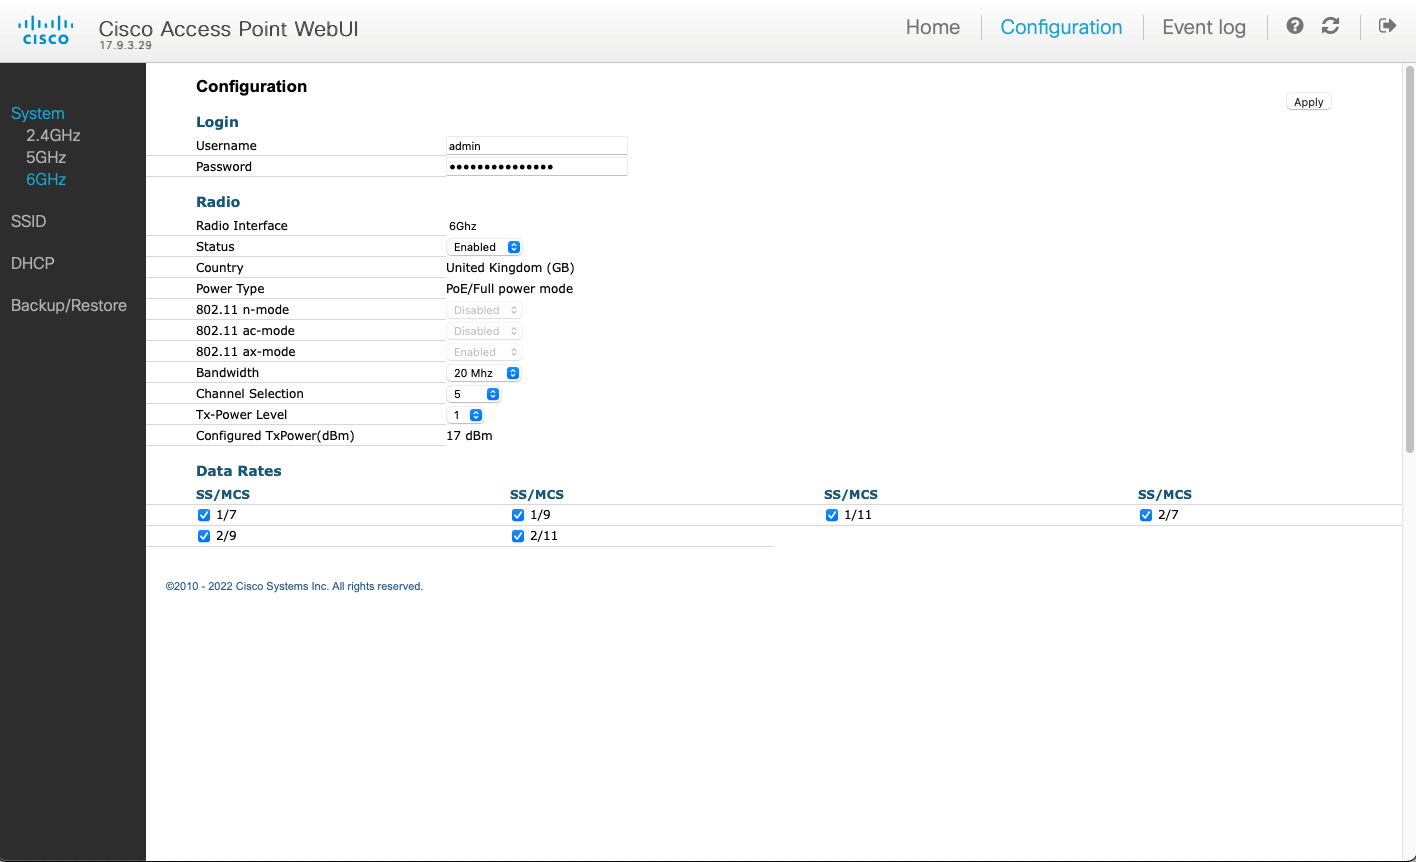
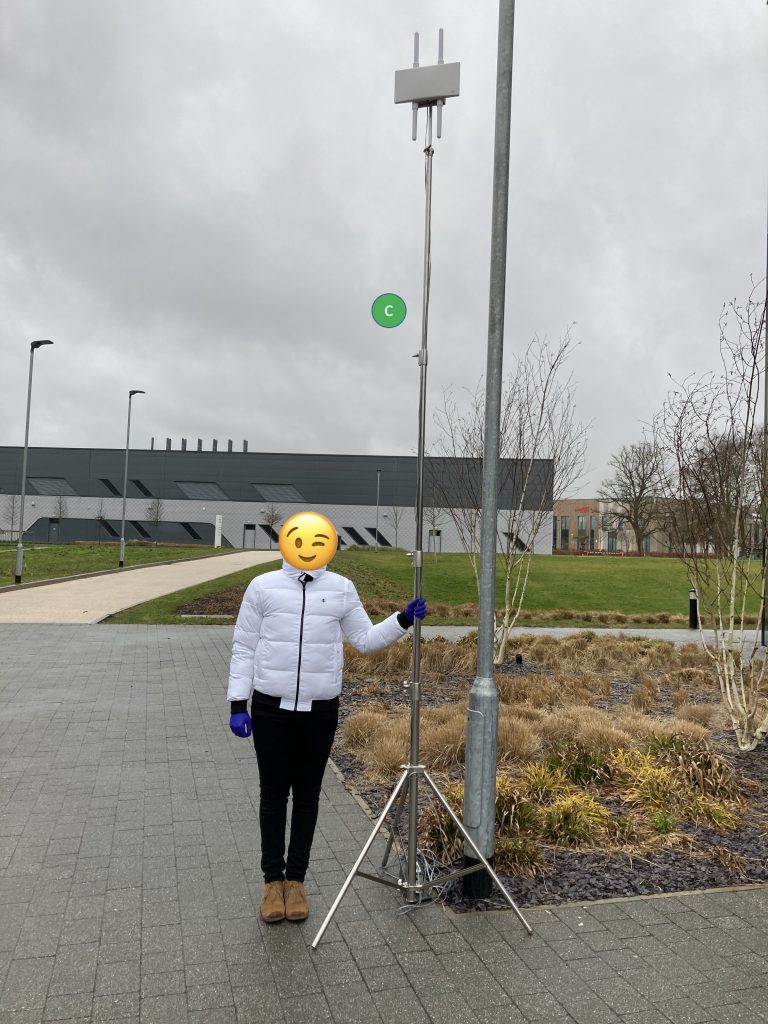
- That’s it. Take the AP with you to site and enjoy the survey. When you PoE power it, it will automatically start in the Site Survey mode with your customised settings.
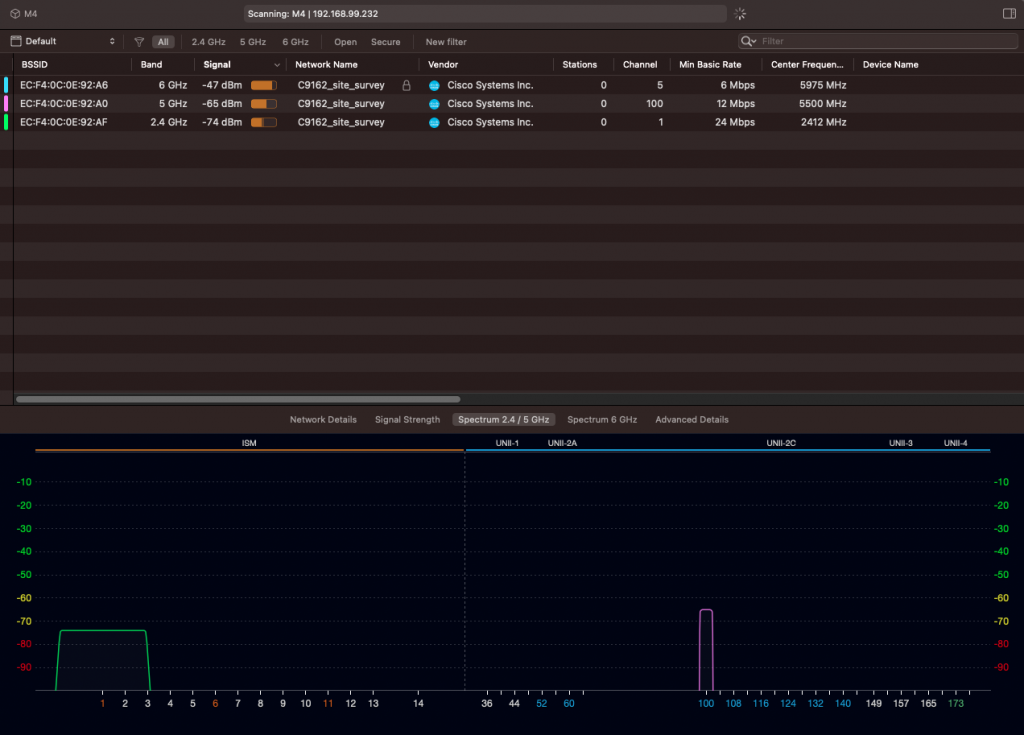
To scan 6 GHz spectrum, I use WiFi Explorer Pro with WLAN Pi M4 as a remote sensor. It has a built-in tri-band Wi-Fi adapter.

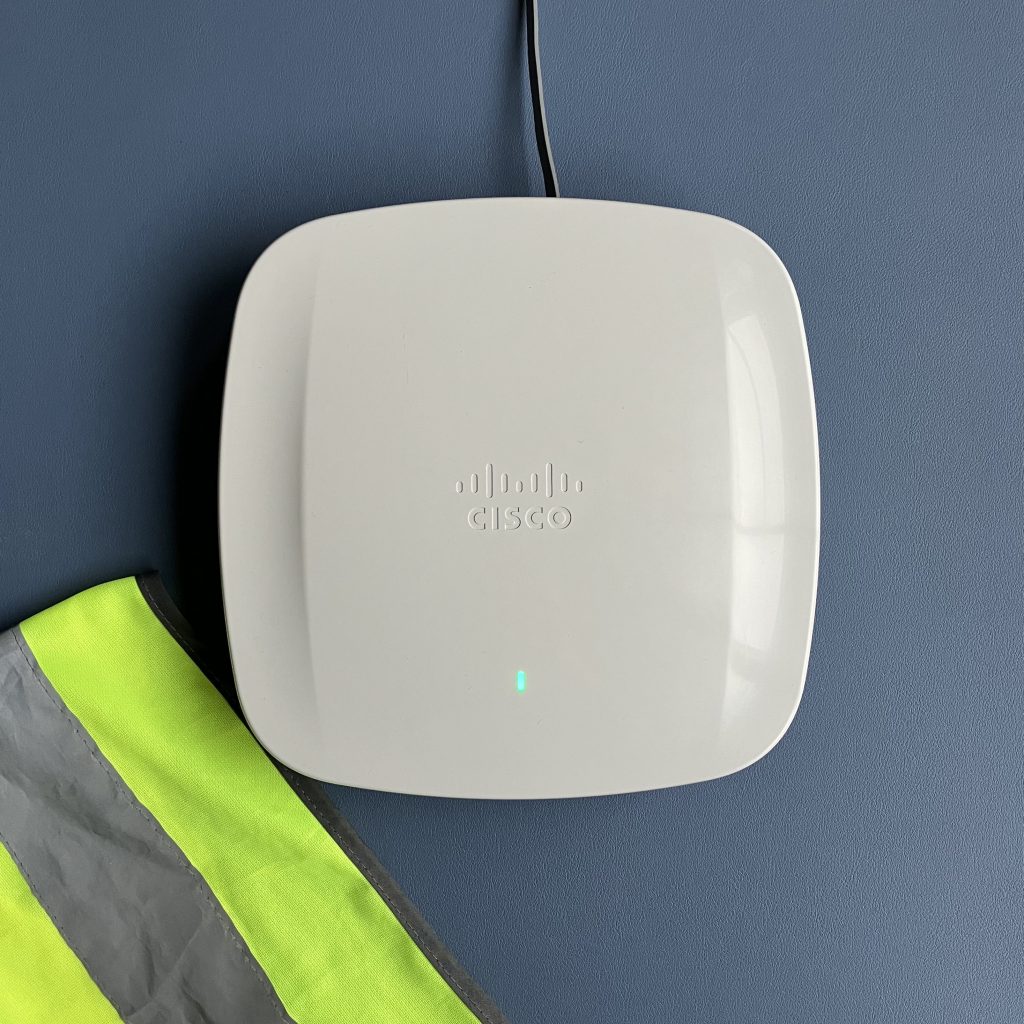
New LED pattern in Site Survey mode
During boot, the LED flashes blue.
After the AP successfully starts Site Survey mode, the LED flashes red and green. This is a normal Site Survey mode pattern, and absolutely nothing to worry about.

Warning: Read before you switch back to CAPWAP mode

If you switch the AP from Site Survey mode back to CAPWAP mode, you will no longer be able to log in via its Console port. The mode change wipes all CAPWAP settings of the AP including credentials. If you proceed with switch to CAPWAP mode, you will have to perform these steps to regain Console port access:
- Join the AP to a Catalyst 9800 controller
- Create Console port credentials and Enable password in AP Join Profile of the controller (Configuration > AP Join)
- Controller automatically pushes these newly created credentials to the AP
- You can now login to the Console port of the AP and switch back to Site Survey mode or run other commands
How long does a Site Survey AP take to boot?
From plugging the Ethernet cable in to seeing the SSIDs on the air, it takes about 3-4 minutes. DFS channels take 4 minutes or so, other bands come up faster.
Does the AP need wired connectivity or IP address on its Ethernet interface?
No, wired connectivity is not needed. The AP can just be powered by a power injector with no upstream Ethernet link. No IP address is needed on the wired port of the AP.
Does internet connectivity work?
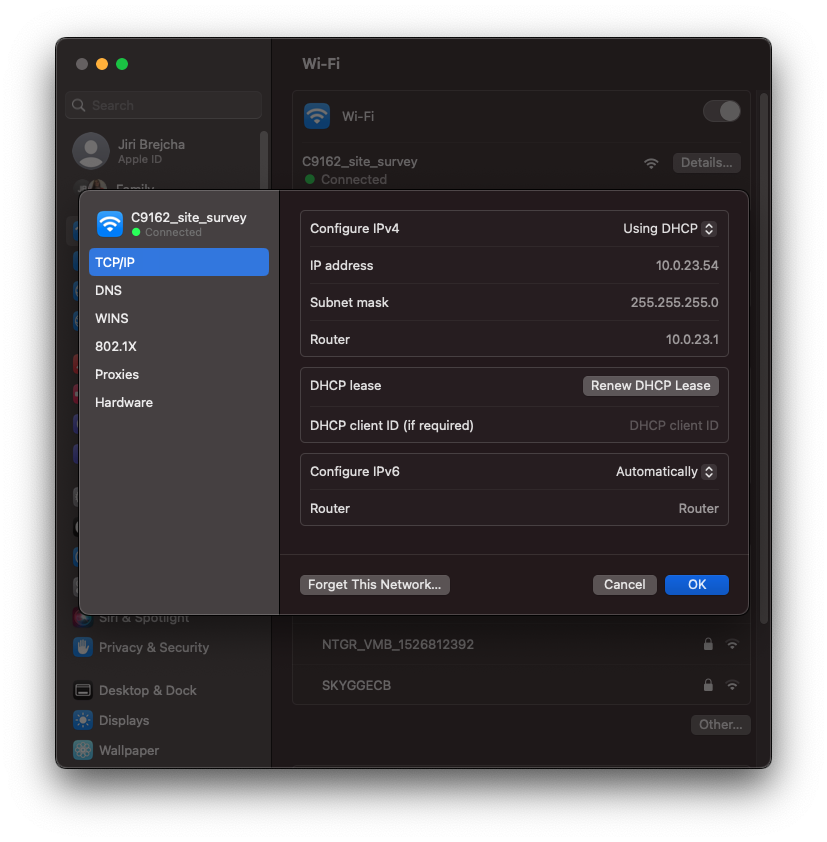
Yes, it does. If you connect AP’s Ethernet port to infrastructure that provides internet, wireless clients connected to the AP in Site Survey mode get internet access too.
The Ethernet interface of the AP gets an IP address via DHCP from the existing infrastructure. The AP has its own DHCP scope 10.0.23.0/24 enabled on its survey SSID. It then NATs traffic coming from wireless clients to the wired network.