Sabrent 5 GbE Multigigabit Ethernet Adapter

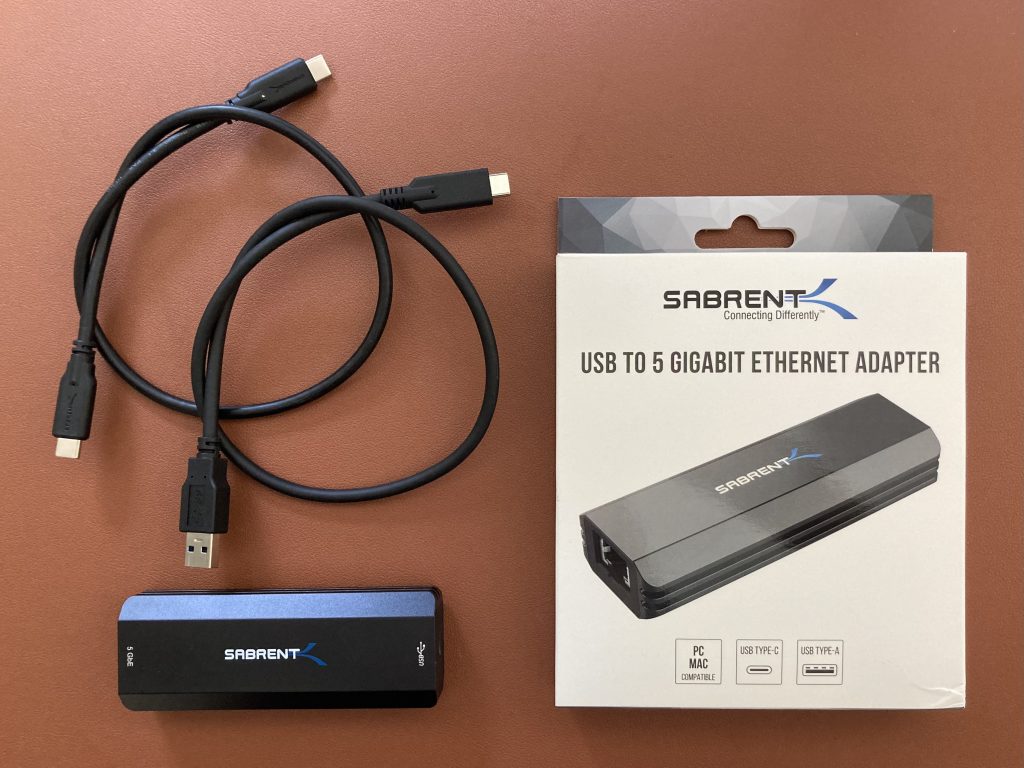
Sabrent NT-SS5G is a 5 GbE USB adapter, which allows you to achieve higher throughput than 2.5 GbE adapters, and break the 2.35 Gbps barrier. It works great on Windows. If you are a macOS or Linux user, I recommend you consider other options like this instead.

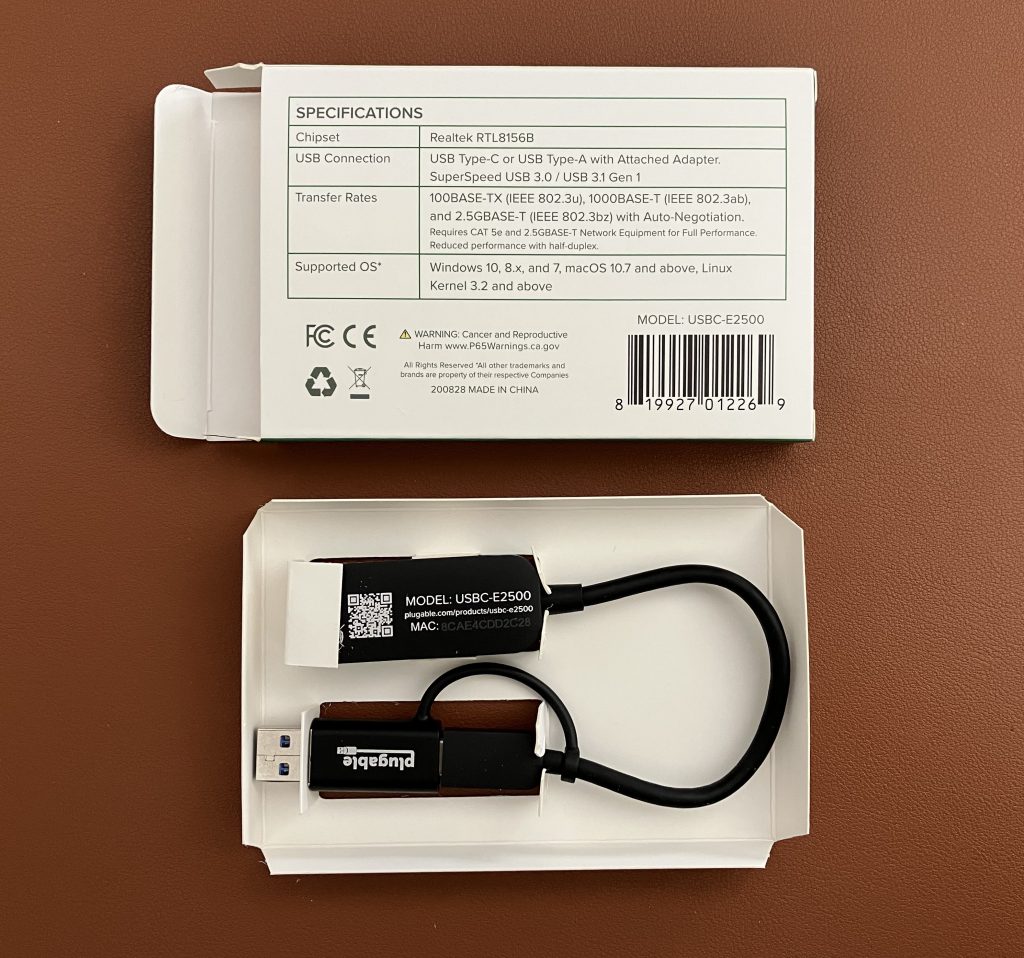
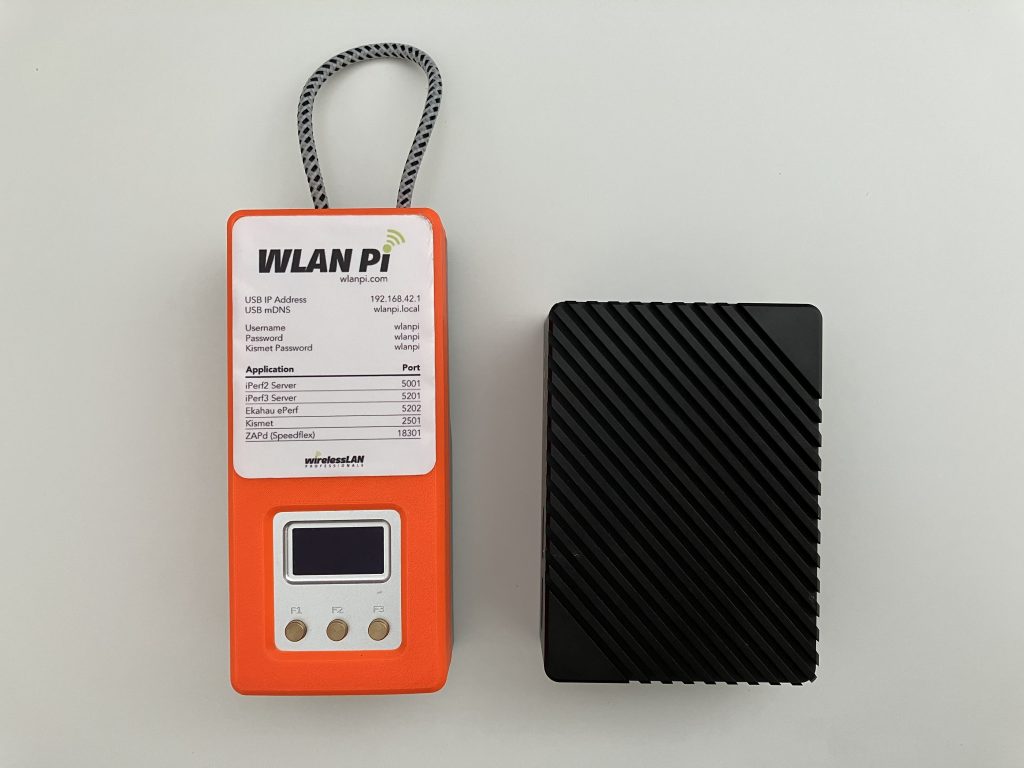
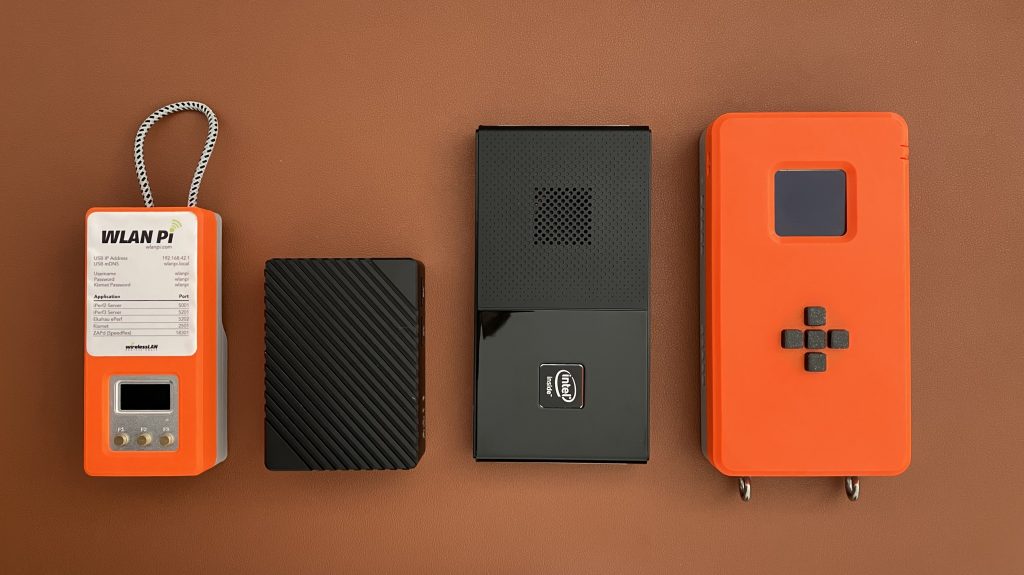
The adapter itself is larger than 2.5 GbE adapters, it uses AQC111U chip, and ships with short 2 detachable USB-A and USB-C cables. USB-C port on its back connects the adapter to your computer. A metal shell protects it, serves as a heatsink, and also adds to its weight.

Windows 11

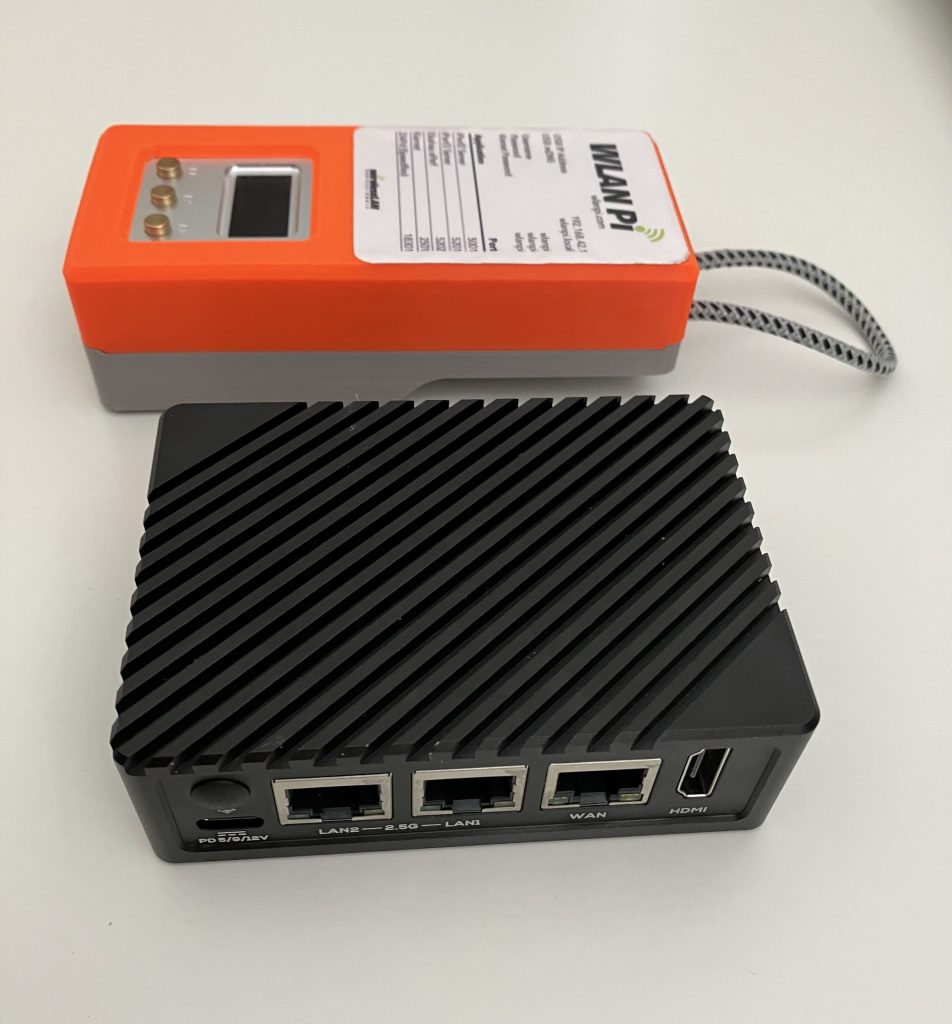
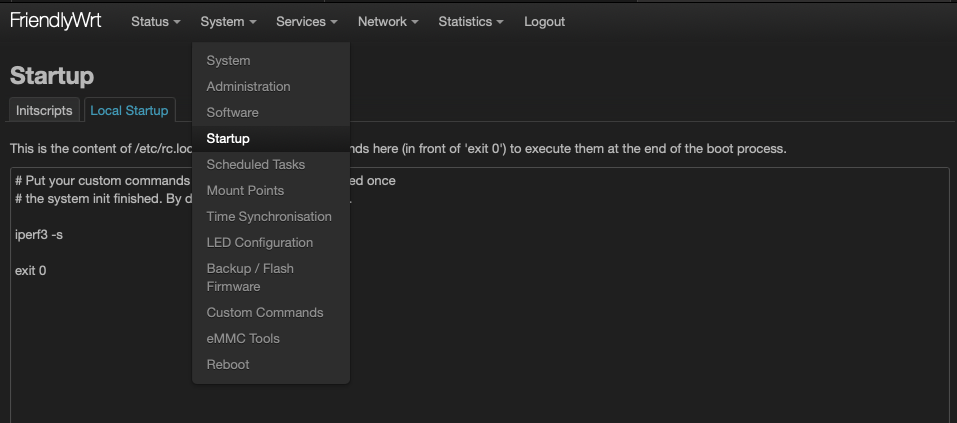
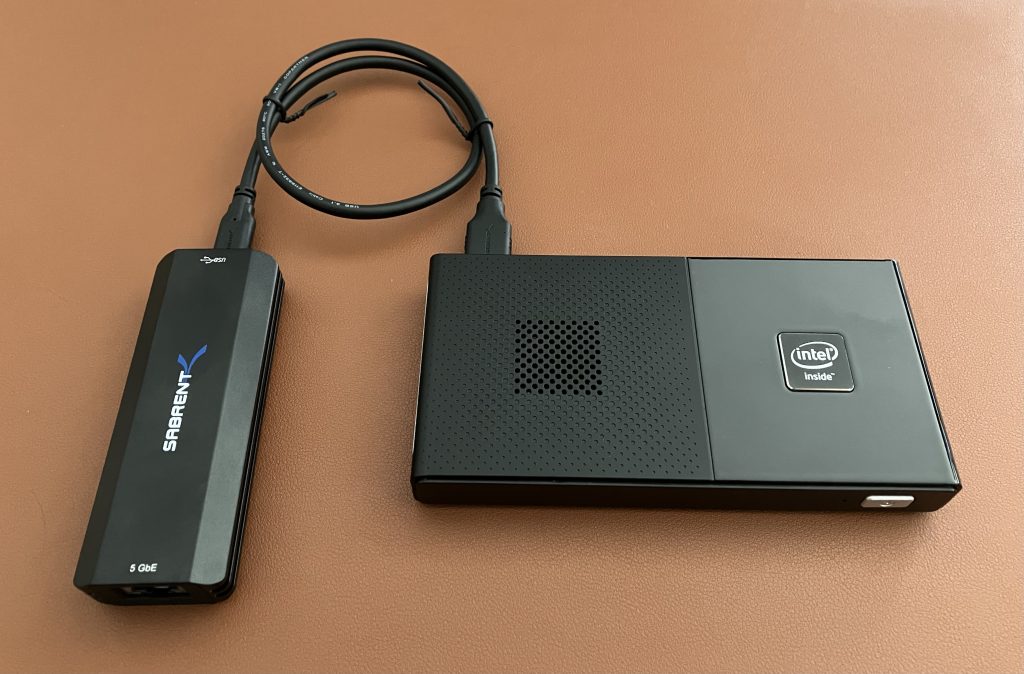
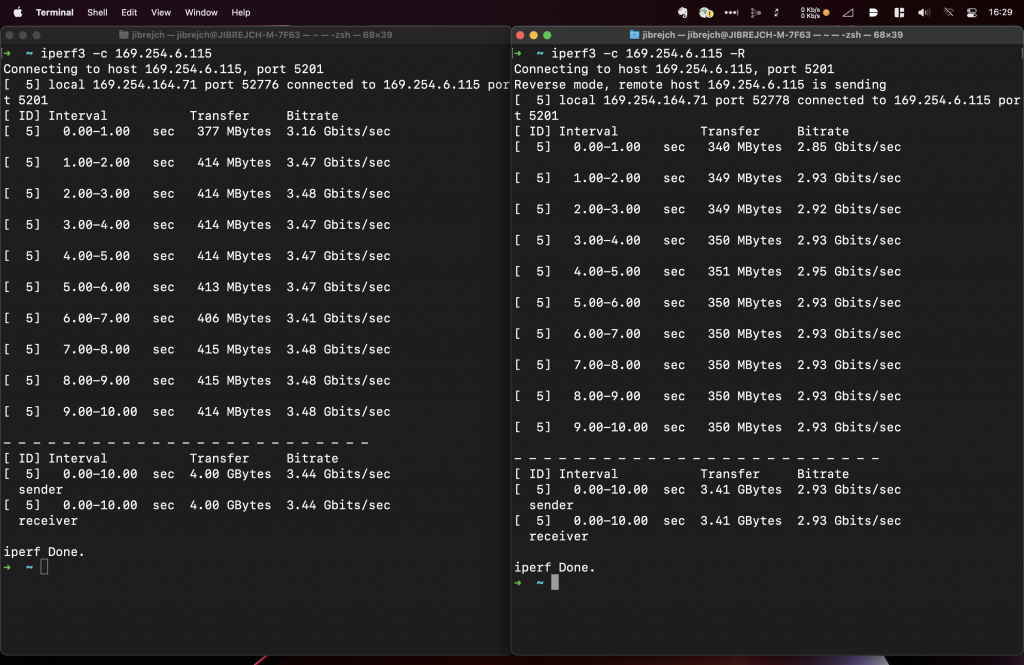
Install the driver from Sabrent’s website and you are good to go. In my tests with this Topton M6 Mini PC, I measured 2.93 Gbps down and 3.44 Gbps up with default iperf3 settings.

2.93 Gbps down and 3.44 Gbps up with default iperf3 settings

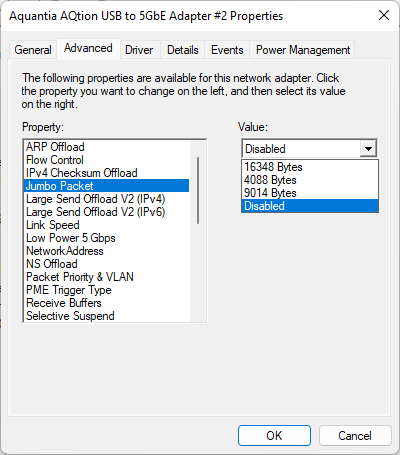
In adapter options, you can actually configure quite a few things including Jumbo frame support. Note that these are fixed values.

macOS

I can’t recommend this adapter for macOS users. It forces you to disable macOS System Integrity Protection (csrutil), otherwise it won’t work. It might be okay for a proof of concept or lab setup, but I would hesitate from using it in production.

This is how to install the driver if you were interested:

  1. Install the driver using the pkg file provided by Sabrent. It installs a Kernel Extension (kext), which drives this adapter.
  2. Enable the extension by going to System Preferences > Security & Privacy > enable the extension > Reboot.
  3. After reboot, unplug the adapter and plug it back in.
  4. It should work as long as you leave the System Integrity Protection disabled.

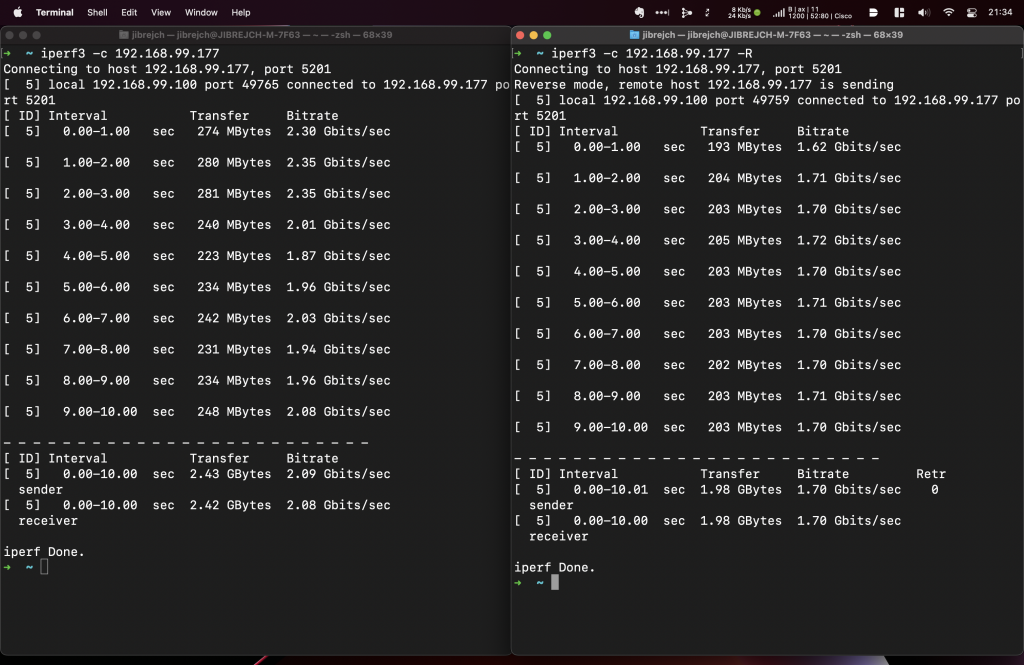
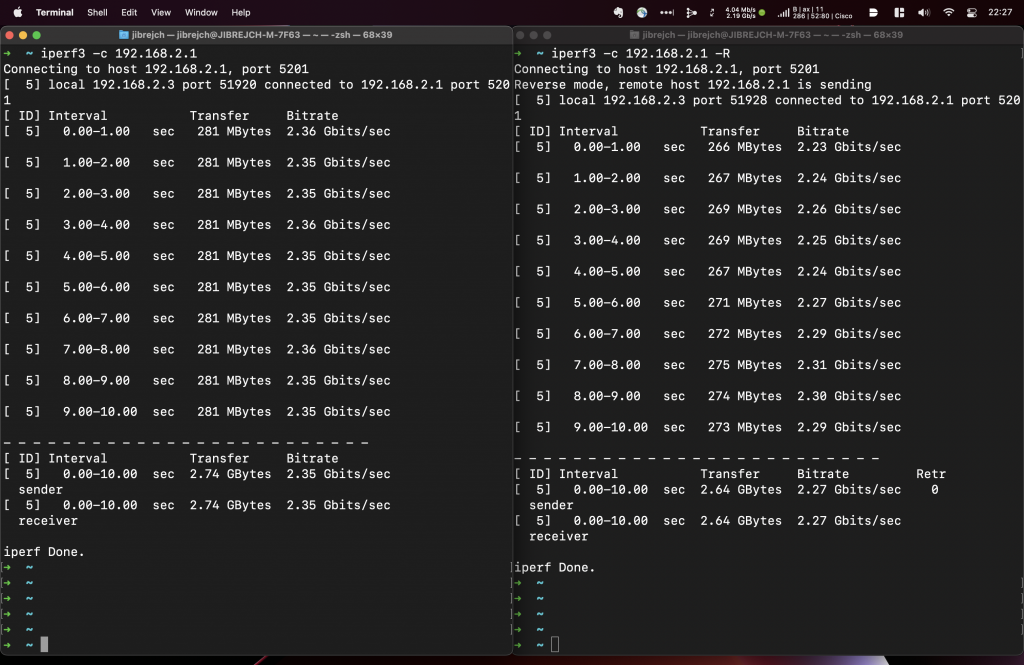
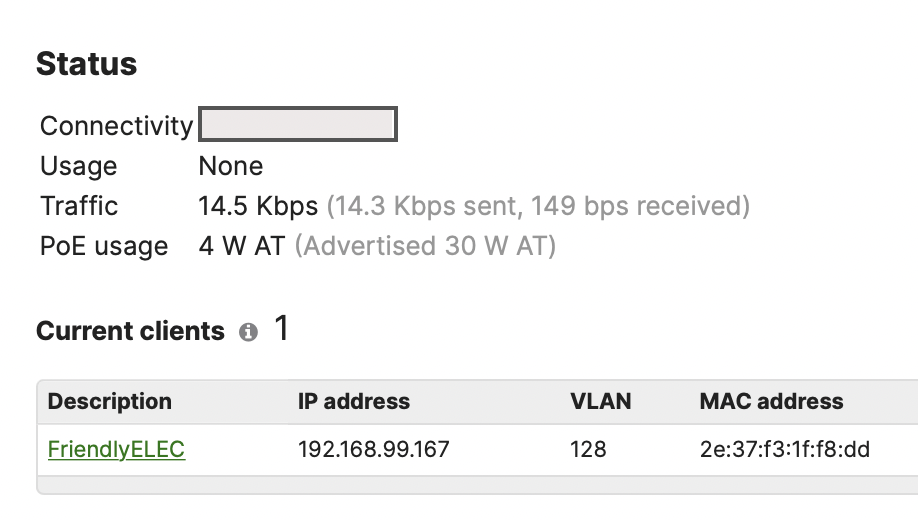
From throughput perspective, it saw download speeds of 3.30 Gbps, and upload of 3.45 Gbps. This was with default iperf3 settings, standard 1500-byte MTU and one stream. Great results considering that this adapter’s USB interface maximum theoretical throughput is 5 Gbps.

In my view, you might be better off buying a 2.5 GbE adapter, which can push 2.35 Gbps up and down consistently and with no driver installation needed. I tested one here. Alternatively, a 10GbE Thunderbolt Ethernet adapter is even faster choice, but more costly, and larger form factor. Or, if your other half approves, treat yourself to an M1 Mac Mini with built-in 10 GbE 😉

Linux

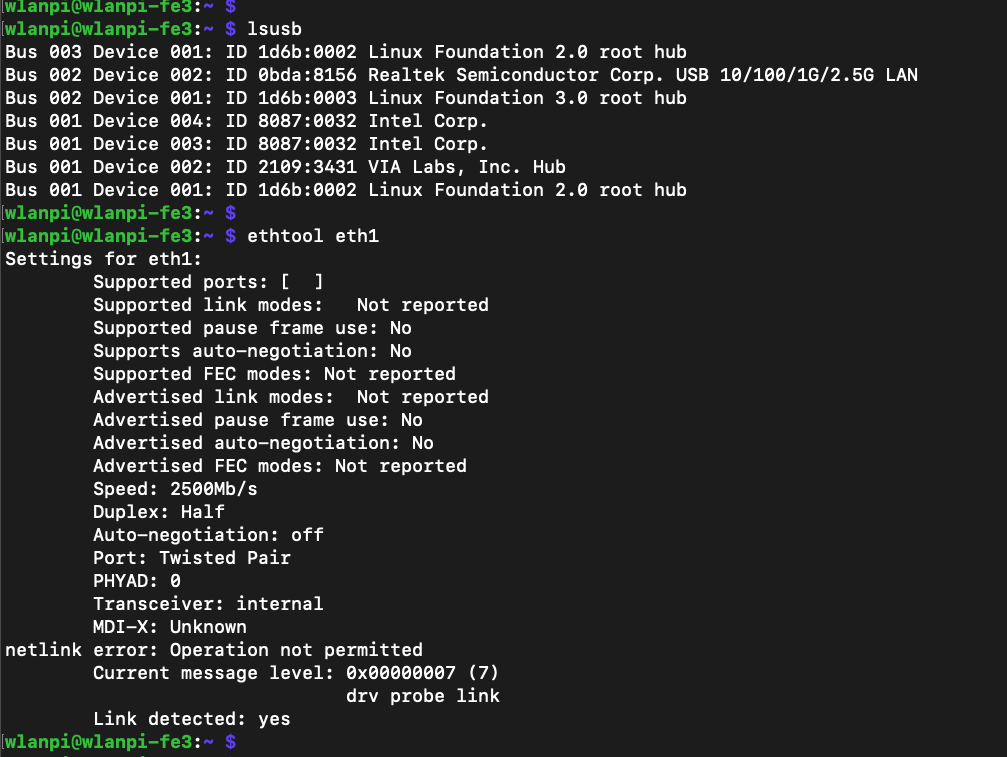
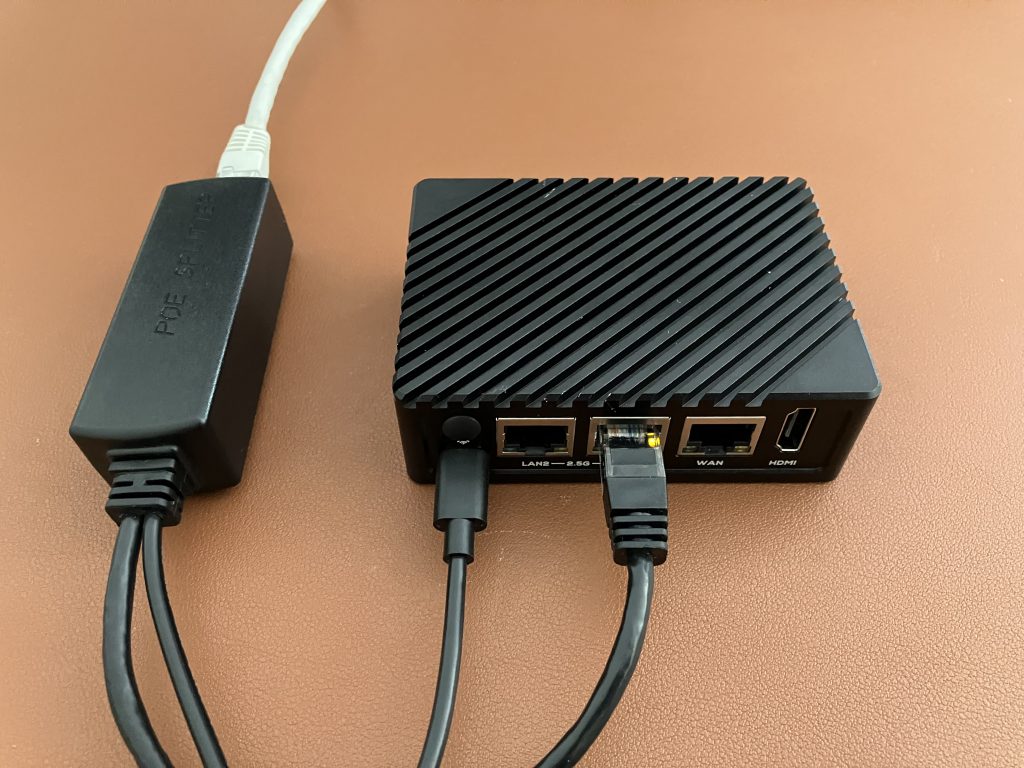
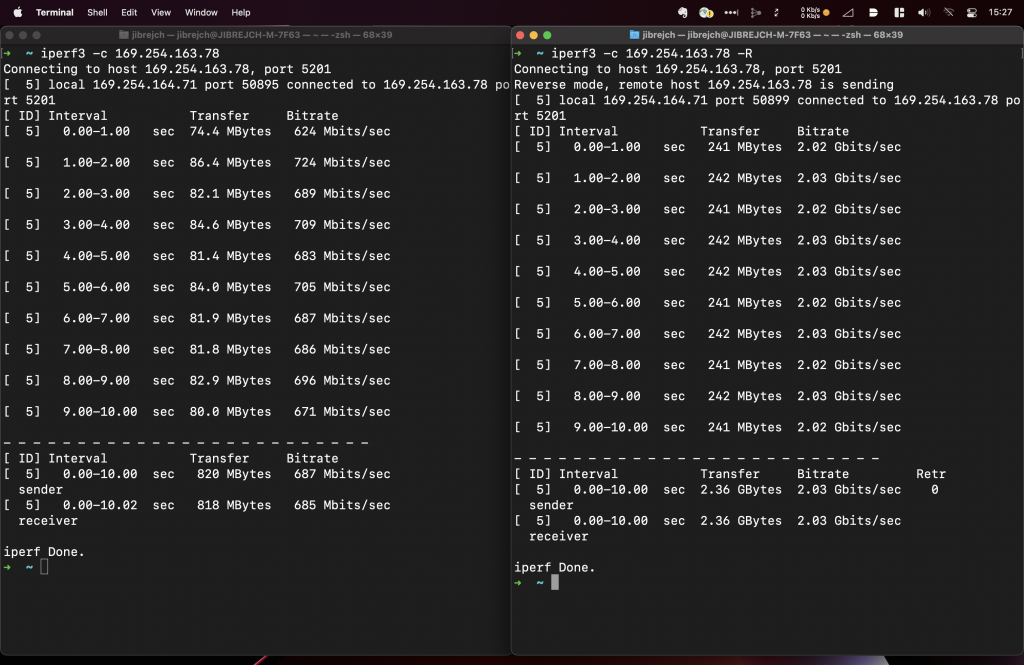
I tested this adapter on 64-bit Raspberry Pi OS running on Raspberry Pi 4. Although the default driver distributed in Linux Kernel 5.15 works, it doesn’t even deliver symmetric 1 Gbps.

Sabrent connected to Raspberry Pi 4
Upload speeds well below 1 Gbps
Default aqc111 driver details

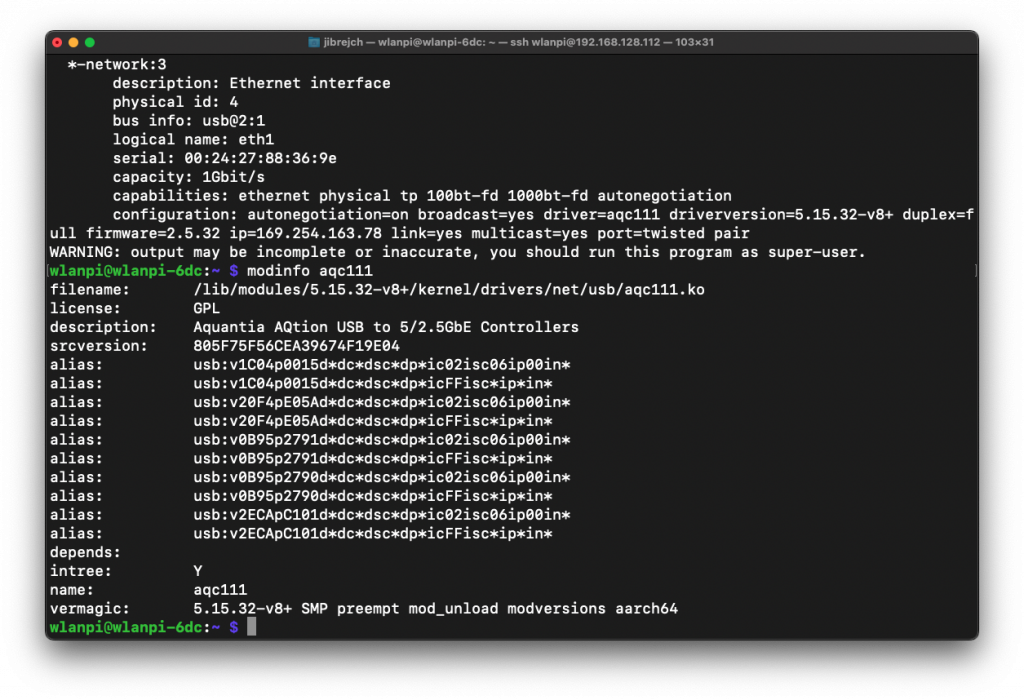
Let’s download the latest driver from Sabrent’s website. Unfortunately that doesn’t seem to be able to compile for 64-bit OS. I tried compiling on 32-bit Raspberry OS, to no avail. If you have any ideas, please do let me know.

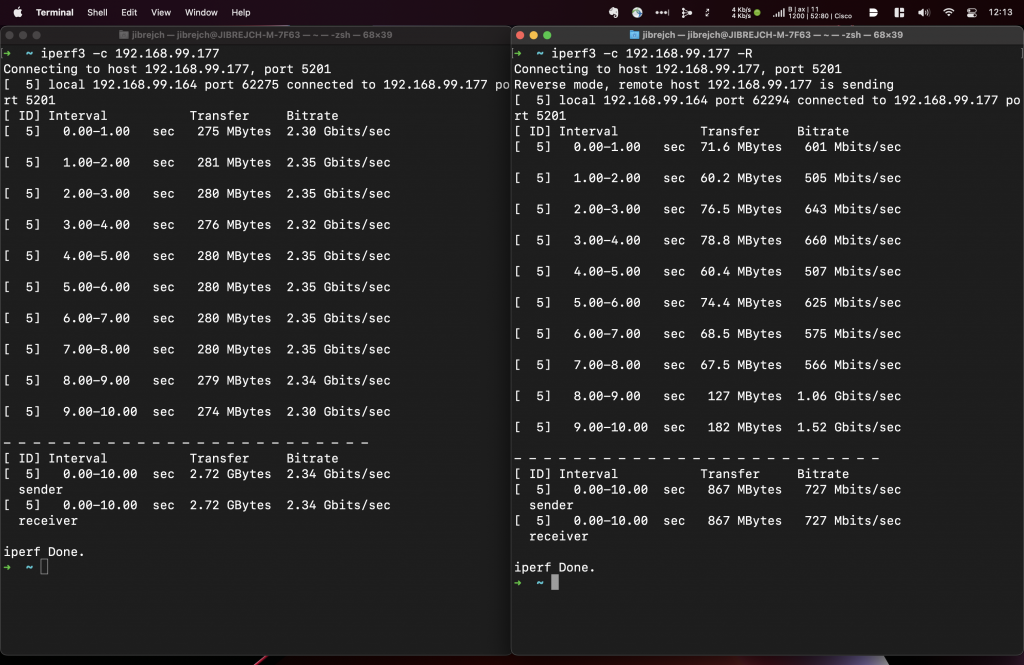
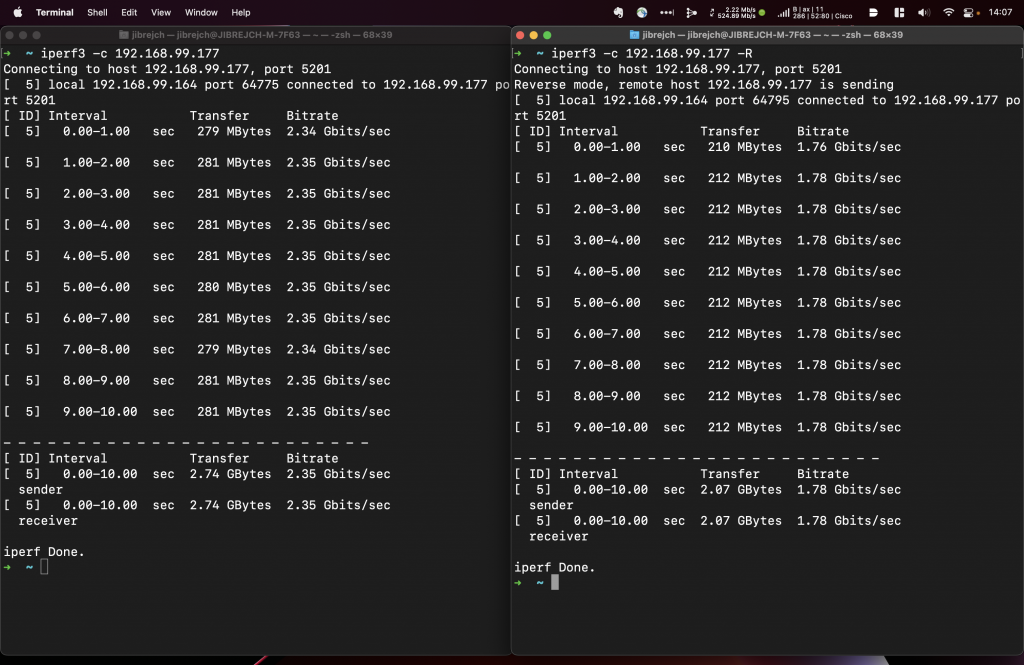
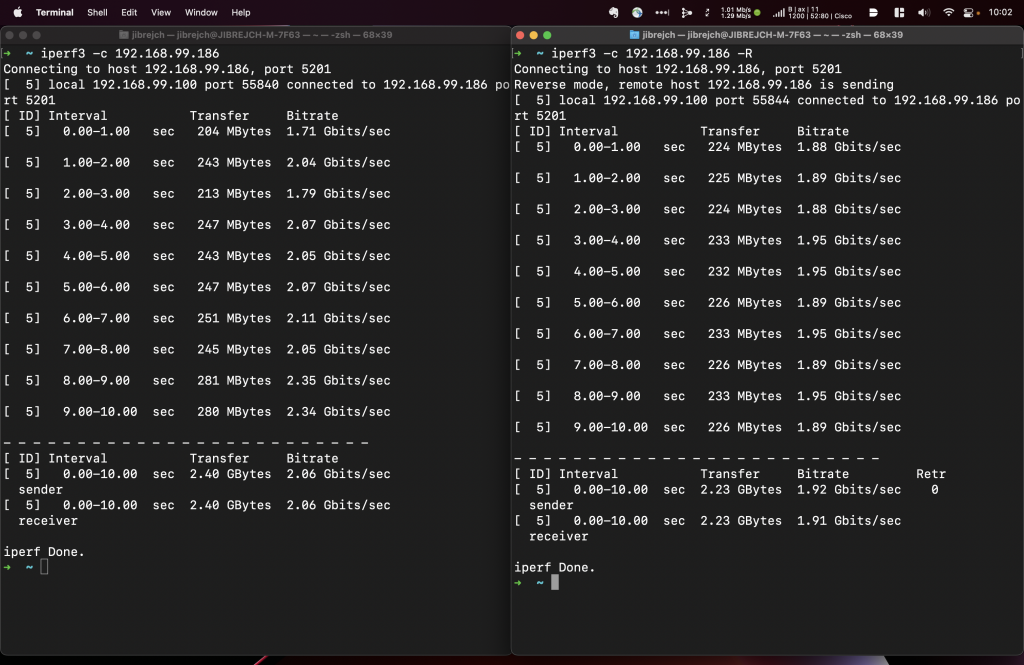
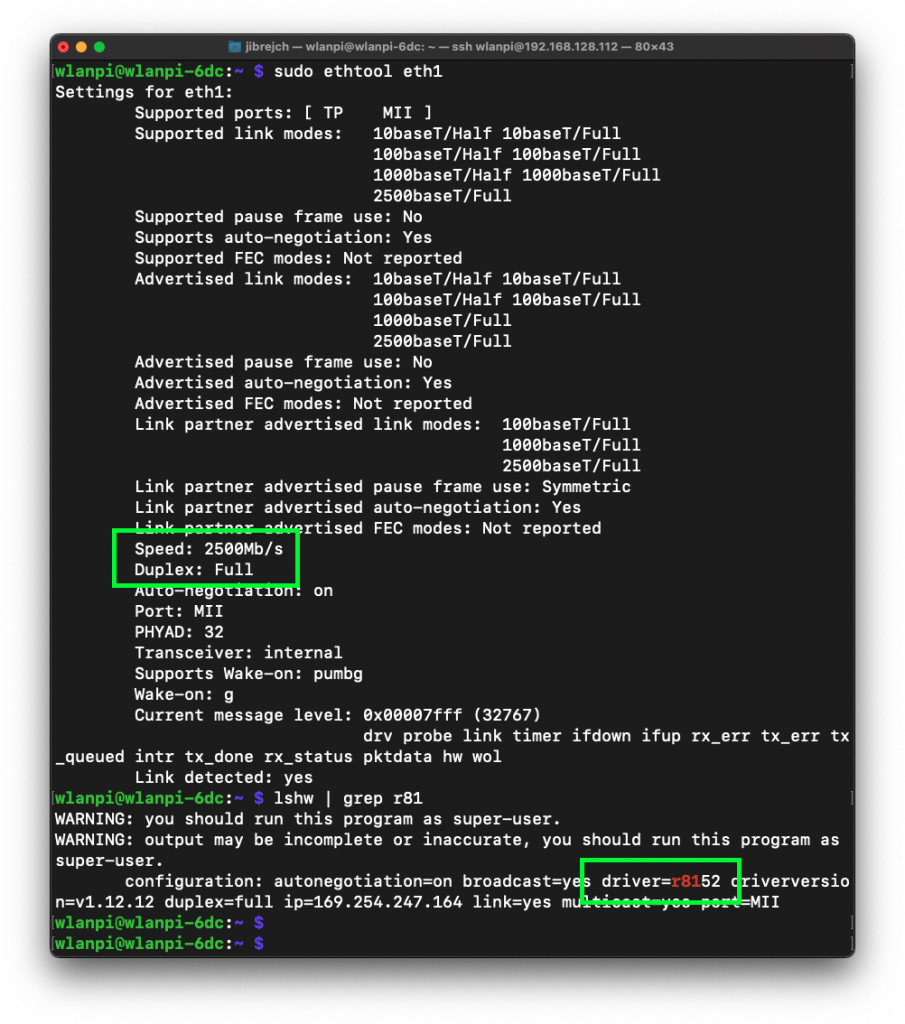
So, on Linux, a Realtek RTL8156B based 2.5 GbE adapter might be a better choice for you. Here is the one I tested.

Plugable 2.5 Gigabit Ethernet to USB 3.0 Multigigabit Adapter

Plugable makes this inexpensive 2.5 Gigabit Ethernet USBC-E2500 adapter. It is based on Realtek RTL8156B chip. On Windows and macOS it works out of the box. If you want to use it on a Linux machine like WLAN Pi Pro or Raspberry Pi 4, expect some troubles along the way, but good performance when you get there.

The USB-C to USB-A adapter is allows you to use it with a MacBook (USB-C) or Raspberry Pi 4 (USB-A)
The adapter itself has a plastic shell and is very lightweight

Windows 11

When they say “update the driver using Windows Update first”, they mean it. Windows 11 will recognise the adapter and you can start using it, but the default driver distributed with Windows 11 significantly reduces this adapter’s performance.

727 Mbps down and 2.34 Gbps up with default driver

Now, let’s use Windows Update to download the latest driver.

Don’t forget to update the driver using Windows Update

As you can see, download throughput (from iperf3 server to iperf3 client) has dramatically improved.

1.78 Gbps down and 2.35 Gbps up with updated driver

Although the box suggests Jumbo frame support, Windows driver settings don’t give me any option to edit the MTU size. So, I assume Jumbo frames are not supported.

MacOS Monterey

On macOS, this adapter works out of the box with no additional driver installation required. That’s a very nice surprise. And performance is great.

Symmetric 2.35 Gbps throughput on macOS

Auto-negotiation worked just fine. If you want to configure speed or MTU manually, you can, but Jumbo frames are not supported on macOS either.

Jumbo frames are not supported

Linux

Now the bad news. If you are considering to use this adapter on a Linux machine, the default driver cdc_ncm is a trouble as it only supports 2.5 Gbps Half duplex. Setting Full duplex manually using ethtool command doesn’t work either.

Default driver only supports Half duplex

As you might expect, with the default driver and Half duplex, throughput is very poor.

1.22 Gbps down and 704 Mbps up with the default cdc_ncm driver on WLAN Pi Pro

On WLAN Pi Pro and Raspberry Pi 4 running 5.15 Linux Kernel I managed to fix the duplex issue by the steps listed below. But I hit new auto-negotiation issue between the Plugable adapter and Cisco Catalyst WS-C3560CX-8XPD switch. It took the adapter to eventually negotiate 2.5 Gbps Full duplex around 15 minutes of constantly flapping the interface. Forcing speed and duplex on the Plugable adapter by ethtool did not work. Certainly not ideal, and definitely worth testing before you commit to the Plugable adapter. With other multigigabit adapters, the Plugable had no negotiation issues.

1.7 Gbps down and 2.09 Gbps up with r8156 driver on WLAN Pi Pro
1.91 Gbps down and 2.06 Gbps up on Raspberry Pi 4 using the correct r8156 driver
Raspberry Pi 4 also known as WLAN Pi Community Edition

How to force Linux to use the right driver

To enable Full duplex capability, we need to tell Linux to use Realtek r8156 driver instead of the default cdc-ncm.

  1. Download the latest driver from Realtek’s website
  2. Unzip it and copy the 50-usb-realtek-net.rules file to your Linux machine
  3. On the Linux machine copy this file here sudo cp 50-usb-realtek-net.rules /etc/udev/rules.d/
  4. Reboot by sudo reboot
  5. Verify that the adapter negotiated 2.5 Gbps Full duplex and is using the Realtek r8156 driver.

Portable and affordable 2.5 Gigabit Ethernet iperf3 Server – FriendlyElec NanoPi R5S

What problem am I trying to solve?

Wi-Fi standards have developed and also WAN links are fast and reasonably priced these days. When it comes to throughput testing tools like iperf3 servers, 1 Gigabit Ethernet has become a bottleneck. A Wi-Fi 6E client can now easily generate more than 1 Gbps of traffic, but how do we measure it?

To overcome that issue, I am looking for a reasonably priced portable single-board computer, which can push more than 1 Gbps of traffic. It should be powered via USB-C, battery, or PoE powered, and should be portable to fit in my “just in case I need it” tool bag.

FriendlyElec NanoPi R5S

This little FriendlyElec NanoPi R5S single-board computer (SBC) delivers everything I mentioned above. Let’s have a look.

Dimensions and case

It comes with a well designed aluminium case, which also serves as a heatsink. The whole unit is smaller than the smallest iPhone, slightly thicker obviously. It runs silent. There is no built-in fan whatsoever.

Portable? Tick! By the way, did you know that the original WLAN Pi uses NanoPi NEO2?
Left to right: WLAN Pi, R5S, Intel-based SBC I am also testing, WLAN Pi Pro

Ports

USB-C power input, two 2.5 GbE, one 1 GbE, HDMI useful troubleshooting or demos, two USB-A 3.0 ports

It has two 2.5 Gigabit Ethernet interfaces (LAN1 and LAN2) and one 1 Gigabit Ethernet interface (WAN). Either of the LAN ports delivers 2.3 Gbps of actual useful iperf3 throughput with default 1500-byte MTU and single stream. I used MacBook with OWC 10 Gigabit Ethernet Thunderbolt 3 Adapter and Cisco WS-C3560CX-8XPD switch.

From client’s perspective that’s 2.27 Gbps down and 2.35 Gbps up

Power

The R5S only draws 4 Watts in idle, and can be powered by any USB-C 5V power source. Your MacBook USB-C charger, iPad/iPhone charger, or USB-C battery pack would do. Alternatively, use a 1 Gigabit Ethernet 5V PoE splitter and PoE power the unit. In my lab with a 2 meter cable, the 1 Gigabit Ethernet PoE splitter actually allowed the R5S auto negotiate stable 2.5 Gbps connection with the switch.

PoE powered

Software

FriedlyElec built and published two operating system SD card images for the R5S – Ubuntu and FriendlyWRT. I tested both, and for my use case FriendlyWRT works best. It has a network-centric and easy to use web UI, has iperf3 preinstalled, and delivers great performance.

Initial setup and tips

R5S ships without any micro SD card, so make sure you have one ready to use. Flash the software image to it using Balena Etcher or similar tool.

Connect the WAN port to a network with existing DHCP server. If you are in the same subnet, simply ping FriendlyWrt.local to get the IP address of the R5S.

Then access the web UI or SSH to the unit, SSH is enabled by default. Change the root password now.

Now, this is important! To achieve maximum throughput, delete the pre-configured bridge interface br0, and configure both multigigabit eth1 (LAN1 port) and eth2 (LAN2 port) as standalone unbridged interfaces. Also, tweak IP address settings to your liking while you are there.

eth1 configured as a standalone interface. Bridge interface removed.

Make iperf3 automatically start by going to System > Startup > Local Startup and add iperf3 -s and hit the Save button.

Change CPU Governor setting to Performance. And CPU Minimum Frequency to the maximum value.

Here is the FriendlyElec documentation and introduction to their FriendlyWRT distribution.

Final verdict

This little single-board computer absolutely deserves its space in my tool bag. For the 2 GB RAM model with case I paid $88 including shipping to the UK. Add a Micro SD card and that’s all you need to get started.

Finally, it you need top performance, don’t care that much about small form factor, and money is no object, the latest Apple M1 Mac Mini can be configured with built-in 10 GbE.

Use SSH key stored on GitHub instead of an SSH password to access your WLAN Pi

By default WLAN Pi, and Linux in general, uses a username and password-based SSH authentication. It involves quite some typing, some brain capacity to remember the password, and it is not the most secure method either.

You can create a public and private key pair. Your SSH client automatically logs in using the private key. The SSH server uses the public key to confirm that you possess the right private key. No password needed, and it also is more secure. The private key is never sent over the network, and this method protects you against man-in-the-middle attacks.

The beauty of this GitHub method is that GitHub stores your SSH public key centrally, which you can easily update, and you can install it to the machine you want to SSH to, by a single command ssh-import-id-gh. You can even add this to a startup script so that it automatically updates your trusted keys.

Let’s do this

ssh-keygen is the program that generates a public/private key pair on your local system. The private key is stored in ~/.ssh/id_rsa, and the public key is stored in ~/.ssh/id_rsa.pub.

The security of this method depends on keeping the private key safe and secure. Make sure not to leave the private key behind.

ssh-keygen -t rsa -C "your@email.com"
Generating public/private rsa key pair.
Enter file in which to save the key (/Users/jiri/.ssh/id_rsa): 
Enter passphrase (empty for no passphrase): 
Enter same passphrase again: 
Your identification has been saved in /Users/jiri/.ssh/id_rsa
Your public key has been saved in /Users/jiri/.ssh/id_rsa.pub
The key fingerprint is:
SHA256:.....
The key's randomart image is:
+---[RSA 3072]----+
.....
+----[SHA256]-----+

Display the public key, which is a text file at the end of the day, and copy its content to clipboard:

cat ~/.ssh/id_rsa.pub
ssh-rsa
.....

Save this public key to your GitHub account. Browse to github.com, log in, and open Settings:

Click New SSH key, name the key, paste your public key from the clipboard and save it:

To verify that your key has been added you can browse to https://api.github.com/users/jiribrejcha/keys, where jiribrejcha is your GitHub username:

The last step is to SSH into your WLAN Pi or Linux machine and tell it to use this public key from my GitHub, where jiribrejcha is my GitHub username:

ssh-import-id-gh jiribrejcha

If the command isn’t installed, you can fix that by:

sudo apt install ssh-import-id

Passwordless SSH access

When you authenticate to a server using public key authentication, the SSH client offers a copy of the public key to the server and the server then compares it against the keys listed in your ~/.ssh/authorized_keys file. This key was added automatically by the ssh-import-id-gh command. If the key matches, the server indicates that it is able to proceed with the authentication. The private key is then used to sign a message that includes data specific to the SSH session. The server can then use its copy of the public key to verify the signature.

We have just SSH’d to the Pi without a password prompt.

Special thanks

To Colin Vallance for sharing this tip.

Introducing Telegram Bot for the WLAN Pi

Up until now, you could only use the WLAN Pi display to see its IP address and other IP details. If you are on the same subnet you could do ping wlanpi.local. Alternatively, your DHCP server log or show ip arp on the access switch could tell you.

Telegram Bot for the WLAN Pi automates the whole process and it sends you the IP details of your WLAN Pi whenever the Pi comes online. You can then easily and remotely skim through the details, check its IP address, public IP address, current mode, uptime, switch and port details the WLAN Pi is connected to, or double-check that its Ethernet adapter successfully negotiated 1 Gbps Full Duplex.

And you can do all this from you wrist, phone, tablet or laptop.

How to enable Telegram Bot

  1. Download WLAN Pi image 2.0.1 or newer. Flash it onto an SD card. Boot up from this SD card.
  2. Create a new Telegram account if you do not have one already. Start the Telegram app.
  3. Let’s create a new Telegram bot. Find a person called Botfather and send them a message saying /newbot.
  4. Follow the instructions to create a new bot.
  5. After the new bot is created, copy the API key to a text editor.
  6. Start a new chat with the newly created bot and say Hey, Hi or something like that and welcome them to the blue planet. This is mandatory and you can send more than one message.
  7. Now SSH to the WLAN Pi and run this command with root privileges sudo telegrambot
  8. It will complain about missing API key and tell you where to paste it.
  9. Edit the configuration file, uncomment the second line and paste your own API key from step 5 using sudo nano /etc/networkinfo/telegrambot.conf.
  10. Save the file using CTRL+o (letter o) and exit the editor using CTRL+x.
  11. Make sure you sent a Telegram message in step 6 to your new bot.
  12. Connect your WLAN Pi to the internet.
  13. Finally, reboot by sudo reboot

Multiple Pi’s can use the same API key and send their IP configurations to the same chat or you can have 1 chat per WLAN Pi (my preferred option). It is completely up to you.

How often are Telegram messages sent?

Every time the WLAN Pi reboots and has internet access, it will send a new message to you.

If internet connection goes down (for example when you disconnect the Ethernet cable, DNS server stops responding or something breaks at your ISP while eth0 still remains up) for more than 10 seconds, the WLAN Pi will send you a new message with its fresh details after the internet connection goes up again.

Send a new message manually

Assuming you have completed the setup using the above instructions, you can SSH to the WLAN Pi at any time and send a new Telegram message manually using sudo telegrambot.

How to troubleshoot

If you are not receiving any message from the WLAN Pi, send another message to the Telegram bot using the Telegram app and reboot the Pi.

You can also check the logs and grep for telegrambot:
sudo cat /var/log/messages | grep telegrambot

How to convert hundreds of Cisco Aironet or Catalyst APs from Mobility Express or Embedded Wireless Controller to Lightweight mode using Option 43

You may have used DHCP Option 43 to point an AP to its controller before. But only very few people know that Cisco APs can automatically convert themselves from the built-in controller mode (think Mobility Express or Embedded Wireless Controller) to Lightweight mode after they receive a special Option 43 from a DHCP server.

If you have a pallet of access points (or routers with built-in Wi-Fi in Mobility Express mode) next to your desk and need to convert all of them to Lightweight mode, simply configure DHCP Option 43 in the following format on your DHCP server and plug them into a PoE capable switch. After the APs boot up and receive the option from DHCP server, they automatically switch to the Lightweight mode and attempt to join the configured controller (192.168.130.2 in our case).

Option 43 format used for AP conversion

f2:05:c0:a8:82:02

“f2” tells the AP that we want it to switch to Lightweight mode

“05” means that only one controller IP address will follow

“c0:a8:82:02” is the controller IP address (192.168.130.2 in this case) in hexadecimal format, search for “IP to Hex Converter” if you do no want to do the math

Cisco IOS/IOS-XE DHCP server configuration

You can run DHCP server on a Catalyst switch. The DHCP scope configuration is straightforward.

ip dhcp pool <pool name>
network <ip network> <netmask>
default-router <default-router IP address>
dns-server <dns server IP address>
option 43 hex f205c0a88202

WLAN Pi, Raspberry Pi and any other Linux ISC DHCP server configuration

Special thanks to Nicolas Darchis, who helped me find the “vendor-encapsulated-options” option. It lets you enter Option 43 in the hex format and all it takes is a single line of DHCP server configuration.

# eth0 DHCP scope on ISC DHCP server
subnet 192.168.130.0 netmask 255.255.255.0 {
interface eth0;
range 192.168.130.100 192.168.130.200;
option routers 192.168.130.1;
option domain-name-servers 208.67.222.220, 208.67.222.220;
default-lease-time 86400;
max-lease-time 86400;
option vendor-encapsulated-options f2:05:c0:a8:82:02;
}

DHCP server on Cisco Meraki MX appliance

If your DHCP server runs on a Cisco Meraki MX appliance, you can easily configure Option 43 using Dashboard. Here are the instructions.

Packet capture or it did not happen

Here is the DHCP Offer packet with the special Option 43 value sent from DHCP server to the APs. They will start the conversion automatically after receiving it.

Option 43 which converts the AP from ME or EWC mode to lightweight

Verify successful AP conversion to Lightweight mode

Console to one of the APs and you will notice this message:

[*08/25/2020 23:24:39.5620] Last reload reason : 2: AP type changed from ME to CAPWAP

Or you can let the AP finish its job. And then verify successful conversion to Lightweight mode whenever you are ready using the “show version” command.

9120#show version
<output omitted>
9120 uptime is 0 days, 0 hours, 5 minutes
Last reload time : Tue Aug 25 23:24:39 UTC 2020
Last reload reason : AP type changed from ME to CAPWAP
<output omitted>

Cisco Aironet and Catalyst AP Option 43 configuration for ISC DHCP server on Linux

There is great document explaining how to configure Option 43 on ISC DHCP server on the Cisco website.

If all you need is a simple DHCP server which will assign Option 43 to all devices on the network, without selectively assigning it only to specific AP models using the class construct, you can simplify your ISC DHCP server configuration to this. It works great on a WLAN Pi.

Configuration

# Linux ISC DHCP server configuration in /etc/dhcp/dhcpd.conf
option space Cisco_LWAPP_AP;
option Cisco_LWAPP_AP.server-address code 241 = array of ip-address;

# eth0 DHCP scope
subnet 192.168.73.0 netmask 255.255.255.0 {
interface eth0;
range 192.168.73.100 192.168.73.200;
option routers 192.168.73.1;
option domain-name-servers 208.67.222.222, 208.67.220.220;
default-lease-time 86400;
max-lease-time 86400;
vendor-option-space Cisco_LWAPP_AP;
option Cisco_LWAPP_AP.server-address 10.10.10.10, 10.20.20.20;
}

Verification

The access point will get its IP configuration from the DHCP server including Option 43 and will try to join these controllers.

Throughput speed test of the fastest tp-link and Devolo Magic 2 Wi-Fi power line adapters (PLC)

I am in the market of buying a new pair of power line adapters. Power line is a great alternative or complement to Ethernet and Wi-Fi. It provides low latency and jitter and is very flexible and easy to install.

The current tp-link TL-PA6010 adapters have served me well, but they are now reaching their maximum throughput. So, I decided to get a new pair of the fastest adapters on the market (Devolo Magic 2 Wi-Fi) and also a pair of the best adapters from tp-link (TL-PA9020P). These will be used to connect my home office and lab networks to my router.

Since there are multiple brands offering a variety of products with a variety of advertised speeds, I am curious to see if the more expensive adapters are worth the premium price, what real throughput they would provide and if and how much a passthrough socket improves the power line speed.

Left to right: Devolo Magic 2 Wi-Fi, tp-link TL-PA9020P, tp-link PL-PA6010 (not sold anymore, this would be an equivalent)

Specification

I tested my current low-end adapters and two new high-speed ones:

Throughput, ping, jitter, power and Wi-Fi tests

Power line speeds vary and depend on the distance between the two adapters, your electrical wiring and interference. Please take the numbers below as relative ones, which would allow you to compare how these adapters perform under the same conditions and in the same setup.

All throughput numbers below were TCP measurements taken by iPerf3 running on a WLAN Pi (a single-board computer with 1 Gbps Ethernet) and the client was my MacBook with 1 Gbps USB-C Ethernet adapter. There were no intermediate network devices between them:

MacBook iPerf3 client <-> PLC1 <-> PLC2 <-> WLAN Pi iPerf3 server

The average download speed (measured 5 times at each of the locations in my house) ranges from 13% to 26% of the advertised speeds and goes nowhere near them. With £16 per 100 Mbps, the cheapest adapter seems to be the best value for money, unless you need higher speed and are willing to pay for it. It also is the most power efficient.

Devolo Magic 2 proved to the be the fastest solution with 331 Mbps average download speeds, while TL-PA9020P provided slightly better upload speeds than Devolo.

Each of the parameters (i.e. Download average) consisted of five iPerf3 tests in each location and I then computed the average values:

Built-in Wi-Fi access point

Devolo Magic 2 Wi-Fi remote adapter comes with a built-in dual-band 802.11ac Wi-Fi AP (not just a repeater as some of the cheaper adapters), but it is unstable and resets the power line connection every single time I connect and generate some traffic. I used the latest firmware available in July 2020. If a built-in Wi-Fi is a must-have for you, do NOT buy this adapter. Wait until it gets fixed or look for alternatives.

This is what happens. The SSID is broadcast, a Wi-Fi client can associate to the AP, but when the iPerf test starts, the client gets disconnected and power line connection is torn down for 10 seconds or so and then re-establishes. I was able to reproduce this bug every single time and it was not just one-off random problem.

On the positive note, it supports 2.4 GHz only, 2.4 + 5 GHz or 5 GHz only modes. It does not let you change channel width on 5 GHz though and always uses 80 MHz, which may sound like a good idea in a small town, but it is a disaster in a shared building with many other access points and neighbours present.

If high-speed power line without Wi-Fi is what you are after, then the Magic 2 non-Wi-Fi model could be a good option for you.

Passthrough socket

Passthrough socket allows you to plug an electrical appliance to the power line adapter without generating the socket your adapter is plugged into unusable. Cheaper adapters usually do not provide this.

The other benefit is that adapters with passthrough socket use filters to suppress noise coming from the connected electrical appliance and this improves speed by 13% – 15%.

Pros and cons

Devolo Magic 2 Wi-Fi
+ Fastest average download speed
+ Comes with a mobile app and each unit has a management web GUI
– Built-in access point resets the whole unit and Wi-Fi is not usable
– It runs quite warm compared to the other two and is the largest

tp-link TL-PA9020P
+ Very good and symmetrical performance
+ Stable
– No built-in Wi-Fi
– Still quite expensive compared to the slower and cheaper units

tp-link TL-PA6010 (or similar)
+ Great value for money
+ Stable
– Relatively low speeds
– No passthrough socket, no Wi-Fi

And the winner is

My personal preferences are very likely different from yours and that is fine. I am looking for symmetrical TCP throughput of at least 200 Mbps, ideally a passthrough socket support and all other features are nice to have.

Devolo Magic 2 Wi-Fi proves to be unstable as the built-in access point crashes the whole adapter and resets the power line connection. Its back side also becomes quite warm regardless the load.

So, I decided for tp-link TL-PA9020P. It is stable, does all I need it to do and both adapters come with 2 Ethernet ports which gives me flexibility to plug my own access point in or connect using wired Ethernet connection.