Convert Cisco Meraki MR access point to Catalyst DNA mode

Same hardware, your choice of management

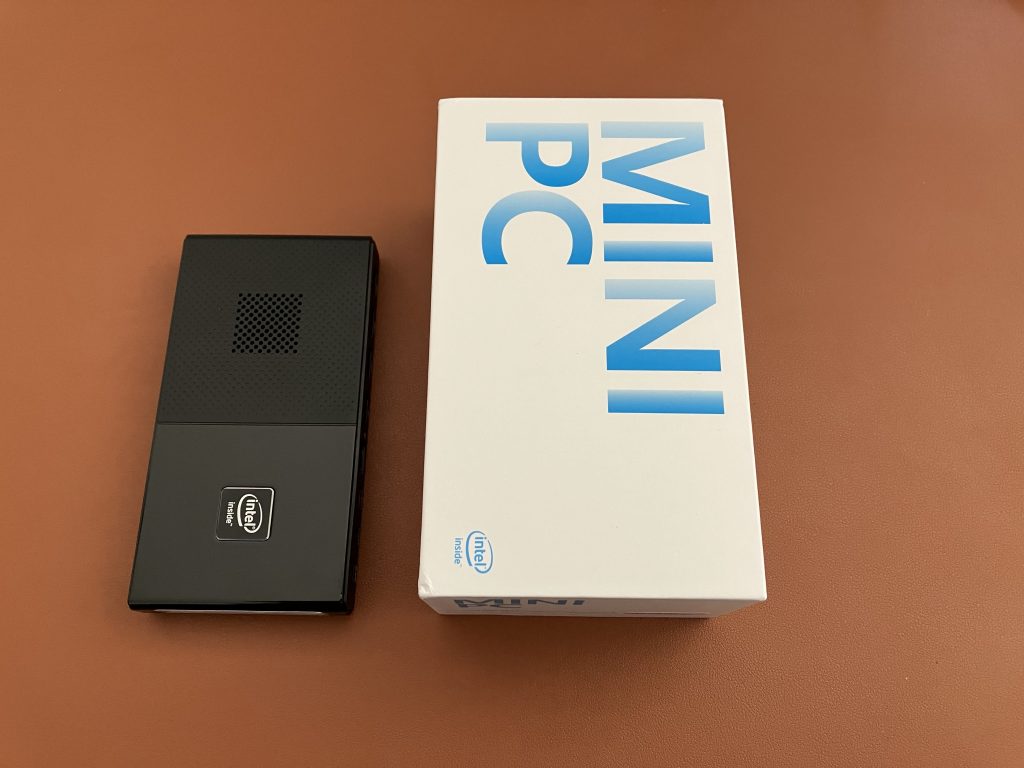
The latest generation of Wi-Fi 6E Catalyst Wireless access points (CW9162, CW9164, CW9166 series) gives you the option to either cloud-manage them using Cisco Meraki Dashboard, or manage the APs by Cisco Catalyst 9800 series Wireless LAN Controller (WLC).

They are the exact same hardware and they ship pre-loaded with the Catalyst/DNA and Meraki software image. Depending on the mode setting, they either boot one image or the other.

What do we need

  • Catalyst Wireless CW9162I, CW9164I, CW9166I, CW9166D1, CW9163E access point in Meraki mode
  • Cisco Meraki MR access point license to perform the conversion
  • Cisco DNA Essentials or DNA Advantage access point license if you want to use join and manage the AP by a Catalyst 9800 controller

Choose AP mode before ordering

You will have the best experience when you order your access points in the right mode.

Order the right mode

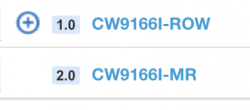
Order a DNA persona AP and it will auto-discover your Catalyst 9800 controller using one of the supported methods. In the UK, I can order the “-ROW” AP and manage it by Catalyst 9800, and optionally add Catalyst Center (previously known as DNA Center) to get analytics, assurance and other great features. Find the right access point SKU and regulatory domain based on your coutry using this tool.

If you prefer, order the Meraki mode access point, connect it to the internet, and claim it in the Dashboard. Meraki APs use a single “-MR” SKU globally.

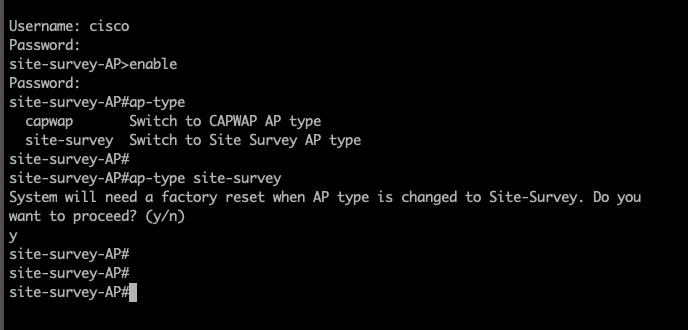
Conversion from MR to Catalyst/DNA mode

If you ordered a Meraki access point and your requirements have changed, you can convert the AP to DNA mode.

1. Make sure you have an active Meraki MR license. Why? We need the license to connect the AP to Dashboard, and to open a conversion request with Meraki technical support team.

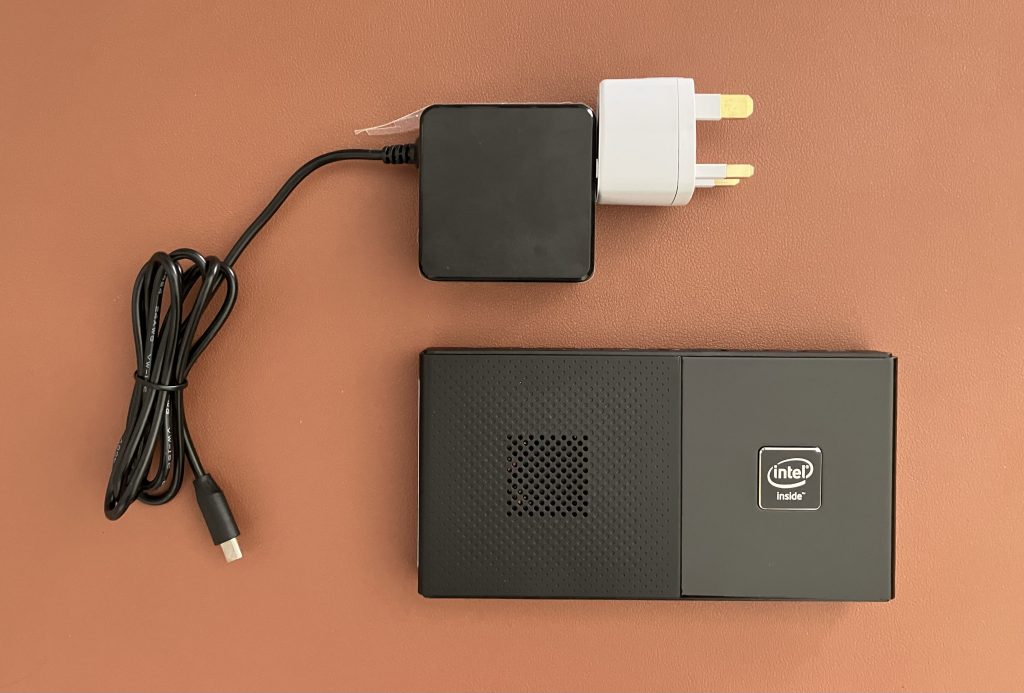
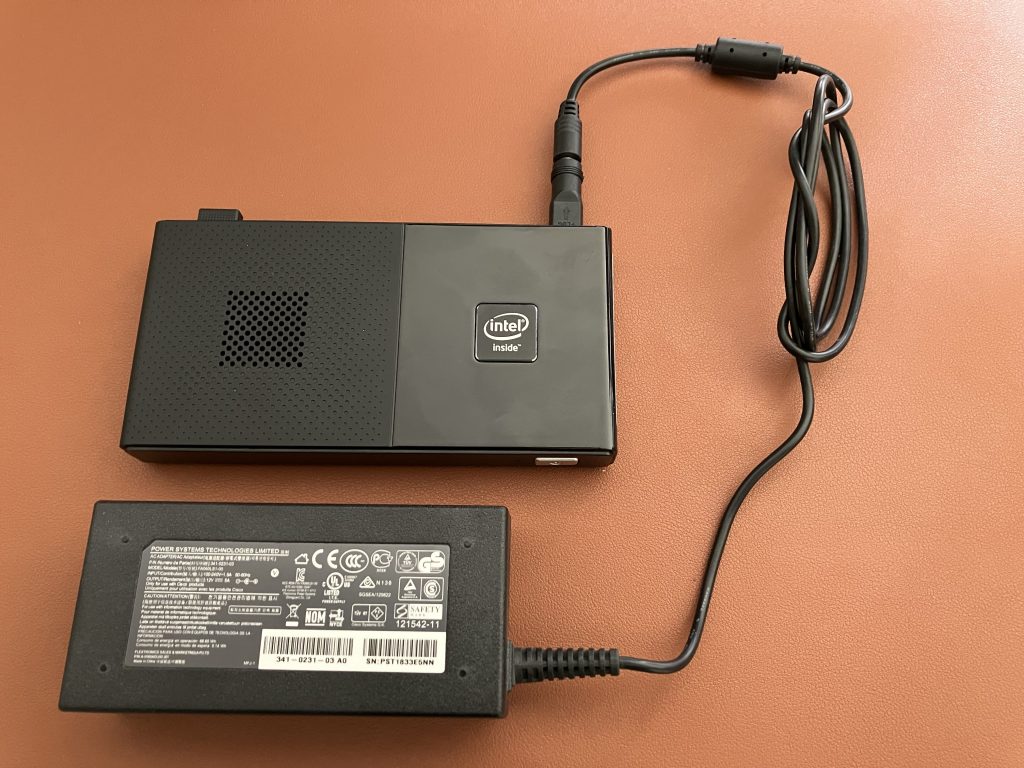
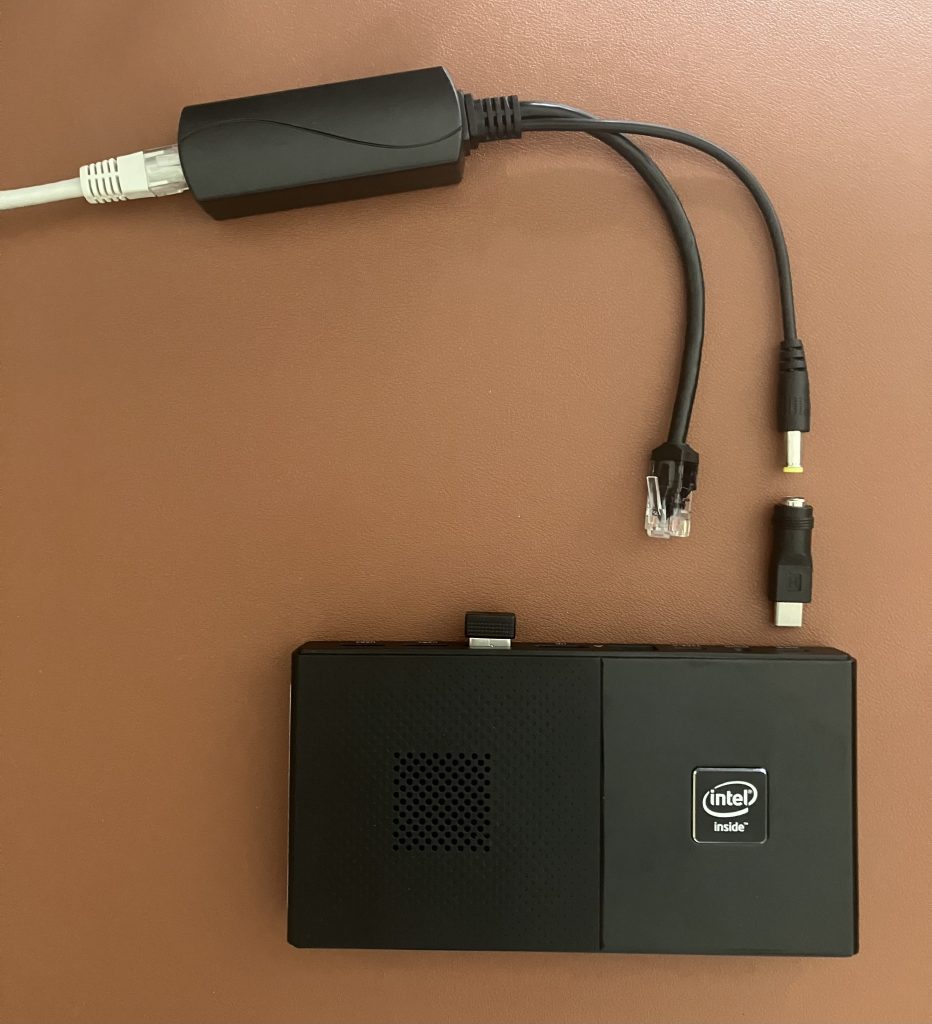
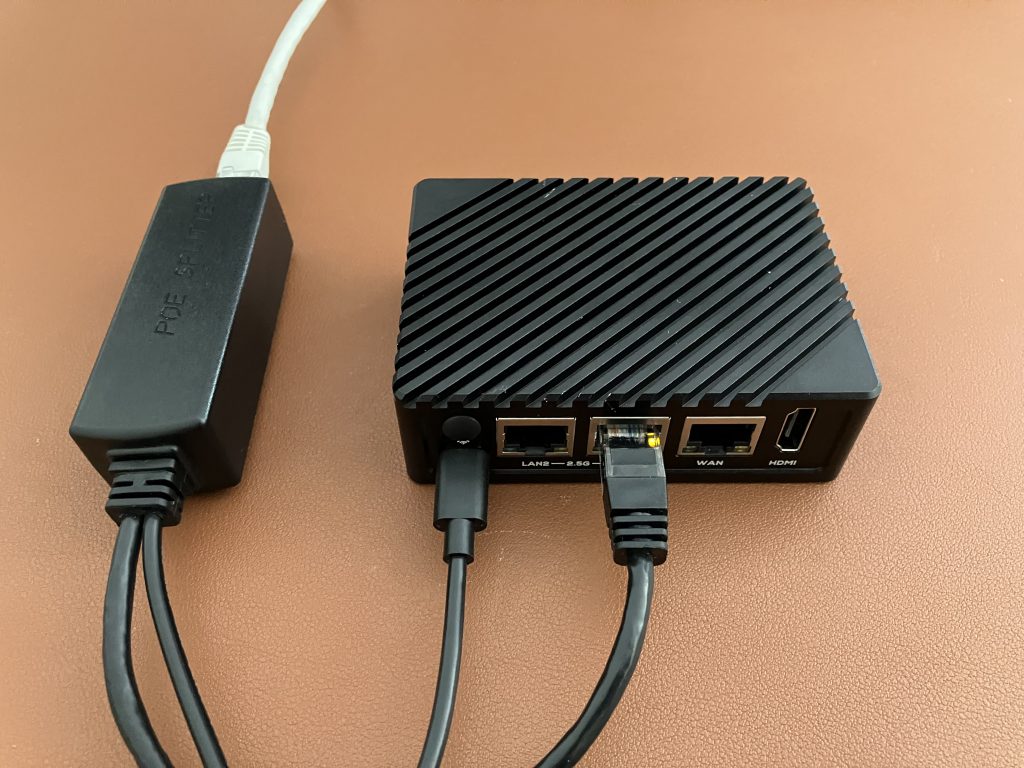
2. Provide power and internet connectivity to the access point.

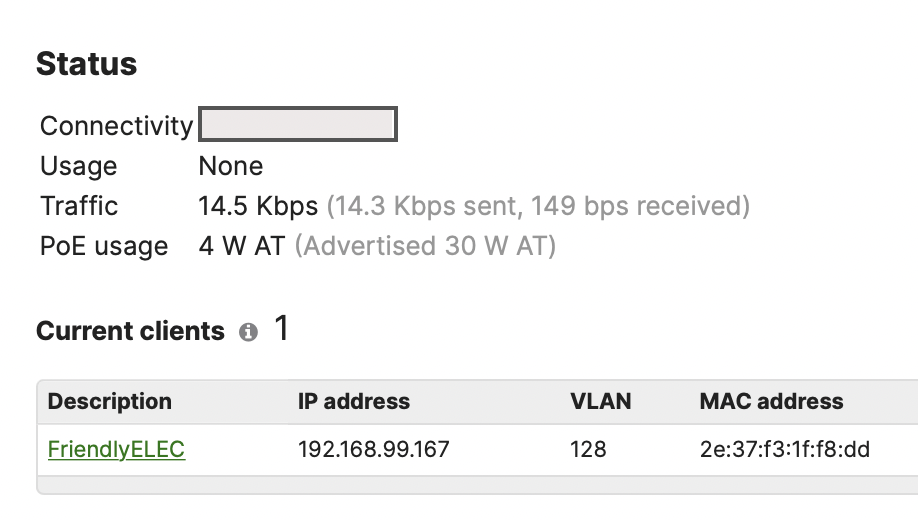
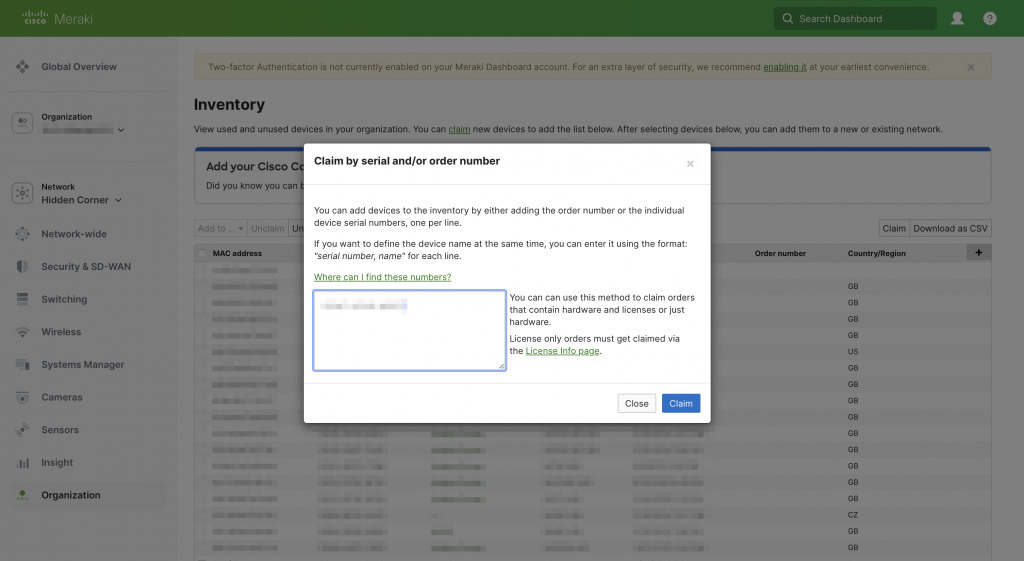
3. Log in to Dashboard. Navigate to Organization > Configure > Inventory and add the access point using its Meraki S/N.

Enter the Meraki S/N from the product label

4. Add your MR license to Dashboard under Organization > Configure > License Info.

5. Wait for the AP to connect to Dashboard and change its LED to solid green or solid blue. Perfect, the AP is now online.

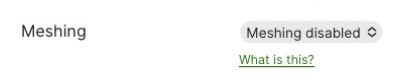
6. Complete this checklist first. Disable Meshing feature and make sure your Catalyst 9800 is ready for the AP to connect after conversion has completed.

Disable Meshing feature

7. Open a new support case by clicking the (?) question mark in the top right hand corner > Cases > New Case.

8. Include all these details to speed up the conversion process. Find your Customer Number by clicking the person icon in the top right hand corner. To get your Daily Support Code, click the same person icon, then open My profile.

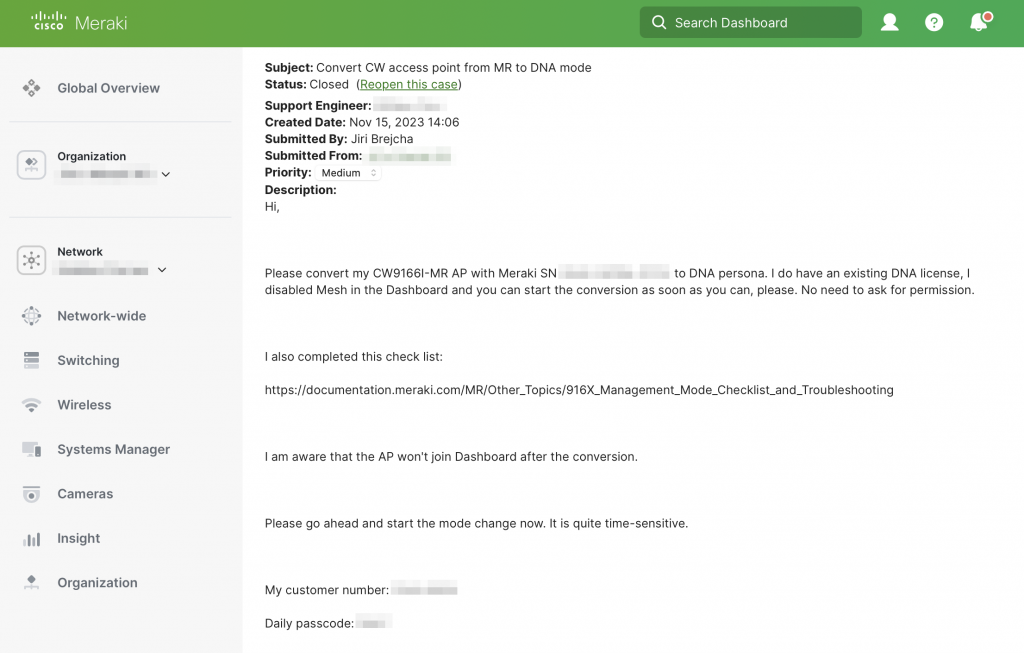
Hi,

Please convert my CW*****-MR AP with Meraki SN ****-****-**** to DNA mode. I do have an existing DNA license. I disabled Meshing in the Dashboard.

I have completed this checklist:
https://documentation.meraki.com/MR/Other_Topics/916X_Management_Mode_Checklist_and_Troubleshooting

I am aware that the AP will not join Dashboard after the conversion, unless I convert it back to MR mode.

Please go ahead and start the mode change immediately.

My customer number: ****-****
My support passcode for today: ****

Have a great day!

9. If this conversion is urgent, call into Meraki support. No, don’t e-mail the support team, call them. Have the case number by hand. Find the best phone number here.

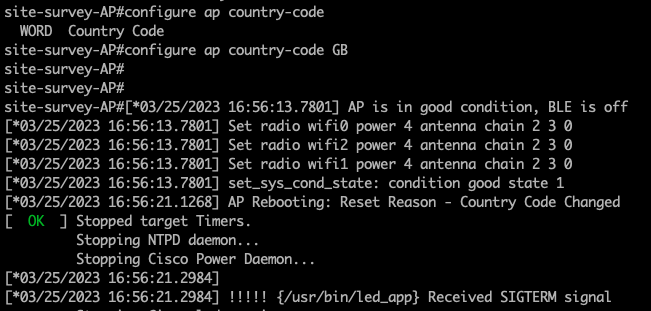
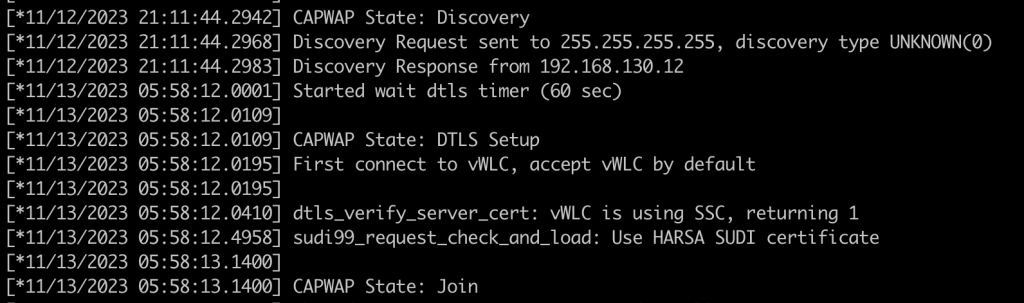
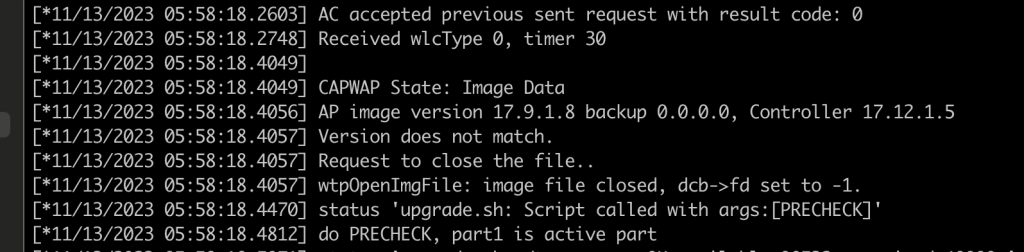
10. After the support engineer starts the conversion, your AP will reboot. It is now in the Catalyst mode. You can verify that by keeping an eye on the Console port output during its boot. Just to remind you (and myself): The new Console port baud rate is 115200 from 17.12.1 release onwards.

Autoboot in 5 seconds
Catalyst Mode Selected

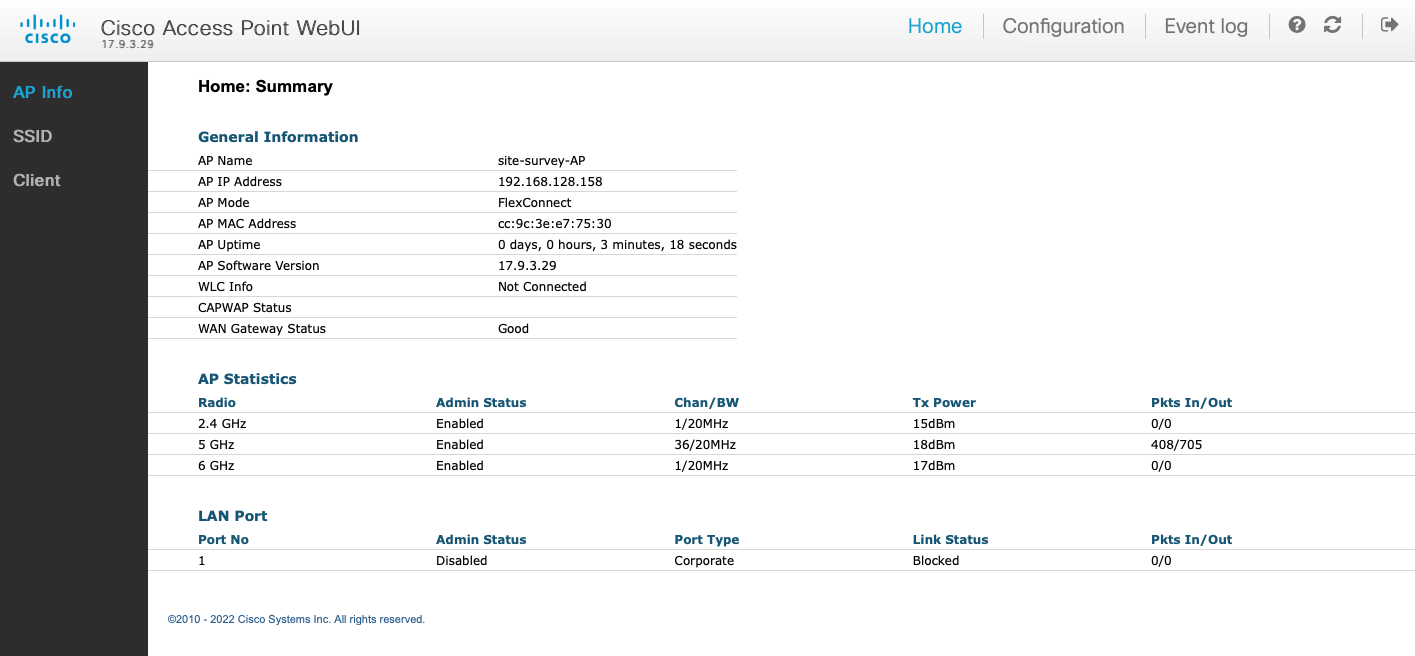
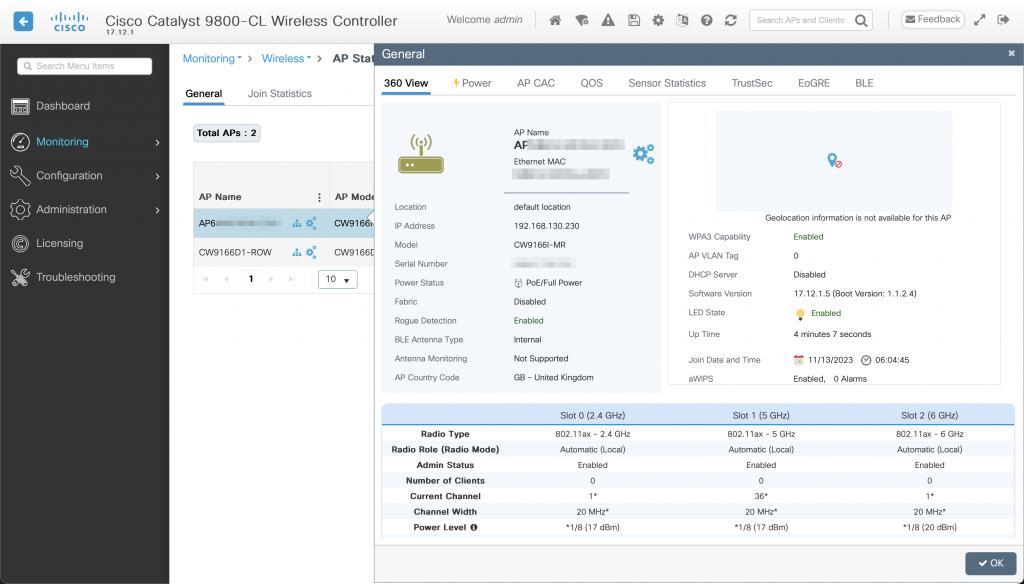
11. The AP should now follow the standard Catalyst LED pattern. It is ready to be managed by a Catalyst 9800 series controller – be it a hardware appliance, virtual machine, or public cloud instance.

12. Our DHCP server assigned an IP address to the AP, which has automatically discovered and joined the WLC located in the same IP subnet.

Successful WLC discovery and AP join
Followed by automatic software image upgrade
The AP has joined the WLC and is ready for use

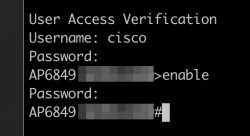
To enable SSH and Console access, create a username, password and enable password in the Catalyst 9800 controller’s AP Join Profile > Management > User section. SSH protocol is disabled by default. You can enable it in the AP Join Profile.

You have full Console access and control over the AP

New Site Survey mode on Cisco Catalyst Wi-Fi 6E access points

Cisco Catalyst Wi-Fi 6E access points in DNA persona support a new Site Survey mode. It allows you to perform AP-on-a-stick survey, it comes with a fresh web interface, and it supports 6 GHz. This new mode is included in the Lightweight access point software image.

Unlike the Embedded Wireless Controller (EWC) mode, which was available on previous generation of APs, this new Site Survey mode doesn’t require any extra software image download or reflash of the AP.

CW9162 access point in Site Survey mode

What do we need

  • Either of C9136I, CW9166I, CW9164I and CW9162I APs in DNA persona (controller-managed AP running Lightweight software image) works. We are going to use CW9162I-ROW DNA persona AP running 17.9.3 or newer release.
  • Console cable connected to the USB port of your laptop and the RJ45 Console port of the AP
  • PoE injector, PoE-capable battery pack, or switch with PoE support. To power CW916x APs, PoE+ (802.3af) is sufficient. You will need UPOE (802.3bt) to leverage full radio capability of C9136I.

Why the 17.9.3 or newer release

Why am I insisting on 17.9.3 or newer release? There was an issue, which prevented Site Survey mode from working on ROW regulatory domain APs used in the UK. The AP simply won’t accept the GB country code, and it won’t enable 5 GHz and 6 GHz radios. This is fixed in 17.9.3.

How to upgrade the AP to 17.9.3

Simply join the AP to an existing Catalyst 9800 controller running 17.9.3 release. During the join process, the AP will automatically upgrade its software to 17.9.3 to match your controller’s release.

If you don’t have a controller by hand, download and spin up C9800-CL 17.9.3 virtual machine controller on your favourite hypervisor or cloud service and join the AP to it.

How to activate and use the Site Survey mode

  1. Console into the Lightweight AP. Please note Catalyst APs used 9600 baud rate by default, which has recently in 17.12.1 release changed to 115200 bauds.

    Switch the AP to Site Survey mode using this command, press y, and wait for it to reload:

    ap-type site-survey


    Note: Mode change to Site Survey mode erases the AP settings and resets Console port credentials to cisco/Cisco.

  2. After it reloads, ROW domain AP will only broadcast 2.4 GHz survey SSID. No 5 GHz. No 6 GHz. That’s because we haven’t configured any country code yet and it doesn’t know what regulatory to follow. Note the Country NONE value.


  3. If you are using ROW (Rest Of World) domain AP, configure country code using this command using Console connection and reload:

    configure ap country-code GB


  4. The AP will boot up and broadcast the survey SSID on all 3 bands.


  5. Connect to the survey SSID wirelessly. It is an open SSID, no passphrase needed.


  6. Access the access point’s web interface on https://10.0.23.1. Default credentials are admin/admin. Click OK, and change default credentials.

  7. Using the web UI, customise the RF settings to fit your survey needs. Default 6 GHz channel setting is set to Auto, which results in channel 1, which is not a Preferred Scanning Channel (PSC).

    Let’s change it to channel 5 or other PSC channel.


  8. That’s it. Take the AP with you to site and enjoy the survey. When you PoE power it, it will automatically start in the Site Survey mode with your customised settings.

    To scan 6 GHz spectrum, I use WiFi Explorer Pro with WLAN Pi M4 as a remote sensor. It has a built-in tri-band Wi-Fi adapter.
Custom 6 GHz channel and Tx power
Site survey SSID enabled on all 3 bands

New LED pattern in Site Survey mode

During boot, the LED flashes blue.

After the AP successfully starts Site Survey mode, the LED flashes red and green. This is a normal Site Survey mode pattern, and absolutely nothing to worry about.

LED flashes red and green in Site Survey mode

Warning: Read before you switch back to CAPWAP mode

Take a deep breath before you do this

If you switch the AP from Site Survey mode back to CAPWAP mode, you will no longer be able to log in via its Console port. The mode change wipes all CAPWAP settings of the AP including credentials. If you proceed with switch to CAPWAP mode, you will have to perform these steps to regain Console port access:

  1. Join the AP to a Catalyst 9800 controller
  2. Create Console port credentials and Enable password in AP Join Profile of the controller (Configuration > AP Join)
  3. Controller automatically pushes these newly created credentials to the AP
  4. You can now login to the Console port of the AP and switch back to Site Survey mode or run other commands

How long does a Site Survey AP take to boot?

From plugging the Ethernet cable in to seeing the SSIDs on the air, it takes about 3-4 minutes. DFS channels take 4 minutes or so, other bands come up faster.

Does the AP need wired connectivity or IP address on its Ethernet interface?

No, wired connectivity is not needed. The AP can just be powered by a power injector with no upstream Ethernet link. No IP address is needed on the wired port of the AP.

Does internet connectivity work?

Yes, it does. If you connect AP’s Ethernet port to infrastructure that provides internet, wireless clients connected to the AP in Site Survey mode get internet access too.

The Ethernet interface of the AP gets an IP address via DHCP from the existing infrastructure. The AP has its own DHCP scope 10.0.23.0/24 enabled on its survey SSID. It then NATs traffic coming from wireless clients to the wired network.

iPad Pro Wi-Fi 6E Preference of 5 GHz over 6 GHz

You may have read my 6 GHz discovery test of the new Wi-Fi 6E iPad Pro. This time we ask the “Hey Siri, what is iPad Pro’s favourite band?” question.

Since Apple hasn’t published any documentation that would cover this subject, I configured a tri-band SSID on Catalyst 9136 AP. The SSID name is the same for all 2.4 GHz, 5 GHz and 6 GHz bands. Now, what band does iPad prefer?

Setup

  • Wi-Fi 6E iPad Pro 11-inch (4th generation) running iPadOS 16.1
  • Catalyst 9136 Wi-Fi 6E AP
  • C9800-CL cloud controller running 17.9.2

Max transmit power and 80 MHz wide 5 GHz channel

All 3 bands are enabled with manual Power Level 1 (PL1), which forces the AP to use highest permitted Transmit Power.

In this case, the 6 GHz SSID had the strongest absolute signal strength (RSSI) of the 3 bands.

  • 2.4 GHz enabled, PL1
  • 5 GHz channel 36, 80 MHz wide, PL1
  • 6 GHz channel 5, 80 MHz wide, PL1

The iPad prefers the 5 GHz band and joins using this band.

Reduce transmit power on 5 GHz radio

Let’s use the exact same configuration as above and reduce 5 GHz radio’s transmit power to the lowest, Power Level 8 (PL8). Will that make it prefer 6 GHz?

  • 2.4 GHz enabled, PL1 (RSSI on the iPad -31 dBm)
  • 5 GHz channel 36, 80 MHz wide, PL8 (RSSI on the iPad -55 dBm)
  • 6 GHz channel 5, 80 MHz wide, PL1 – strongest absolute RSSI (RSSI on the iPad -30 dBm)

Yes! The iPad Pro prefers 6 GHz every single time. As you can see, the 6 GHz RSSI is 25 dB stronger than the 5 GHz one, which is why (as far as I can tell).

Narrower 5 GHz channel

We are using the the same configuration as in our very first scenario, but 40 MHz we will reduce 5 GHz channel width to 40 MHz.

  • 2.4 GHz enabled, PL1
  • 5 GHz channel 36, 40 MHz wide, PL1
  • 6 GHz channel 5, 80 MHz wide, PL1

Using narrower 5 GHz channel makes the iPad connect using 6 GHz instead.

Disable 5 GHz radio

This time we disable 5 GHz radio and see if 2.4 GHz or 6 GHz wins. I have high hopes for 6 GHz, you?

  • 2.4 GHz enabled, PL1
  • 5 GHz disabled
  • 6 GHz channel 5, 80 MHz wide, PL1 – strongest absolute RSSI

Indeed, the iPad prefers 6 GHz.

Now, let forcefully shut the 6 GHz radio on the AP. iPad moves to its only available option, the 2.4 GHz radio and happily lives there. We now reenable the 6 GHz radio. The iPad doesn’t automatically jump back to 6 GHz, although 6 GHz has stronger RSSI. When we disabled iPad’s Wi-Fi radio, and reenable, it connected on 6 GHz.

Make 2.4 GHz stronger than 6 GHz and disable 5 GHz

Can we make 2.4 GHz appealing enough to the iPad so that it would prefer it over 6 GHz? Let’s disable 5 GHz radio, keep max transmit power on 2.4 GHz, and reduce 6 GHz transmit power to the lowest Power Level 8 (PL8).

  • 2.4 GHz enabled, PL1
  • 5 GHz disabled
  • 6 GHz channel 5, 80 MHz wide, PL8

The 6 GHz RSSI (-45 dBm) is now weaker than the 2.4 GHz RSSI (-33 dBm) by 12 dB. Is it good enough reason for the iPad to prefer 2.4 GHz?

Not really. It connected on 6 GHz 2 times out of 3. Once it connected on 2.4 GHz.

Summary

When 80 MHz wide 5 GHz channel is used, the iPad prefers 5 GHz. If 5 GHz drops below a certain threshold, and is much weaker than 6 GHz, it then prefers 6 GHz.

It prefers 6 GHz over 40 MHz wide 5 GHz channel.

It doesn’t use 2.4 GHz unless it has no other option.

Please take these tests with a pinch of salt. Ideally I would repeat each of them 10 or so times. Time is of the essence and I only repeated each test 3 times.

Portable and Powerful 2.5 GbE iperf3 Server Capable of 3 Gbps – Topton M6 Mini PC

After using FriendlyElec R5S single-board computer as a portable iperf3 server, I decided to also order and test Topton M6 Mini PC. It is more powerful, based on Intel CPU, and runs Windows 11 Pro or Ubuntu. I personally chose Windows (yes, I am brave), mainly because I also wanted to use this device as a Windows Wi-Fi client for other things than iperf3 testing.

Dimensions and case

Compared to the R5S, Topton M6 Mini PC is still portable, but about twice as large. Plastic case wraps the unit, but it is more fragile if you plan to carry it in your backpack or tool bag. There is a built-in fan which is always on. Not a big deal if you use it as an perf3 server, but little inconvenient when it runs on your desk for a longer period of time.

iperf3 performance

Topton M6 has a single onboard 2.5 Gigabit Ethernet port consistently capable of 2.35 Gbps up and down iperf3 throughput with default settings.

Consistent 2.35 Gbps iperf3 throughput

Now, can we make it go faster? Let’s see. We will use USB-A 5 Gigabit Ethernet capable Sabrent adapter. This can either be connected to a USB-A port or USB-C port of the Mini PC. In my tests, I have found that the USB-C port has limited throughput and only tops around 350 Mbps. When I connected the Sabrent 5GbE adapter to USB-C, it only auto negotiated 1 Gbps Full Duxplex.

Use any of the three USB-A 3.1 ports instead to avoid that limitation.

Use USB-A ports, not the USB-C
With the USB adapter, we get 2.94 Gbps down and 3.27 Gbps up

With the USB adapter, the whole setup get less portable. But it allows us to achieve 2.94 Gbps down and 3.27 Gbps up from clients perspective. Is it worth the extra spend? If you need to break the 2.35 Gbps barrier of the built-in 2.5 GbE port, this might be a workable solution for you.

Power adapter with an adapter

This Mini PC is quite strict when it comes to its power source. It requires 12V/2A USB-C PD adapter. Unfortunately, your USB-C MacBook or iPad chargers won’t work.

It draws around 7.5 Watts in idle mode.

If you happen to only use this PC in the US, happy days, as the power adapter ships with US plug. If you select UK during the ordering process, you will receive the US power adapter with UK adapter, which adds to its overall size.

My way around this is to use a standard non-USB-PD 12V/2A adapter with 5.5×2.1mm barrel jack connector, and a barrel jack to USB-C adapter. This particular “power brick” has a standard IEC C14 power cable connector, which you can find in any data centre and with the right European, UK, or Australian plug.

Power adapter with barrel jack + barrel jack 5.5×2.1mm to USB-C adapter
Detail of barrel jack 5.5×2.1mm to USB-C adapter

Battery power

Simply use a USB-C cable and USB PD battery pack capable of delivering 12V/2A. No surprises there.

Powered by PoE

I prefer powering equipment using PoE over local power bricks. If you are in the same boat, you can power this Mini PC by a PoE splitter.

Please pay close attention to the splitter specs. We want the one with a barrel jack and 12V/2A. Since the Mini PC uses USB-C power connector, we will use a barrel jack 5.5×2.1mm to USB-C adapter. Here is the complete setup. Press the power button and voila!

Under the hood

Most of the components are soldered to the main board with little room for upgrades. I ordered the lowest 8GB DDR4 and 128GB NVMe spec with Windows 11 Pro OEM preinstalled (no actual Windows license included).

I was hoping for the Wi-Fi adapter to be replaceable, but it is not the case. It is Intel AX201 and soldered to the board. Good enough, just not ideal for Wi-Fi professionals. M.2 slot would be ideal.

A quick look at the bottom side of the PCB shows the NVMe drive.

NVMe drive is practically the only replaceable component

Final verdict

Personally, I think this Mini PC has some great potential for certain use cases, but as an iperf3 server, I would rather use the FriendlyElec NanoPi R5S I reviewed here.

If you absolutely need to break the 2.3 Gbps barrier, it can be done with the help of a USB 5 GbE adapter, but it is not very cost effective. The Mini PC cost me £186 including shipping to the UK. The Sabrent 5GbE USB adapter costs around £65.

Finally, it you need top performance, don’t care that much about small form factor, and money is no object, the latest Apple M1 Mac Mini can be configured with built-in 10 GbE.

Portable and affordable 2.5 Gigabit Ethernet iperf3 Server – FriendlyElec NanoPi R5S

What problem am I trying to solve?

Wi-Fi standards have developed and also WAN links are fast and reasonably priced these days. When it comes to throughput testing tools like iperf3 servers, 1 Gigabit Ethernet has become a bottleneck. A Wi-Fi 6E client can now easily generate more than 1 Gbps of traffic, but how do we measure it?

To overcome that issue, I am looking for a reasonably priced portable single-board computer, which can push more than 1 Gbps of traffic. It should be powered via USB-C, battery, or PoE powered, and should be portable to fit in my “just in case I need it” tool bag.

FriendlyElec NanoPi R5S

This little FriendlyElec NanoPi R5S single-board computer (SBC) delivers everything I mentioned above. Let’s have a look.

Dimensions and case

It comes with a well designed aluminium case, which also serves as a heatsink. The whole unit is smaller than the smallest iPhone, slightly thicker obviously. It runs silent. There is no built-in fan whatsoever.

Portable? Tick! By the way, did you know that the original WLAN Pi uses NanoPi NEO2?
Left to right: WLAN Pi, R5S, Intel-based SBC I am also testing, WLAN Pi Pro

Ports

USB-C power input, two 2.5 GbE, one 1 GbE, HDMI useful troubleshooting or demos, two USB-A 3.0 ports

It has two 2.5 Gigabit Ethernet interfaces (LAN1 and LAN2) and one 1 Gigabit Ethernet interface (WAN). Either of the LAN ports delivers 2.3 Gbps of actual useful iperf3 throughput with default 1500-byte MTU and single stream. I used MacBook with OWC 10 Gigabit Ethernet Thunderbolt 3 Adapter and Cisco WS-C3560CX-8XPD switch.

From client’s perspective that’s 2.27 Gbps down and 2.35 Gbps up

Power

The R5S only draws 4 Watts in idle, and can be powered by any USB-C 5V power source. Your MacBook USB-C charger, iPad/iPhone charger, or USB-C battery pack would do. Alternatively, use a 1 Gigabit Ethernet 5V PoE splitter and PoE power the unit. In my lab with a 2 meter cable, the 1 Gigabit Ethernet PoE splitter actually allowed the R5S auto negotiate stable 2.5 Gbps connection with the switch.

PoE powered

Software

FriedlyElec built and published two operating system SD card images for the R5S – Ubuntu and FriendlyWRT. I tested both, and for my use case FriendlyWRT works best. It has a network-centric and easy to use web UI, has iperf3 preinstalled, and delivers great performance.

Initial setup and tips

R5S ships without any micro SD card, so make sure you have one ready to use. Flash the software image to it using Balena Etcher or similar tool.

Connect the WAN port to a network with existing DHCP server. If you are in the same subnet, simply ping FriendlyWrt.local to get the IP address of the R5S.

Then access the web UI or SSH to the unit, SSH is enabled by default. Change the root password now.

Now, this is important! To achieve maximum throughput, delete the pre-configured bridge interface br0, and configure both multigigabit eth1 (LAN1 port) and eth2 (LAN2 port) as standalone unbridged interfaces. Also, tweak IP address settings to your liking while you are there.

eth1 configured as a standalone interface. Bridge interface removed.

Make iperf3 automatically start by going to System > Startup > Local Startup and add iperf3 -s and hit the Save button.

Change CPU Governor setting to Performance. And CPU Minimum Frequency to the maximum value.

Here is the FriendlyElec documentation and introduction to their FriendlyWRT distribution.

Final verdict

This little single-board computer absolutely deserves its space in my tool bag. For the 2 GB RAM model with case I paid $88 including shipping to the UK. Add a Micro SD card and that’s all you need to get started.

Finally, it you need top performance, don’t care that much about small form factor, and money is no object, the latest Apple M1 Mac Mini can be configured with built-in 10 GbE.