Direct 20 Gbps connection between Mac and Windows 11 machine with no Ethernet adapters

Problem statement

Here is the challenge. We have a MacBook Pro M2 and an Intel NUC 12th generation PC running Windows 11. We want to transfer a significant amount of data between the two and potentially sync content of 2 directories. The Mac has no Ethernet adapter.

Solution

Both machines support Thunderbolt 4 and USB4. I happen to have a 0.5 m (1.6 ft) Thunderbolt 4 cable in my tools bag. We connect the two machines back to back. They establish USB4 peer to peer 20/20 Gbps connection, and automatically assign locally significant IP addresses from the 169.254.0.0/16 APIPA range.

For the record, I am using the Thunderbolt 4 cable shipped with my trusty OWC 10 Gigabit Ethernet Thunderbolt adapter.

Direct MacBook to Intel NUC USB4 20/20 Gbps connection

The MacBook side

Let’s start with the Mac. Head over to System Settings and Network. Select the Thunderbolt Bridge adapter and explore its config.

Thunderbolt bridge interface and IP address

As far as I can tell, the machines have decided to use USB4. From what Windows network manager is telling us, they negotiated 20/20 Gbps link speed. I expected 40 Gbps but I think I set a wrong expectation in my head. 20 Gbps up and 20 Gbps down full duplex makes up 40 Gbps.

Windows PC on the other end of the Thunderbolt link

A quick iperf3 test gives us amazing throughput of 16.4 Gbps of TCP traffic from the Mac client to PC server. That’s fast!

16.4 Gbps of TCP traffic from Mac to PC

By default macOS uses standard MTU size of 1500 Bytes. This is important hold that thought.

Standard MTU

In the downstream direction, that is from Windows PC towards the Mac, we “only” get 5.3 Gbps. Windows claims 20/20 Gbps link speed, so what’s wrong?

Limited 5.3 Gbps TCP throughput from PC to Mac

Yes, we need to bump MTU (Maximum Transmission Unit) size to the maximum value of 9000 Bytes on my Mac. Apparently, Windows defaults to 62000 Bytes MTU on this peer to peer link type, and there is no UI option to change it. But that’s fine for now.

Enable Jumbo frame support on Mac

Let’s retest upload speed. Now we are talking. That’s 16.4 Gbps TCP from Mac to PC and 12.8 Gbps from PC to Mac. I am starting the file transfer.

12.8 Gbps TCP from PC to Mac with Jumbo frames enabled

We are not done yet.

Intel NUC and the Windows part

Windows sees this link as a peer to peer USB4 connection.

Connection status

The two machines negotiated a 20/20 Gbps link. Windows uses 62000 Bytes MTU by default with no obvious UI option to change it. Mac uses 9000 Bytes. MTU mismatch is bad and we should fix that.

20/20 Gbps USB4 P2P link
Adapter settings don’t offer MTU adjustment in the UI

Let’s deal with the MTU, and set it to 9000 Bytes on Windows. Same as the Mac.

Set MTU to 9000 Bytes on Windows 11 for this adapter

With matching MTU on both sides of the pipe, we get 15.1 Gbps TCP throughput from Mac to PC, and 13.6 Gbps from PC to Mac. Slightly more symmetrical in both directions.

Mac to PC
PC to Mac

Summary

I knew Thunderbolt 4 peer to peer connection was possible between 2 Macs but I’ve never tried connecting a Mac to a PC. It works.

Use a Thunderbolt 4 cable, not just a regular “USB-C to USB-C” cable. If there is a Mac involved, increase macOS MTU size to Jumbo 9000 Bytes and match MTU setting on both machines.

The outcome is a peer to peer 20/20 Gbps USB4 link with TCP throughput around 15 Gbps in either direction.

10 Gigabit Ethernet on Intel NUC

Earlier this week, I tested a 10 Gigabit Ethernet M.2 network adapter on Raspberry Pi 5, and it didn’t quite cut it. Mainly due to limited PCIe Gen 2 performance. Now, the question is can this 10 Gigabit adapter actually push 10 Gbps of traffic at all?

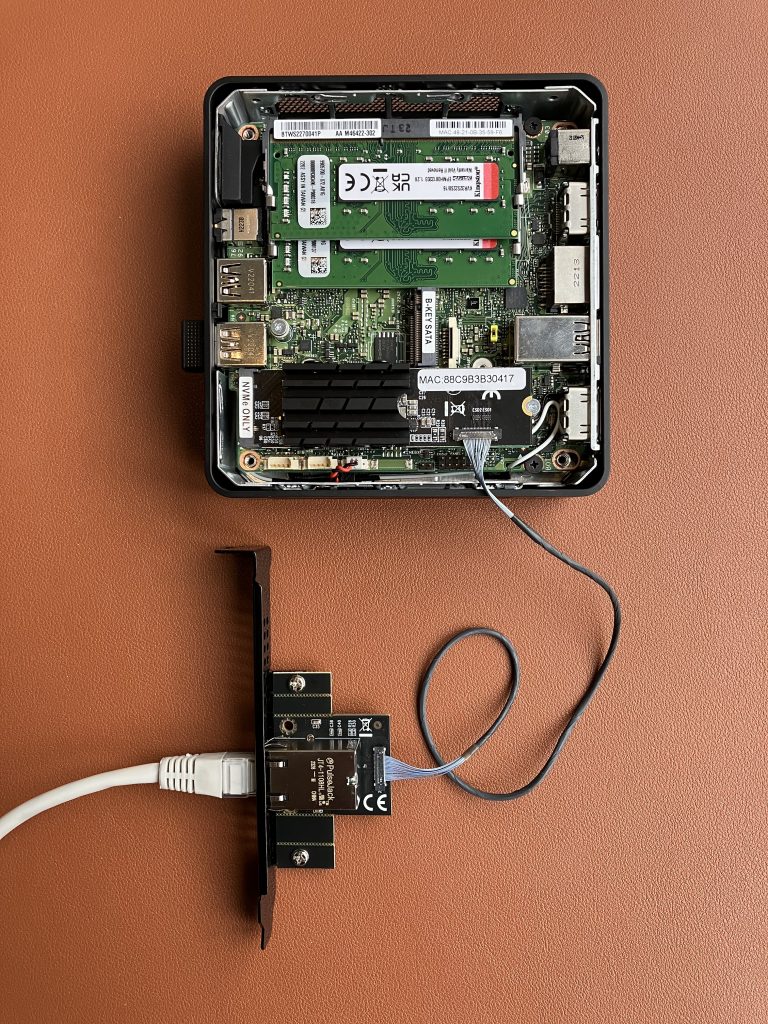
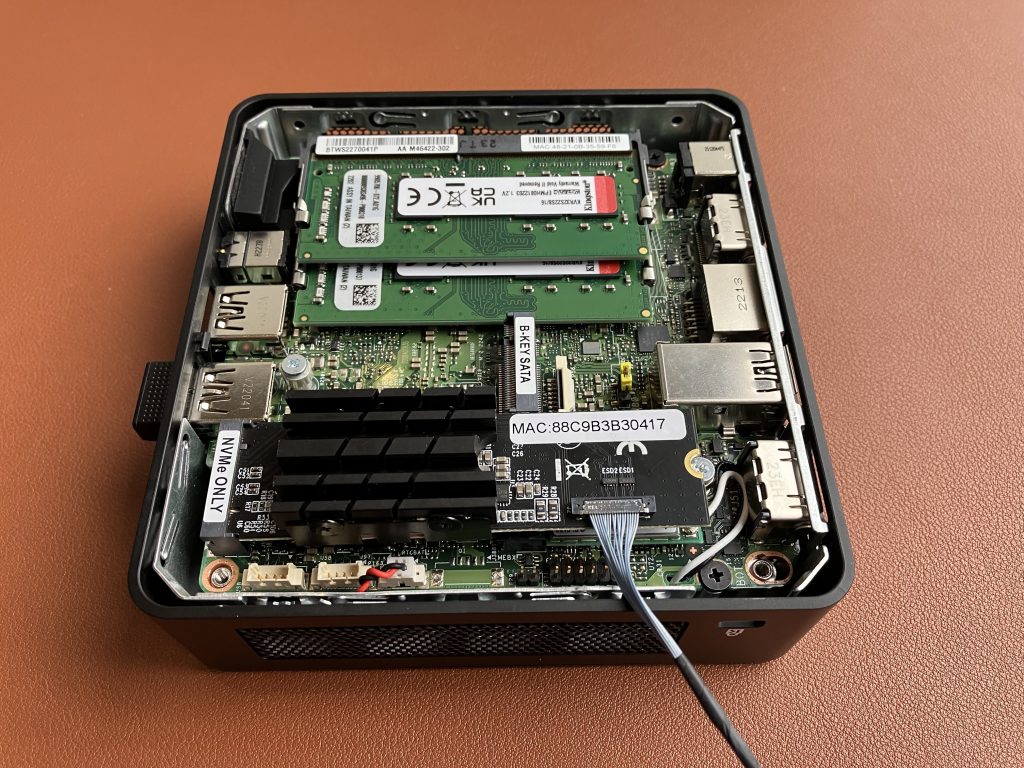
To find out, we are going to slightly reconfigure this Intel NUC 12th generation mini PC. It has an M.2 M-key slot for NVMe drive. Let’s use this slot for our 10 GbE adapter. And we will boot Windows 11 off an external USB SSD drive.
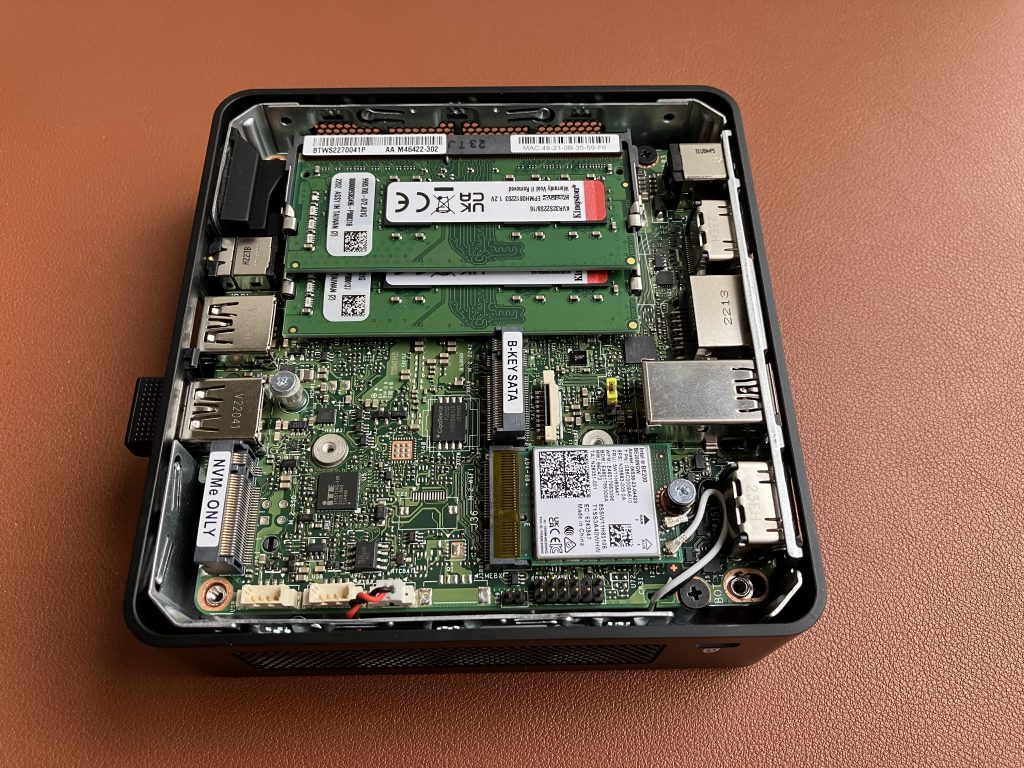
Remove NVMe from the M.2 slot
Install 10 GbE network adapter instead
Intel NUC with 10 GbE adapter connected to 10 GbE switch

Install Windows 11 23H2 version on a USB SSD drive, boot Windows, run Windows Update, voila!
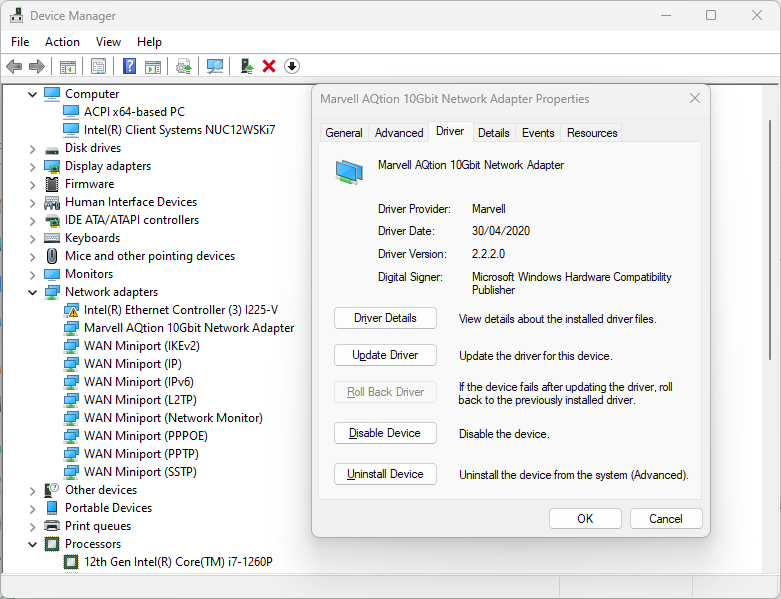
Windows Update installed latest driver automatically
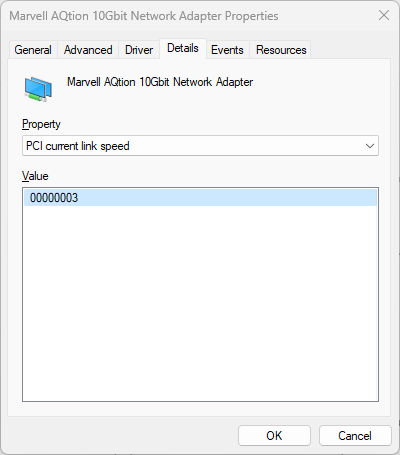
It uses PCIe Gen 3
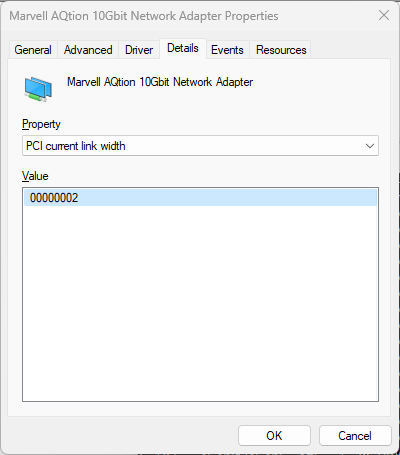
And x2 link width
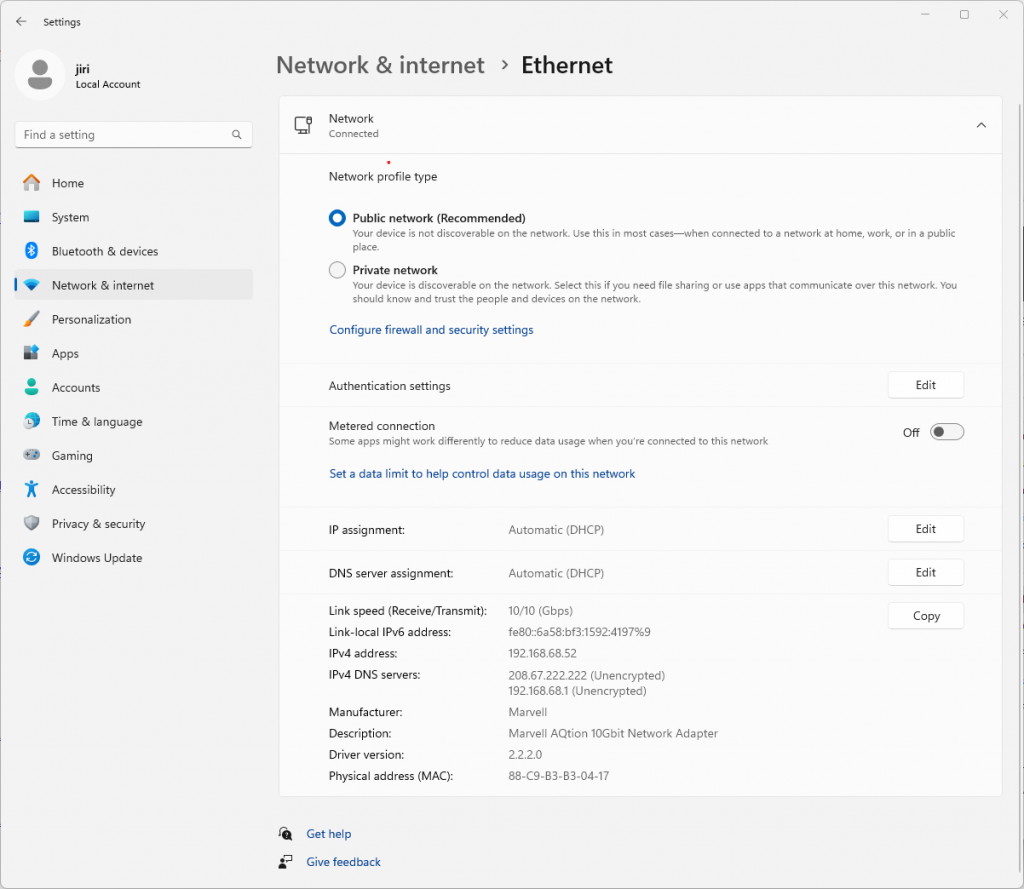
10 Gbps Full Duplex

With default iperf3 settings we get 6.44 Gbps/7.93 Gbps in the downlink and uplink direction respectively. Not bad, but is that it? Of course not.
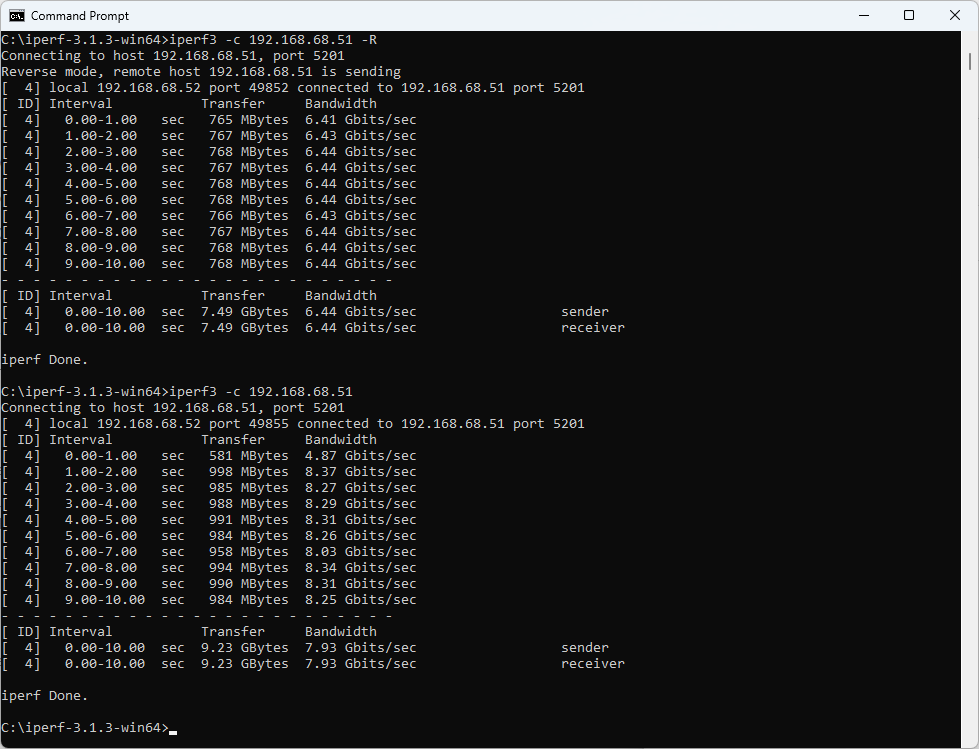
iperf3 with default settings

I don’t really want to enable Jumbo frames as it’s not always possible to enable Jumbo frame support end-to-end, especially if part of the network doesn’t support it or isn’t under your management. Fortunately, 8 parallel TCP streams in iperf3 do the trick for us. We get 9.48 Gbps download speed.
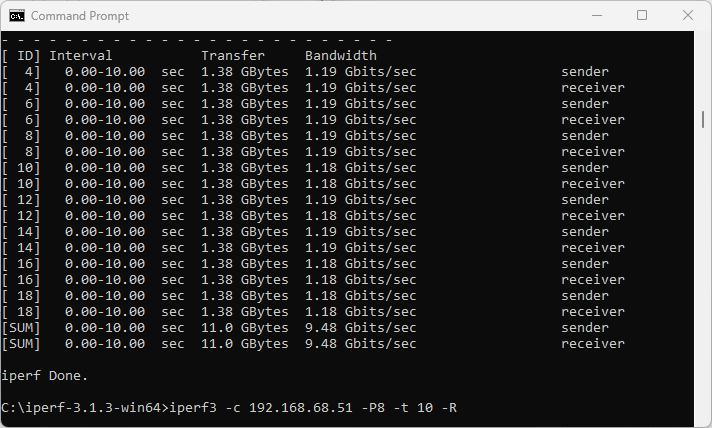
9.48 Gbps download

In the upstream direction from this NUC to my MacBook with 10 GbE adapter, we also get 9.48 Gbps. I am happy. You? 😉
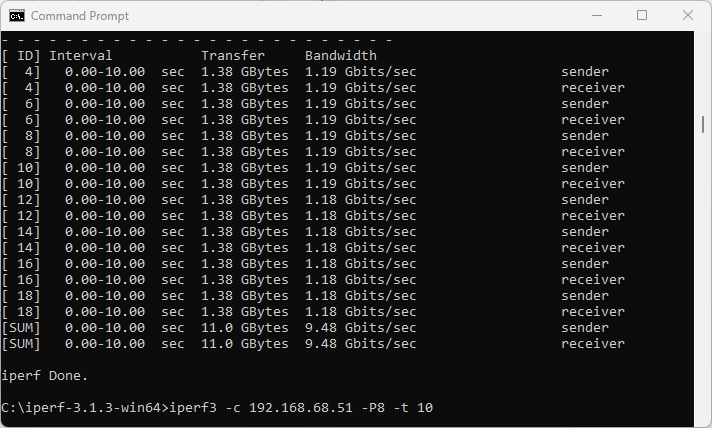
9.48 Gbps upload

Summary

After all, this 10 GbE M.2 network adapter is indeed capable of pushing 9.48 Gbps of traffic in either direction. But! It is not really a good choice for a system like Intel NUC. I can’t pop the lid back on, the heatsink is too tall. Frankly, I can’t recommend this adapter at all. It runs hot at 84° Celsius in idle.

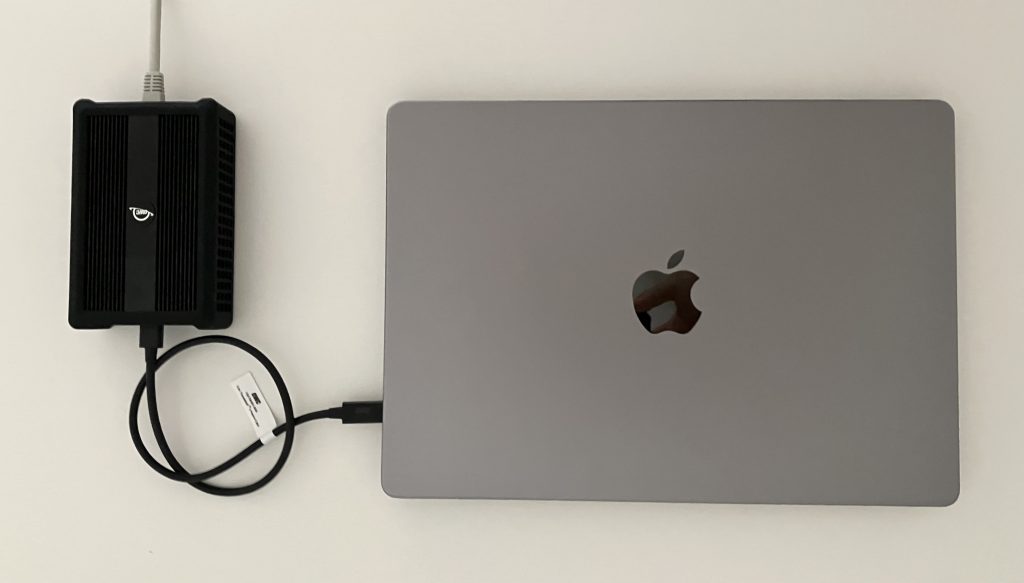
If you are looking for a daily driver, and your system supports Thunderbolt, get yourself this OWC 10GbE to Thunderbolt adapter. Here is my test. It works out of the box on Windows (I tested this Intel NUC 12th Gen) and macOS (I tested MacBook Pro M1 and M2). Interestingly, it uses the same chip as the above M.2 adapter. Just compare the two products and their heatsink sizes. The AQC107 keeps the main CPU utilisation very low, but it produces a significant amount of heat.
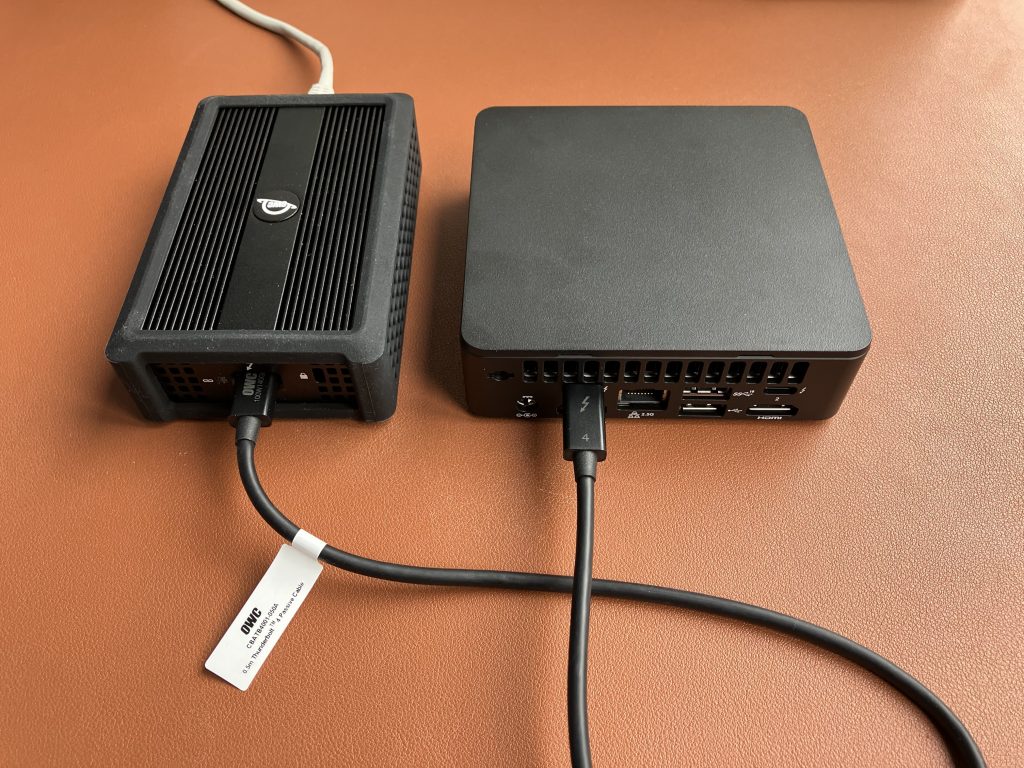
OWC 10 GbE to Thunderbolt network adapter connected to Intel NUC
OWC 10 GbE to Thunderbolt network adapter connected to MacBook

Microsoft Security Essentials konečně česky

Antimalware nástroj Microsoft Security Essentials je konečně dostupný ke stažení i v české jazykové verzi. Toto kompletní antimalware řešení je poskytováno zcela zdarma. Jeho výhodou jsou především snadná obsluha a nízké nároky na systémové prostředky. Před započetím instalace je automaticky provedeno ověření pravosti operačního systému Windows. Poté během několika desítek sekund proběhne samotná instalace.

Pohledem do licenčních podmínek zjistíte, že Microsoft počítá s použitím v domácnostech a SOHO (Small Office/Home Office):
Smíte nainstalovat a používat libovolný počet kopií softwaru ve vašich zařízeních ve vaší domácnosti pro užívání osobami, které tam pobývají, nebo pro užívání ve vaší domácí malé firmě.

Stahujte: zde

Microsoft Get on the Bus dnes v Praze

Road show Microsoftu nazvaná Get on the Bus si dnes udělala zastávku v pražském Edenu. Převážně členové Microsoft Learning a Community týmu postupně představili nový Exchange Server 2010, Windows Server 2008 R2, Windows 7 a nahlédli jsme ale i pod pokličku přípravy certifikačních zkoušek. Continue reading Microsoft Get on the Bus dnes v Praze

Důvěryhodné SSL certifikáty zdarma od StartComu

Myšlenka pořízení důvěryhodného certifikátu pro webový server v praxi obvykle zanikne při zjištění jeho pořizovací ceny. Zásadně nový na věc ovšem přináší certifikační autorita StartCom poskytující některé důvěryhodné certifikáty zcela zdarma! Continue reading Důvěryhodné SSL certifikáty zdarma od StartComu

Antivirus od Microsoftu je dostupný ke stažení

security-essentials

Microsoft uvedl finální verzi svého antivirového, antispyware a antimalware řešení. Produkt nese název Microsoft Security Essentials. Můžete si jej zdarma stáhnout z Download centra Microsoftu a vyzkoušet jeho kvality. Pokud snad dosud nemáte v počítači žádný antivirový produkt, je nejvyšší čas to napravit.

Produkt zatím oficiálně není dostupný pro český trh. Stáhnout si jej ale můžete přímo od Microsoftu pomocí jednoho z níže uvedených přímých odkazů.

Přímé odkazy ke stažení

Download for XP (32-bit)
Download for Windows 7 & Vista (32-bit)
Download for Windows 7 & Vista (64-bit)

Oficiální web produktu

Microsoft Security Essentials

Jak projít pohovorem na technickou pozici?

Pokud aktuálně hledáte práci a ucházíte se o technickou pozici, mohl by vám pomoci záznam z posledního partnerského Microsoft Live Meetingu, jehož téma bylo zaměřeno právě na tuto problematiku. Kromě samotného výkladu videozáznam obsahuje také řadu dotazů. Ty, které se nevešly, najdete zodpovězené na Microsoft Technet Blogu.

Video: záznam Live Meetingu
Q&A: odpovědi na položené otázky


HR: Jak projít pohovorem na technickou pozici?

Software z Microsoft Action Pack dostupný online ke stažení

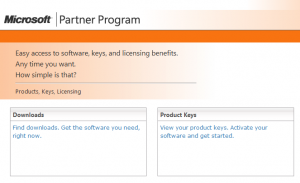
Patříte-li mezi partnery Microsoftu, možná jste si předplatili balíček Action Pack Subscription. Jde o software určený pro přípravu demonstrací pro zákazníky a vnitrofiremní použití. Veškerý software byl doposud distribuován formou fyzických CD médií.

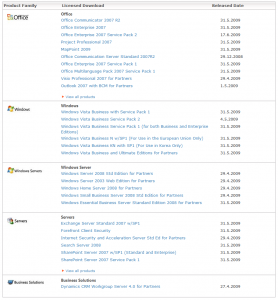
Nyní jsme se dočkali a Microsoft zavádí elektronickou distribuci softwaru. Podobně jako například u MSDN či Technet Subscription je možné si software kdykoliv odkudkoliv stáhnout bez nutnosti hledat fyzická média či čekat na jejich doručení. Správa produktových klíčů se rovněž dočkala změny. V partnerském webu totiž přibyla stránka s kompletním přehledem produktů a odpovídajících klíčů. Odpadá tedy ruční opisování z oranžových papírových štítků.

Celý postup je úžasně jednoduchý. Přihlásíte se partnerským Live ID, přejdete do sekce stahování, stáhnete požadovaný produkt, zkopírujete si produktový klíč a instalace může začít.

download-action-pack-software

Malou vadou na kráse je, že výčet software dostupný online nepokrývá kompletní šíři produktů, které jste doposud obdrželi v rámci Action Packu. Například SBS 2003 R2 budete prozatím hledat marně.

action-pack-software-summary

Informace o elektronické distribuci: https://partner.microsoft.com/global/40096013
Action Pack produkty ke stažení: https://partner.microsoft.com/global/40108639