Unboxing desktop stand CW-ACC-DESK1-00 for Cisco Wireless CW9172H Wi-Fi 7 access point

Alongside the wall plate Wi-Fi 7 wall plate access point CW9172H, Cisco also introduced a number of accessories. This desktop stand CW-ACC-DESK1-00 allows the AP to be deployed on a desk and secured by a Kensington lock. That makes it a perfect solution for micro branches, locations where mounting to ceiling is not an option, and using this access point in wireless active testing sensor mode.

The official documentation describes all included parts here. I will just equip you with few extra photos.

Packaging
Parts included
Fully assembled AP with desktop stand
Rear side of access points with desktop stands attached

How to enable site survey mode on Cisco Wireless CW9179F large public venue Wi-Fi 7 access point

The fact that you are here most likely means that you already have the AP on your desk, and you are readying for a site survey. Let’s skip all product detail this time and go straight into the survey part.

CW9179F access point on a workbench

Choose the right site survey mode

All Cisco Wi-Fi 7 APs, including the CW9179F, support cloud-managed (think Meraki Dashboard) and controller-managed mode (think Catalyst). You can easily switch between them. This gives you access to Catalyst Site Survey mode, or Meraki Site Survey mode.

As of September 2025, the Catalyst Site Survey mode supports all software-configurable beam patterns – Boresight, Wide, Front-and-back. That’s what we are aiming for.

Kit list

  • CW9179F access point
  • Power injector CW-INJ-8, switch, or PoE battery back and a couple of twisted pair cables
  • Wired internet connectivity
  • Console cable – the blue RJ-45 to USB-C or USB-A one
  • TFTP server on your laptop – Transfer on macOS is great
  • Terminal app on your laptop – Royal TSX, Putty, SecureCRT or the screen command
  • Download 17.18.1 Lightweight access point image from Cisco.com download section
  • No controller needed

Let’s do this

Power your AP by a switch, power injector or battery pack and connect it to internet. I am using Cisco’s 802.3bt power injector CW-INJ-8 here, and Internet Sharing feature on my Mac to get the AP online.

CW9179F AP powered by CW-INJ-8 injector

Create a new network on Meraki Dashboard, select the right country, and claim the AP in Dashboard using its Cloud ID (previously known as Meraki Serial Number). Make sure the AP connects to Dashboard and shows as online. The AP will set its country code and regulatory domain. Verify.

Verify country setting

Switch the AP from Meraki mode to Catalyst mode using the Migrate to WLC button on Dashboard.

Don’t switch the AP mode using Meraki Local Status Page (LSP)! The AP might not broadcast the survey SSID if you go down that route.

Remove the grey Console port cap and console into the AP using RJ-45 console cable and your favourite terminal app.

We are now in Catalyst Lightweight access point mode. Log in using username cisco, password Cisco, type enable command, and enter default enable password Cisco.

Console session authentication

Download the CW9179F lightweight access point image. Upgrade the AP to 17.18.1 release (or newer) which has all the survey features we need. The link is correct, this AP uses the exact same image as CW9178I.

Start a TFTP server on your laptop, and move the image file to your TFTP root folder.

Now, instruct the AP to download the image from TFTP server and upgrade its code to 17.18.1.

archive download-sw /reload tftp://192.168.2.1/ap3g4-k9w8-tar.17_18_1_8.tar

After it reboots, check its software version using show version command. Happy days we are running 17.18.1 now.

Finally, switch the AP to site survey mode using ap-type site-survey command. When asked for reboot, press y and enter.

In Site Survey mode, both the front and the back LEDs follow this pattern.

🟢 ⚫️ 🔴 ⚫️ 🟢 ⚫️ 🔴 ⚫️

Log in and use this command:

capwap ap ip 192.168.2.20 255.255.255.0 192.168.2.1 208.67.222.222 208.67.220.220

The format is:

capwap ap ip <IP-address> <Mask> <Gateway> <Pri-DNS-server> <Sec-DNS-server>

The AP is now broadcasting site survey SSID.

Site survey SSID

Connect to it wirelessly.

Connected to site survey SSID

And access the Site Survey mode web interface running on https://10.0.23.1. Username admin, password admin. Change the password after first login and save it to your notes or print a label.

That’s where we make the beam pattern selection.

Beam selection

Adjust the SSID name, Tx Power, channel number, enable/disable features to your needs.

Available 2.4 GHz (Slot 0 radio) configurations
This image has an empty alt attribute; its file name is cw9179f-site-survey-mode-web-interface-1024x724.png
Available 5 GHz (Slot 1 radio) configurations
Available 5 GHz (Slot 2 radio) configurations
Available 6 GHz (Slot 3 radio) configurations

Or even enable WPA2 pre-shared key security.

SSID security settings

You’ve done it! Happy surveying!

Revert to standard client-serving mode

If you need to switch the AP back to Lightweight Catalyst mode, or Meraki mode, just use the ap-type capwap, or ap-type meraki command.

Unboxing Cisco Wireless CW9172H wall plate Wi-Fi 7 access point

Wall plate access points provide both wired Ethernet and Wi-Fi connectivity. Cisco has just started shipping the latest CW9172H Wi-Fi 7 wall plate AP. Same as all other Cisco’s Wi-Fi 7 APs, it is designed for global use. The regulatory domain is no longer dictated by the SKU. The CW9172H can be managed either by Cisco Meraki Dashboard, or Catalyst 9800 controller and Catalyst Center.

CW9172H in a hotel room

It can be mounted onto an electrical wall plate. The twisted pair cable runs inside the wall and there are no visible cables.

Wall plate mounting with no visible cables

If no wall plate is available, you can mount the AP using a spacer accessory kit on the actual wall surface with cables clipped to the wall.

CW9172H in a hotel room

Back to unboxing. What is included in the box? Well, if you order multiple access points, select the 6-pack option referred to as “multi packaging”. Who wouldn’t want a six pack? 😊

The 6-pack box dimensions are about 33 x 20 x 25 cm and it contains 6 APs.

Inside are 6 smaller boxes with 1 access point each.

Each AP is wrapped in paper. No plastic bags anymore.

Mounting bracket and accessories are placed underneath the AP.

Accessories are packaged in paper bags. Let’s have a closer look.

Finally, there is the access point.

The passthrough port covered by a plastic cover. There is 1 PoE out port and 2 standard Ethernet downlinks for your devices.

On the side is a standard RJ-45 console port, also covered by a plastic cover mainly for aesthetics reasons. Let’s remove the cover, shall we?

The Ethernet passthrough port cover follows similar style.

Back side of the AP hosts the up to 2.5 Gbps Ethernet uplink and passthrough port.

Optional accessories

There are extra parts you can order depending on how you wish to use and mount the CW9172H.

The spacer kit is designed for mounting on the actual wall surface.

Desktop stand accessory is another option if you prefer to place the AP on a desk.

The port lock prevents users from connecting or disconnecting cables to the ports on the bottom side of the AP.

As per usual, refer to the Cisco installation guide and data sheet for official guidance.

Check down tilt angle of Cisco Wireless Wi-Fi 6E or Wi-Fi 7 AP remotely

What if you were able to detect access point’s down tilt angle remotely? Perhaps that would have explained unusual client connectivity issues at a remote site, spot an AP which has been installed incorrectly, or bent AP mounting hardware in a warehouse damaged by a scissor lift.

CW9176D1 mounted at an angle

Problem statement

If you have ever deployed an access point with directional antenna (be it external or inbuilt), you know that orientation matters. Directional antennas focus the energy towards their main lobe. Access points or antennas deployed at incorrect angle mean that coverage is going to be very different from the desired one.

Location-based services and asset tracking accuracy very much depend on AP placement and orientation. What if the AP that was supposed to be mounted on a wall with 30 degree down tilt is actually sat flat on top of a network cabinet pointed towards the sky?

What if the down tilt angle of the AP changed literally overnight while maintenance was going on, and some heavy machinery was present inside your venue?

Solution

Selected Cisco’s Wi-Fi 6E and Wi-Fi 7 APs ship with built-in accelerometer. It detects and reports down tilt angle of each supported AP.

  • Down tilt of 0° represents an AP mounted to the ceiling surface with its LED pointed straight down towards the floor.
0° down tilt angle
  • AP sat flat on a desk with the LED pointed towards the ceiling reports 180°.
180° down tilt angle

Supported AP models

Wi-Fi 6E: CW9166D1
Wi-Fi 7: CW9176I, CW9176D1, CW9178I, CW9179F

Cloud-managed AP by Cisco Meraki Dashboard

There is nothing you need to do on your part to enable this feature. As long as your AP is equipped with the accelerometer, you will see the down tilt angle on the Wireless > Access Points page.

Ceiling mounted CW9176I

It updates quite frequently. I would say every couple of minutes. So, if I remove the AP from its bracket and pop it on my desk, you can see that my desk desperately asks for about 2° of attention 😄

AP on a desk

As of May 2025, the angle is not available via API yet. The product manager confirmed that this was already work in progress, and he asked me to let you know.

AP managed by Catalyst 9800 controller

In Catalyst mode, accelerometer is supported since 17.15.1. By default the sensor is disabled, and no angle is visible in the web UI. We can enable it on a per access point basis.

Either from the controller web UI:

Or by this CLI command – note the “no” keyword:

ap name CW9176 no sensor environment accelerometer shutdown

To verify that accelerometer sensor is now enabled, we use this show command:

show ap sensor status

We then view the angle from the web UI:

And “Show more” provides raw detail:

As of May 2025, there isn’t a CLI command available to display the angle yet. Stay tuned.

Refresh rate of the angle in my case was 15 minutes. Hand on heart, the refresh rate isn’t important. You mount the AP and by the time you get back to your desk, the angle updates. I was just curious. Just picture me refreshing the AP 360 View page for 15 minutes. Real story 😊

For reference

Nicholas Swiatecki presented on this very subject at the Mobility Field Day. Watch his session.

Kjetil Teigen Hansen built a nice Grafana dashboard that represents the angle visually.

Unboxing Cisco Wireless CW9176I Wi-Fi 7 access point

Cisco’s Wi-Fi 7 access points introduced new packaging, replaced plastic bags with paper, and introduced new ordering process. This particular AP is the CW9176I-RTG SKU. The RTG stands for Ready To Go. It is build to stock which means super fast shipping, 1 AP per box packaging, and mounting brackets are included with no option to customise it. This -RTG option is perfect if you just need a single AP urgently to perform an “AP on a stick” site survey for example.

Now, if you want to minimise the cardboard volume and storage space, I highly recommend you use the CW9176I-CFG SKU. It allows you to order a 10-pack (that’s 10 APs per box) and fully customise mounting hardware or even opt out from it and use your existing brackets. The CFG part stands for configurable and it is build to your order.

Where in the SKU is the regulatory domain?

It’s gone, and it’s great! Cisco’s Wi-Fi 7 APs are designed for global use. The SKU is no longer assigned to any particular region or country. Simply order an AP. It will detect its location, and set the right country code.

Is this the cloud-managed or Catalyst controller managed model?

It is whatever you want it to be. After you plug it in, claim in in your Cisco Meraki Dashboard inventory, and it will run in Meraki mode. If you don’t claim it, it will discover your Catalyst 9800 controller, and become a Catalyst lightweight access point. Same SKU, same hardware, you choose how you manage it.

You can even switch between the two modes at any point in time with no TAC support whatsoever.

Each Wi-Fi 7 AP consumes a Unified License. This license is the same for both modes. It gives you rights to either cloud-manage the AP in Cisco Meraki Dashboard, or you can join it to Catalyst 9800 controller, and manage it by Catalyst Center.

What’s in the CW9176I-RTG box?

This is the individually packaged RTG SKU, 1 AP per box.

Note the paper wrap around the AP. No more plastic bags.

Underneath the AP are the instructions, bracket, and ceiling grid clip.

Detail of the low profile AIR-AP-BRACKET-1 mounting bracket and bolts.

Detail of the AIR-AP-T-RAIL-R ceiling grid mounting clip.

Finally, there is the AP.

All Cisco Wi-Fi 7 APs ship with a white Console port cover by default. Its purpose is to prevent installers from plugging the twisted pair cable carrying Ethernet to the Console port. The cover can be removed without any extra tools.

Note: For official Cisco guidance and information, please refer to the Cisco.com data sheet and deployment guide.

Does iPhone 16 support the optional 4096-QAM Wi-Fi 7 feature?

iPhone 16

Apple has just published a new and very useful Wi-Fi specification document which answers this question.

Note the Maximum MCS index column

What is 4096-QAM?

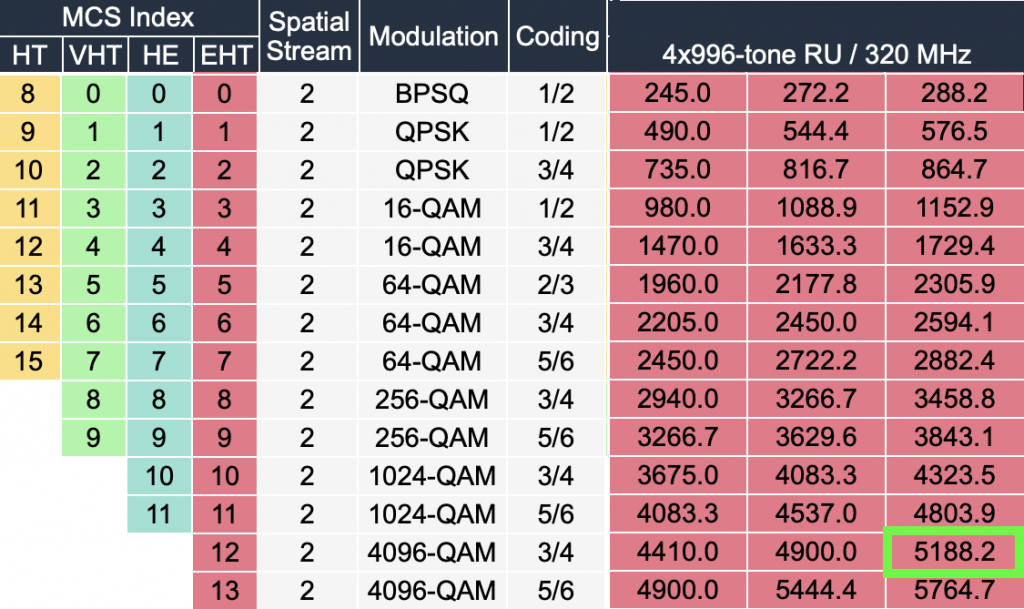
It is the latest modulation technique that allows the access point and Wi-Fi client to send even more data over the air than ever before. Effectively, it adds 2 new MCS indexes 12 and 13 and unlocks faster data rates.

4096-QAM MCS indexes, credit to http://mcsindex.net

Achieving it is challenging as it requires very high Signal to Noise Radio (SNR) – that’s very strong signal and low noise. So in practical terms, it is only used quite rarely.

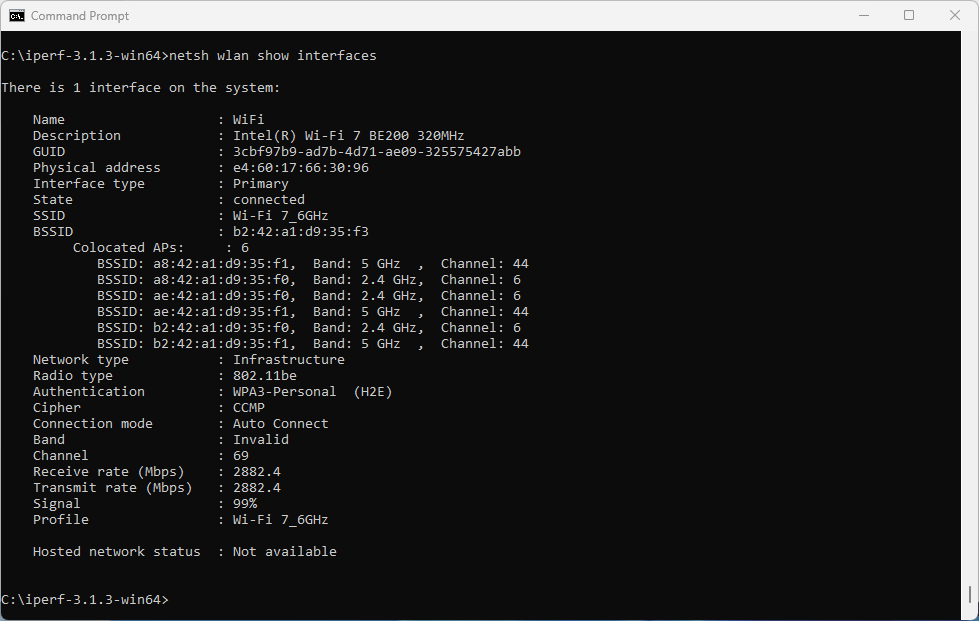
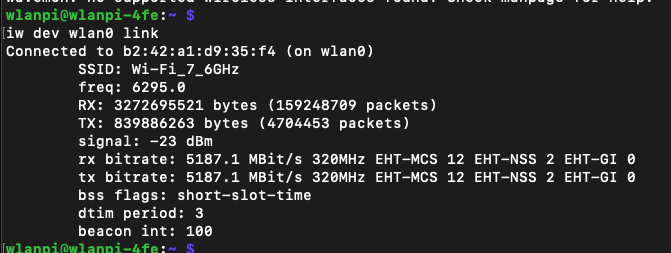
For context, with another client device using Intel BE200 Wi-Fi 7 adapter, I hit MCS 12 with SNR about 60-62 dB. In other words, if my noise floor was -95 dBm, my signal would have to be about -35 dBm.

Does iPhone 16 support it then?

According to the above spec sheet, the maximum Extremely High Throughput (EHT) the iPhone can achieve is MCS 11. 4096-QAM only uses MCS indexes 12 and 13. Check the mcsindex.net site.

So, the answer is no, it doesn’t.

Is it a dealbreaker?

From data rate perspective, even without 4096-QAM, and using 160 MHz wide channel, we are talking 2000+Mbps! Obviously depending on how far you are from the access point.

So I personally can’t complain. I value access to the clean 6 GHz spectrum, low latency and low retransmissions rate over maximum throughput.

My WAN link speed of 900 Mbps is my personal bottleneck and I usually don’t transfer huge amounts of data from the phone.

High Tx (transmit) and Rx (receive) rates

On a laptop, I can imagine 4096-QAM to deliver much more value when it comes to performing backups for moving very large software image or video files. Having said that, don’t forget that there is 2.5, 5 or 10 Gigabit Ethernet for that.

Does iPhone 16 support Wi-Fi 7 Multi-Link Operation (MLO)?

iPhone 16 supports tri-band Wi-Fi 7 and Multi-Link Operation (MLO). More specifically, the Enhanced Multilink Single‐Radio (EMLSR) mode. The client connects using 2 different Wi-Fi bands, only actively uses 1 of them and listens on both bands simultaneously. Let’s enable it on an access point and verify that it works.

Multi-Link Operation

We have a 320 MHz channel configured on the 6 GHz radio. This is for experimental purposes only. Please use narrower channel in production to avoid adjacent channel interference with other 6 GHz access points.

Wi-Fi 7 network with MLO enabled

From client perspective, the iPhone connects using 160 MHz channel width as that is the maximum it supports.

The tri-band SSID is announced in 2.4 GHz, 5 GHz and 6 GHz bands. It is up to the client device to choose the preferred band. MLO-capable Wi-Fi 7 clients can also enable the MLO feature.

Although iPhone 16 supports MLO, the phone itself doesn’t indicate if MLO is active or not. So our only option is to monitor it from the access point’s side. This is a consumer access point and it doesn’t provide a huge amount of detail. I am hoping to retest this with a proper enterprise-grade AP when I can.

Single band at a time

From the Association Request sent by the iPhone to the access point, we can see that it advertises support for only one band at a time.

⏬ Feel free to download the Association Request Wi-Fi frame and dig deeper.

Single band MLD support

6 GHz and 2.4 GHz EMLSR MLO mode

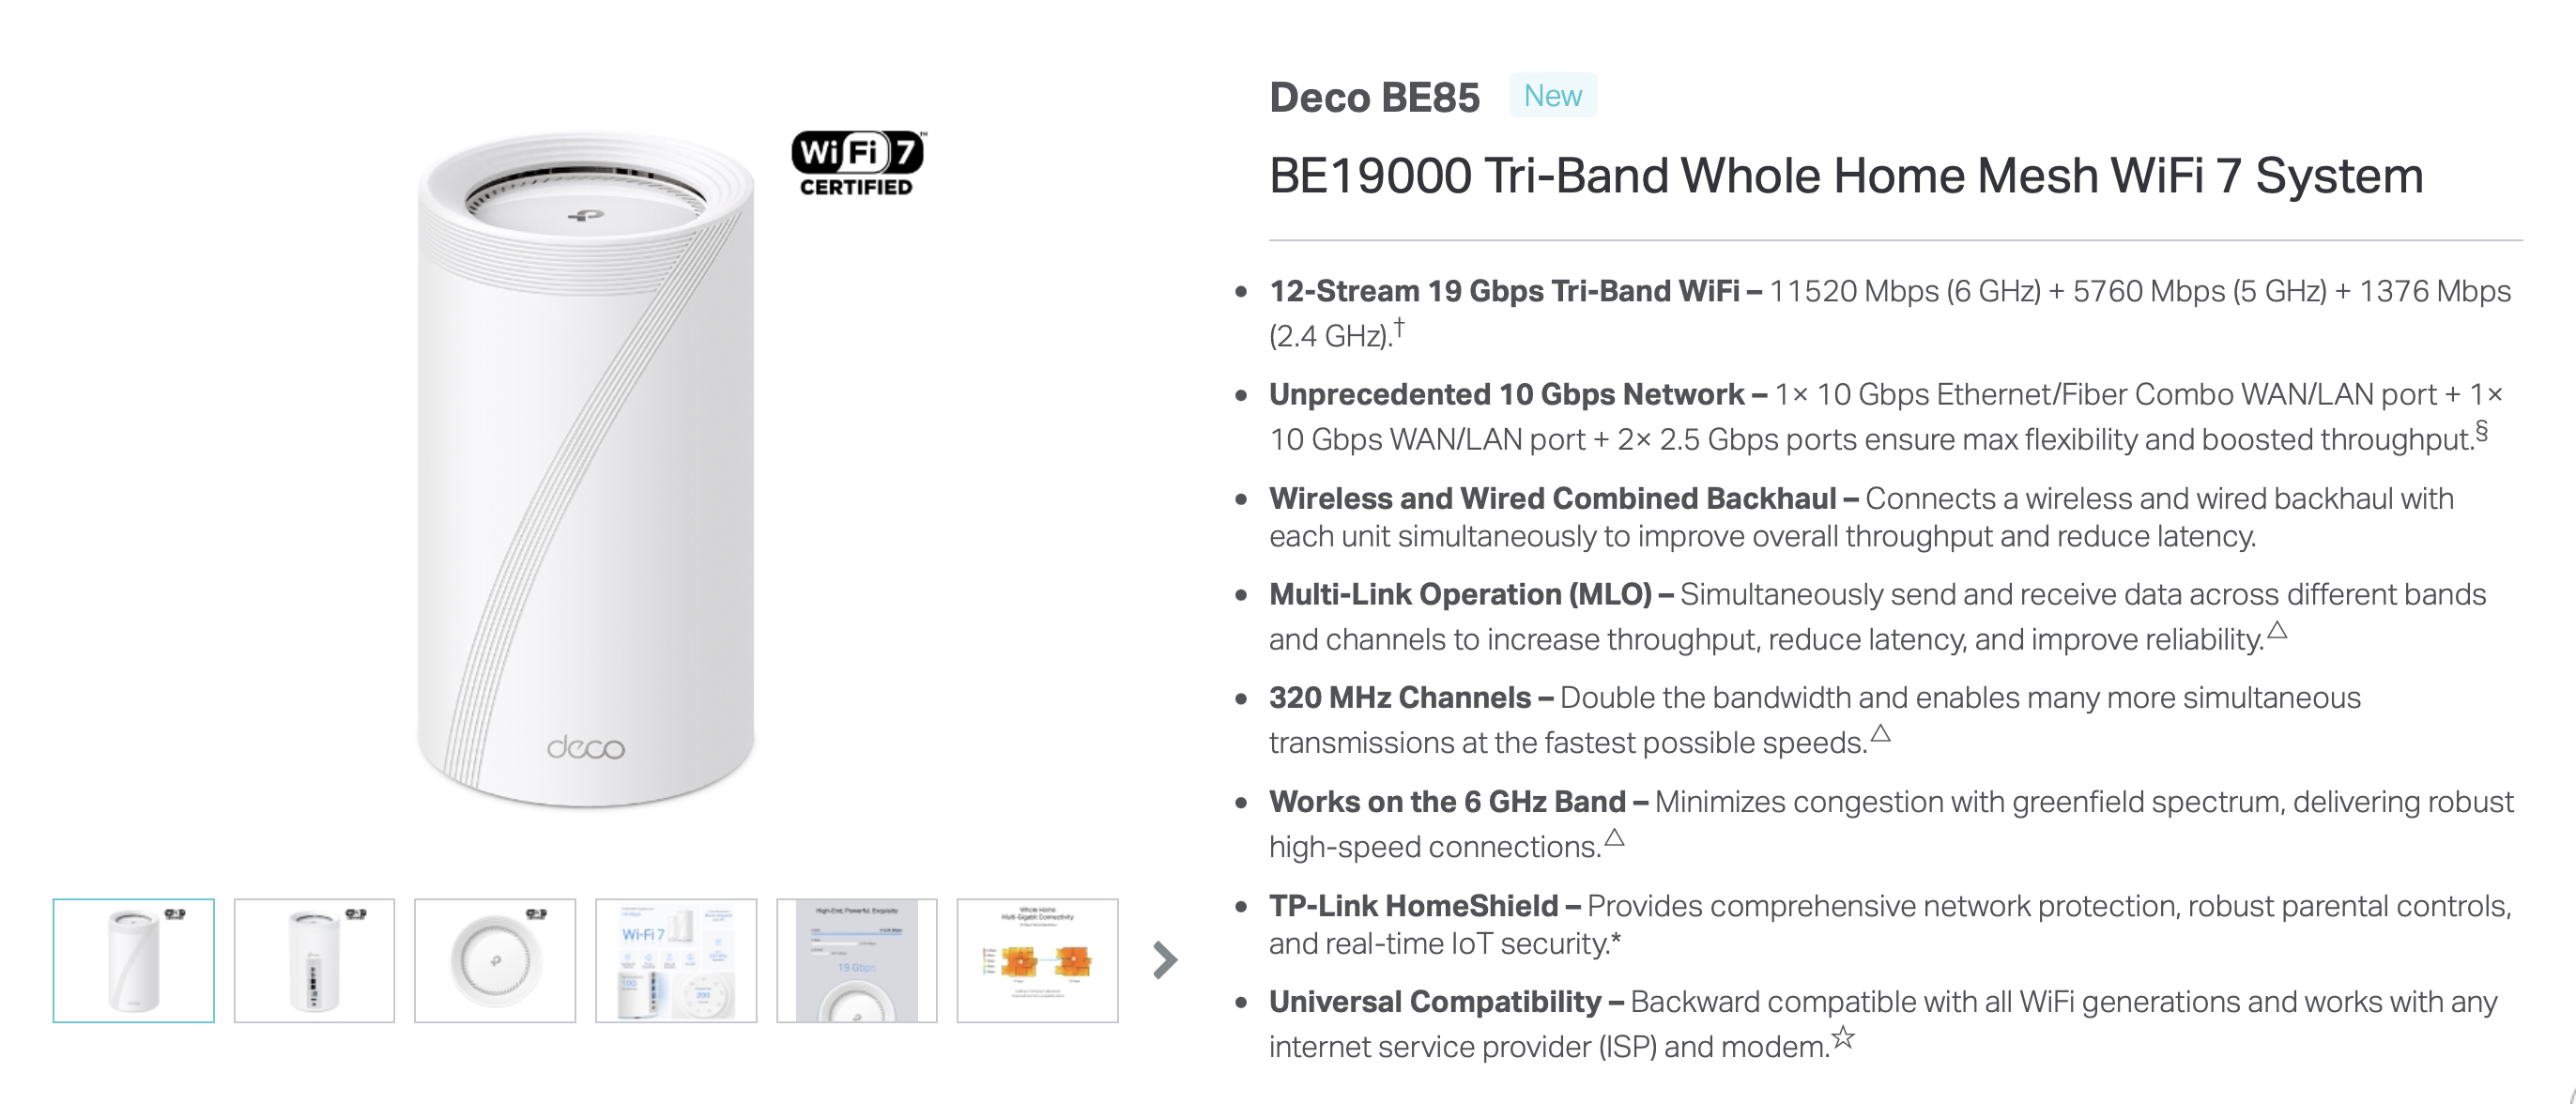
With the default settings of the TP-Link Deco BE85 Wi-Fi 7 access point in place, the iPhone establishes MLO using 2.4 GHz and 6 GHz. It actively uses 6 GHz. 2.4 GHz is there for backup purposes.

TP-Link Deco app shows MLO using 2.4 GHz and 6 GHz

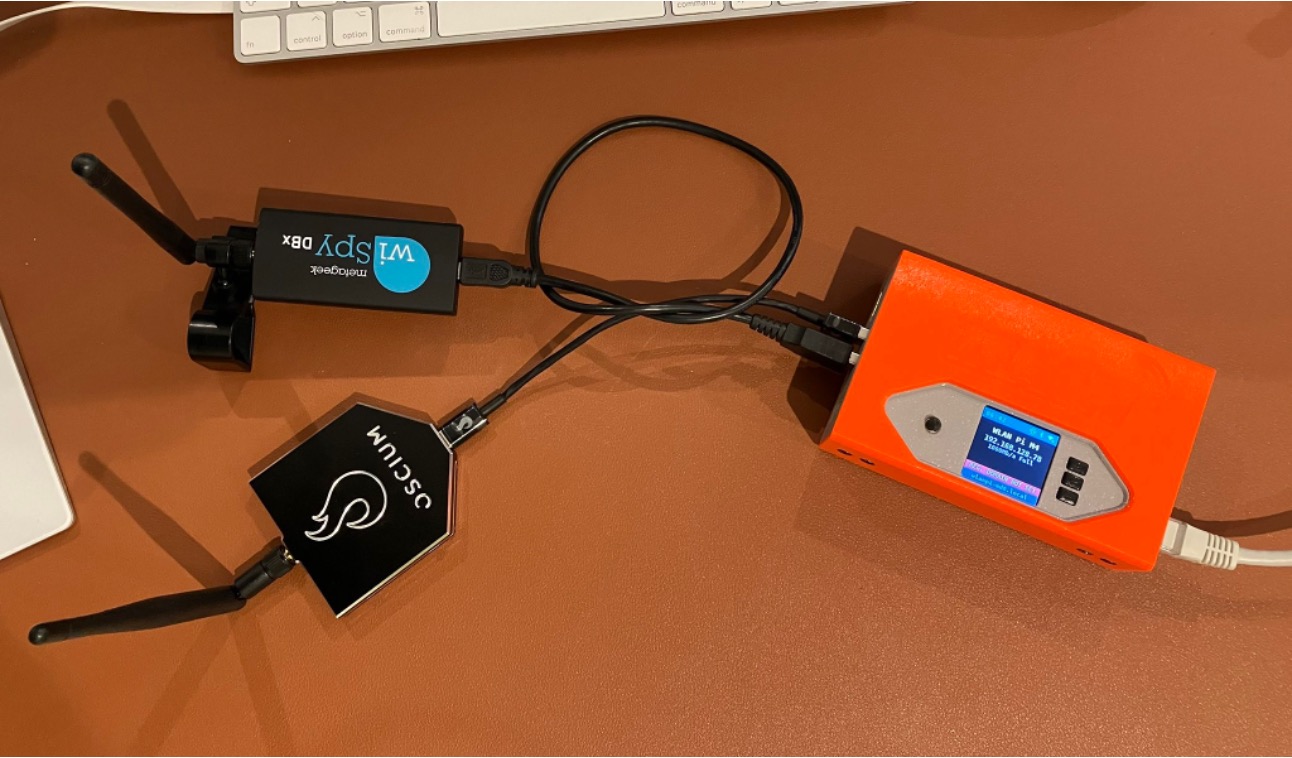
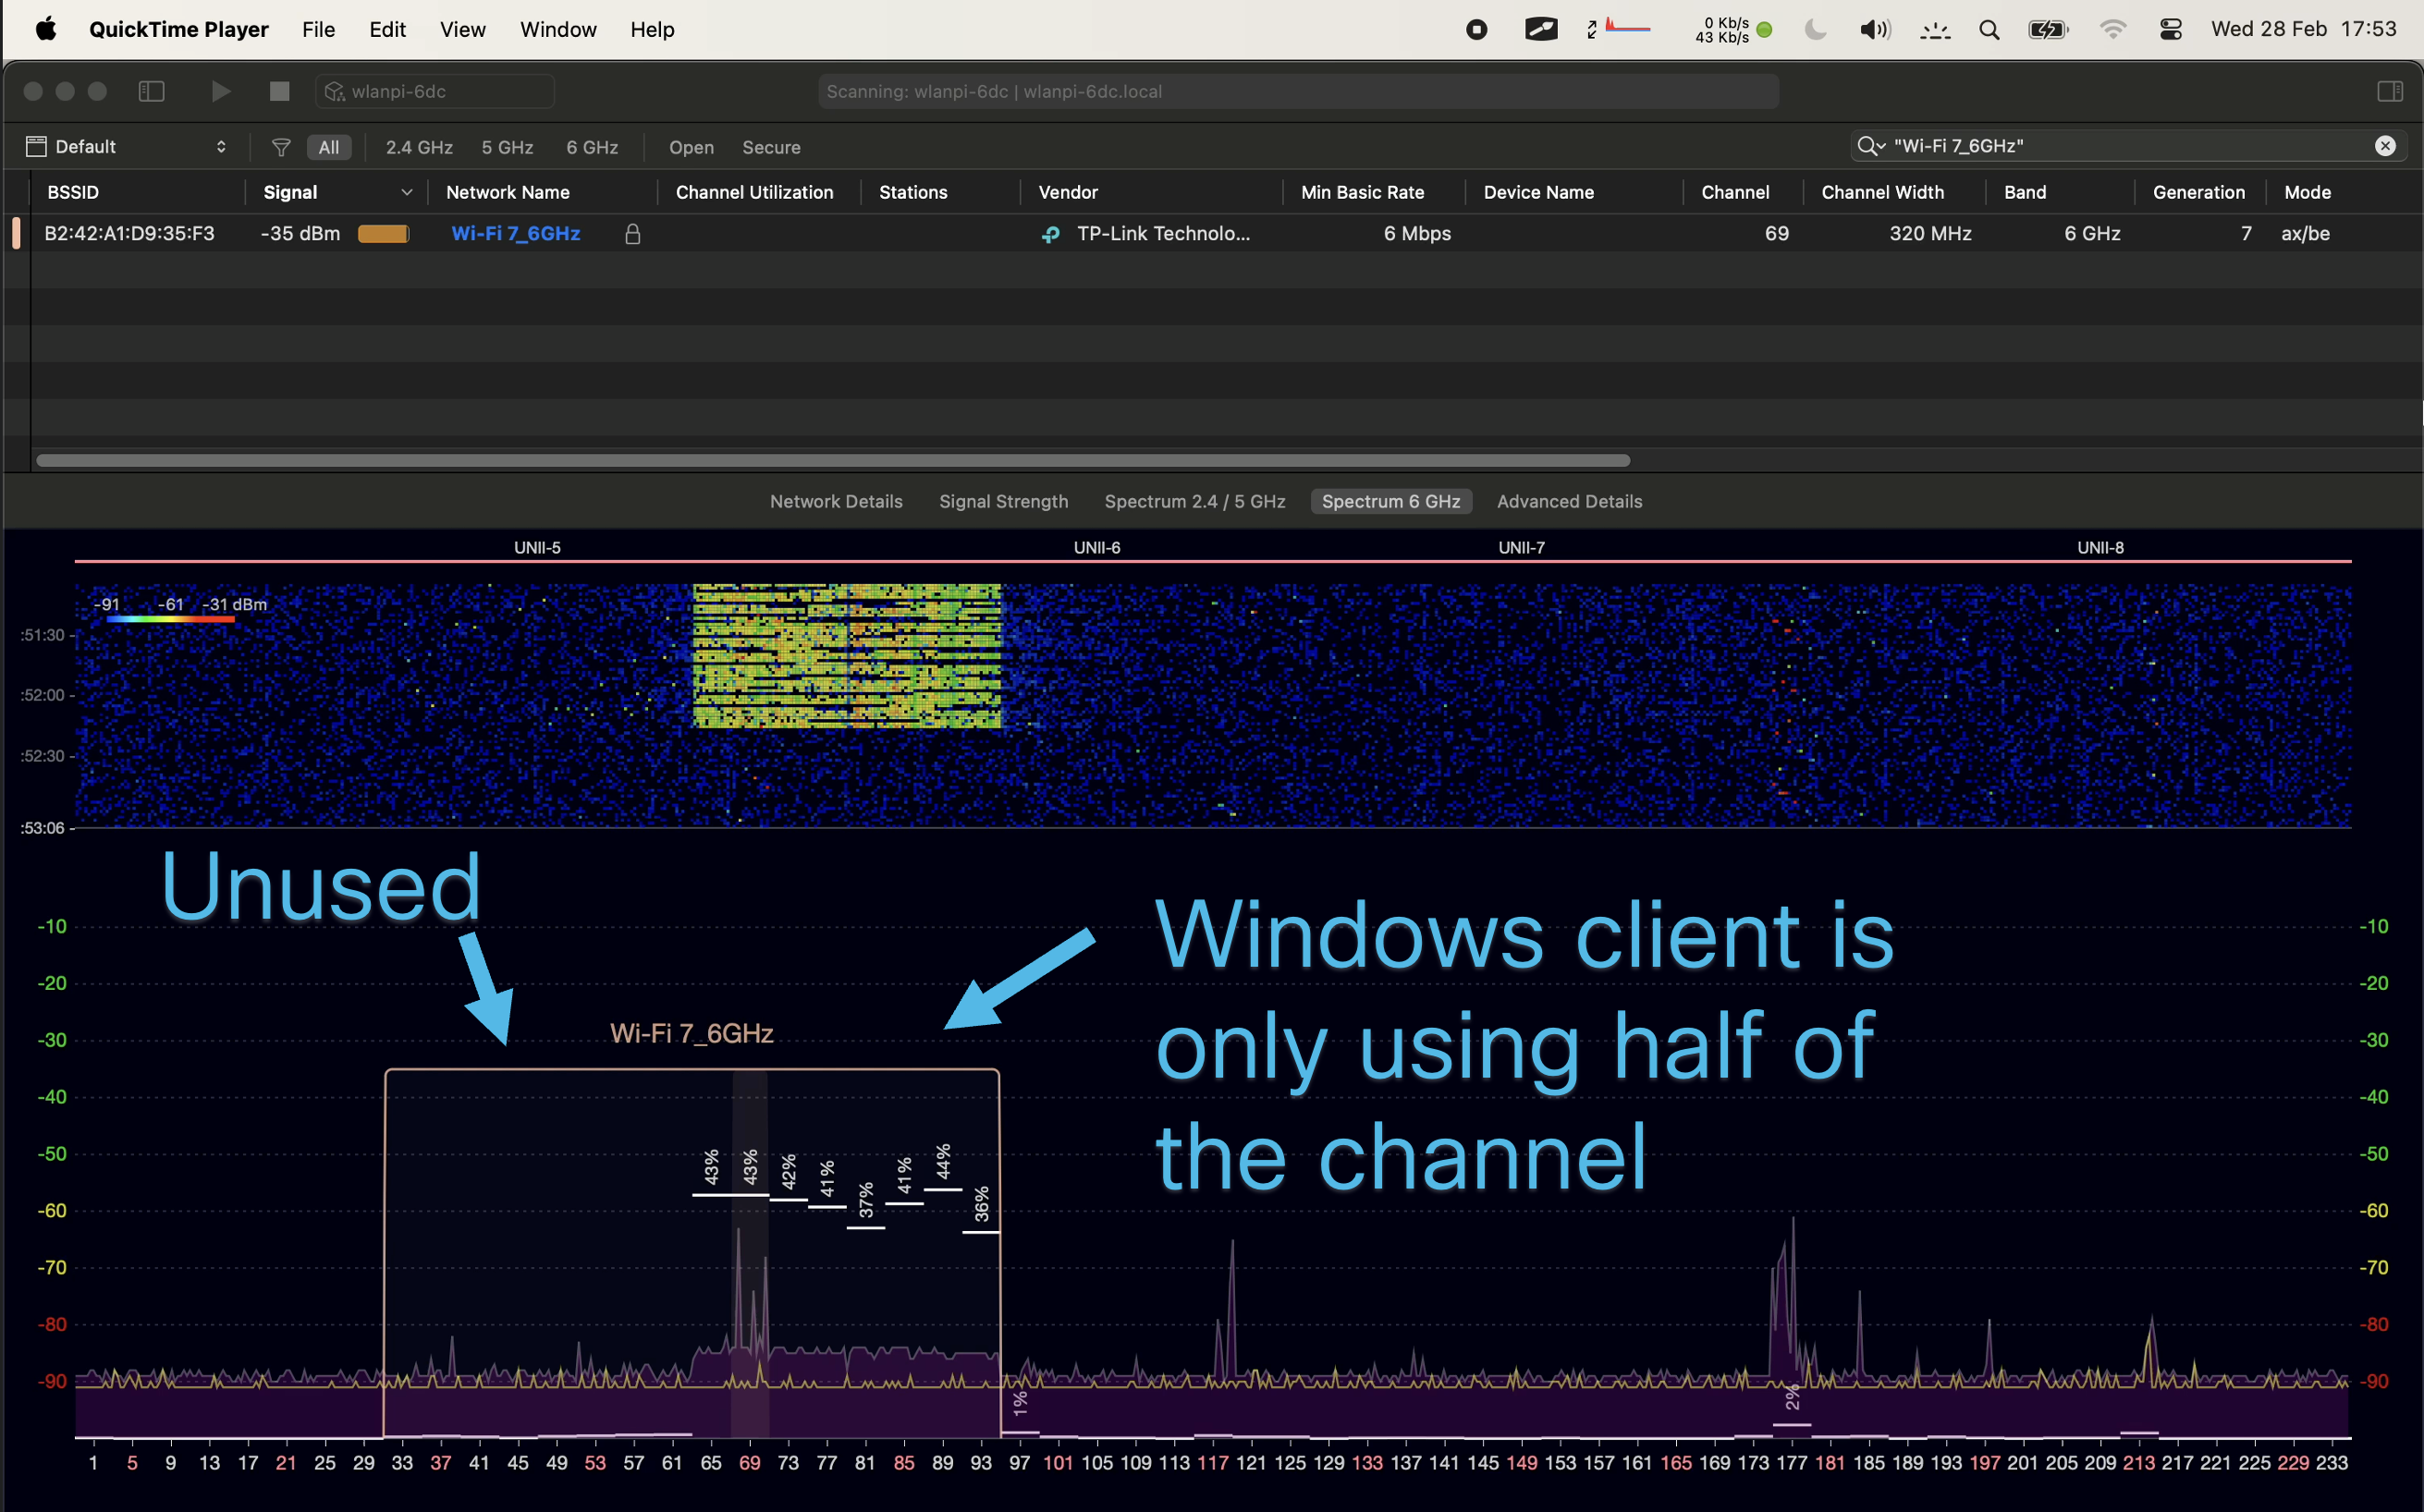
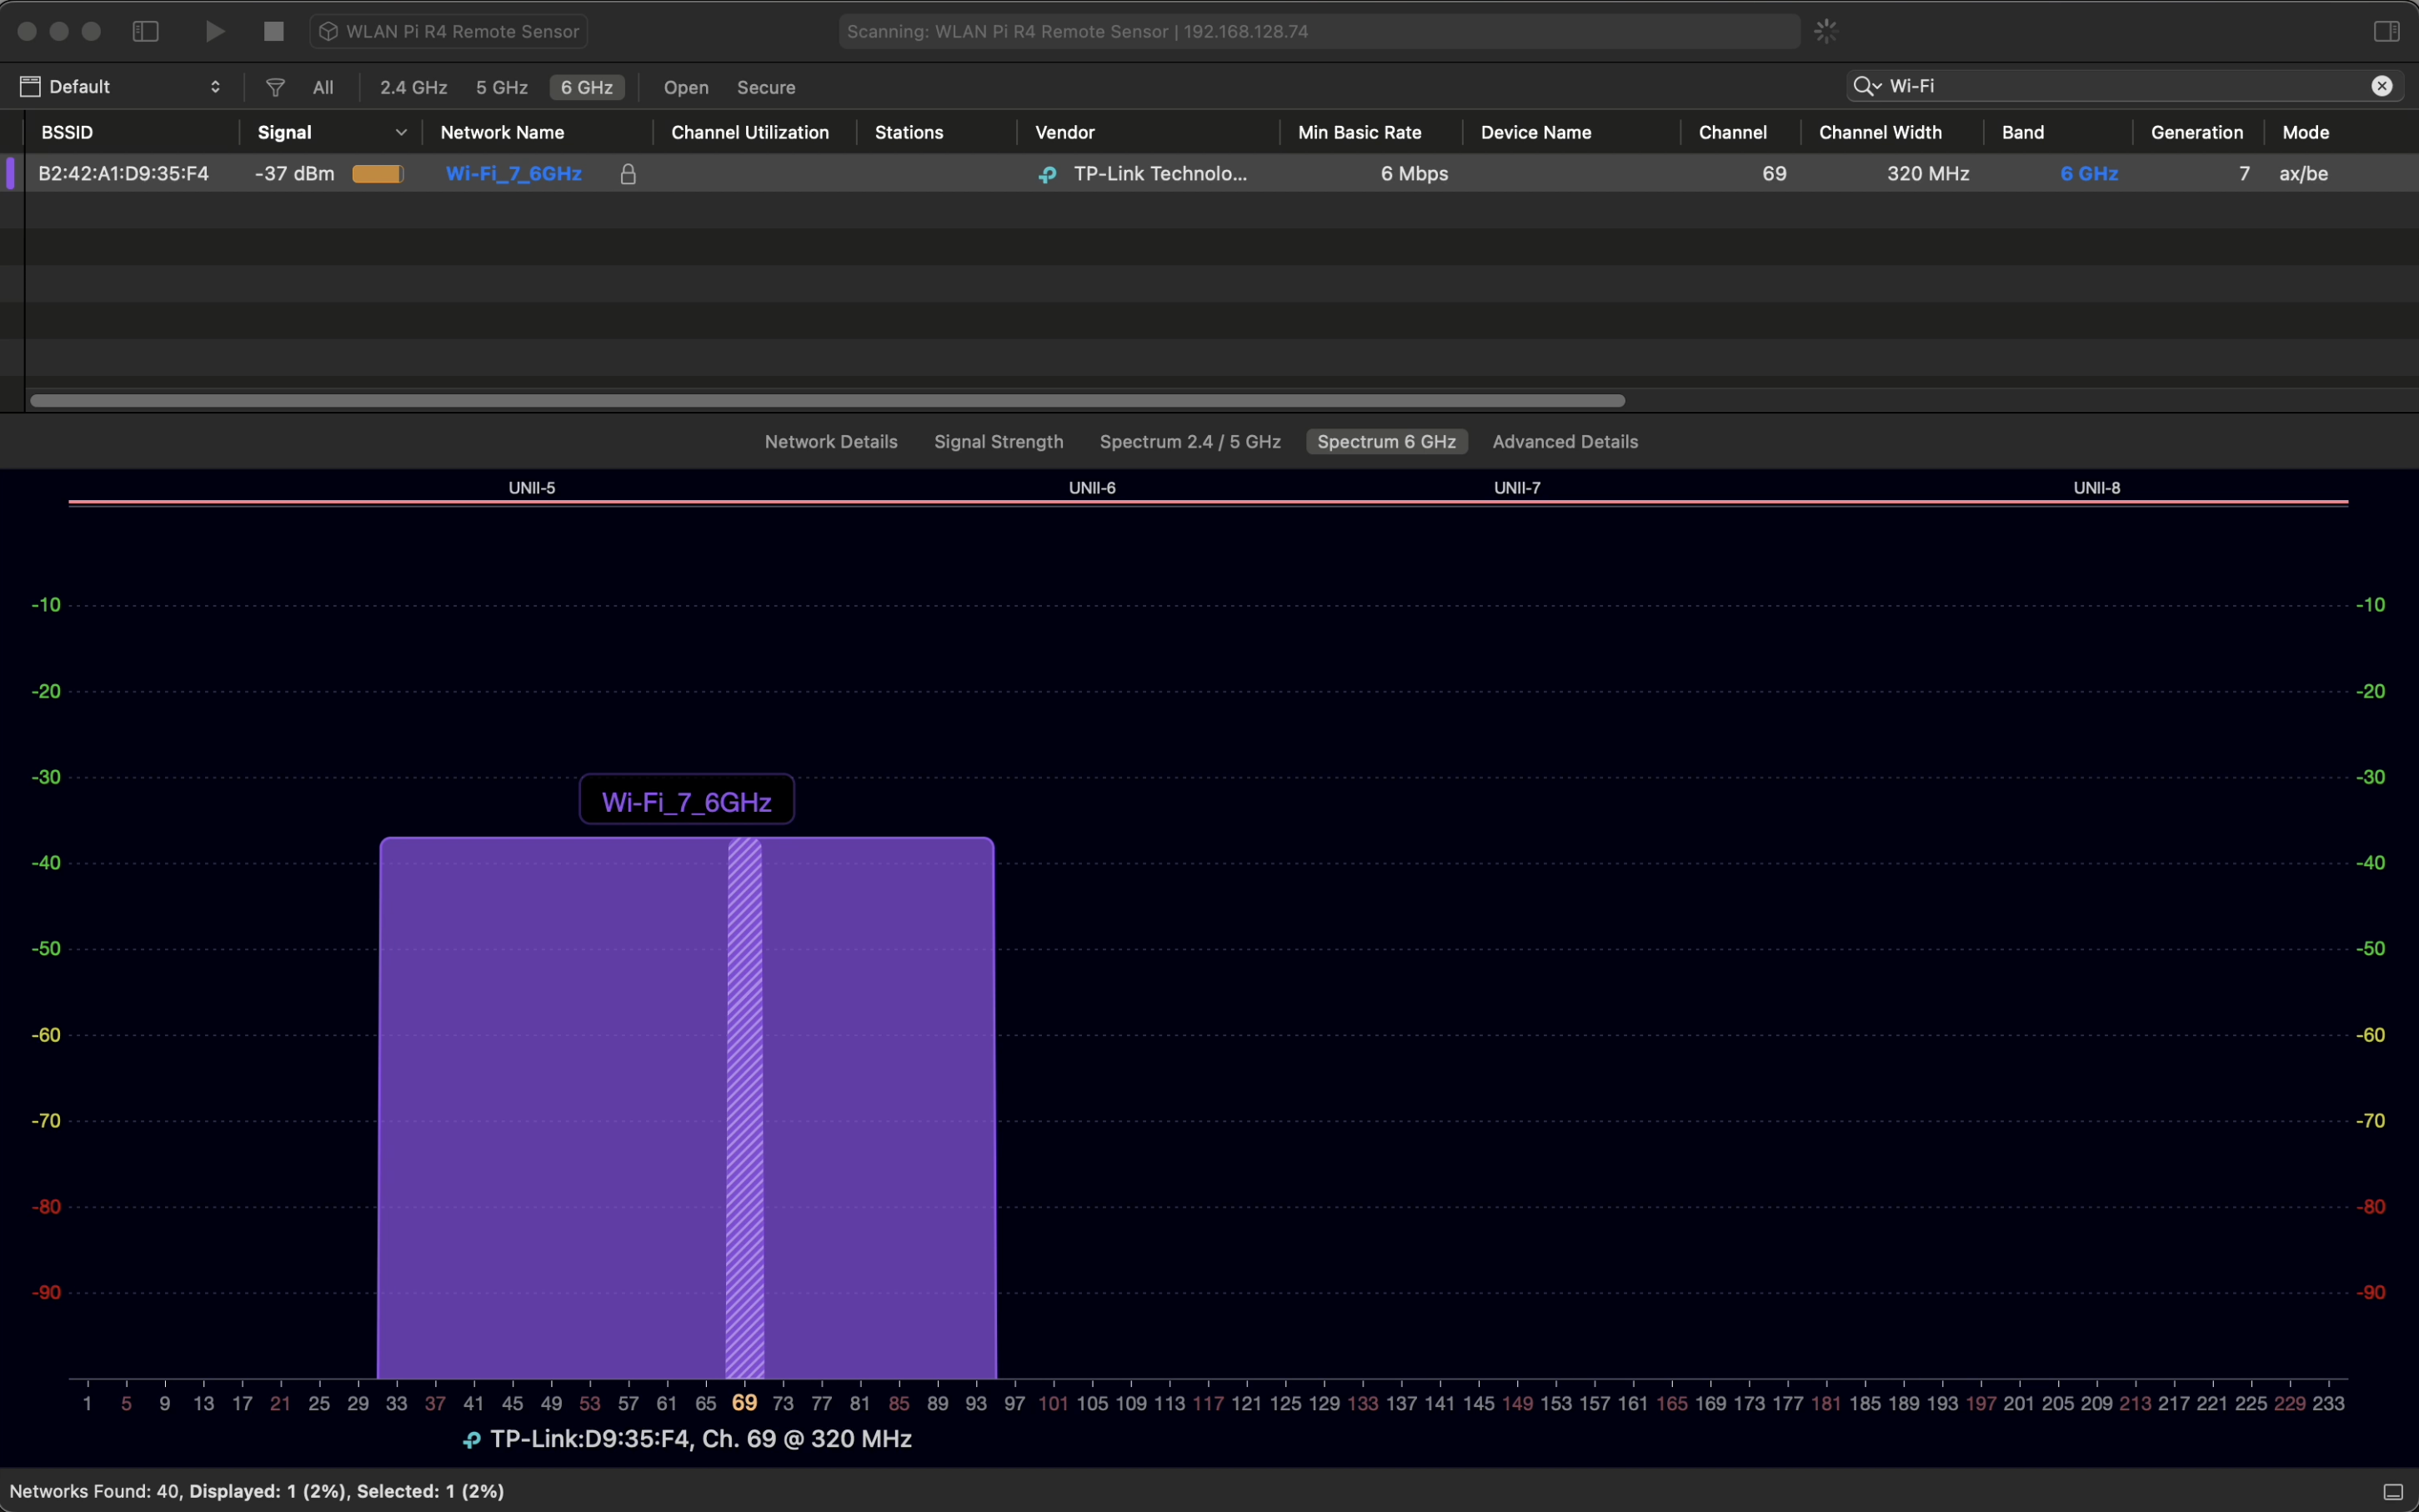
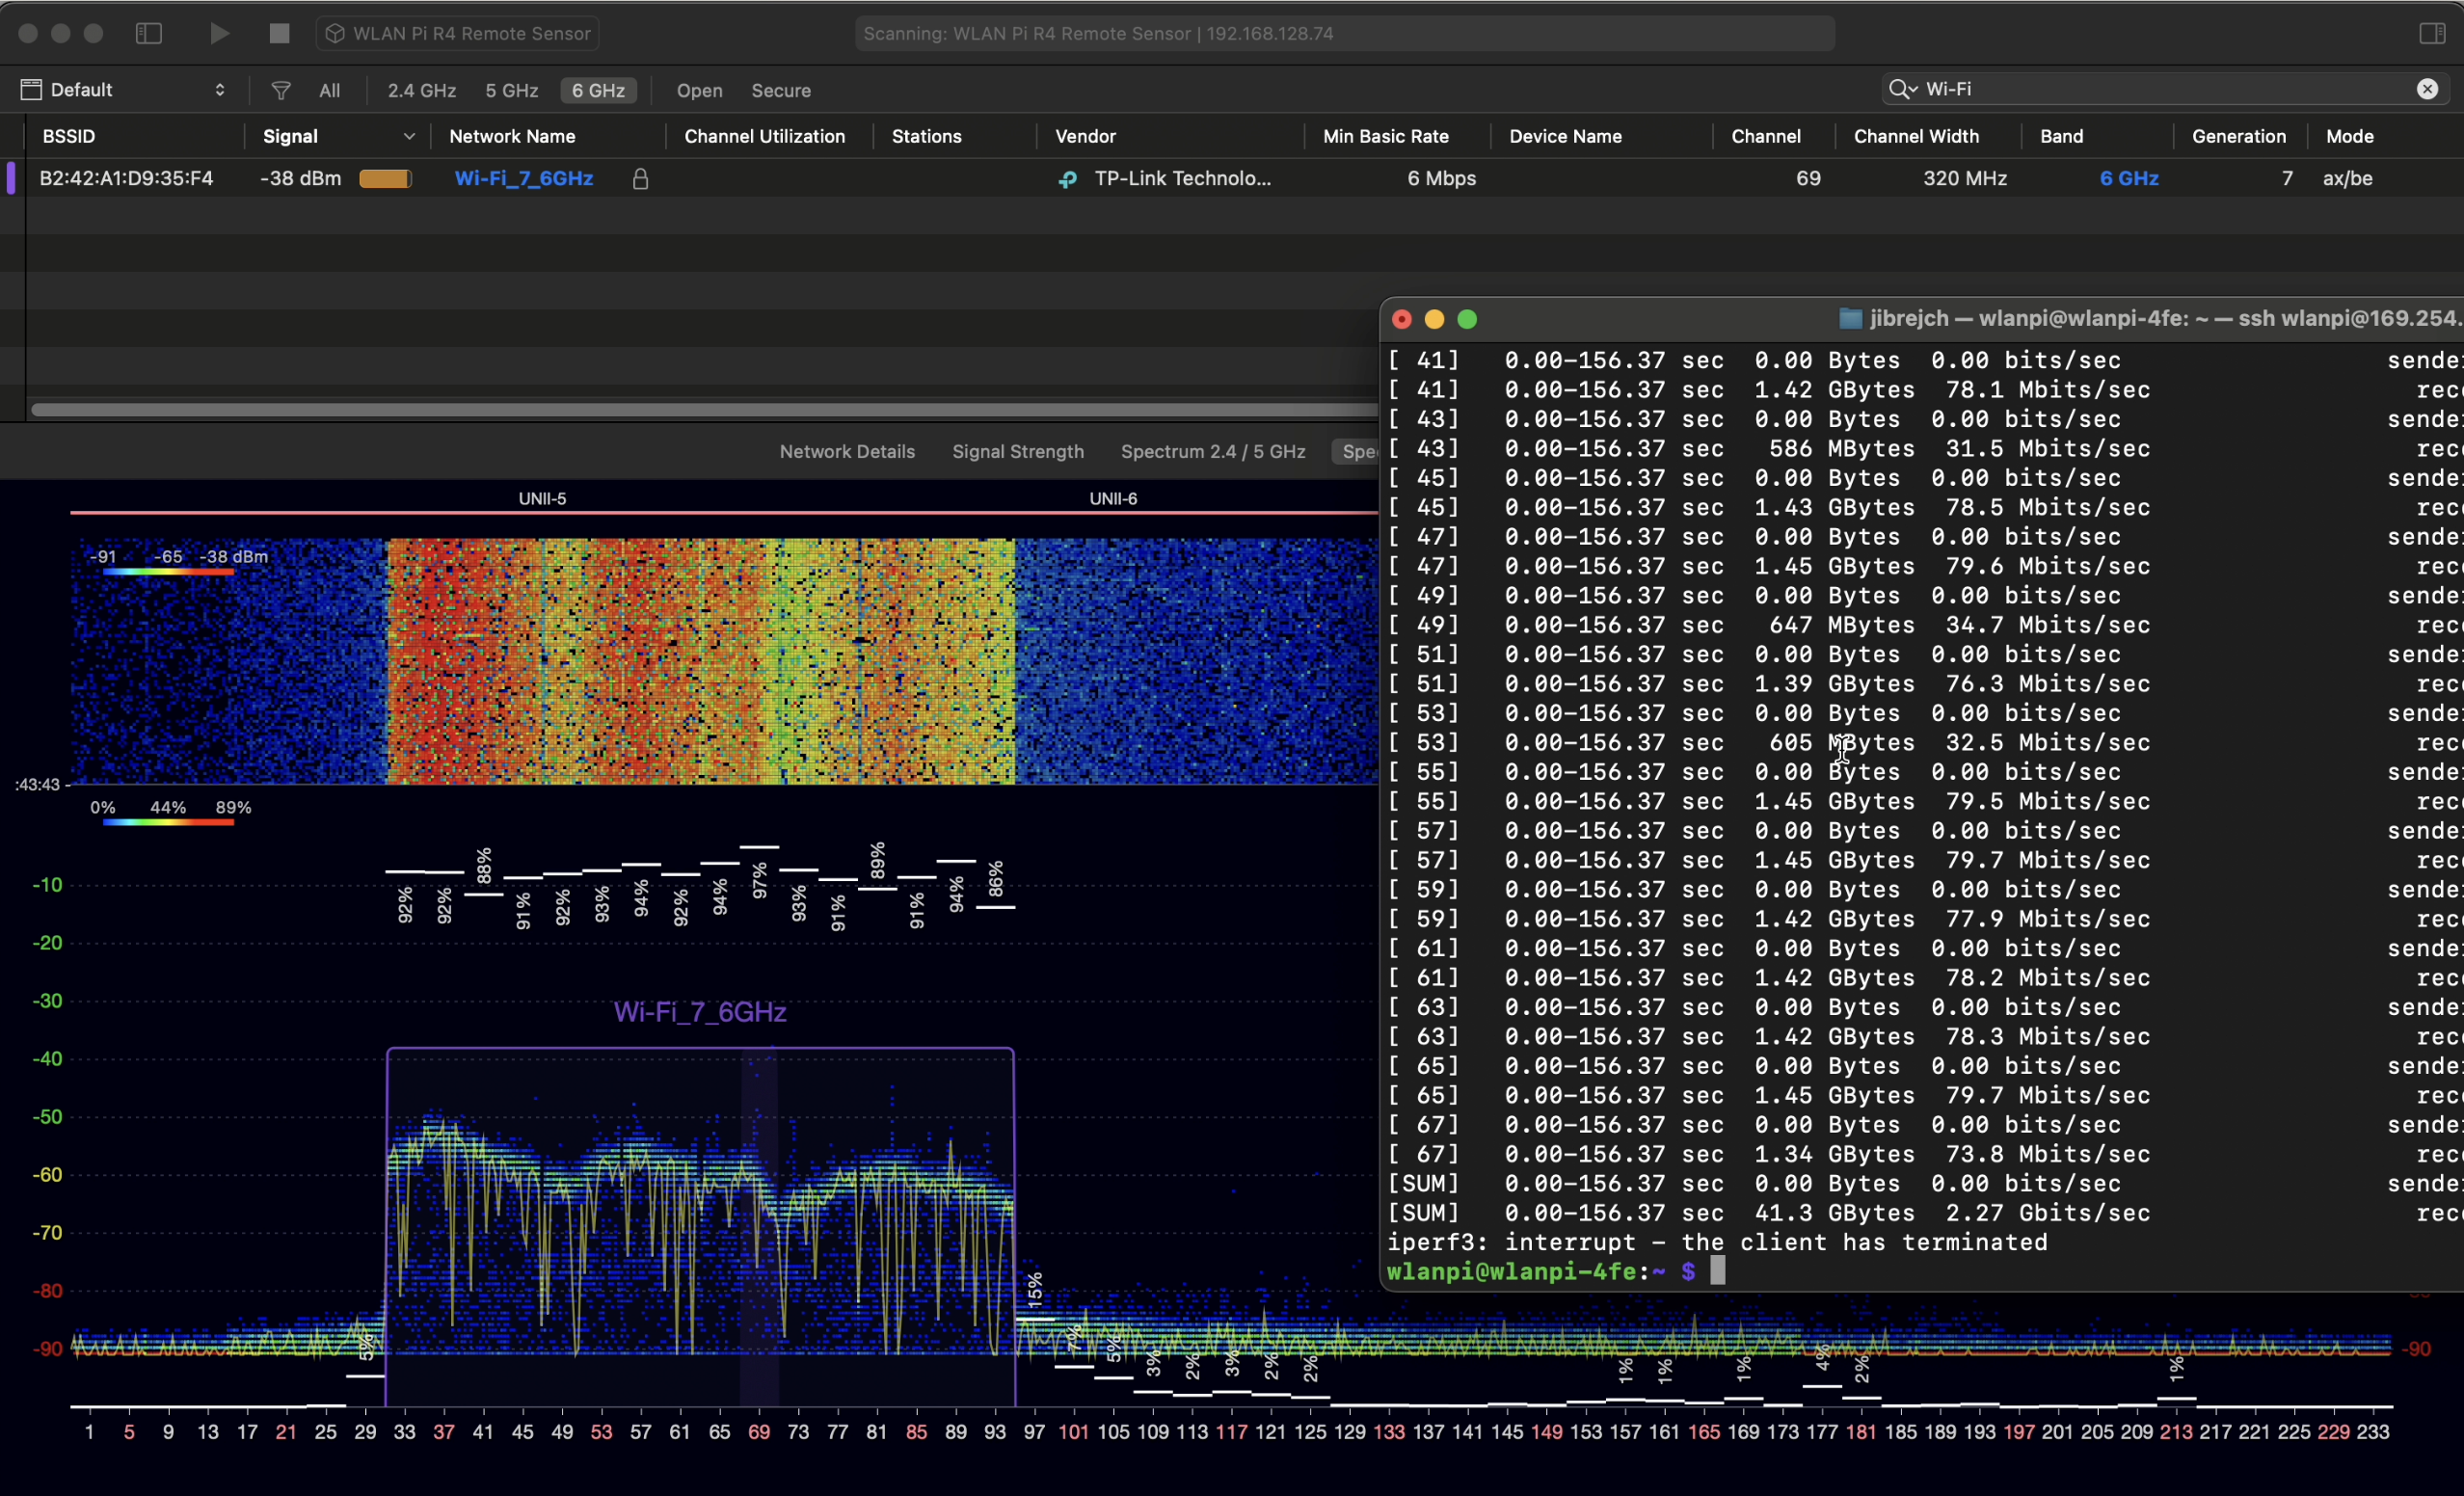
The iPhone uses its 160 MHz wide channel capability and actively pushes all data using the 6 GHz channel 69 as I am trying to demonstrate below using Oscium WiPry Clarity spectrum analyser. Check the “waterfall diagram” that shows the top 160 MHz of the 320 MHz channel being busy processing the data transmission.

MLO in action with iPhone primarily using 6 GHz band

The 2.4 GHz link just sits there in the background, unused. Using the same method, I verified that there is no spectrum utilisation whatsoever on the 2.4 GHz channel.

5 GHz and 2.4 GHz EMLSR MLO mode

When we change Preferred Wi-Fi Band setting to 5 GHz, the iPhone establishes 5 GHz active MLO link and 2.4 GHz as backup.

TP-Link Deco app

6 GHz and 5 GHz EMLSR MLO mode

Now, how do we force MLO using the two modern bands? For the purposes of the demo, I simply disable 2.4 GHz radio on the access point.

Disable 2.4 GHz using TP-Link Deco app

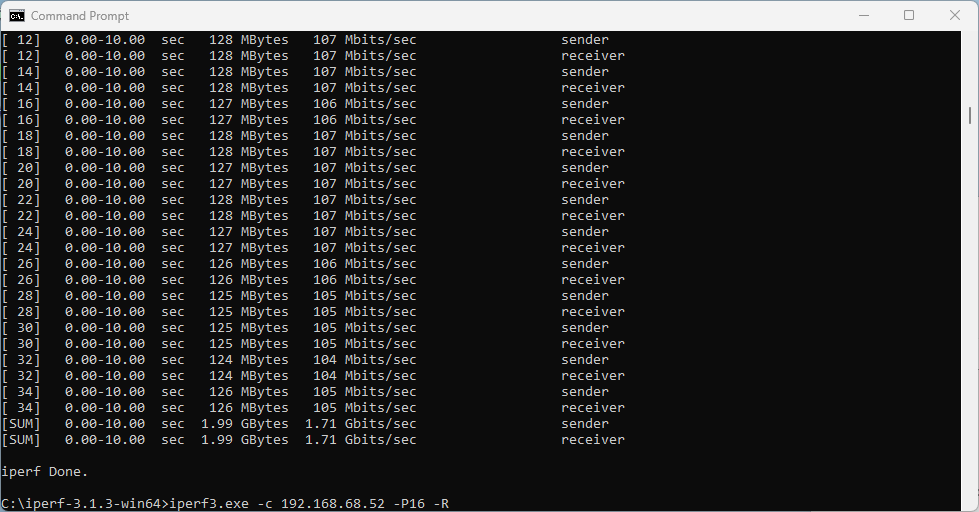
The phone establishes 6 GHz active data connection and uses the 5 GHz band as a backup. How can I be so sure? I watched the spectrum and generated nearly 900 Mbps of data over the wireless link. While the 6 GHz channel shows high utilisation, the 5 GHz channel shows no signs of use.

TP-Link Deco app shows 6 GHz and 5 GHz MLO

On the iPhone, we see active channels 69 in the 6 GHz band. That matches what I’ve just seen using the spectrum analyser.

Active 6 GHz channel 69 using max iPhone 16 channel width 160 MHz

How to trigger MLO band change?

Now, I connect the iPhone using 5 GHz channel. I am going to saturate the channel with other client’s traffic. My hope is that high channel utilisation makes the iPhone stop using the 5 GHz channel and switch to the backup 2.4 GHz channel.

And the result? It correctly detected and reported high channel utilisation, but the MLO band change did not happen.

High channel utilisation

So channel utilisation on its own did not do the trick for me. Perhaps the algorithm penalises and tries to avoid the 2.4 GHz band which is typically in a much worse condition than 5 GHz? Or high channel utilisation must persist for a longer period of time? Time will tell.

What Wi-Fi 7 chip does iPhone 16 use?

As we have learned previously, iPhone 16 supports channel width up to 160 MHz and indeed supports all three 2.4 GHz, 5 GHz and 6 GHz Wi-Fi bands.

iPhone 16

What chipset does it use? To find out we are going to enable Personal Hotspot on the iPhone and see what information we can get from the information elements it broadcasts in its beacons.

As we can see here, iPhone 16 uses Broadcom Wi-Fi 7 chip. That’s about the level of detail we can capture from the beacon frames it sends.

Broadcom chip

Continue reading

Does the iPhone 16 support Multi-Link Operation? Check this blog post.