Officially, vWLC is not supported on Type-2 hosted hypervisors like Fusion or Workstation. However, if you need to build a non-production lab, portable demo or practice for your next exam, technically you can run vWLC in VMware Fusion.
The trick is to install Fusion on your Mac, create a new VM with the free ESXi Hypervisor (or the full-blown one if you have licenses) and deploy vWLC onto the ESXi:
macOS <-> VMware Fusion <-> ESXi Hypervisor running as a VM <-> vWLC VM
It may sound complex, but is actually quite easy to do and runs like a charm even on a 13″ Intel i5 MacBook Pro.
- Download the vWLC OVA image from Cisco.com.
- Download VMware vSphere Hypervisor 6.7 ISO. Register on their website to get a free license key.
- Download the ovftool 4.3.0 (older versions may not work correctly) for Windows and make sure you have a Windows machine or VM by hand as ovftool only runs on Windows.
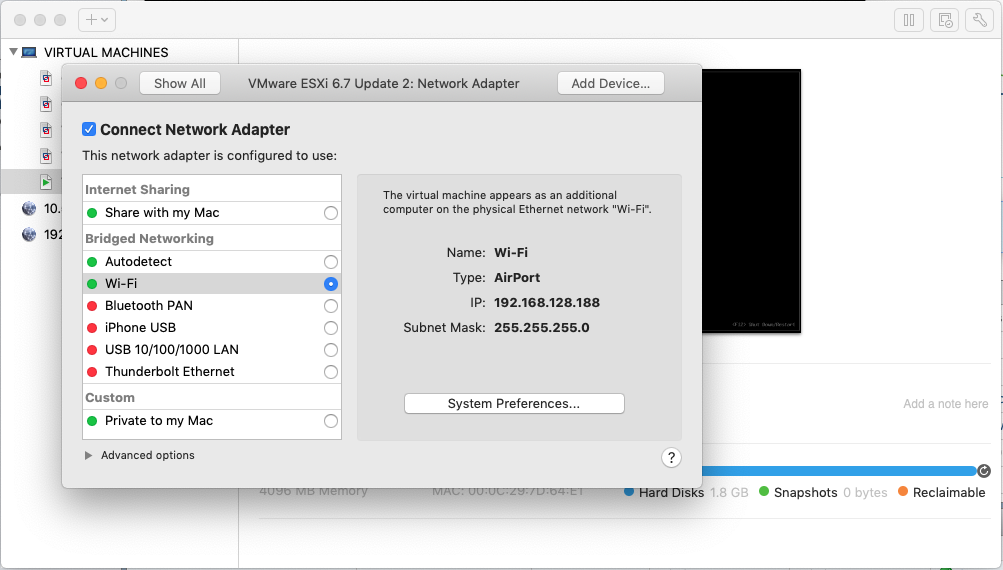
- Create a new VM in VMware Fusion, mount the Hypervisor ISO and install ESXi. Configure networking for this VM as Bridged Networking to Wi-Fi or Ethernet. Wi-Fi is a great option as it allows you to move freely with your Mac whilst running the vWLC.

- With the free ESXi Hypervisor, we have to deploy the vWLC OVA using the ovftool. This will help us get past the errors we would have otherwise ran into the ESXi web GUI. To do this we need a Windows machine.
- Install the ovftool in the Windows machine, transfer the vWLC OVA archive to it and deploy the OVA onto ESXi:
C:\Program Files\VMware\VMware OVF Tool>ovftool.exe –skipManifestCheck –acceptAllEulas –noSSLVerify –noSSLVerify=true -ds=”datastore1″ –net:”VM Network”=”VM Network” –net:”VM Network 2″=”VM Network” C:\Users\Jiri\Desktop\AIR_CTVM-K9_8_5_151_0.ova vi://192.168.196.136
The IP address in this string “vi://192.168.196.136” is our ESXi address. You may have noticed that I am using the same network for both Service Port and Management interfaces. After I deploy the OVA, I usually disable the Service Port adapter in the VM settings and use Management interface for management and for APs to join. It just keeps things simple and we don’t need to worry about multiple adapters and subnets.
- You can set the vWLC VM to Autostart and start it manually now.
- Open Console to it and press any key to activate the console access.
- Follow the installation guide.
- If you are running the evaluation license, accept the EULA. If you purchased AP licenses, add then to the controller and accept the EULA.
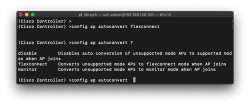
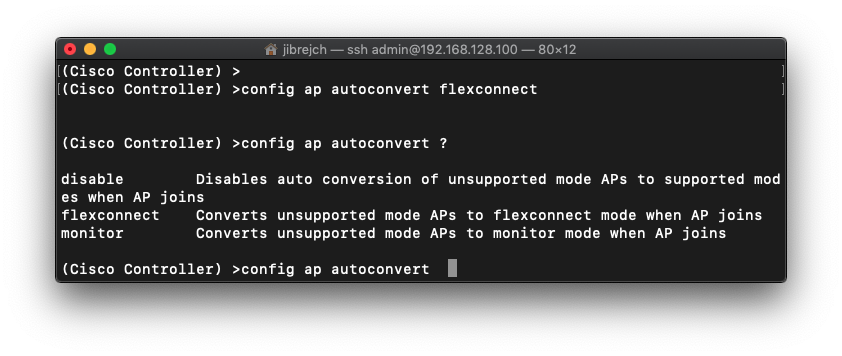
- Since vWLC only supports Flexconnect mode APs, make sure to convert your APs manually or apply this CLI command:
config ap autoconvert flexconnect
- Finally connect your AP to a PoE capable switch or power injector and it should be able to discover and join the virtual controller.
Note: If you installed vWLC VM directly onto Fusion with no ESXi Hypervisor layer, the controller would not be able to communicate on its Management interface.
Catalyst 9800-CL IOS-XE controller
The above scenario covers the AireOS vWLC. Cisco now has a complete range of Catalyst 9800 series controllers with feature parity between them. The new virtual controller is called Catalyst 9800-CL and it brings all the great IOS-XE features, HA SSO, programmability, hot patching and supports all AP modes.
Francois and Rowell published great step by step instructions on how to install C9800-CL onto ESXi and Fusion.