OWC Thunderbolt 3 to 10 Gbps Ethernet Adapter – The Fastest Multigigabit Adapter For Your Mac

When it comes to the fastest copper Ethernet adapter for your Mac, you have only 2 options:

  • If your other half approves, get yourself an M1 Mac Mini with built-in 10 GbE port. It doesn’t get much better than this.
  • Or you can consider an add-on 10 Gigabit Ethernet Thunderbolt 3 adapter for your current Mac.

We will focus on the latter today.

Thunderbolt 3, not USB

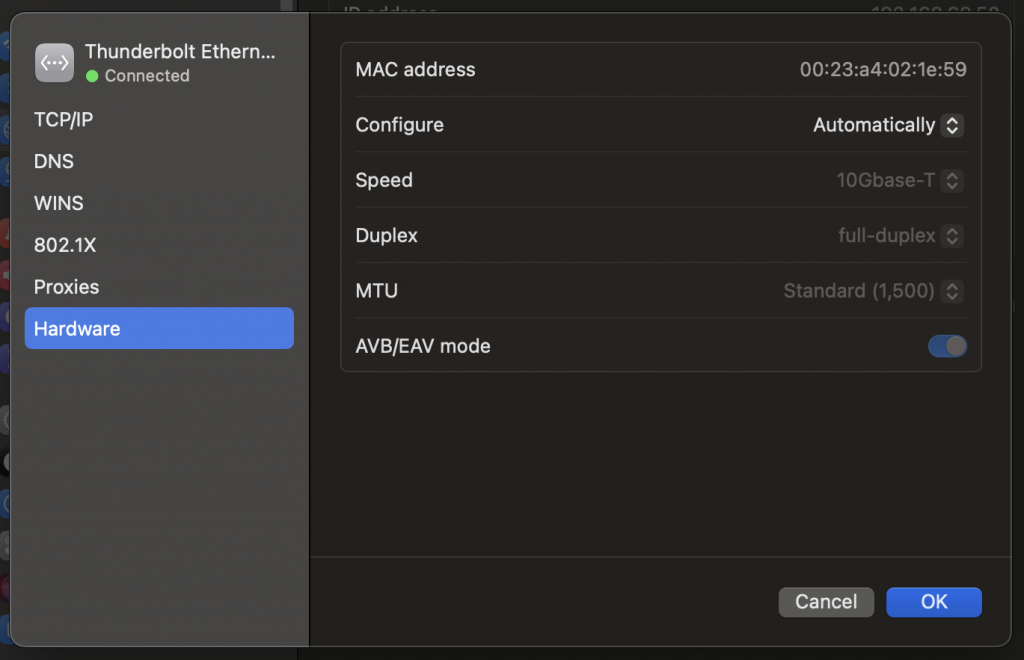
While the USB-C connector might temp you to connect these adapters to a standard USB port, these adapters don’t support USB protocol. They use Thunderbolt 3 and they happen to use the same USB-C connector as USB. That’s the only thing USB and Thunderbolt have in common. Before you order one of these adapters, double-check that your computer supports Thunderbolt 3. That should be most new MacBooks, Mac Minis, Intel NUCs and similar platforms.

Which 10 GbE adapter shall I buy?

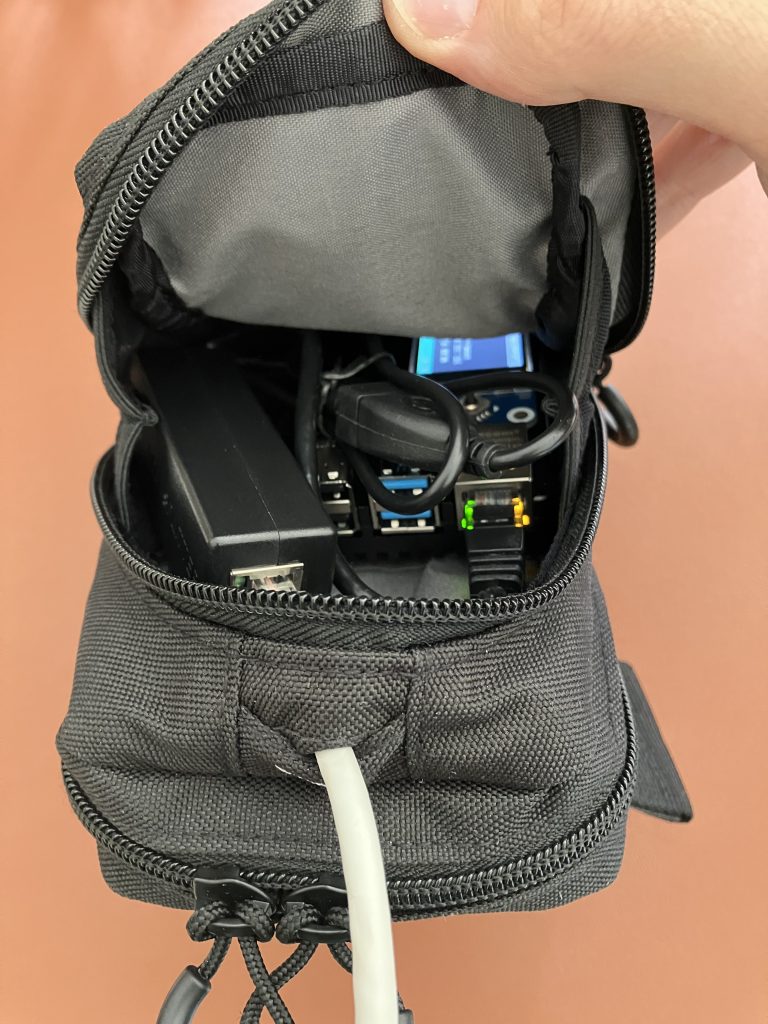
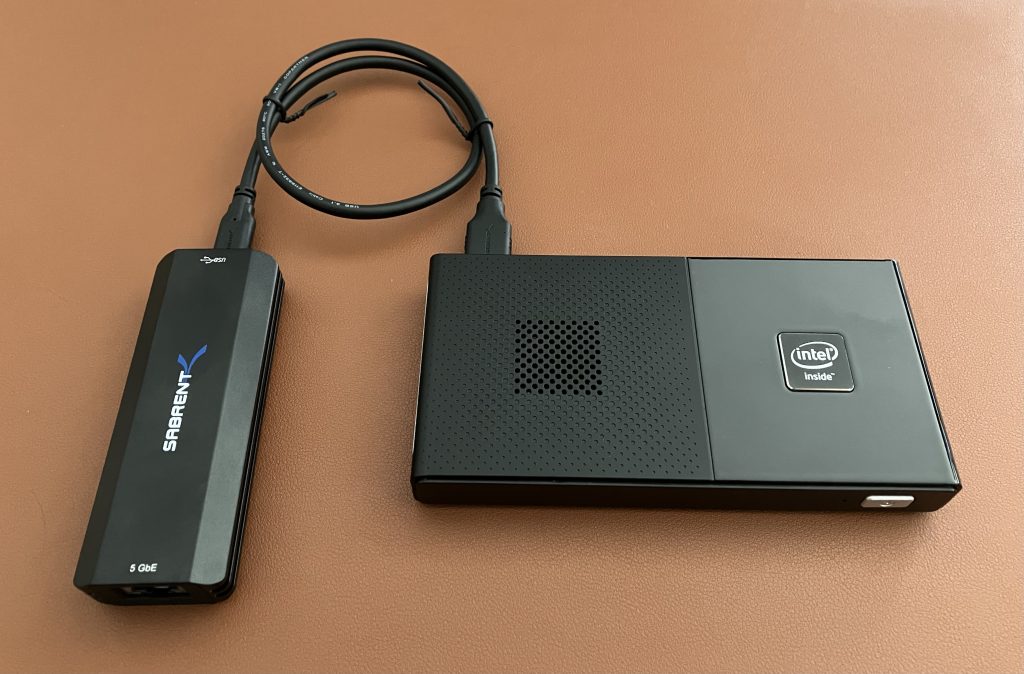
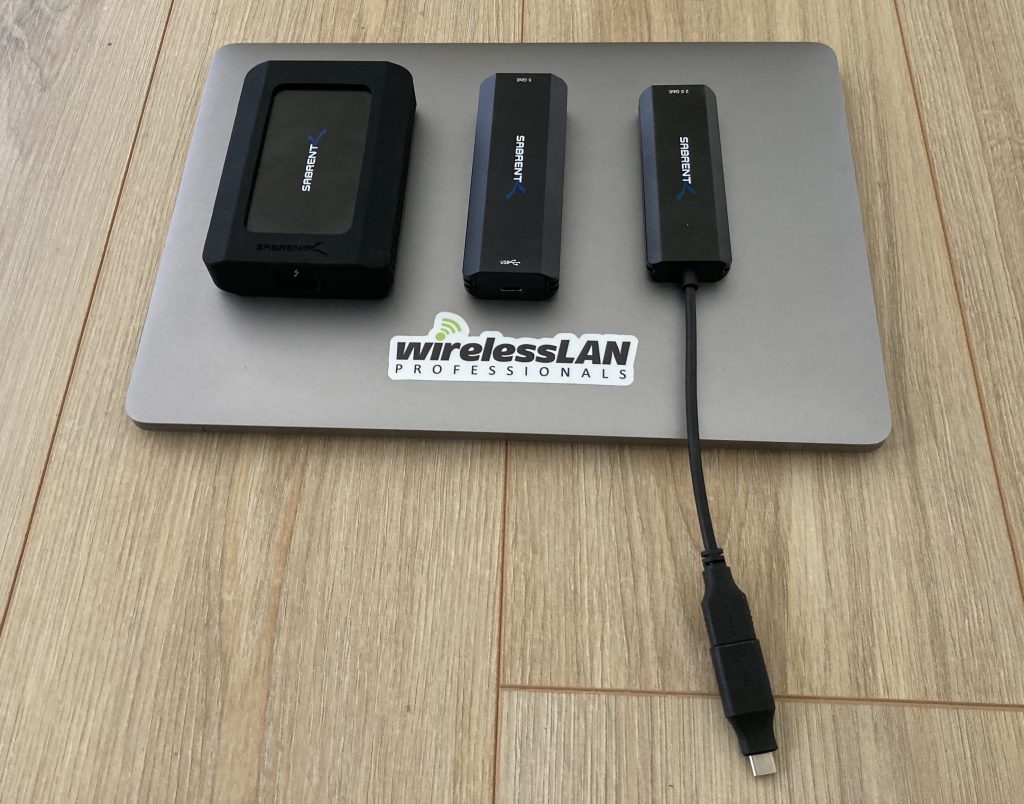
I tested two of these Thunderbolt 10 GbE adapters. One made by Sabrent, and the other by OWC. They both look alike, both perform very well, both get quite warm, and both work out of the box on macOS. Yes, no driver installation required on your part on macOS! 🎉

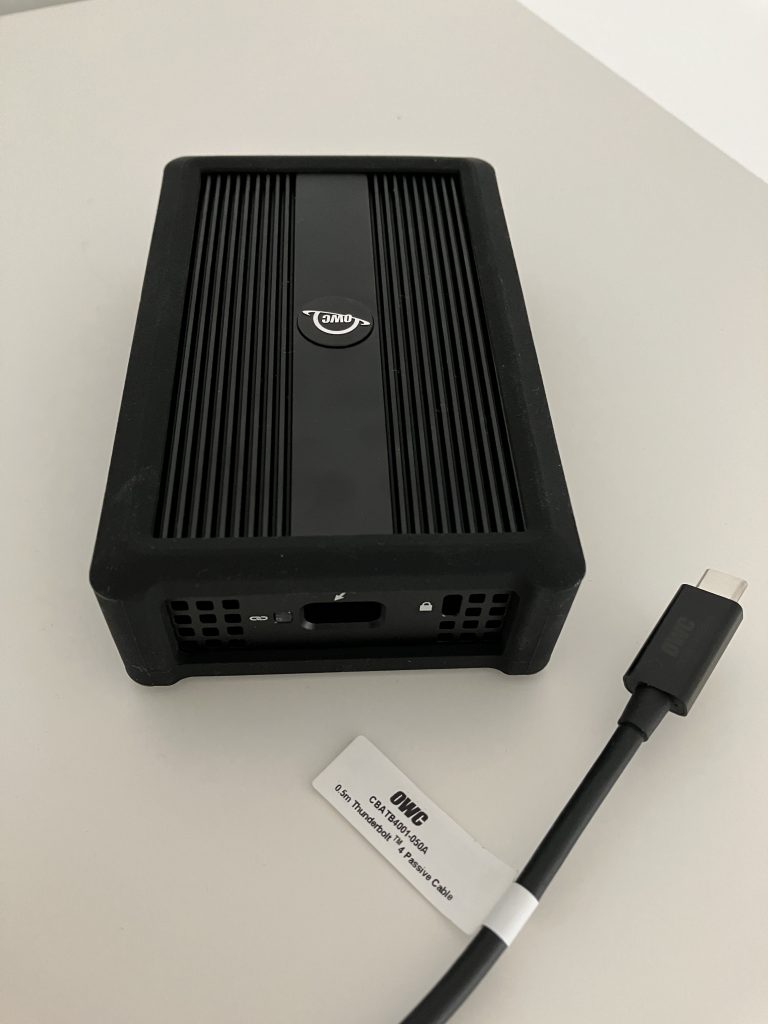
Mainly because of the loose Sabrent cable issue explained below, I recommend the OWC adapter. It comes with great documentation, and even the Thunderbolt cable itself is thicker, feels premium, and most likely delivers better shielding.

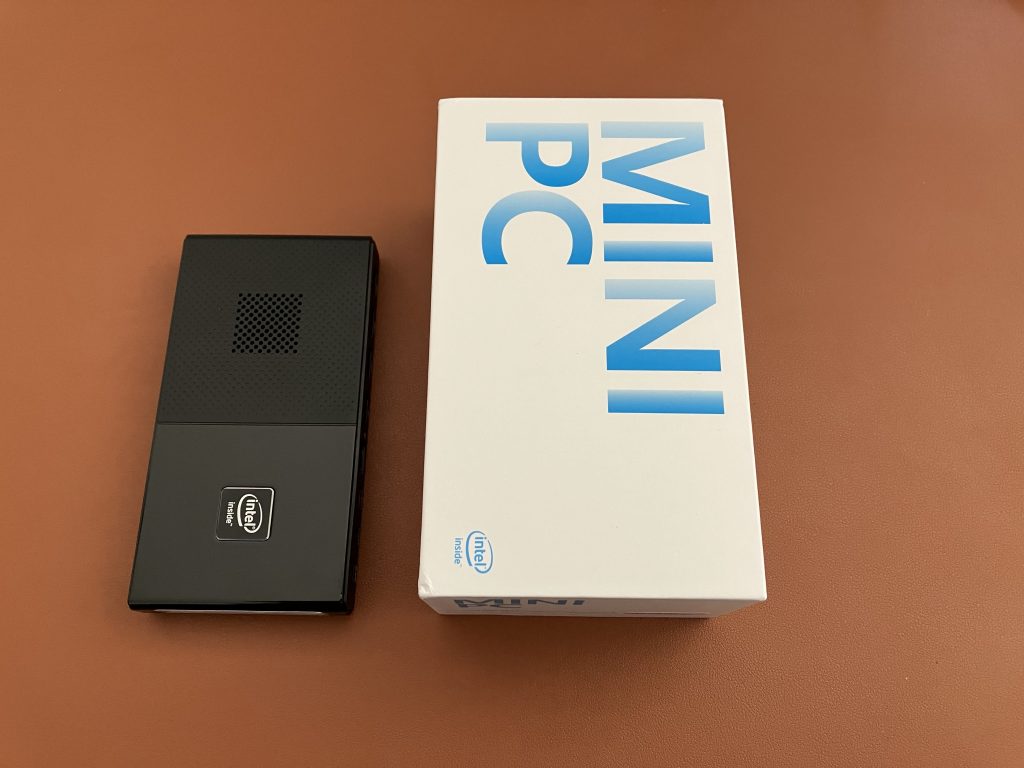
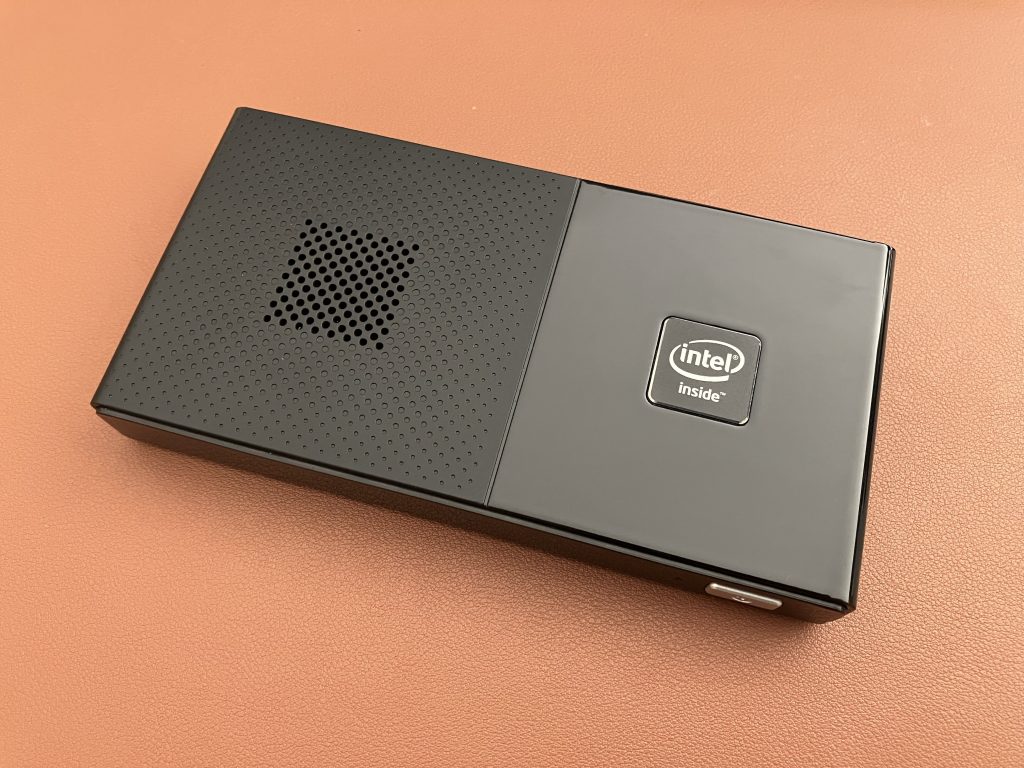
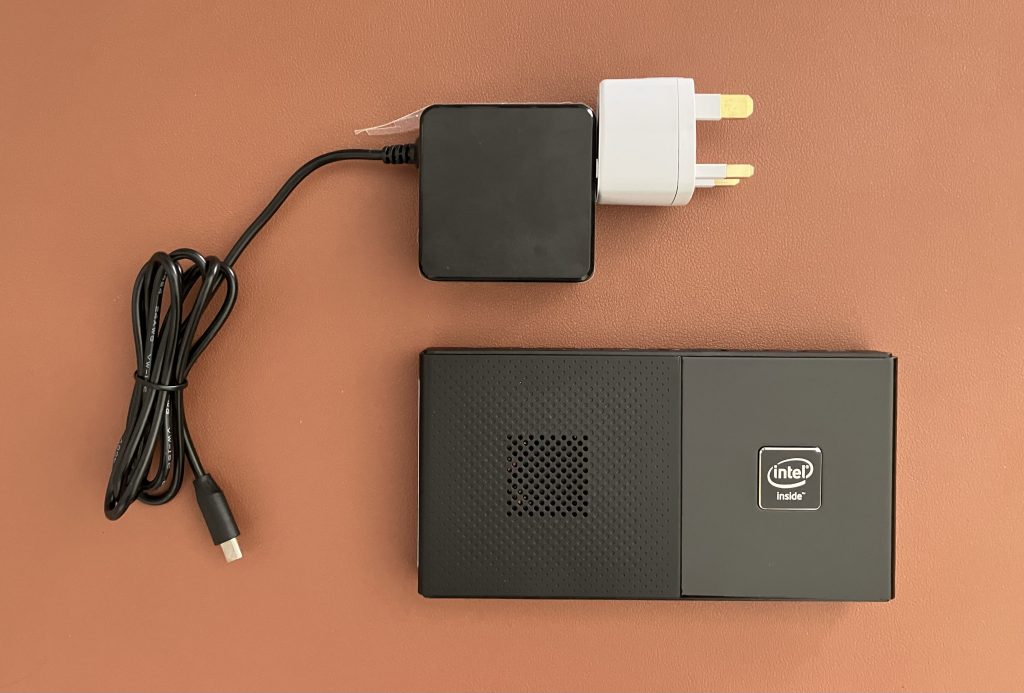
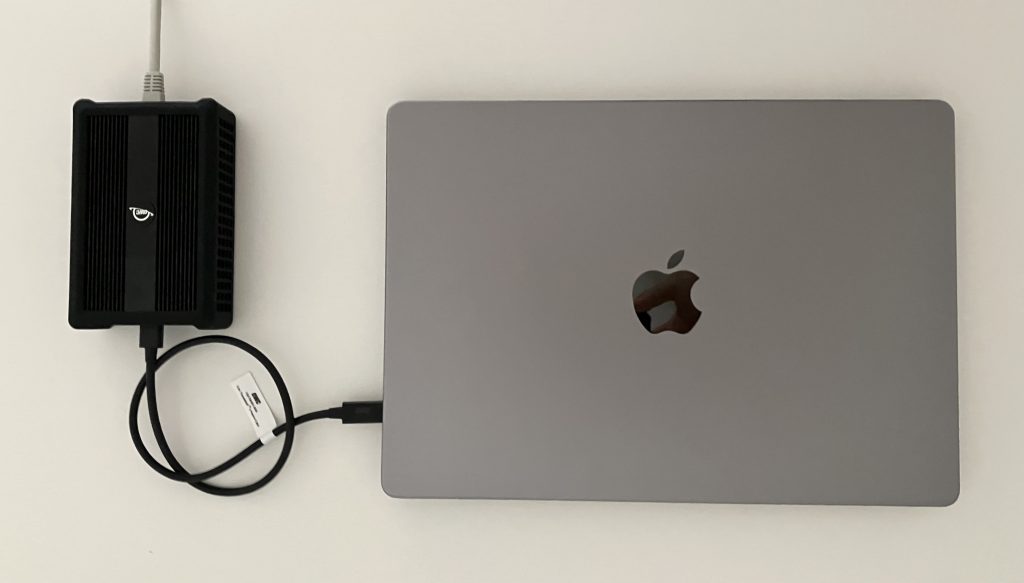
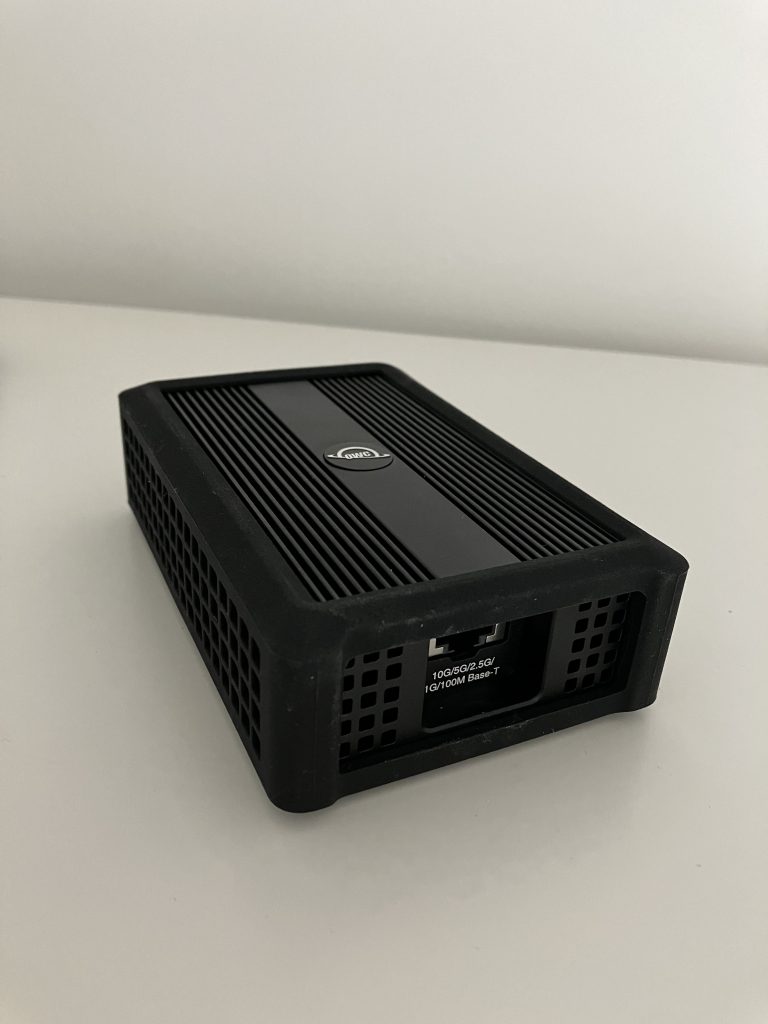
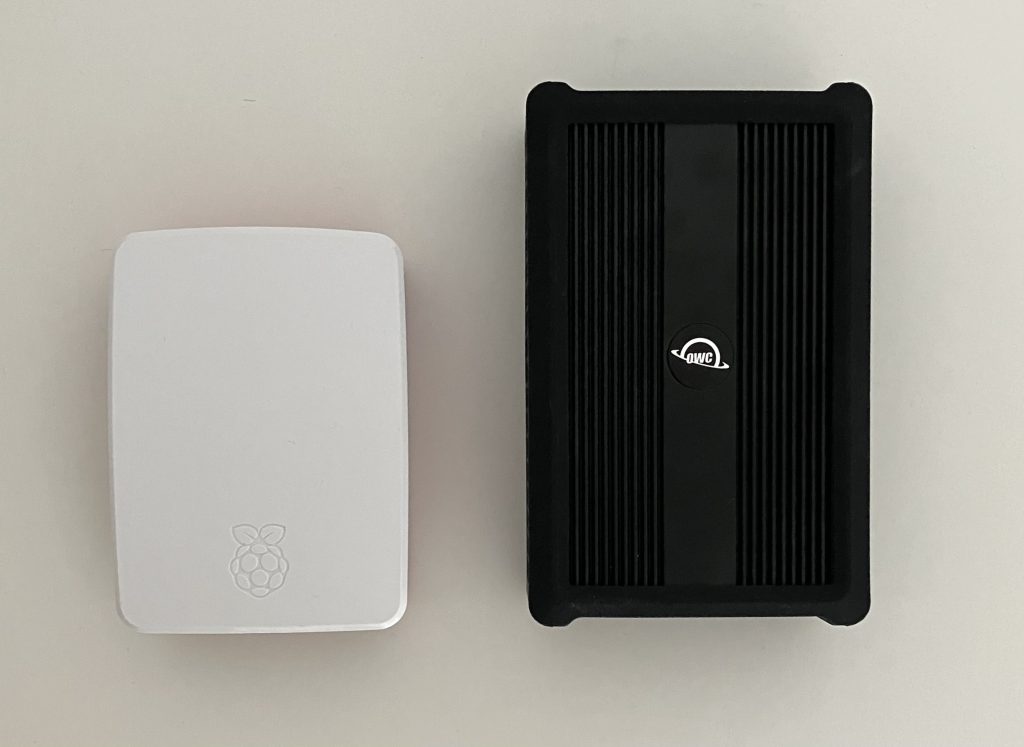
OWC Thunderbolt 3 10G Ethernet Adapter OWCTB3ADP10GBE

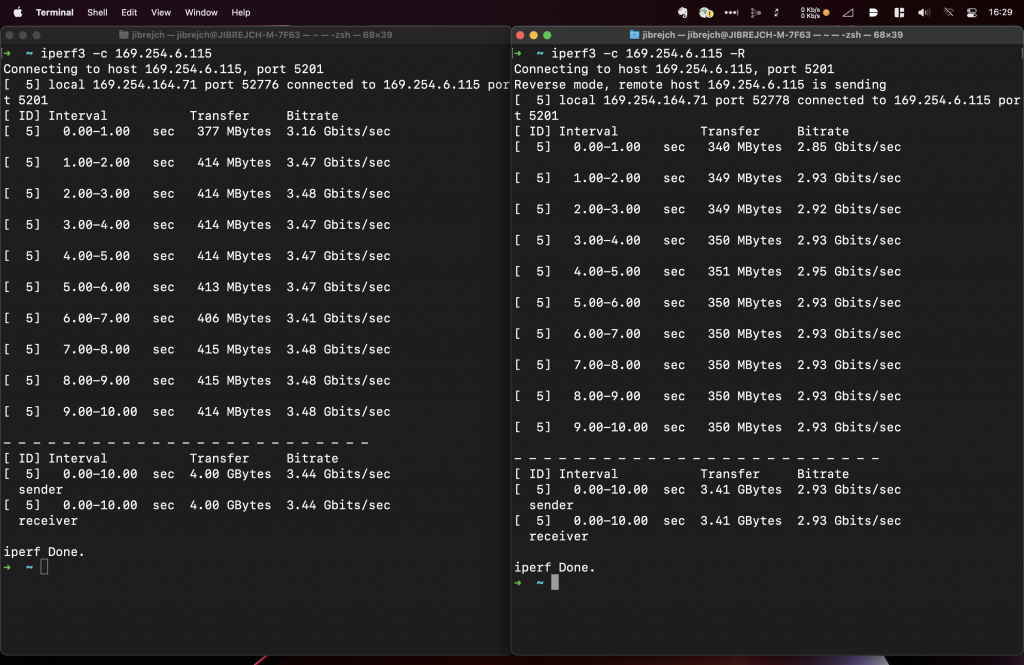
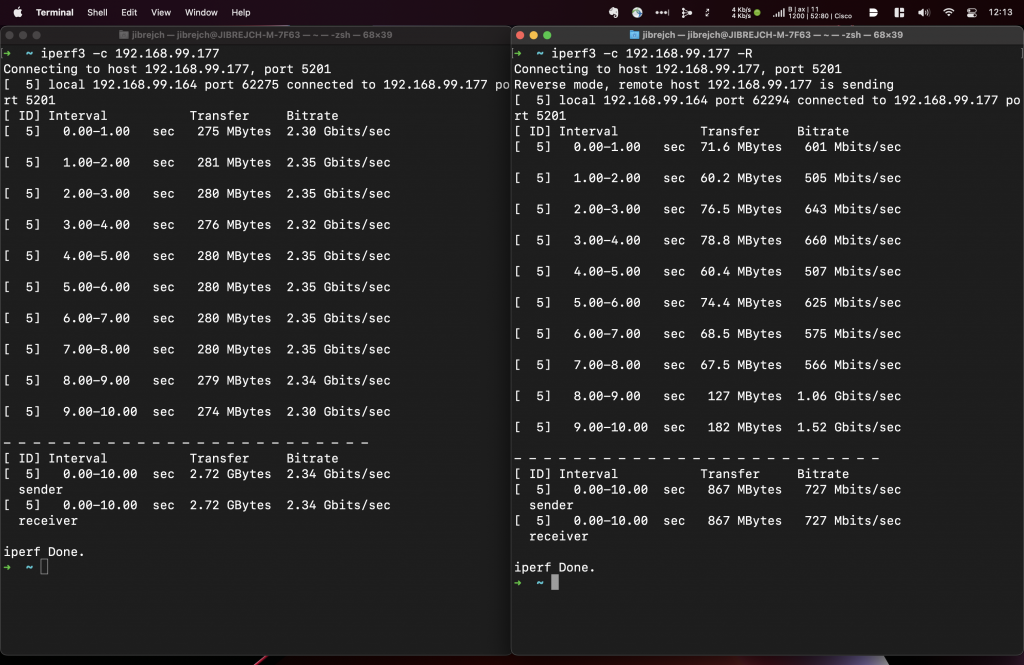
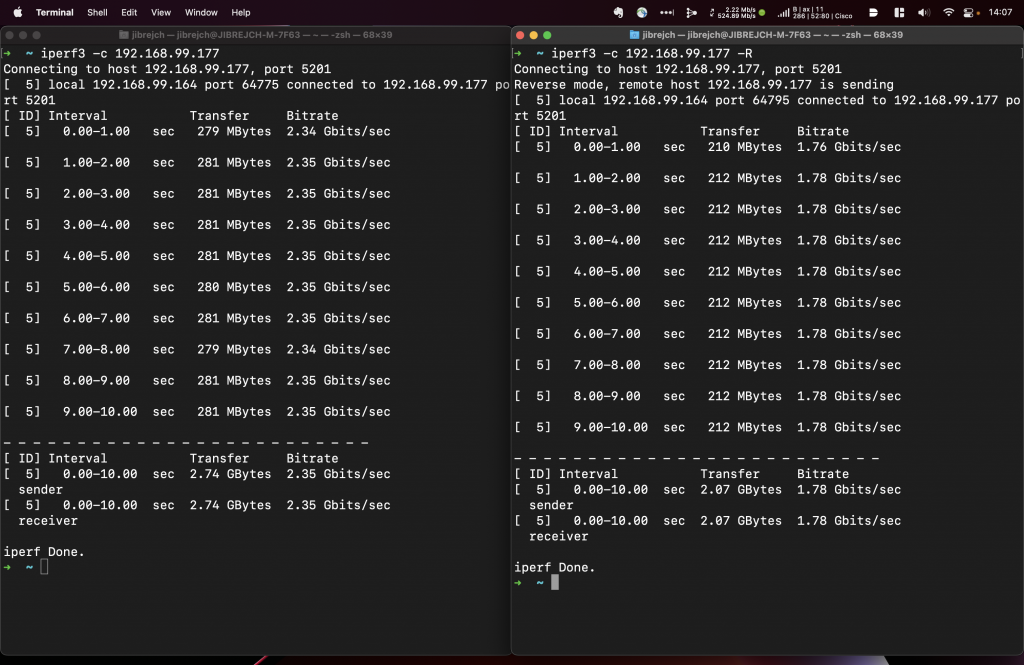
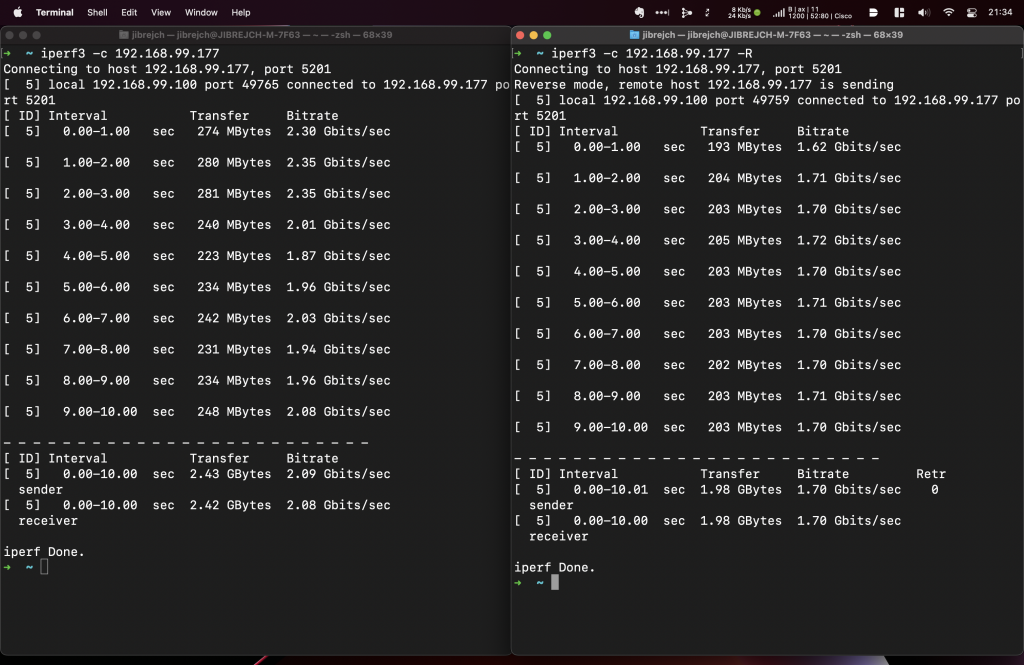
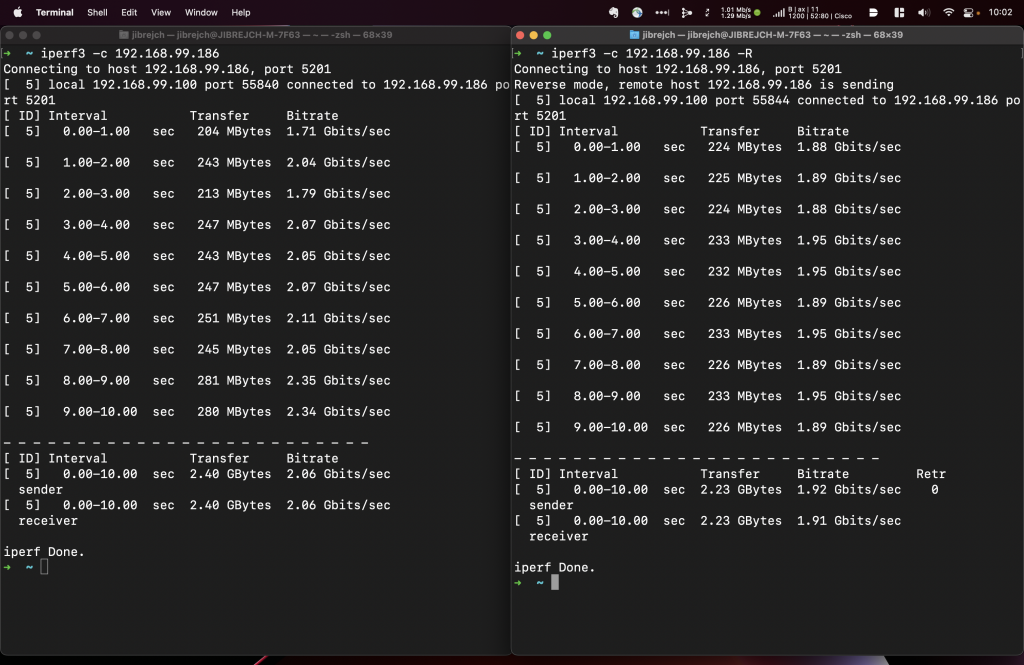
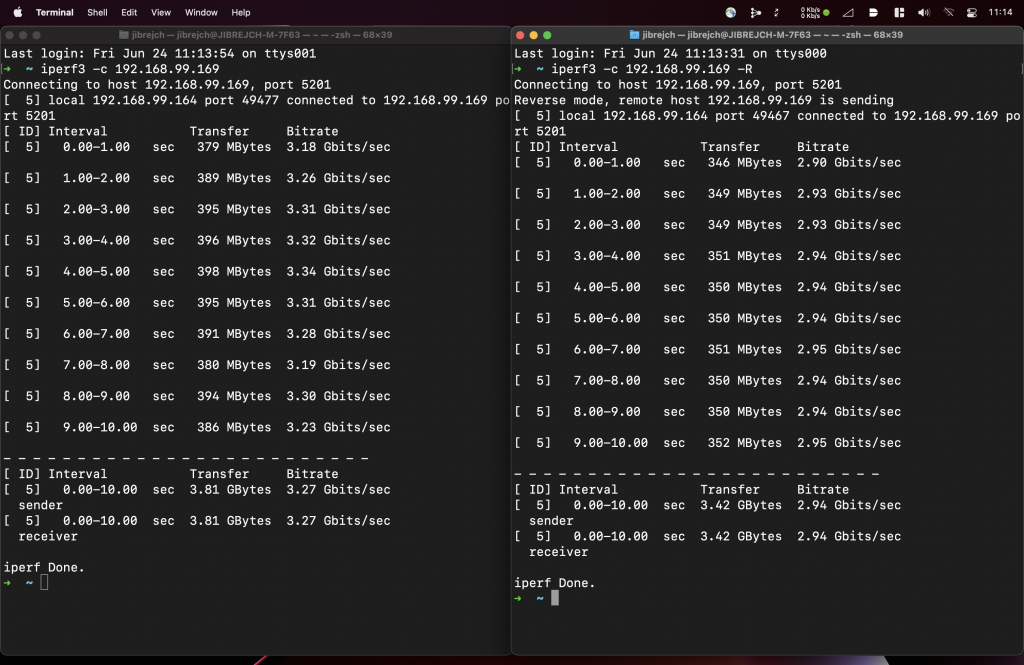
From throughput perspective, I personally tested it up to 3 Gbps down and 3.3 Gbps up using iperf3 with default settings. The limitation is on my part, I just don’t have another 10 GbE computer I could test against.

I’ve seen reports of:

  • between 7 Gbps and 8.74 Gbps uplink speeds with default iperf3 settings
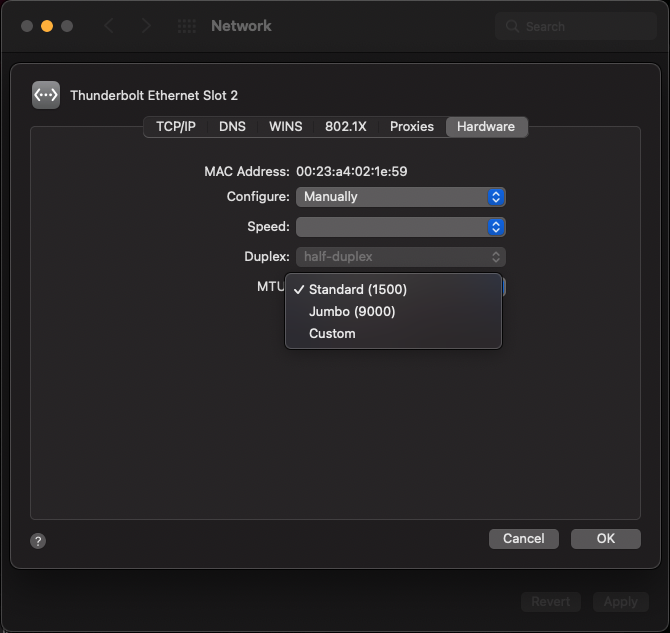
  • 9.5 Gbps uplink iperf3 speeds with Jumbo frames enabled

When I reviewed 2.5 GbE and 5 GbE adapters, this setup has become my reference I ran all iperf3 tests against.

OWC connected to an M1 MacBook Pro
Thunderbolt side
Ethernet side
Raspberry Pi 4 for scale
10 Gbps Full Duplex
It supports Jumbo frames including a custom MTU setting

VLAN tagging

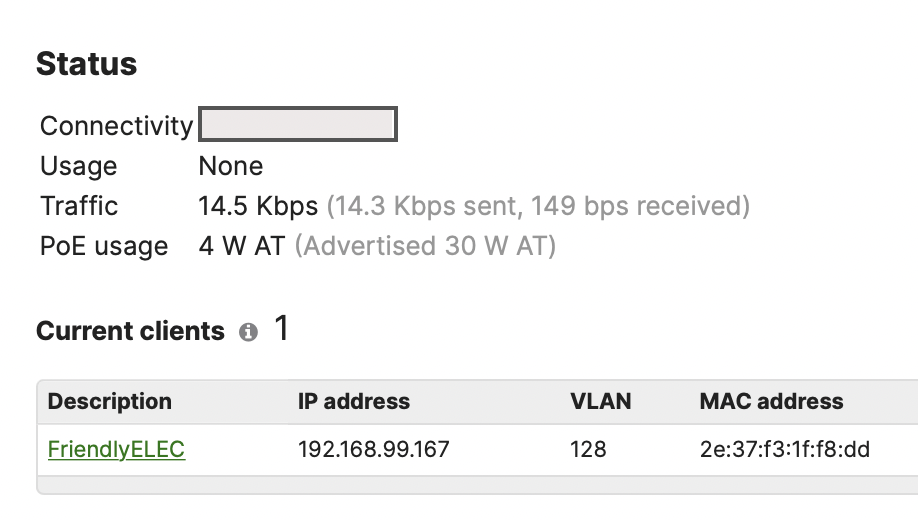
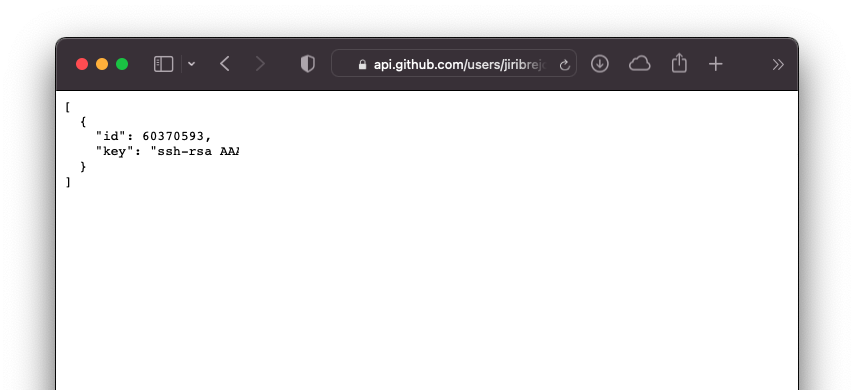
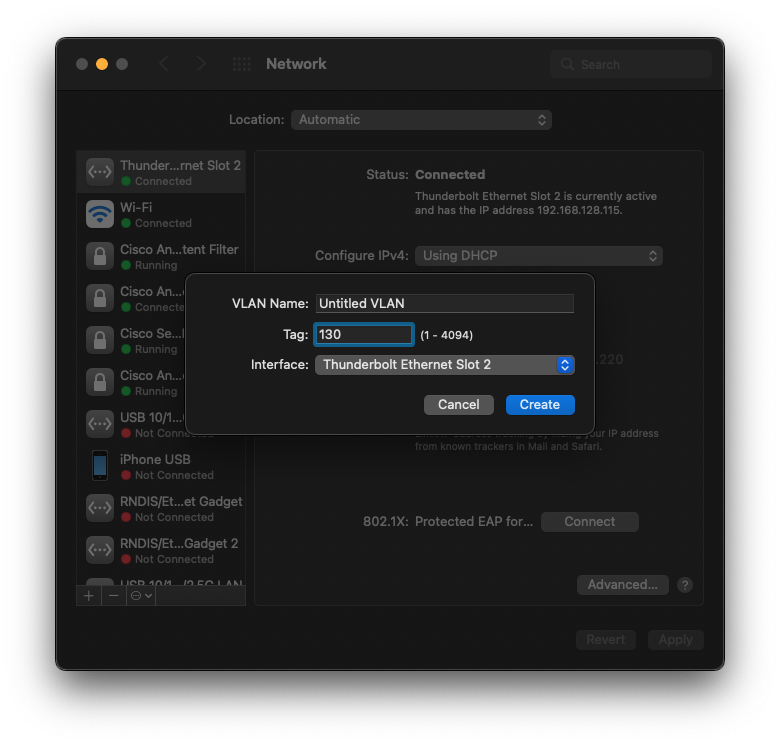
The OWC adapter also supports VLAN tagging. Here is my Trunk port with Native VLAN 129:

Trunk port configured on the access switch

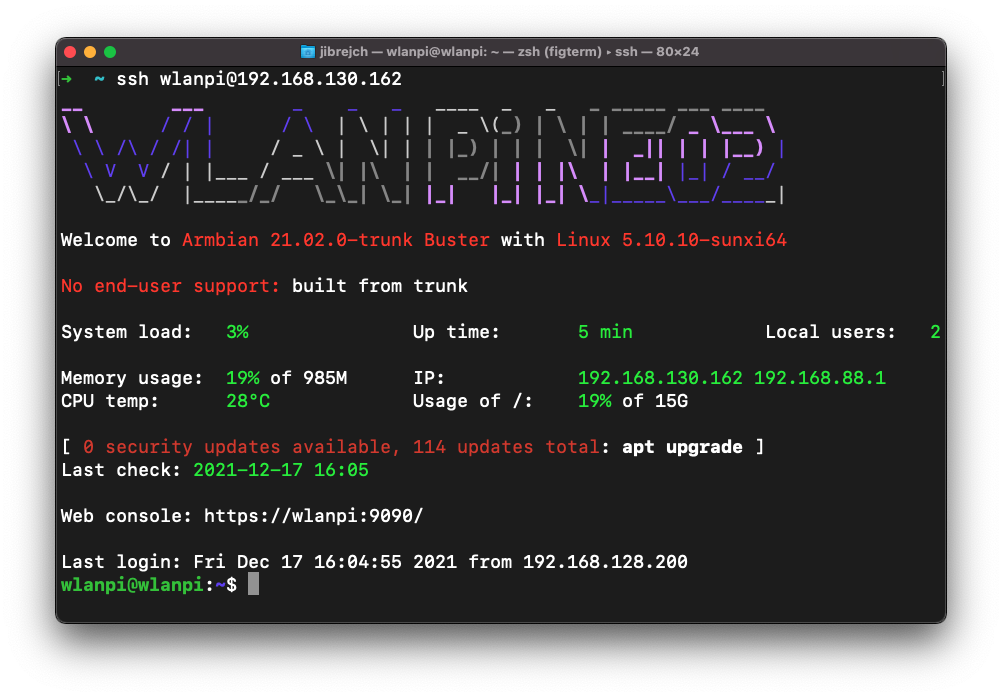
Let’s tag all traffic with VLAN 130:

Create VLAN interface on macOS

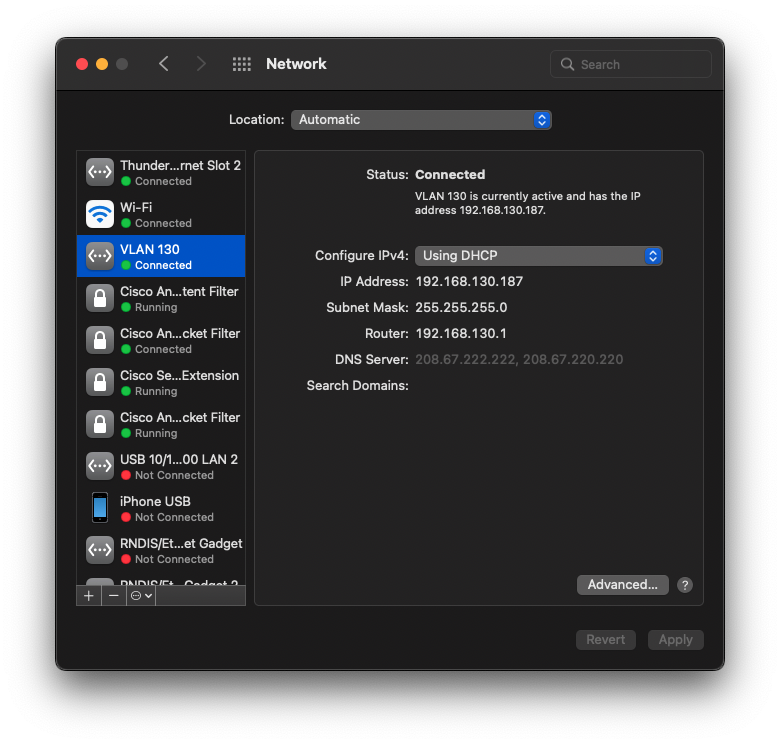
Verify that we are indeed in VLAN 130:

VLAN 130 is being used instead of the Native VLAN 129

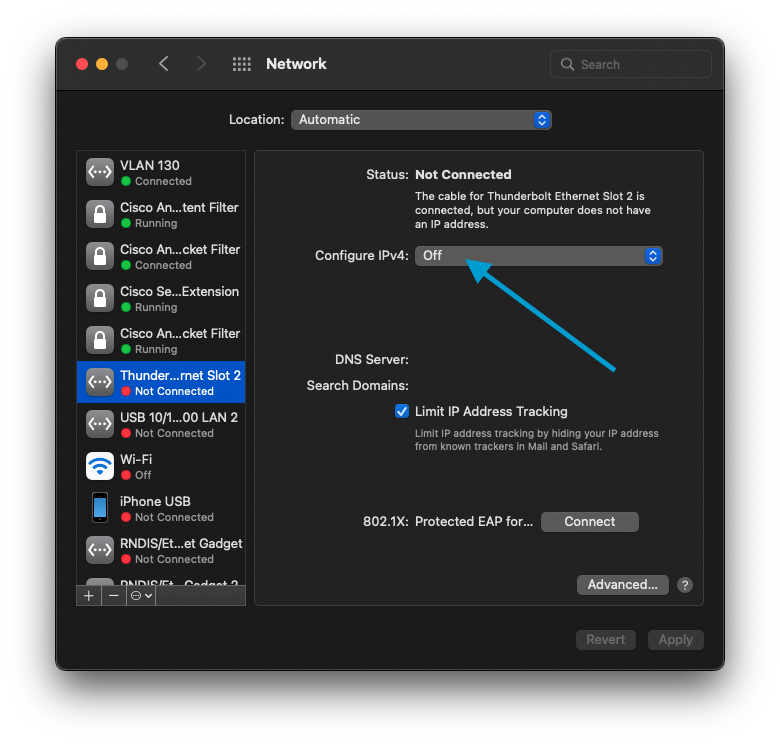
If you only want to use VLAN 130 (without touching the Native VLAN 129), you can disable the adapter itself. VLAN 130 virtual interface will stay up and forward traffic.

Disable the Native VLAN 129 and only use VLAN 130 for all traffic

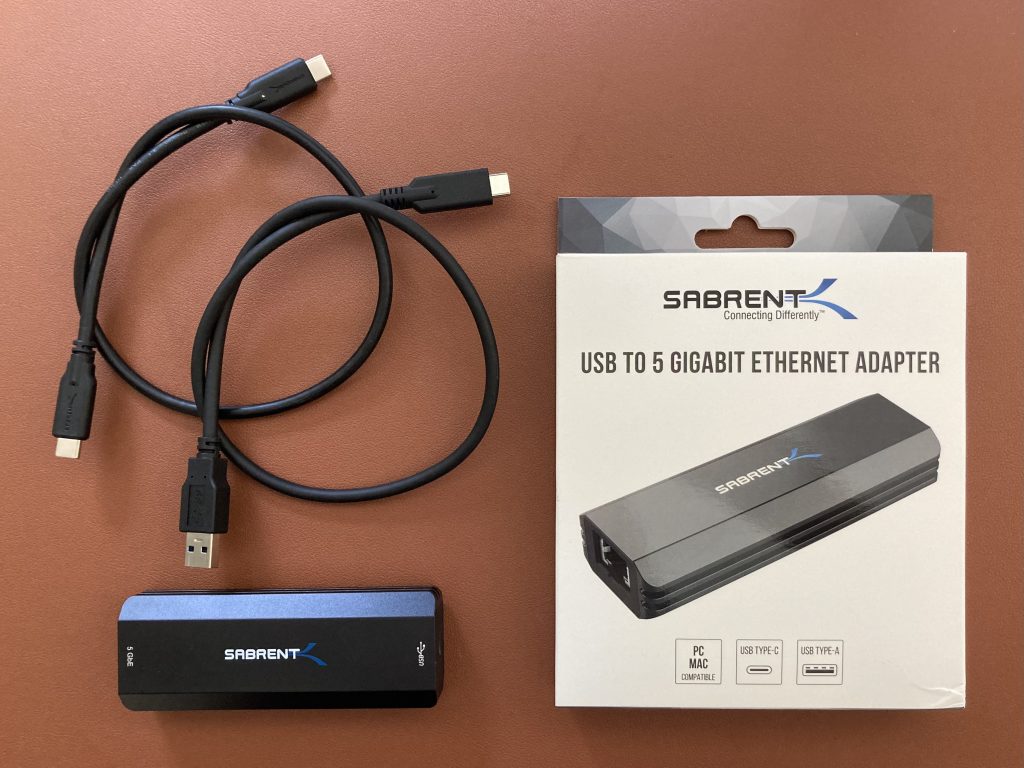
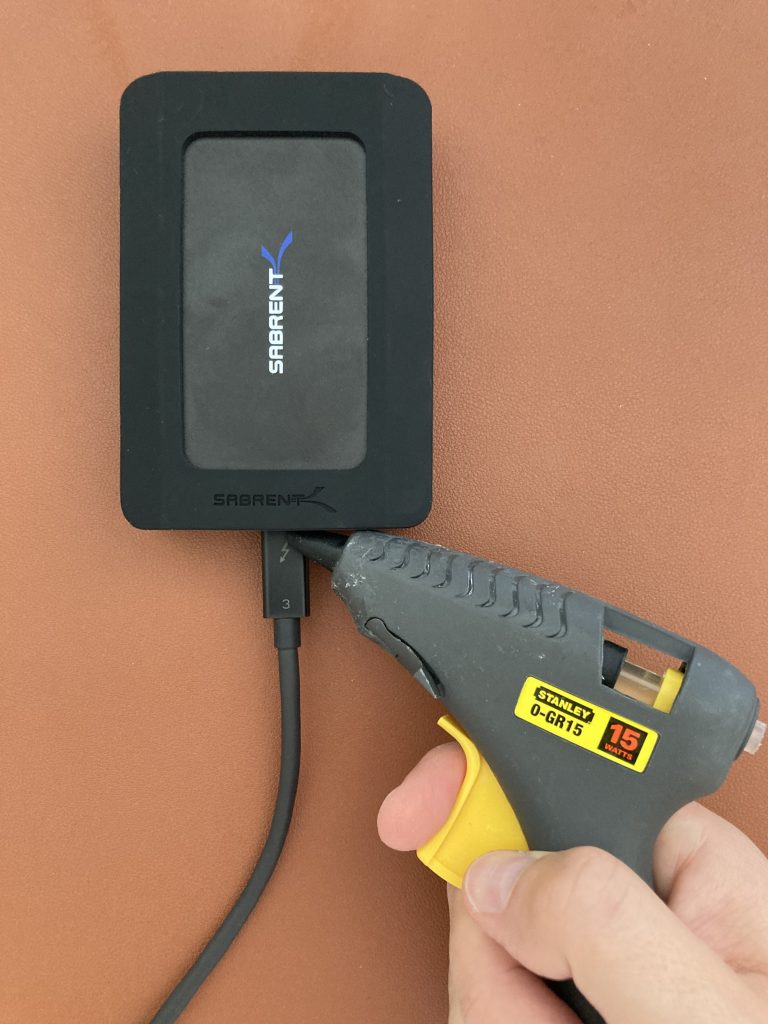
Sabrent Thunderbolt 3 to 10 Gbps Ethernet Adapter TH-S3EA

I won’t go into the detail, but my main challenge with the Sabrent adapter was its loose Thunderbolt cable. The connection between the USB-C socket on the adapter and the USB-C connector on the Thunderbolt cable is very loose and practically pulls out just by the tension of the cable itself. It might have been just my unit, but I can’t recommend it.

Sabrent Thunderbolt 3 to 10Gbps Ethernet Adapter on the left
It almost felt like it needed some hot glue to keep the Thunderbolt cable connected

What about Windows and Linux support?

I tested the Sabrent adapter on Windows 10. It required a Sabrent driver installation and then it worked just fine. I would assume the same for the OWC.

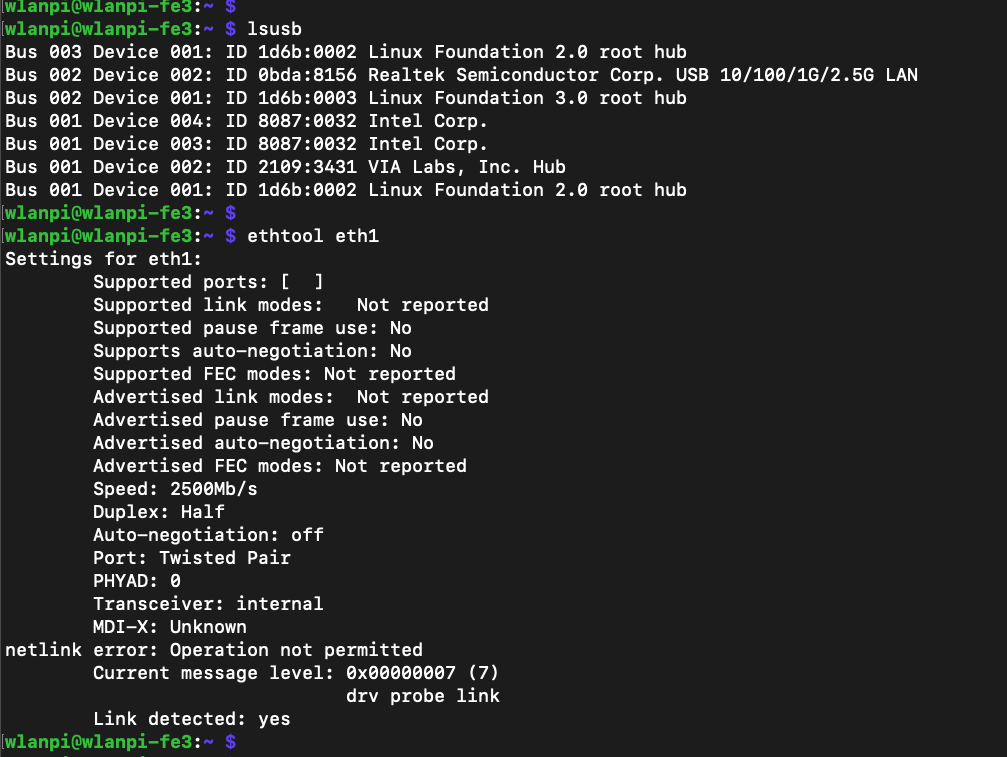
I don’t have a Linux computer with a Thunderbolt port, so I can’t share anything on that front.

How to mount WLAN Pi to a tripod

You might remember me saying something about designing a 3D printed WLAN Pi tripod mount. Yes, that was the plan… until I found a much better solution, which I had already owned.

Why tripod mounted? Well, occasionally I work on an outdoor Wi-Fi project. WLAN Pi can be a really useful for throughput testing, or it can share your phone’s cellular internet connectivity with your access point. This is really useful in cloud-managed surveys, labs, and projects.

Tern RidePocket Handlebar Bag

I present to you this small, well designed, and weatherproof Tern RidePocket bag. It is a fantastic bicycle bag, and as good bag for your WLAN Pi. You can purchase one in many countries around the globe and made by a big bike company, which is here to stay.

WLAN Pi in the Tern RidePocket bag on a tripod
WLAN Pi powered by PoE using PoE splitter
Cable management works really well

If you wanted to, you can battery power your Pi. Just add a battery pack of your choice.

WLAN Pi powered by a USB battery pack

Outdoor surveys involve all kinds of weather, and that’s where this rain cover becomes really useful.

Rain cover

What makes it work better than other or cheaper bags? It mounts securely, and does not slide down the tripod thanks to its strap coated with a layer of anti-slip rubber material.

Anti-slip material on the strap and a hook towards the top
Attached to a tripod
Closer look at the cable hole

If you prefer a Raspberry Pi 4, or WLAN Pi Community Edition based on Raspberry Pi 4, it fits in this bag too including a PoE splitter with little effort.

It fits Raspberry Pi 4 and PoE splitter

Lenlun Bike bag set

Do you need to interact with your WLAN Pi while it is mounted? No problem. I’ve tested a handful of other bags and Lenlun Bike bag set is the best fit. It allows you to see the display and press buttons while it protects everything stored inside.

WLAN Pi in the Lenlun bag
Attachment to tripod is not as clean as Tern
Battery pack and WLAN Pi inside the bag

Finally, after you are done working, these bags can happily carry your keys, phone, battery pack, and wallet.

Brompton bike with Tern RidePocket

Sabrent 5 GbE Multigigabit Ethernet Adapter

Sabrent NT-SS5G is a 5 GbE USB adapter, which allows you to achieve higher throughput than 2.5 GbE adapters, and break the 2.35 Gbps barrier. It works great on Windows. If you are a macOS or Linux user, I recommend you consider other options like this instead.

The adapter itself is larger than 2.5 GbE adapters, it uses AQC111U chip, and ships with short 2 detachable USB-A and USB-C cables. USB-C port on its back connects the adapter to your computer. A metal shell protects it, serves as a heatsink, and also adds to its weight.

Windows 11

Install the driver from Sabrent’s website and you are good to go. In my tests with this Topton M6 Mini PC, I measured 2.93 Gbps down and 3.44 Gbps up with default iperf3 settings.

2.93 Gbps down and 3.44 Gbps up with default iperf3 settings

In adapter options, you can actually configure quite a few things including Jumbo frame support. Note that these are fixed values.

macOS

I can’t recommend this adapter for macOS users. It forces you to disable macOS System Integrity Protection (csrutil), otherwise it won’t work. It might be okay for a proof of concept or lab setup, but I would hesitate from using it in production.

This is how to install the driver if you were interested:

  1. Install the driver using the pkg file provided by Sabrent. It installs a Kernel Extension (kext), which drives this adapter.
  2. Enable the extension by going to System Preferences > Security & Privacy > enable the extension > Reboot.
  3. After reboot, unplug the adapter and plug it back in.
  4. It should work as long as you leave the System Integrity Protection disabled.

From throughput perspective, it saw download speeds of 3.30 Gbps, and upload of 3.45 Gbps. This was with default iperf3 settings, standard 1500-byte MTU and one stream. Great results considering that this adapter’s USB interface maximum theoretical throughput is 5 Gbps.

In my view, you might be better off buying a 2.5 GbE adapter, which can push 2.35 Gbps up and down consistently and with no driver installation needed. I tested one here. Alternatively, a 10GbE Thunderbolt Ethernet adapter is even faster choice, but more costly, and larger form factor. Or, if your other half approves, treat yourself to an M1 Mac Mini with built-in 10 GbE 😉

Linux

I tested this adapter on 64-bit Raspberry Pi OS running on Raspberry Pi 4. Although the default driver distributed in Linux Kernel 5.15 works, it doesn’t even deliver symmetric 1 Gbps.

Sabrent connected to Raspberry Pi 4
Upload speeds well below 1 Gbps
Default aqc111 driver details

Let’s download the latest driver from Sabrent’s website. Unfortunately that doesn’t seem to be able to compile for 64-bit OS. I tried compiling on 32-bit Raspberry OS, to no avail. If you have any ideas, please do let me know.

So, on Linux, a Realtek RTL8156B based 2.5 GbE adapter might be a better choice for you. Here is the one I tested.

Plugable 2.5 Gigabit Ethernet to USB 3.0 Multigigabit Adapter

Plugable makes this inexpensive 2.5 Gigabit Ethernet USBC-E2500 adapter. It is based on Realtek RTL8156B chip. On Windows and macOS it works out of the box. If you want to use it on a Linux machine like WLAN Pi Pro or Raspberry Pi 4, expect some troubles along the way, but good performance when you get there.

The USB-C to USB-A adapter is allows you to use it with a MacBook (USB-C) or Raspberry Pi 4 (USB-A)
The adapter itself has a plastic shell and is very lightweight

Windows 11

When they say “update the driver using Windows Update first”, they mean it. Windows 11 will recognise the adapter and you can start using it, but the default driver distributed with Windows 11 significantly reduces this adapter’s performance.

727 Mbps down and 2.34 Gbps up with default driver

Now, let’s use Windows Update to download the latest driver.

Don’t forget to update the driver using Windows Update

As you can see, download throughput (from iperf3 server to iperf3 client) has dramatically improved.

1.78 Gbps down and 2.35 Gbps up with updated driver

Although the box suggests Jumbo frame support, Windows driver settings don’t give me any option to edit the MTU size. So, I assume Jumbo frames are not supported.

MacOS Monterey

On macOS, this adapter works out of the box with no additional driver installation required. That’s a very nice surprise. And performance is great.

Symmetric 2.35 Gbps throughput on macOS

Auto-negotiation worked just fine. If you want to configure speed or MTU manually, you can, but Jumbo frames are not supported on macOS either.

Jumbo frames are not supported

Linux

Now the bad news. If you are considering to use this adapter on a Linux machine, the default driver cdc_ncm is a trouble as it only supports 2.5 Gbps Half duplex. Setting Full duplex manually using ethtool command doesn’t work either.

Default driver only supports Half duplex

As you might expect, with the default driver and Half duplex, throughput is very poor.

1.22 Gbps down and 704 Mbps up with the default cdc_ncm driver on WLAN Pi Pro

On WLAN Pi Pro and Raspberry Pi 4 running 5.15 Linux Kernel I managed to fix the duplex issue by the steps listed below. But I hit new auto-negotiation issue between the Plugable adapter and Cisco Catalyst WS-C3560CX-8XPD switch. It took the adapter to eventually negotiate 2.5 Gbps Full duplex around 15 minutes of constantly flapping the interface. Forcing speed and duplex on the Plugable adapter by ethtool did not work. Certainly not ideal, and definitely worth testing before you commit to the Plugable adapter. With other multigigabit adapters, the Plugable had no negotiation issues.

1.7 Gbps down and 2.09 Gbps up with r8156 driver on WLAN Pi Pro
1.91 Gbps down and 2.06 Gbps up on Raspberry Pi 4 using the correct r8156 driver
Raspberry Pi 4 also known as WLAN Pi Community Edition

How to force Linux to use the right driver

To enable Full duplex capability, we need to tell Linux to use Realtek r8156 driver instead of the default cdc-ncm.

  1. Download the latest driver from Realtek’s website
  2. Unzip it and copy the 50-usb-realtek-net.rules file to your Linux machine
  3. On the Linux machine copy this file here sudo cp 50-usb-realtek-net.rules /etc/udev/rules.d/
  4. Reboot by sudo reboot
  5. Verify that the adapter negotiated 2.5 Gbps Full duplex and is using the Realtek r8156 driver.

Peloton bike Wi-Fi connection to a Cisco access point stopped working after a software update

Has your bike suddenly lost its Wi-Fi connection after a Peloton software update? Is it saying “Device not connected to internet”?

Here is why and how to fix it before it hopefully gets fixed in one of the upcoming Peloton software updates.

Peloton bikes use Android operating system, and they have recently upgraded to Android 10. Unfortunately, this version has compatibility issues with Cisco Wi-Fi access points and Adaptive Fast Transition feature, which is enabled by default.

To resolve the issue, simply set Fast Transition to Enabled.

Connect to your Wireless LAN Controller, go to Configuration > Tags & Profiles > WLANs > select the network > click Edit > Security > Layer2 > Fast Transition > Enabled > Update & Apply To Device. Now, test that your bike can connect, and test few other devices to make sure everything is working as expected. Then click the floppy disk icon to save this new configuration.

Portable and Powerful 2.5 GbE iperf3 Server Capable of 3 Gbps – Topton M6 Mini PC

After using FriendlyElec R5S single-board computer as a portable iperf3 server, I decided to also order and test Topton M6 Mini PC. It is more powerful, based on Intel CPU, and runs Windows 11 Pro or Ubuntu. I personally chose Windows (yes, I am brave), mainly because I also wanted to use this device as a Windows Wi-Fi client for other things than iperf3 testing.

Dimensions and case

Compared to the R5S, Topton M6 Mini PC is still portable, but about twice as large. Plastic case wraps the unit, but it is more fragile if you plan to carry it in your backpack or tool bag. There is a built-in fan which is always on. Not a big deal if you use it as an perf3 server, but little inconvenient when it runs on your desk for a longer period of time.

iperf3 performance

Topton M6 has a single onboard 2.5 Gigabit Ethernet port consistently capable of 2.35 Gbps up and down iperf3 throughput with default settings.

Consistent 2.35 Gbps iperf3 throughput

Now, can we make it go faster? Let’s see. We will use USB-A 5 Gigabit Ethernet capable Sabrent adapter. This can either be connected to a USB-A port or USB-C port of the Mini PC. In my tests, I have found that the USB-C port has limited throughput and only tops around 350 Mbps. When I connected the Sabrent 5GbE adapter to USB-C, it only auto negotiated 1 Gbps Full Duxplex.

Use any of the three USB-A 3.1 ports instead to avoid that limitation.

Use USB-A ports, not the USB-C
With the USB adapter, we get 2.94 Gbps down and 3.27 Gbps up

With the USB adapter, the whole setup get less portable. But it allows us to achieve 2.94 Gbps down and 3.27 Gbps up from clients perspective. Is it worth the extra spend? If you need to break the 2.35 Gbps barrier of the built-in 2.5 GbE port, this might be a workable solution for you.

Power adapter with an adapter

This Mini PC is quite strict when it comes to its power source. It requires 12V/2A USB-C PD adapter. Unfortunately, your USB-C MacBook or iPad chargers won’t work.

It draws around 7.5 Watts in idle mode.

If you happen to only use this PC in the US, happy days, as the power adapter ships with US plug. If you select UK during the ordering process, you will receive the US power adapter with UK adapter, which adds to its overall size.

My way around this is to use a standard non-USB-PD 12V/2A adapter with 5.5×2.1mm barrel jack connector, and a barrel jack to USB-C adapter. This particular “power brick” has a standard IEC C14 power cable connector, which you can find in any data centre and with the right European, UK, or Australian plug.

Power adapter with barrel jack + barrel jack 5.5×2.1mm to USB-C adapter
Detail of barrel jack 5.5×2.1mm to USB-C adapter

Battery power

Simply use a USB-C cable and USB PD battery pack capable of delivering 12V/2A. No surprises there.

Powered by PoE

I prefer powering equipment using PoE over local power bricks. If you are in the same boat, you can power this Mini PC by a PoE splitter.

Please pay close attention to the splitter specs. We want the one with a barrel jack and 12V/2A. Since the Mini PC uses USB-C power connector, we will use a barrel jack 5.5×2.1mm to USB-C adapter. Here is the complete setup. Press the power button and voila!

Under the hood

Most of the components are soldered to the main board with little room for upgrades. I ordered the lowest 8GB DDR4 and 128GB NVMe spec with Windows 11 Pro OEM preinstalled (no actual Windows license included).

I was hoping for the Wi-Fi adapter to be replaceable, but it is not the case. It is Intel AX201 and soldered to the board. Good enough, just not ideal for Wi-Fi professionals. M.2 slot would be ideal.

A quick look at the bottom side of the PCB shows the NVMe drive.

NVMe drive is practically the only replaceable component

Final verdict

Personally, I think this Mini PC has some great potential for certain use cases, but as an iperf3 server, I would rather use the FriendlyElec NanoPi R5S I reviewed here.

If you absolutely need to break the 2.3 Gbps barrier, it can be done with the help of a USB 5 GbE adapter, but it is not very cost effective. The Mini PC cost me £186 including shipping to the UK. The Sabrent 5GbE USB adapter costs around £65.

Finally, it you need top performance, don’t care that much about small form factor, and money is no object, the latest Apple M1 Mac Mini can be configured with built-in 10 GbE.

Portable and affordable 2.5 Gigabit Ethernet iperf3 Server – FriendlyElec NanoPi R5S

What problem am I trying to solve?

Wi-Fi standards have developed and also WAN links are fast and reasonably priced these days. When it comes to throughput testing tools like iperf3 servers, 1 Gigabit Ethernet has become a bottleneck. A Wi-Fi 6E client can now easily generate more than 1 Gbps of traffic, but how do we measure it?

To overcome that issue, I am looking for a reasonably priced portable single-board computer, which can push more than 1 Gbps of traffic. It should be powered via USB-C, battery, or PoE powered, and should be portable to fit in my “just in case I need it” tool bag.

FriendlyElec NanoPi R5S

This little FriendlyElec NanoPi R5S single-board computer (SBC) delivers everything I mentioned above. Let’s have a look.

Dimensions and case

It comes with a well designed aluminium case, which also serves as a heatsink. The whole unit is smaller than the smallest iPhone, slightly thicker obviously. It runs silent. There is no built-in fan whatsoever.

Portable? Tick! By the way, did you know that the original WLAN Pi uses NanoPi NEO2?
Left to right: WLAN Pi, R5S, Intel-based SBC I am also testing, WLAN Pi Pro

Ports

USB-C power input, two 2.5 GbE, one 1 GbE, HDMI useful troubleshooting or demos, two USB-A 3.0 ports

It has two 2.5 Gigabit Ethernet interfaces (LAN1 and LAN2) and one 1 Gigabit Ethernet interface (WAN). Either of the LAN ports delivers 2.3 Gbps of actual useful iperf3 throughput with default 1500-byte MTU and single stream. I used MacBook with OWC 10 Gigabit Ethernet Thunderbolt 3 Adapter and Cisco WS-C3560CX-8XPD switch.

From client’s perspective that’s 2.27 Gbps down and 2.35 Gbps up

Power

The R5S only draws 4 Watts in idle, and can be powered by any USB-C 5V power source. Your MacBook USB-C charger, iPad/iPhone charger, or USB-C battery pack would do. Alternatively, use a 1 Gigabit Ethernet 5V PoE splitter and PoE power the unit. In my lab with a 2 meter cable, the 1 Gigabit Ethernet PoE splitter actually allowed the R5S auto negotiate stable 2.5 Gbps connection with the switch.

PoE powered

Software

FriedlyElec built and published two operating system SD card images for the R5S – Ubuntu and FriendlyWRT. I tested both, and for my use case FriendlyWRT works best. It has a network-centric and easy to use web UI, has iperf3 preinstalled, and delivers great performance.

Initial setup and tips

R5S ships without any micro SD card, so make sure you have one ready to use. Flash the software image to it using Balena Etcher or similar tool.

Connect the WAN port to a network with existing DHCP server. If you are in the same subnet, simply ping FriendlyWrt.local to get the IP address of the R5S.

Then access the web UI or SSH to the unit, SSH is enabled by default. Change the root password now.

Now, this is important! To achieve maximum throughput, delete the pre-configured bridge interface br0, and configure both multigigabit eth1 (LAN1 port) and eth2 (LAN2 port) as standalone unbridged interfaces. Also, tweak IP address settings to your liking while you are there.

eth1 configured as a standalone interface. Bridge interface removed.

Make iperf3 automatically start by going to System > Startup > Local Startup and add iperf3 -s and hit the Save button.

Change CPU Governor setting to Performance. And CPU Minimum Frequency to the maximum value.

Here is the FriendlyElec documentation and introduction to their FriendlyWRT distribution.

Final verdict

This little single-board computer absolutely deserves its space in my tool bag. For the 2 GB RAM model with case I paid $88 including shipping to the UK. Add a Micro SD card and that’s all you need to get started.

Finally, it you need top performance, don’t care that much about small form factor, and money is no object, the latest Apple M1 Mac Mini can be configured with built-in 10 GbE.

Use SSH key stored on GitHub instead of an SSH password to access your WLAN Pi

By default WLAN Pi, and Linux in general, uses a username and password-based SSH authentication. It involves quite some typing, some brain capacity to remember the password, and it is not the most secure method either.

You can create a public and private key pair. Your SSH client automatically logs in using the private key. The SSH server uses the public key to confirm that you possess the right private key. No password needed, and it also is more secure. The private key is never sent over the network, and this method protects you against man-in-the-middle attacks.

The beauty of this GitHub method is that GitHub stores your SSH public key centrally, which you can easily update, and you can install it to the machine you want to SSH to, by a single command ssh-import-id-gh. You can even add this to a startup script so that it automatically updates your trusted keys.

Let’s do this

ssh-keygen is the program that generates a public/private key pair on your local system. The private key is stored in ~/.ssh/id_rsa, and the public key is stored in ~/.ssh/id_rsa.pub.

The security of this method depends on keeping the private key safe and secure. Make sure not to leave the private key behind.

ssh-keygen -t rsa -C "your@email.com"
Generating public/private rsa key pair.
Enter file in which to save the key (/Users/jiri/.ssh/id_rsa): 
Enter passphrase (empty for no passphrase): 
Enter same passphrase again: 
Your identification has been saved in /Users/jiri/.ssh/id_rsa
Your public key has been saved in /Users/jiri/.ssh/id_rsa.pub
The key fingerprint is:
SHA256:.....
The key's randomart image is:
+---[RSA 3072]----+
.....
+----[SHA256]-----+

Display the public key, which is a text file at the end of the day, and copy its content to clipboard:

cat ~/.ssh/id_rsa.pub
ssh-rsa
.....

Save this public key to your GitHub account. Browse to github.com, log in, and open Settings:

Click New SSH key, name the key, paste your public key from the clipboard and save it:

To verify that your key has been added you can browse to https://api.github.com/users/jiribrejcha/keys, where jiribrejcha is your GitHub username:

The last step is to SSH into your WLAN Pi or Linux machine and tell it to use this public key from my GitHub, where jiribrejcha is my GitHub username:

ssh-import-id-gh jiribrejcha

If the command isn’t installed, you can fix that by:

sudo apt install ssh-import-id

Passwordless SSH access

When you authenticate to a server using public key authentication, the SSH client offers a copy of the public key to the server and the server then compares it against the keys listed in your ~/.ssh/authorized_keys file. This key was added automatically by the ssh-import-id-gh command. If the key matches, the server indicates that it is able to proceed with the authentication. The private key is then used to sign a message that includes data specific to the SSH session. The server can then use its copy of the public key to verify the signature.

We have just SSH’d to the Pi without a password prompt.

Special thanks

To Colin Vallance for sharing this tip.