Portable Catalyst 9136 Wi-Fi 6E demo powered by Zyxel 802.3bt power injector

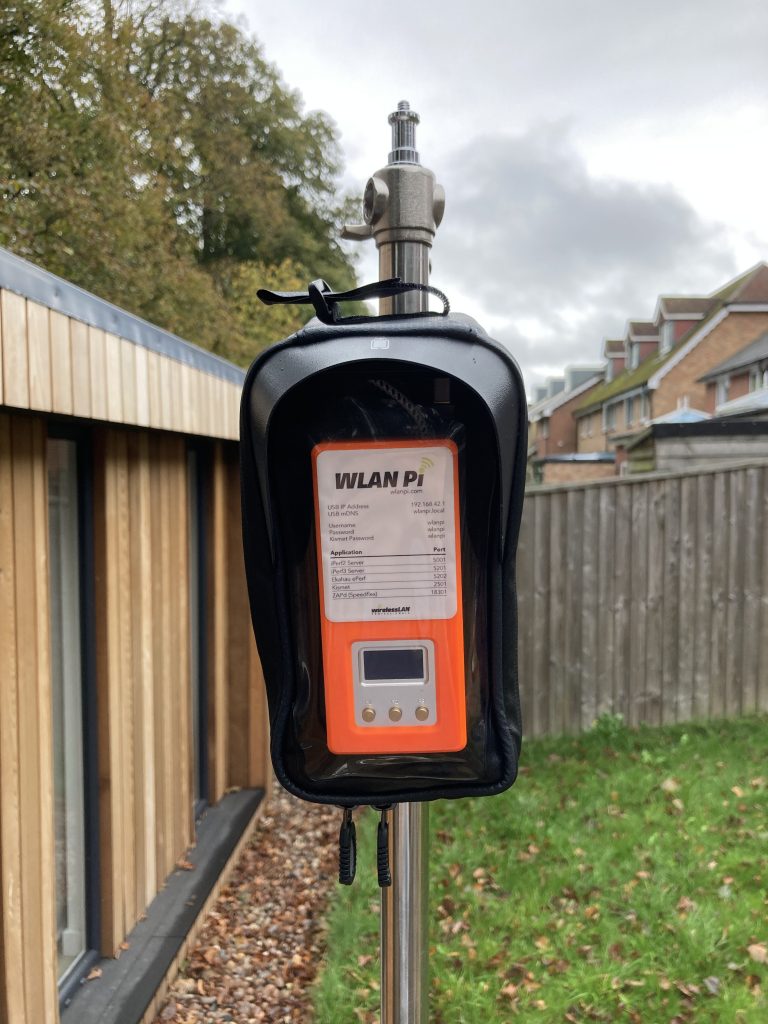
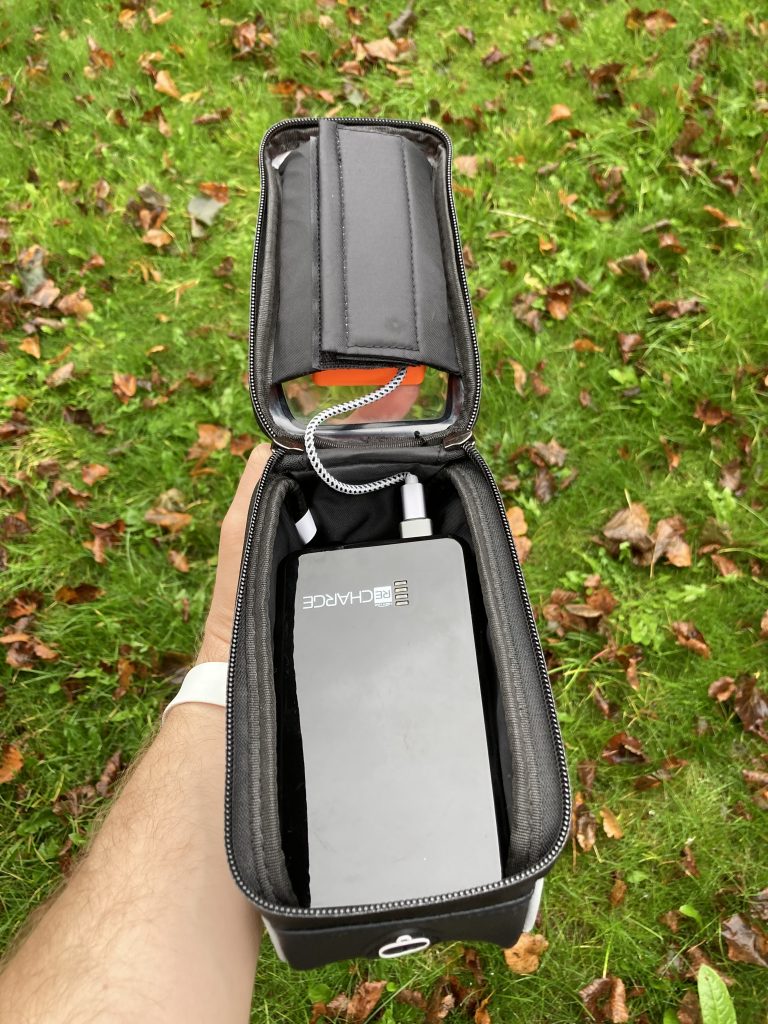
I am building a portable Wi-fi 6E demo in a box solution. What do I use for that?

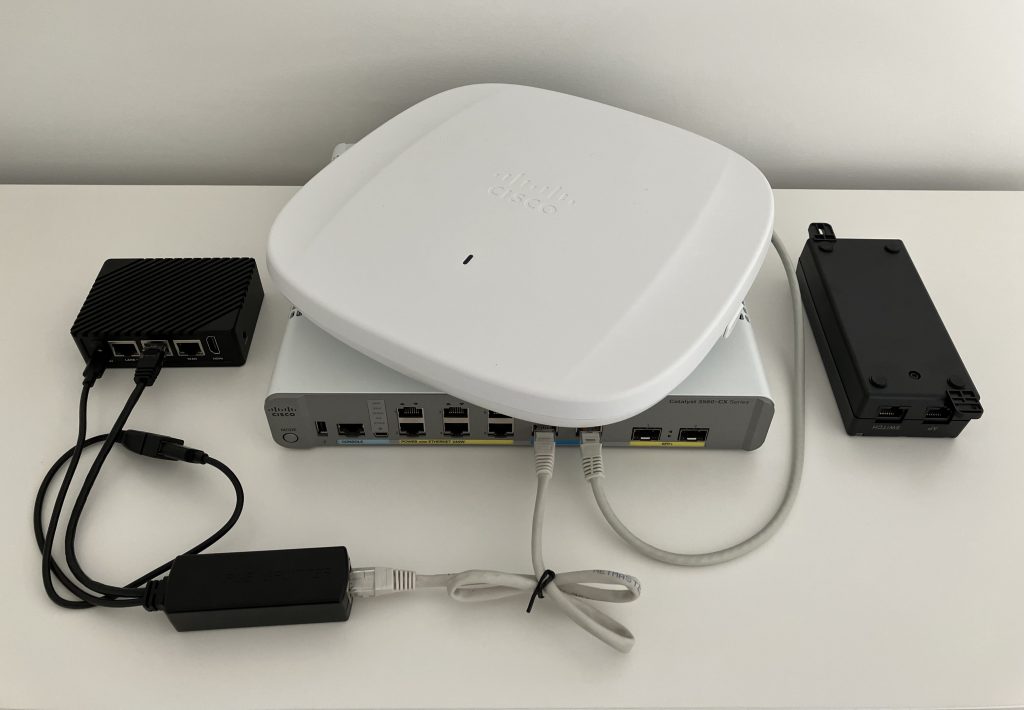
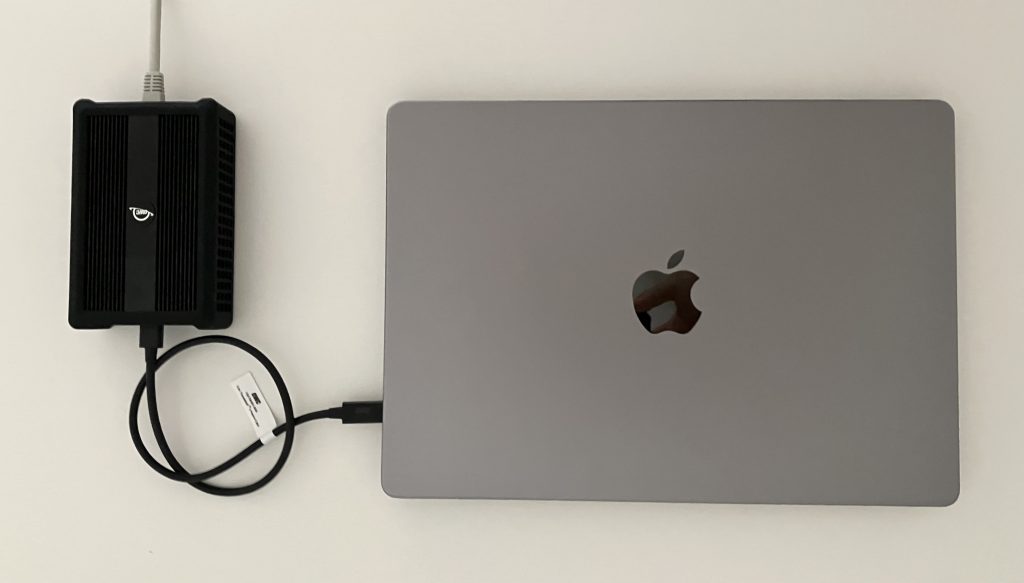
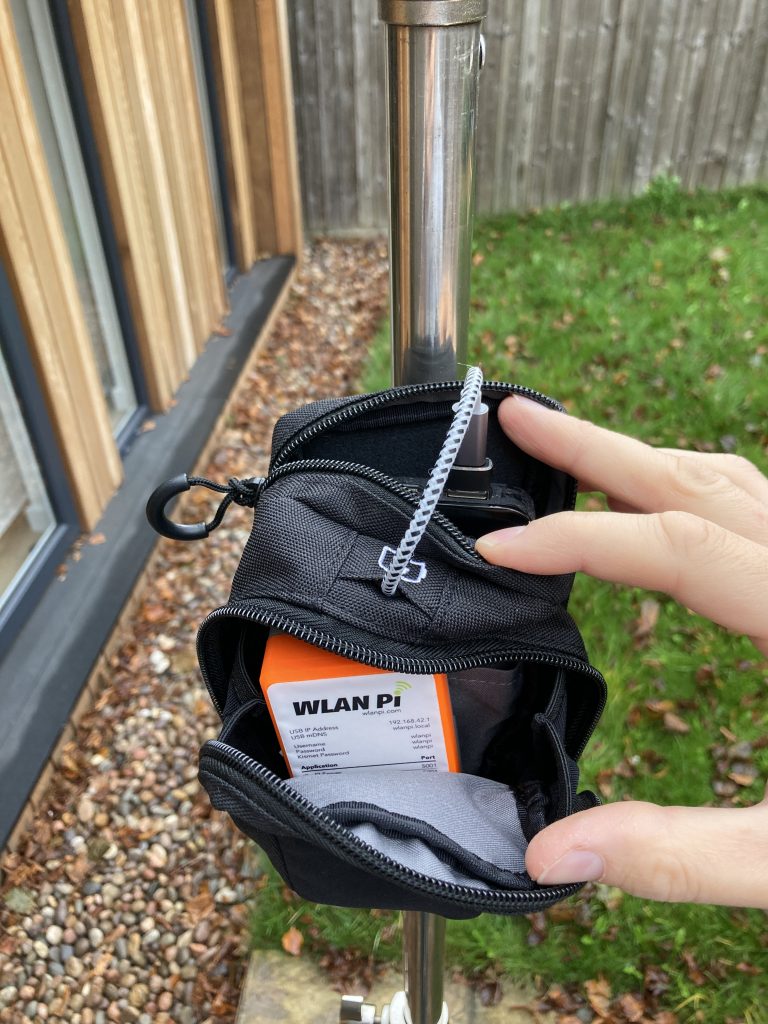
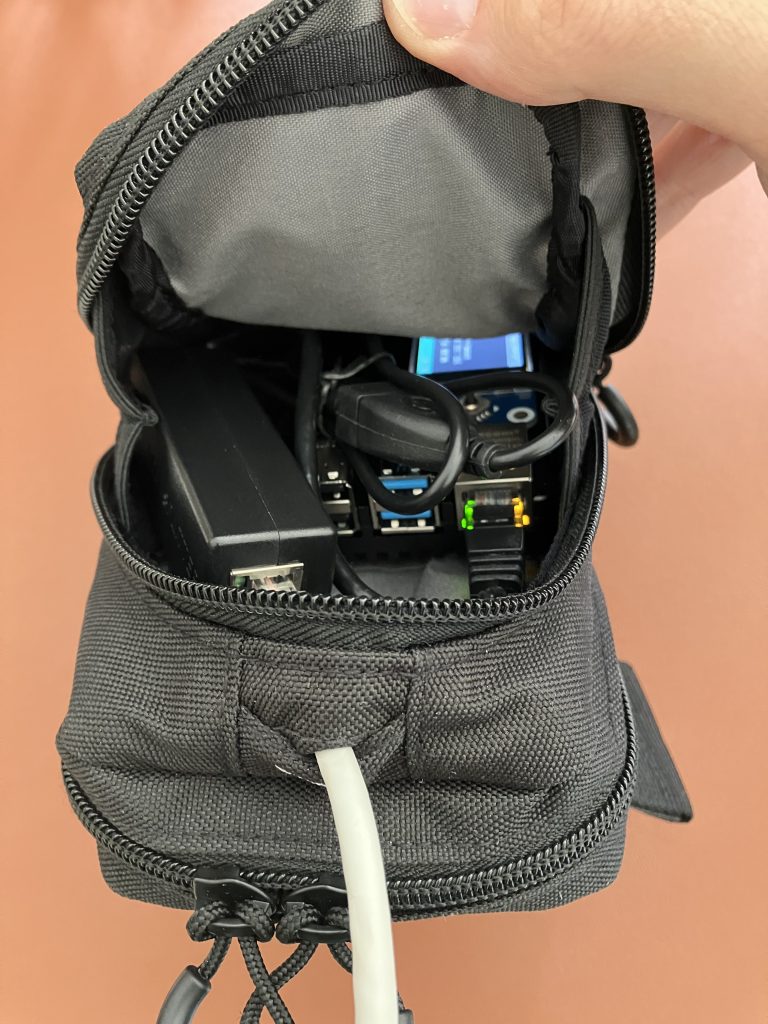
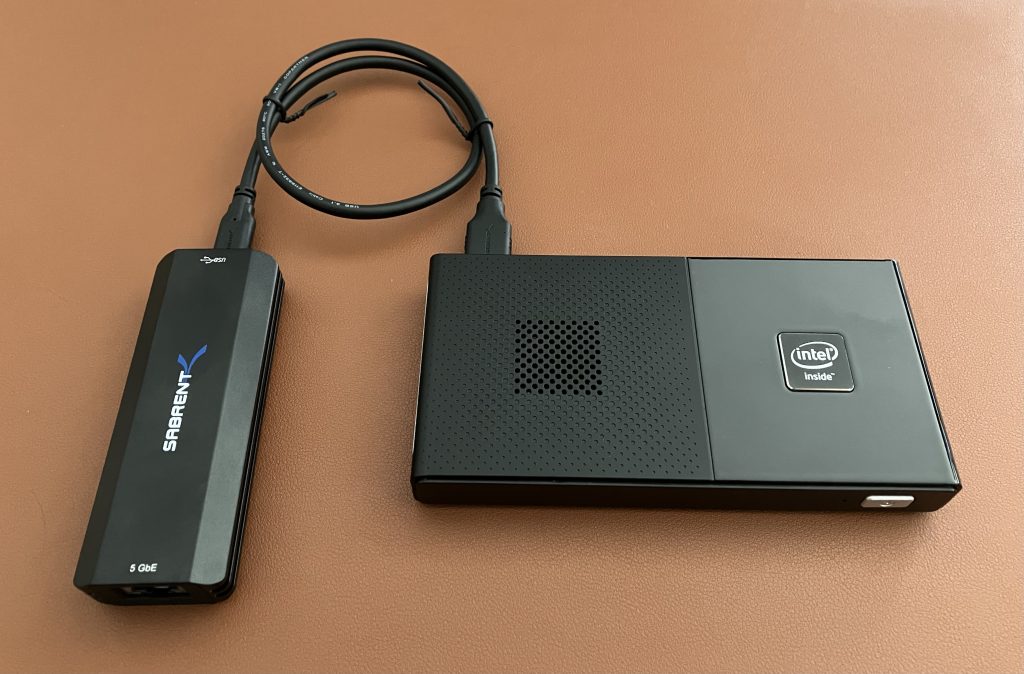
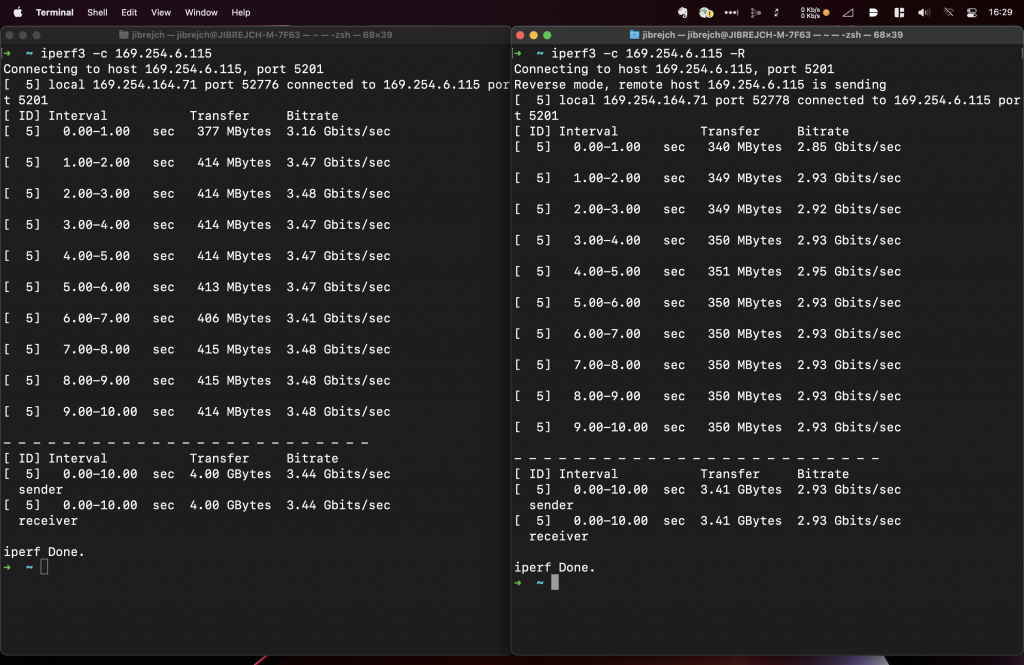
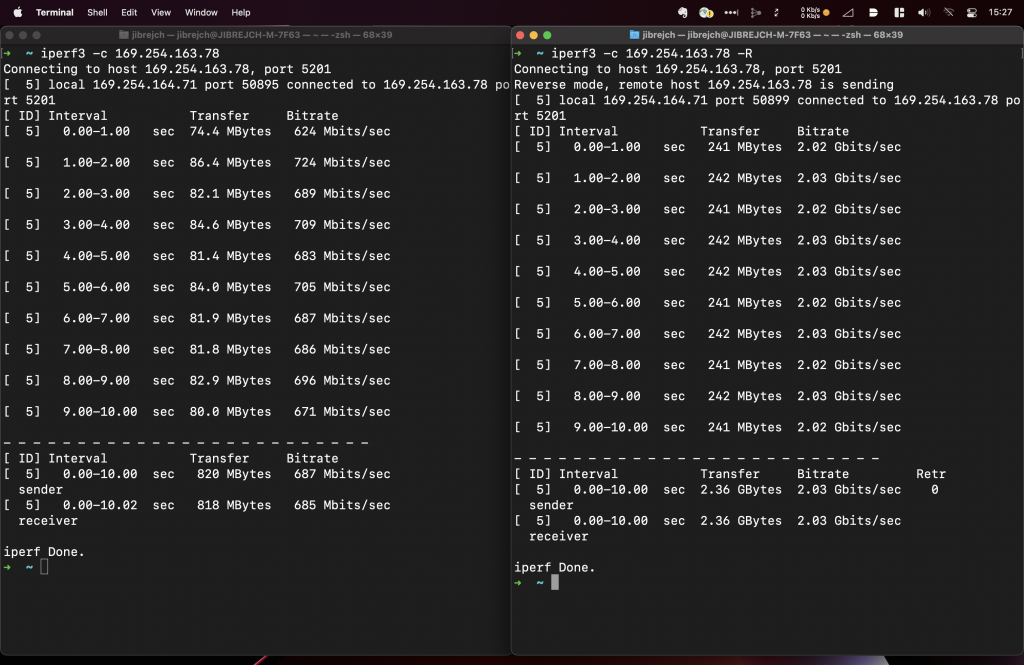
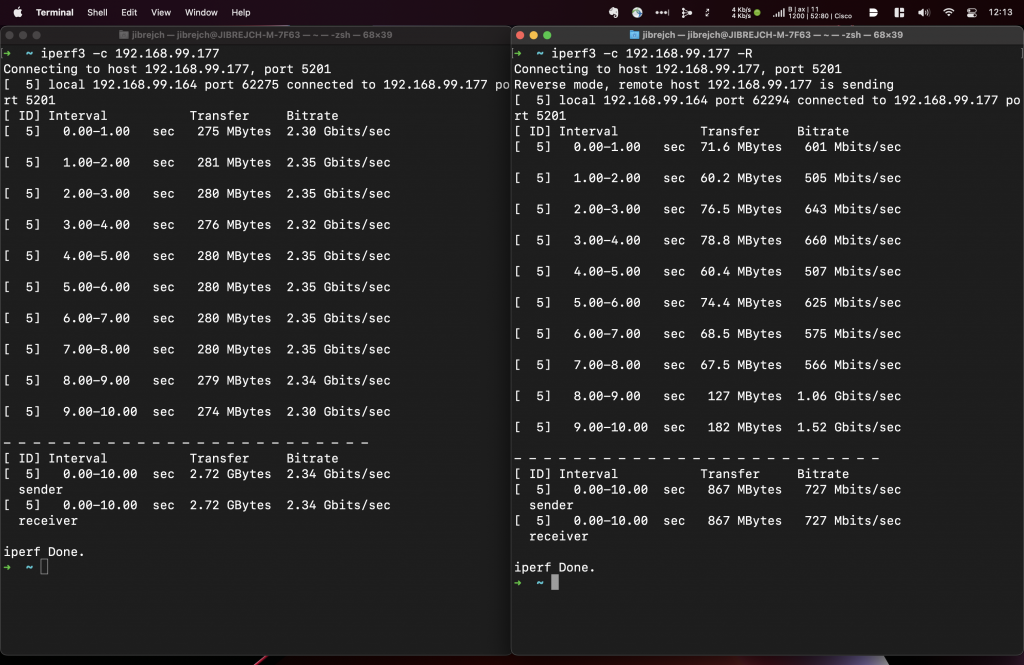
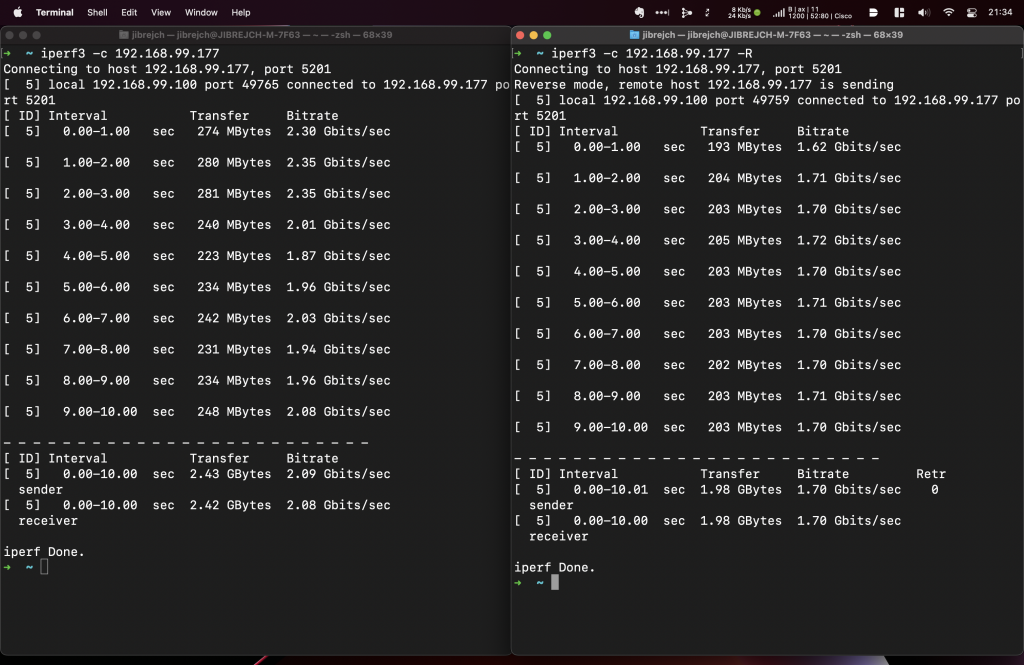
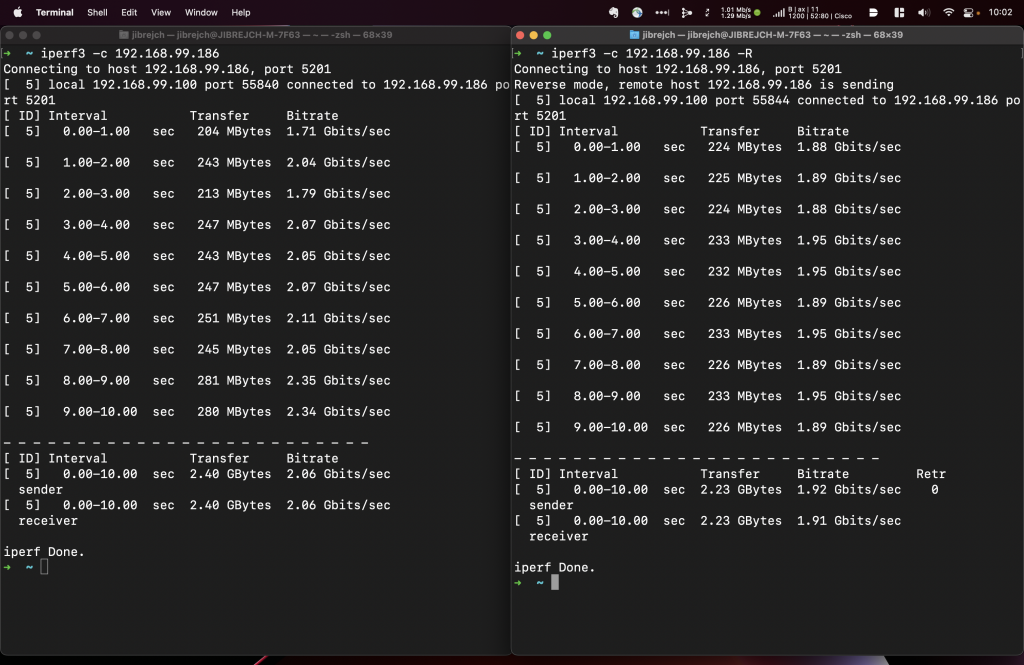
PoE powered FriendlyElec’s NanoPi R5S runs iperf3 server. Here a quick iperf3 performance review of this little, 2.5 GbE, and mighty Linux box.

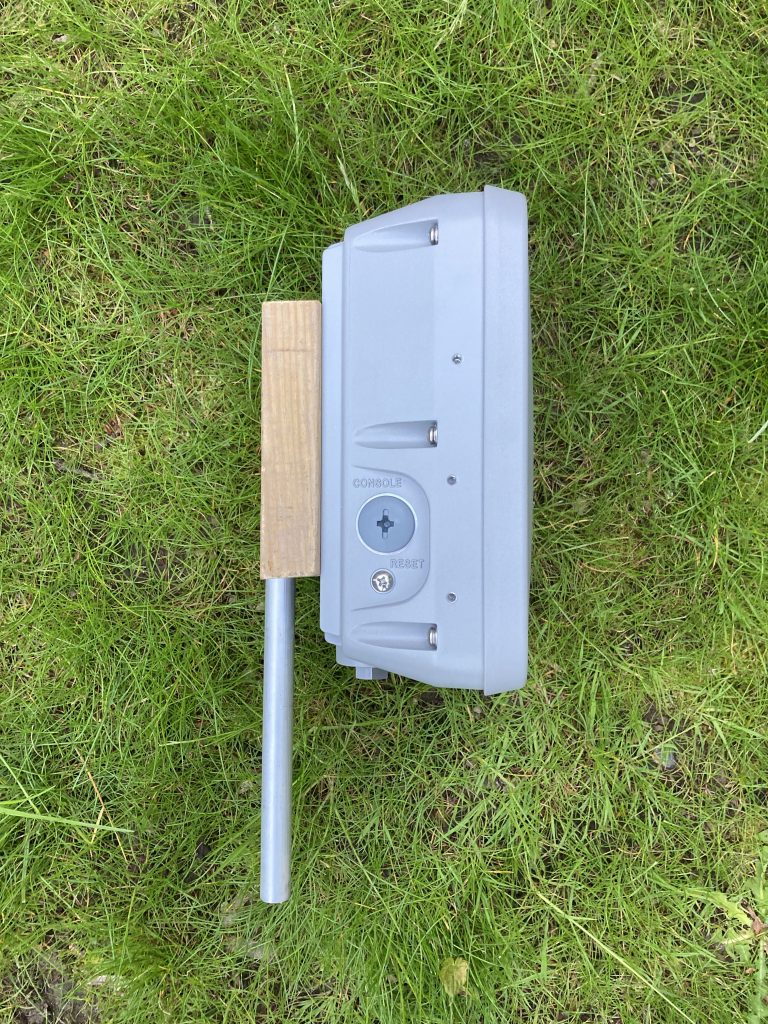
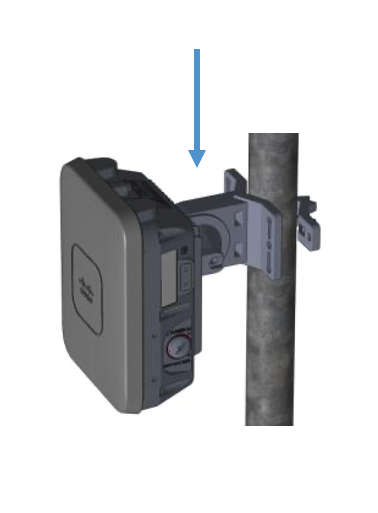
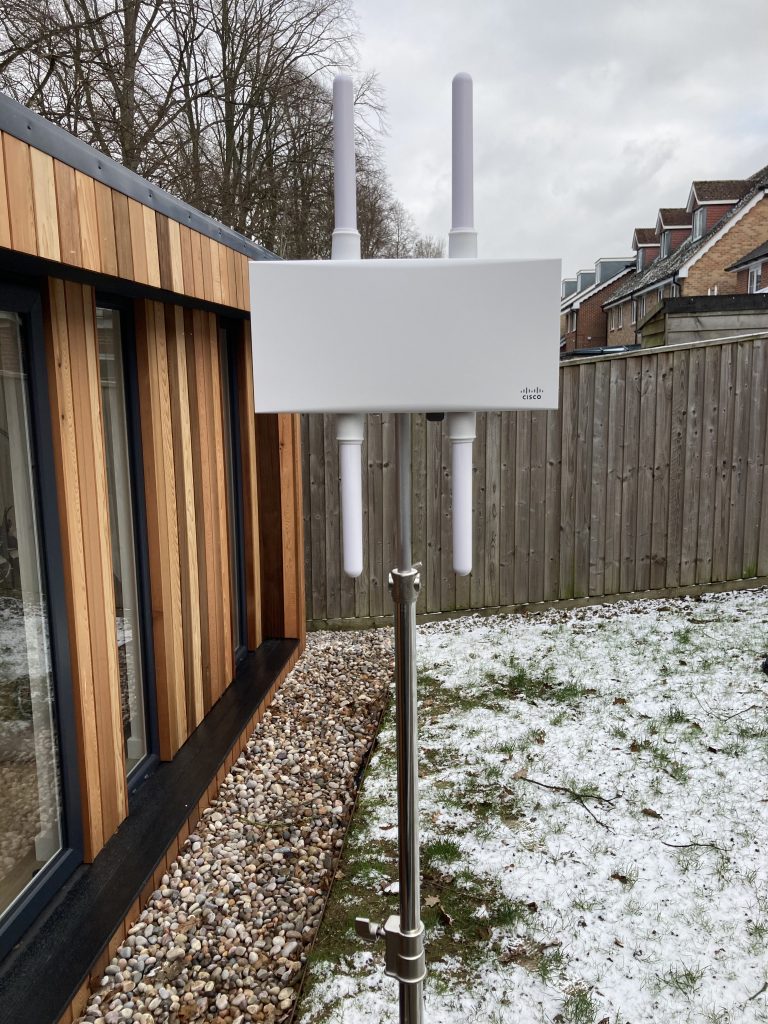
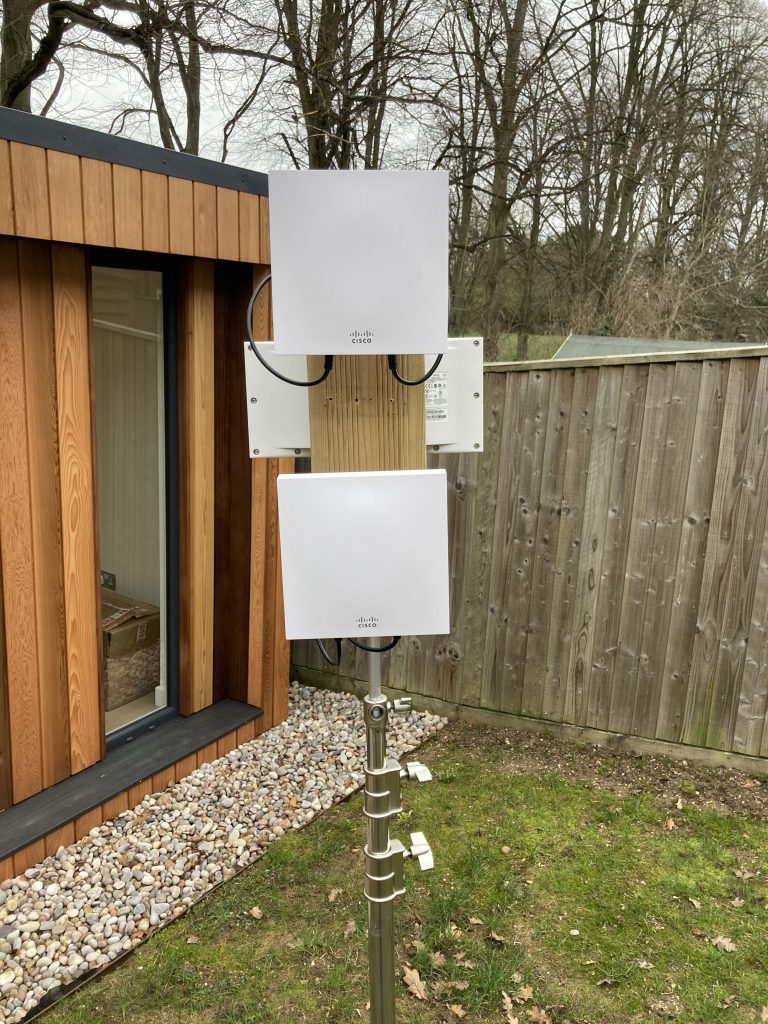
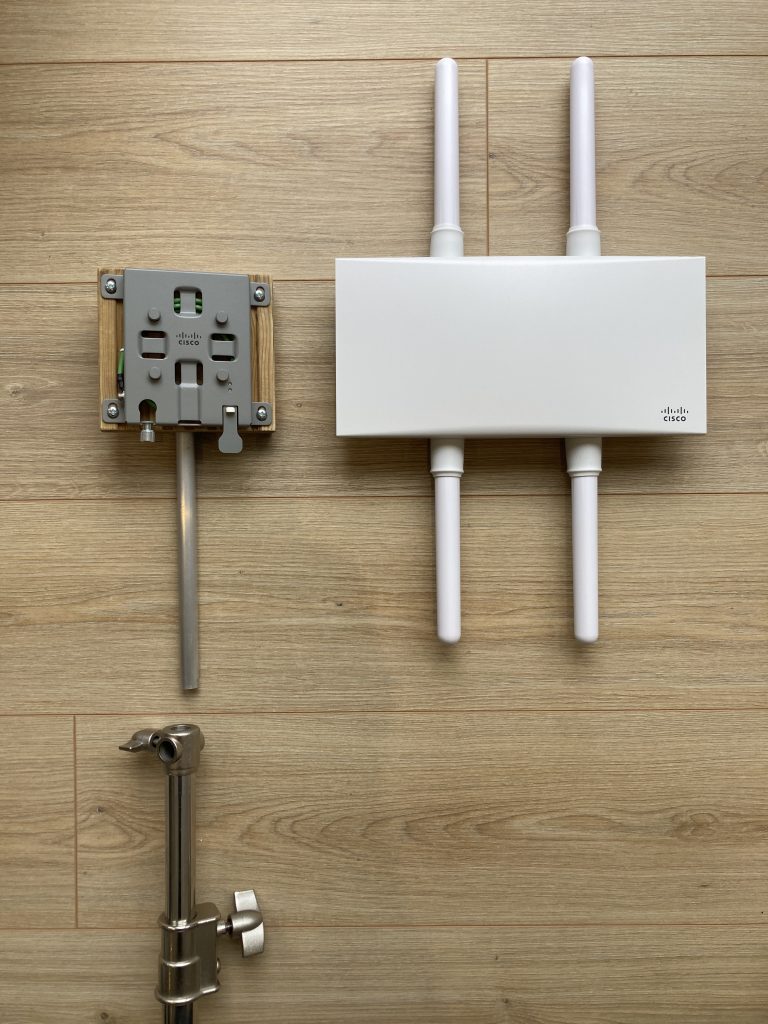
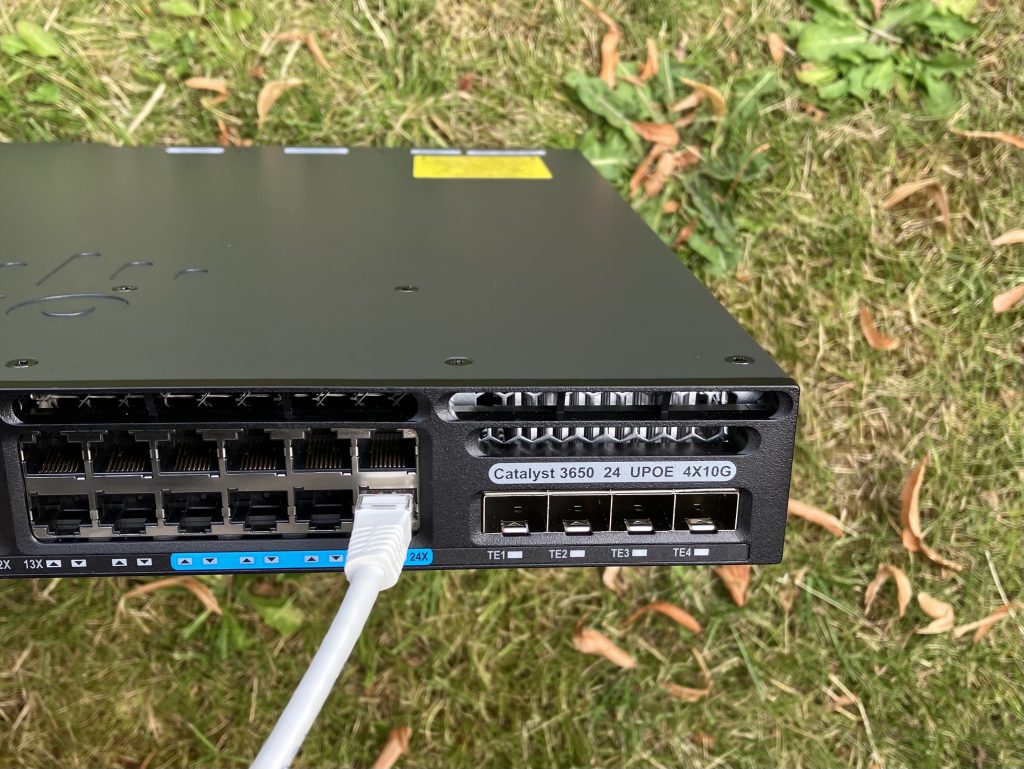
My Catalyst 9800-CL controller is hosted on a cloud, so I don’t need any hardware for that. Finally, my Catalyst 9136 Wi-Fi 6E AP is powered by a Catalyst 3560CX 10 Gigabit Ethernet multigigabit switch.

6 GHz 2×2 MIMO setup powered by PoE+

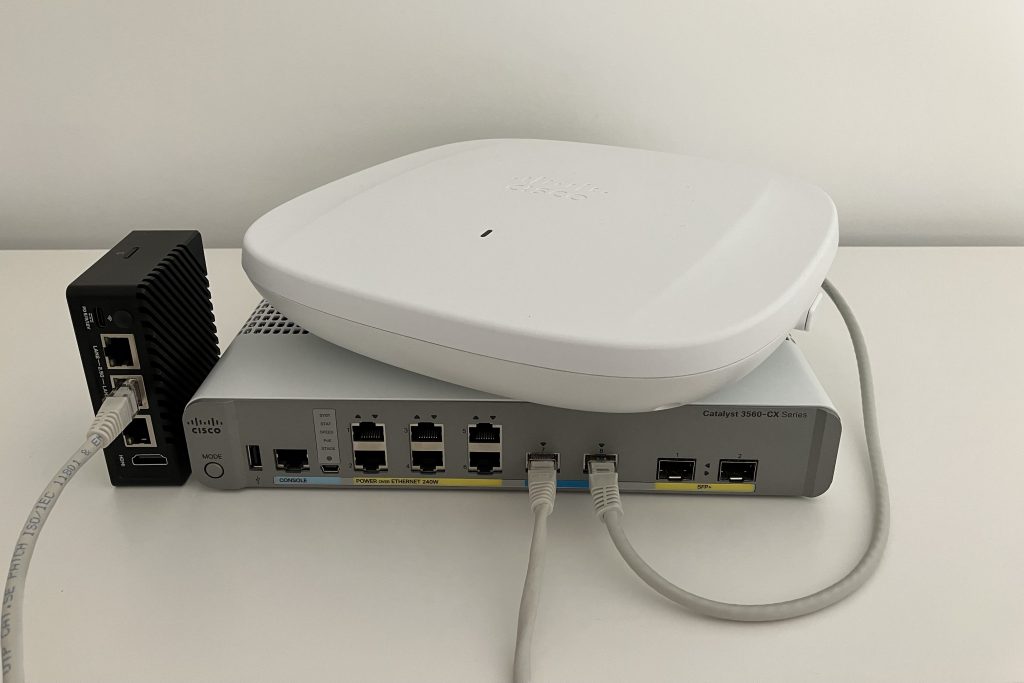
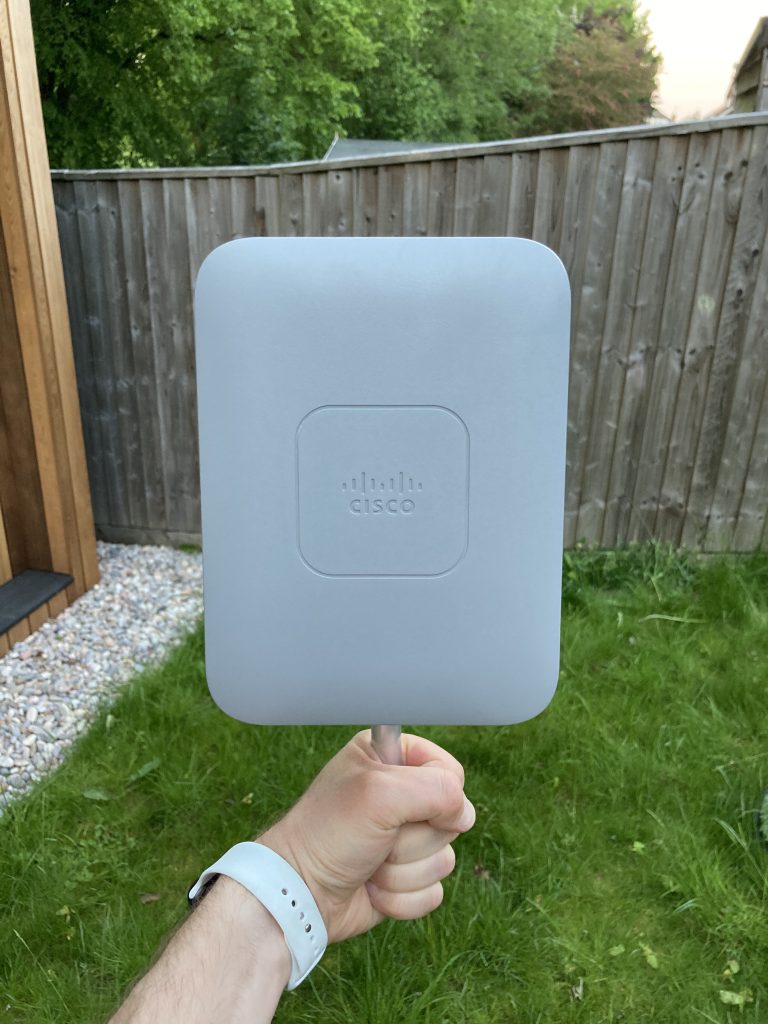
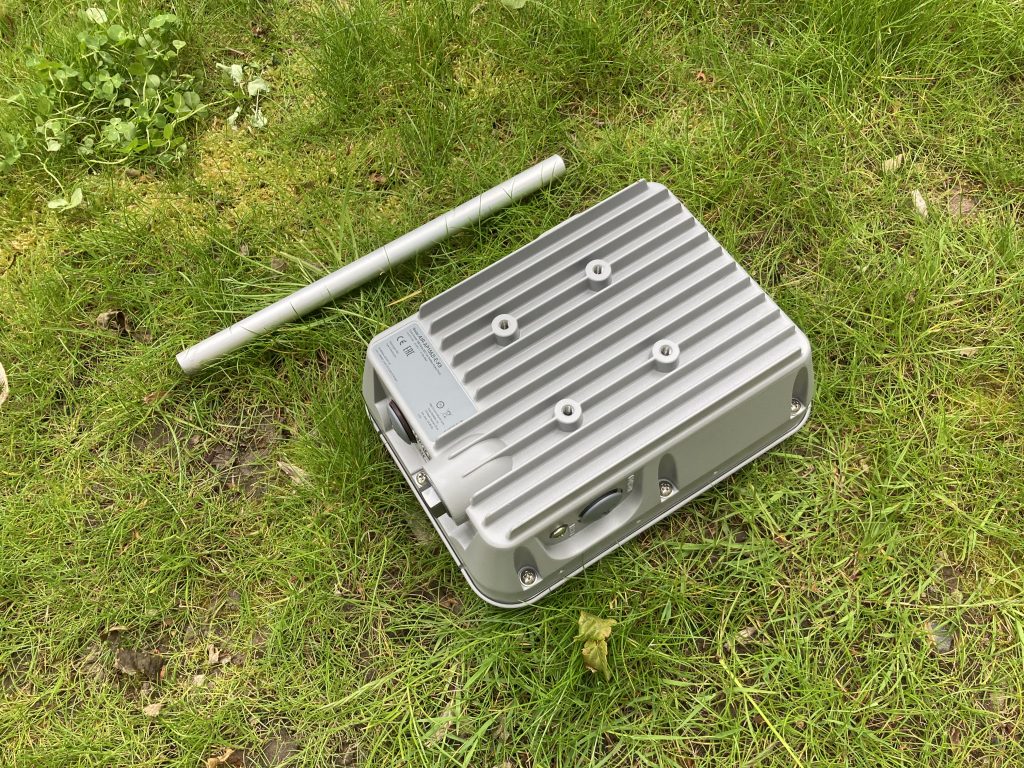
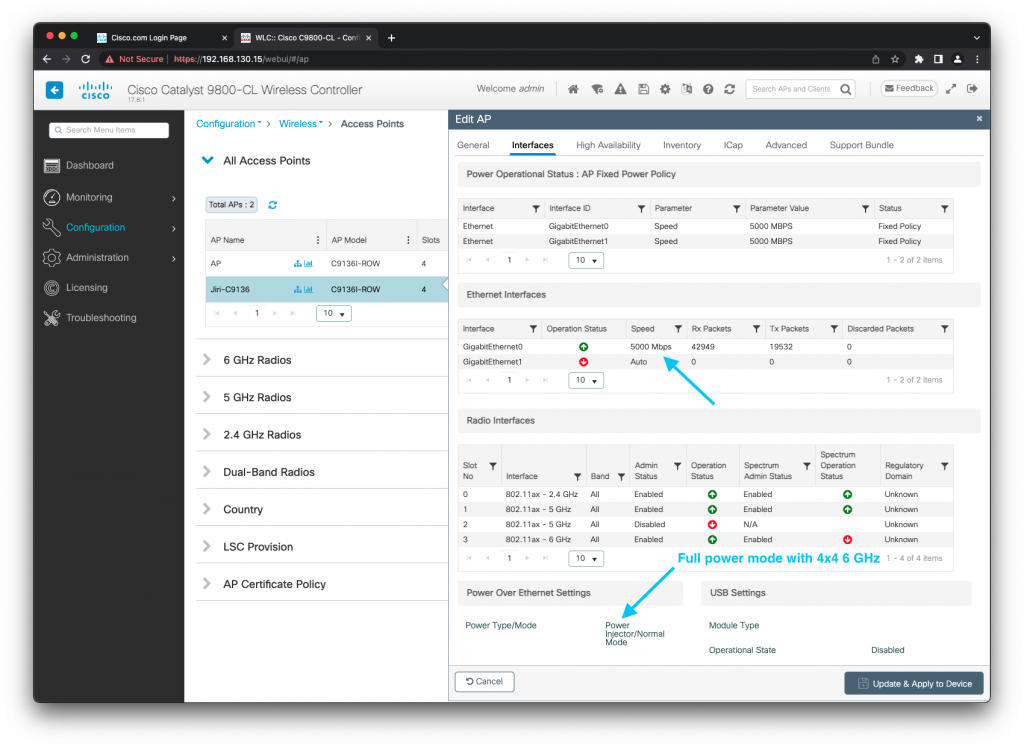
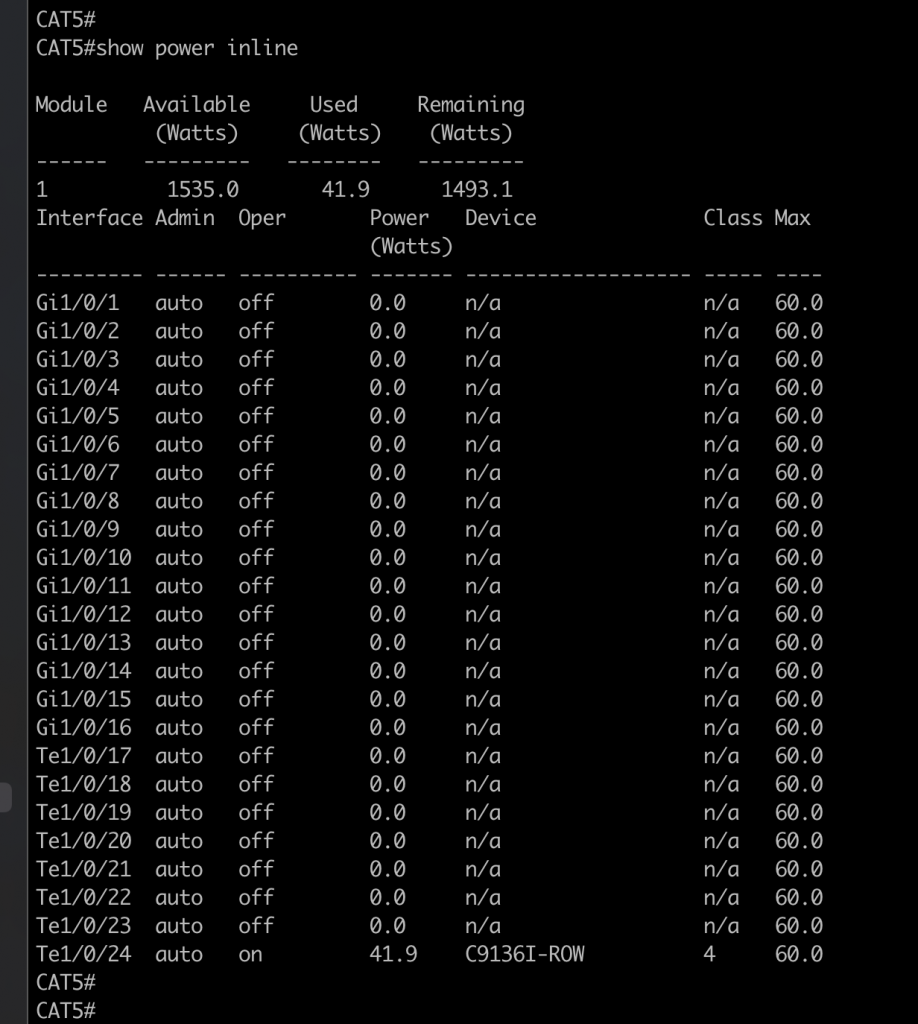
Catalyst 9136 is Cisco’s premium AP with all the bells and whistles including hexa-radio architecture and built-in environmental sensors for smart building use cases. It requires an 802.3bt/UPOE power source to enable 6 GHz radio in full performance 4×4 MIMO mode. The switch I use supports 802.3at/PoE+, which is great, but 6 GHz radio downshifts to 2×2. And that’s where an 802.3bt power injector comes to the rescue.

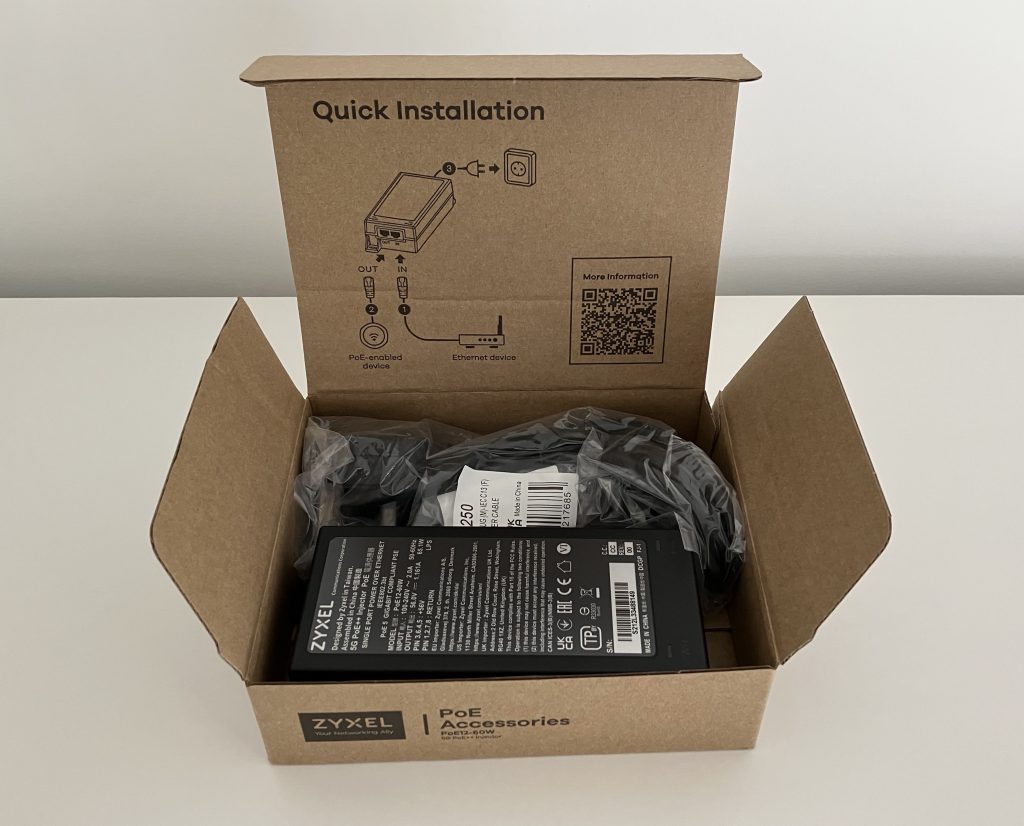
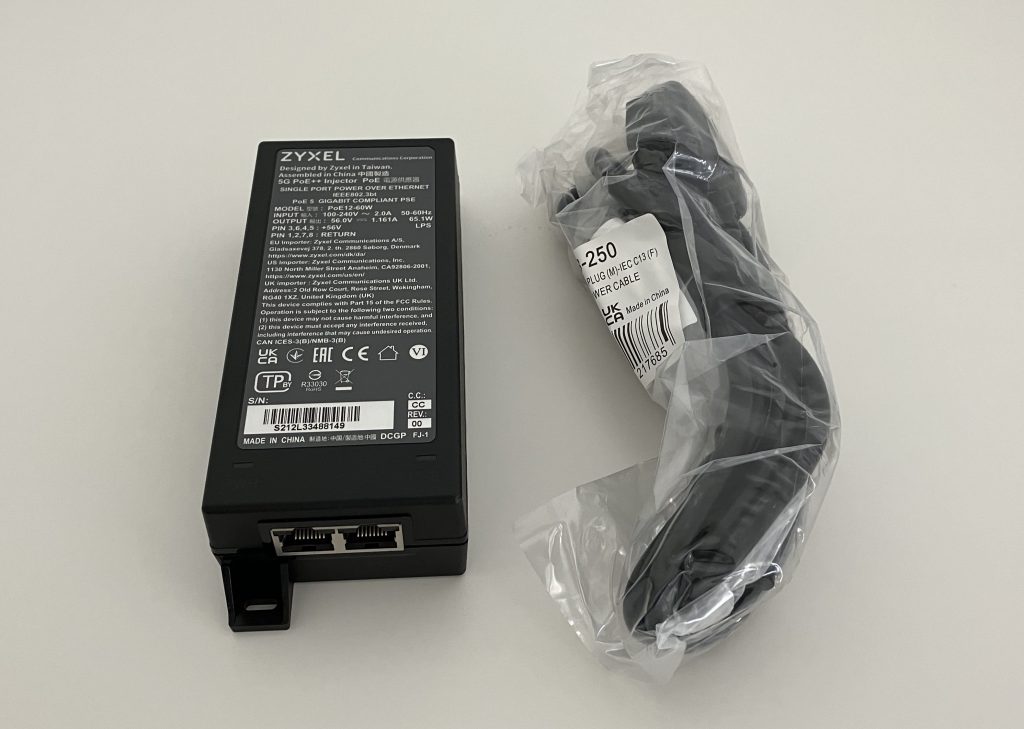
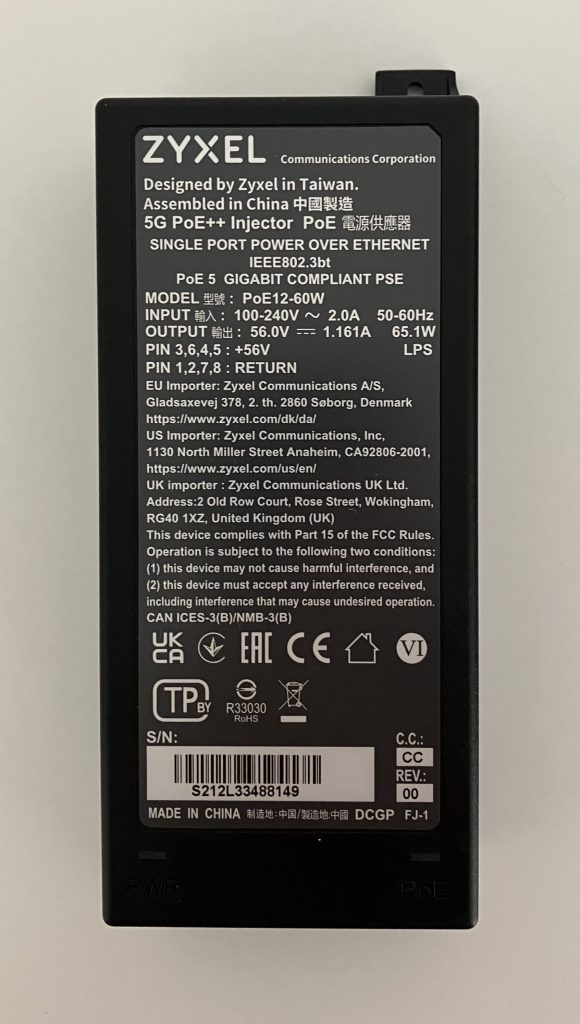
Zyxel 5G PoE++ Injector

Cisco’s 5 GbE 802.11bt power injector (AIR-PWRINJ7=) is now available, and that’s my go to option for production use.

Since the Cisco injector isn’t widely available yet, I decided to test this Zyxel one. It provides 802.3bt power and allows the AP to run in full power and full 4×4 6 GHz radio mode with no compromise.

Do I like power injectors in production?

Absolutely not! Ideally you should design for 802.3bt/UPOE switches to power all your new APs via PoE.

It allows you to:

  • easily, centrally and remotely monitor how much power the APs use
  • enable/disable power on a port to bounce an AP
  • leverage redundant Platinum-rated power supplies for the AC to DC power conversion
  • manage the solution with ease – just think how difficult it is to manage more than 1 power injector, the number of AC power sockets, and what happens when someone disconnects the injector?
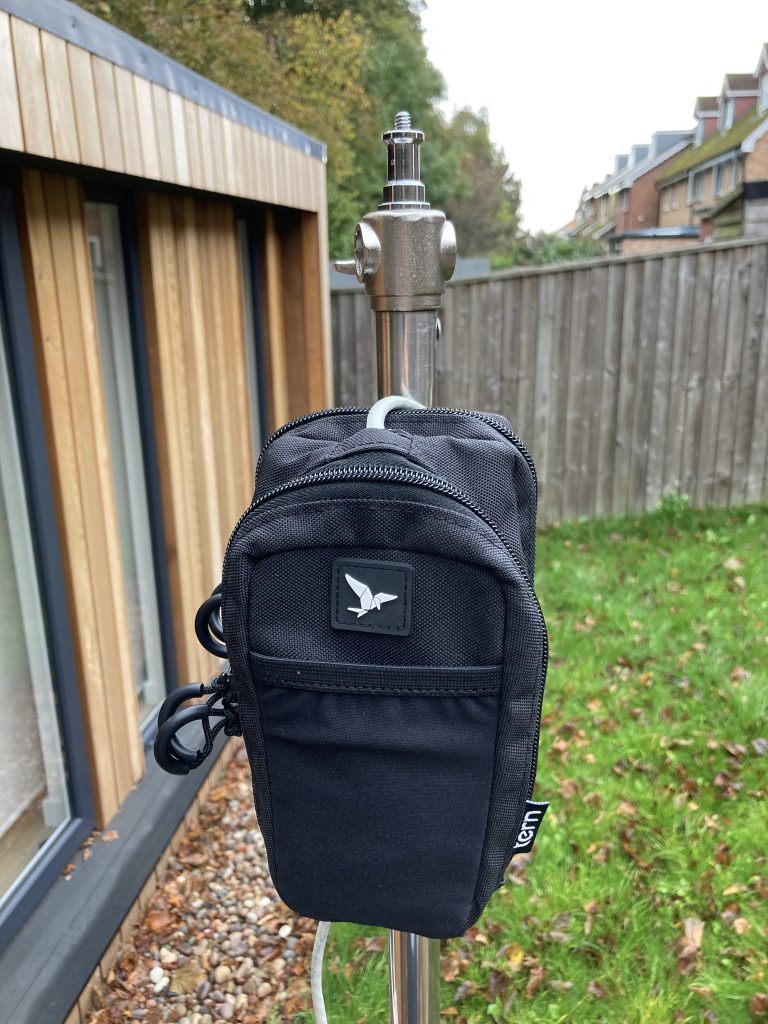
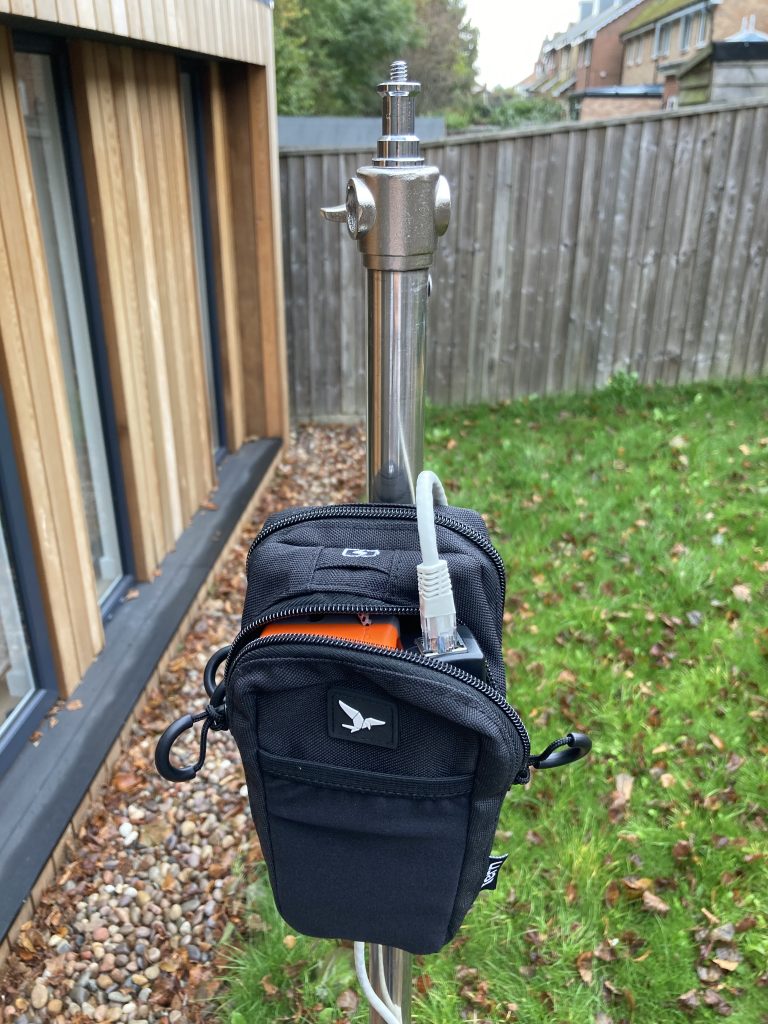
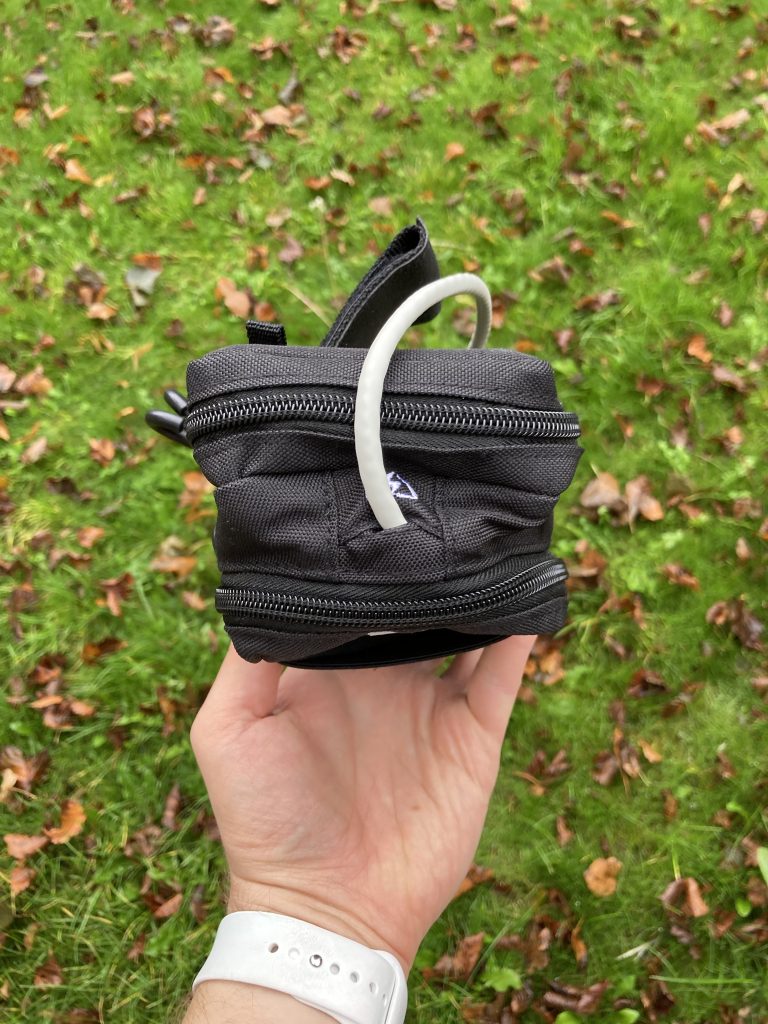
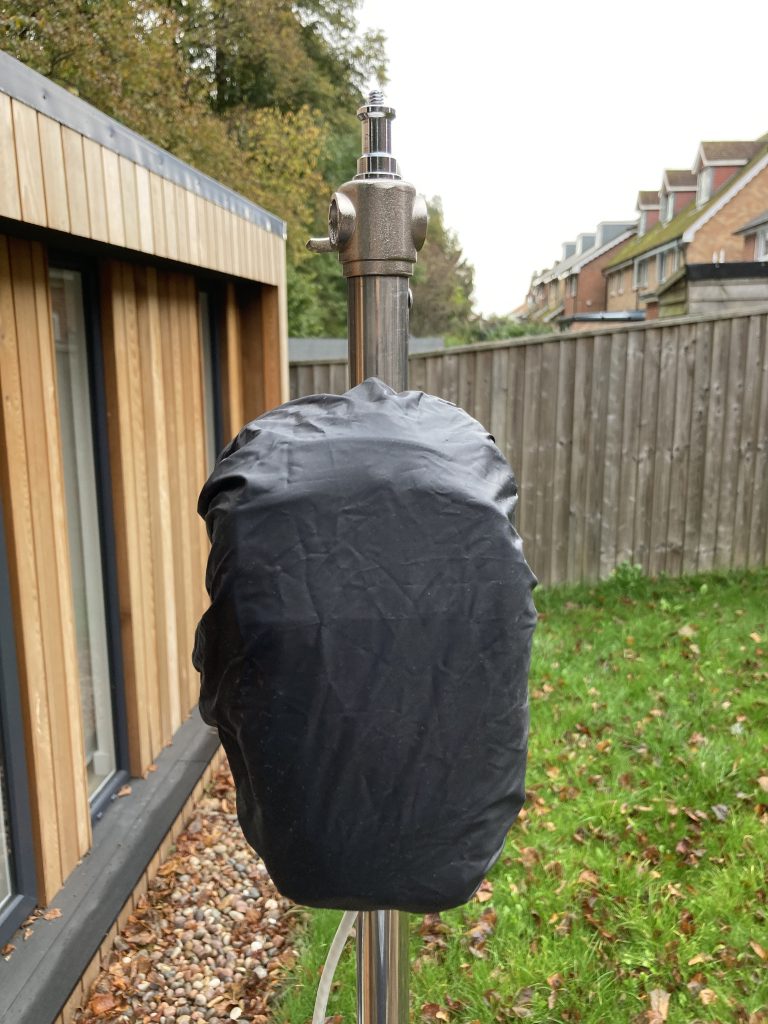
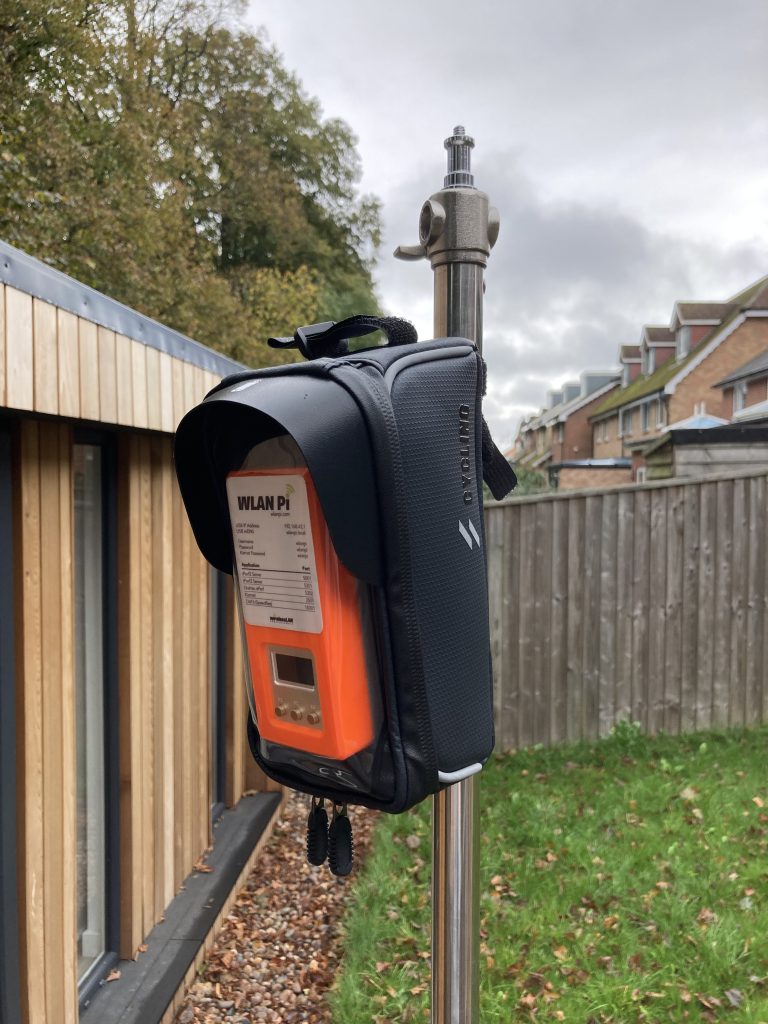
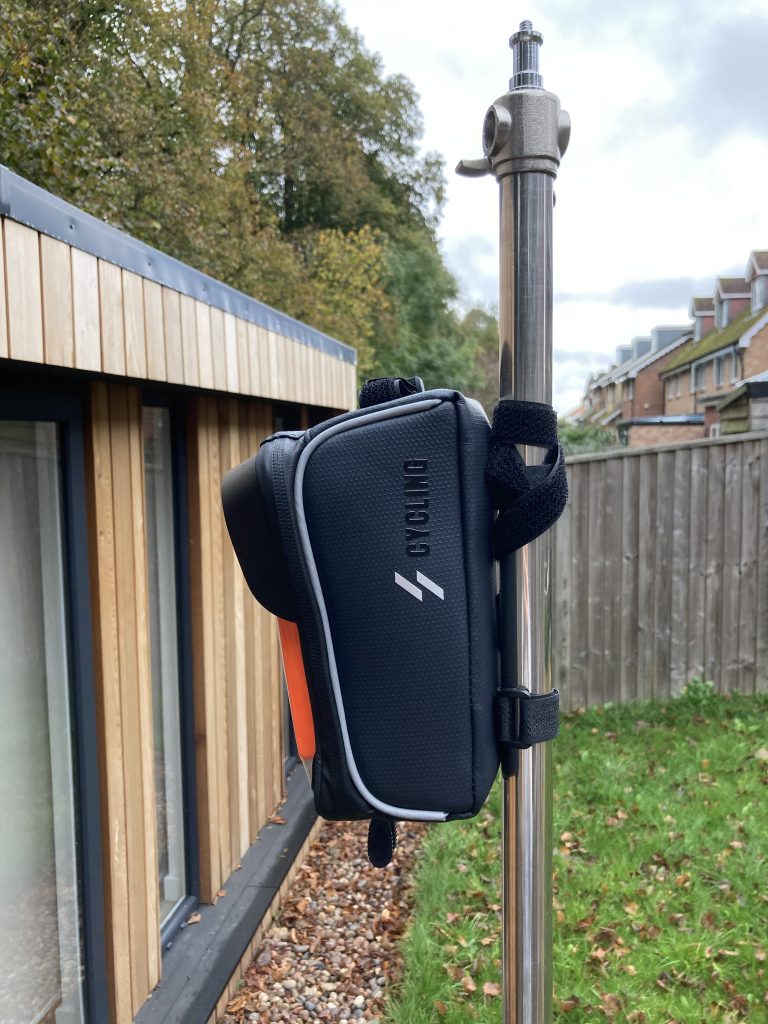
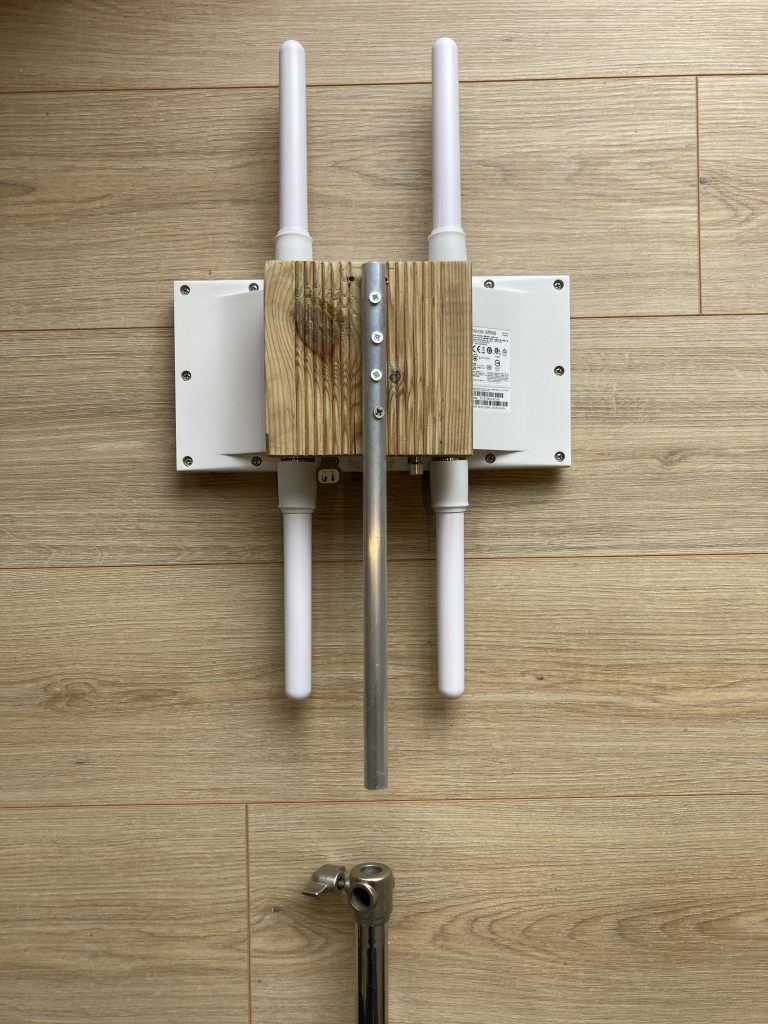
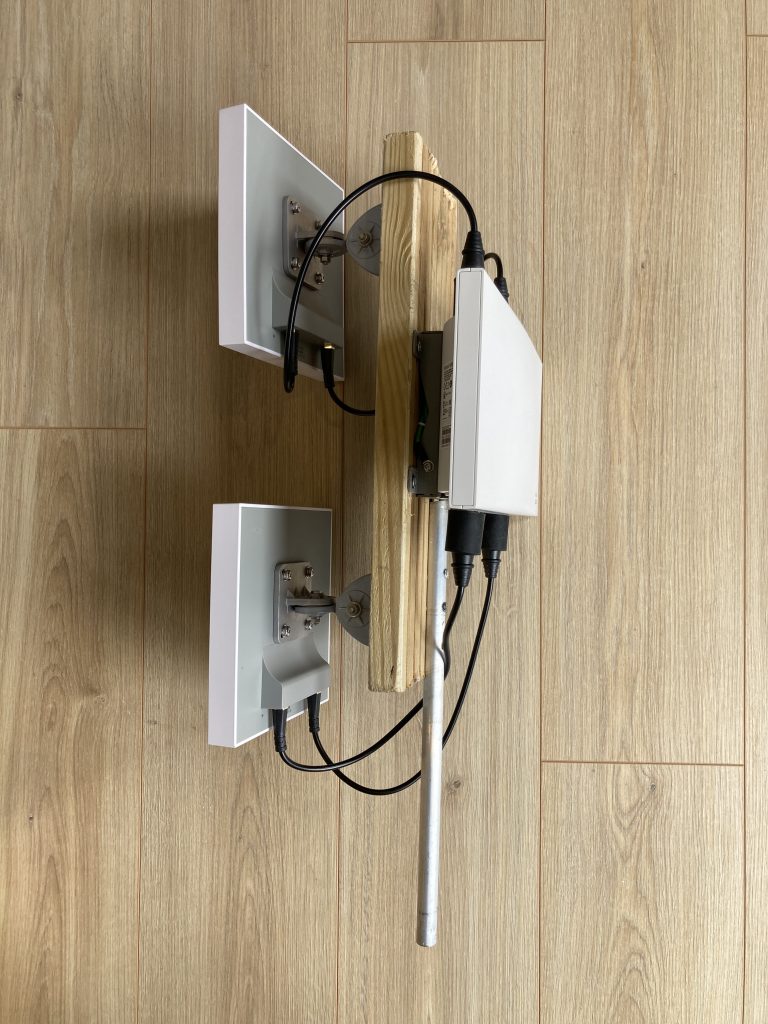
I still use C3650 UPOE mGig switch in my lab. Catalysts 9300 and 9400 the best choice these days.
UPOE and mGig capable C3650 providing full power to the AP

Final look

Carrying a full-size switch is not really an option for me, because small form factor is my main goal. So a power injector works best for me. But if I could I would love to use a compact 802.3bt switch.

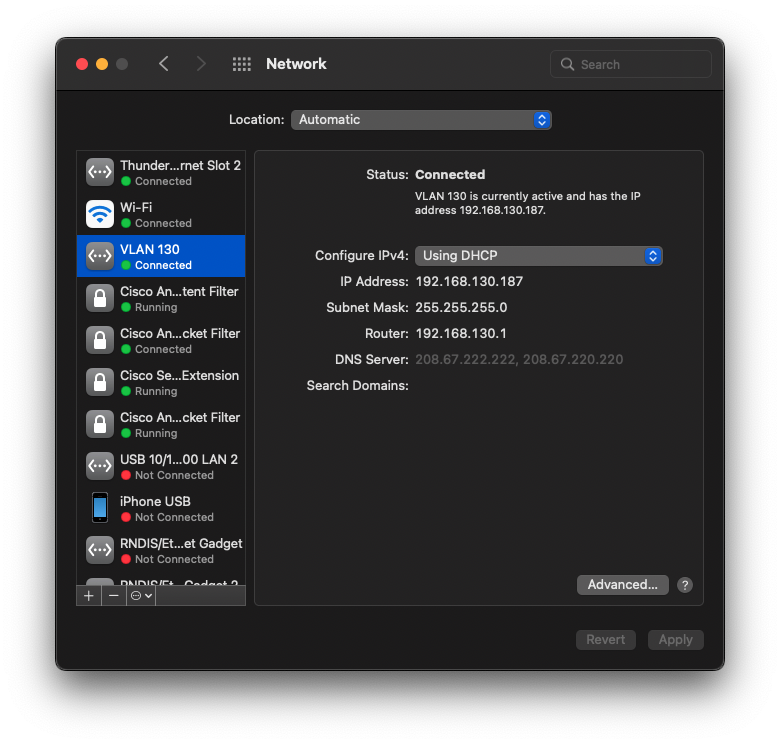
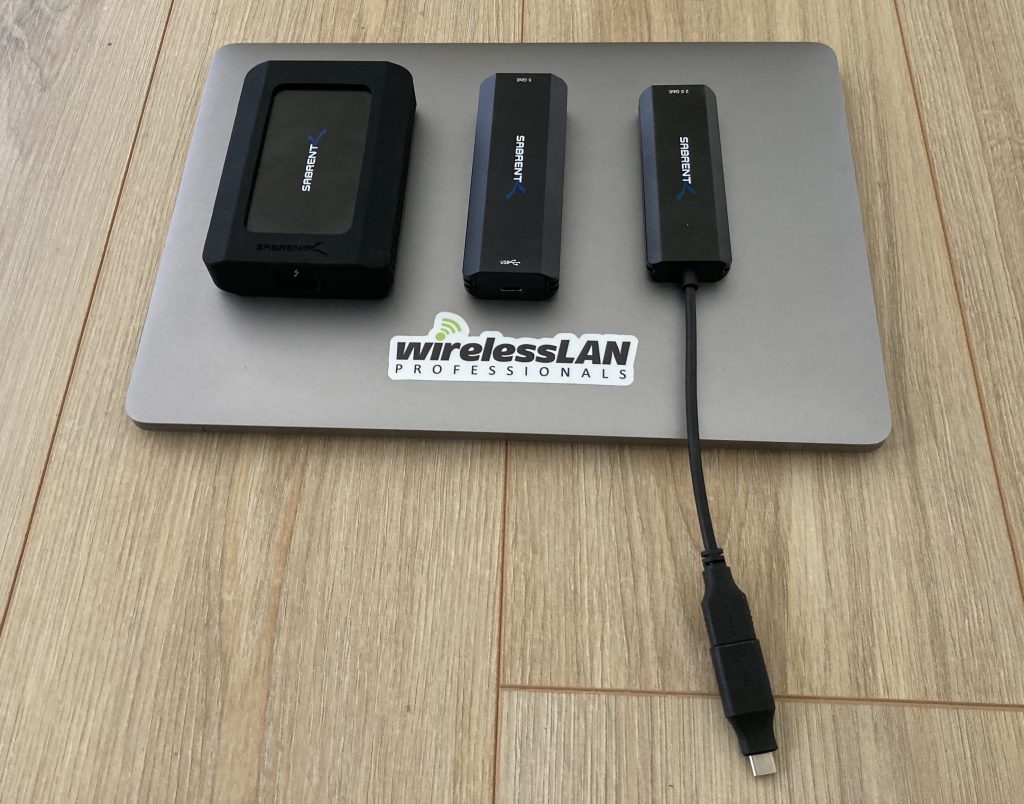
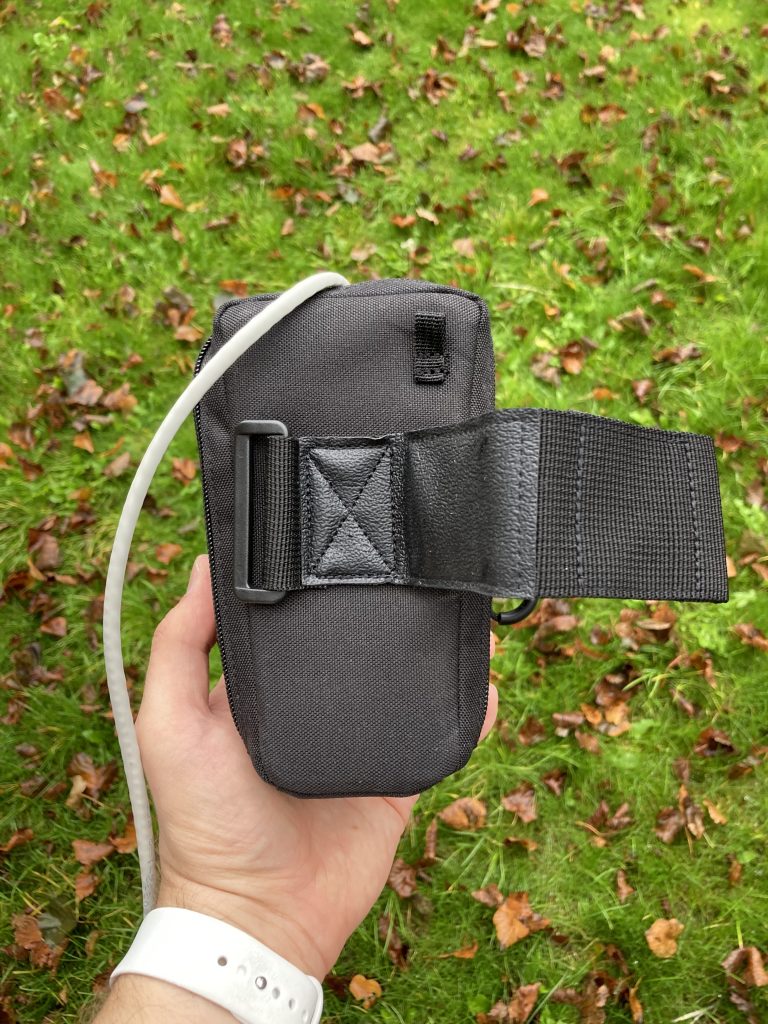
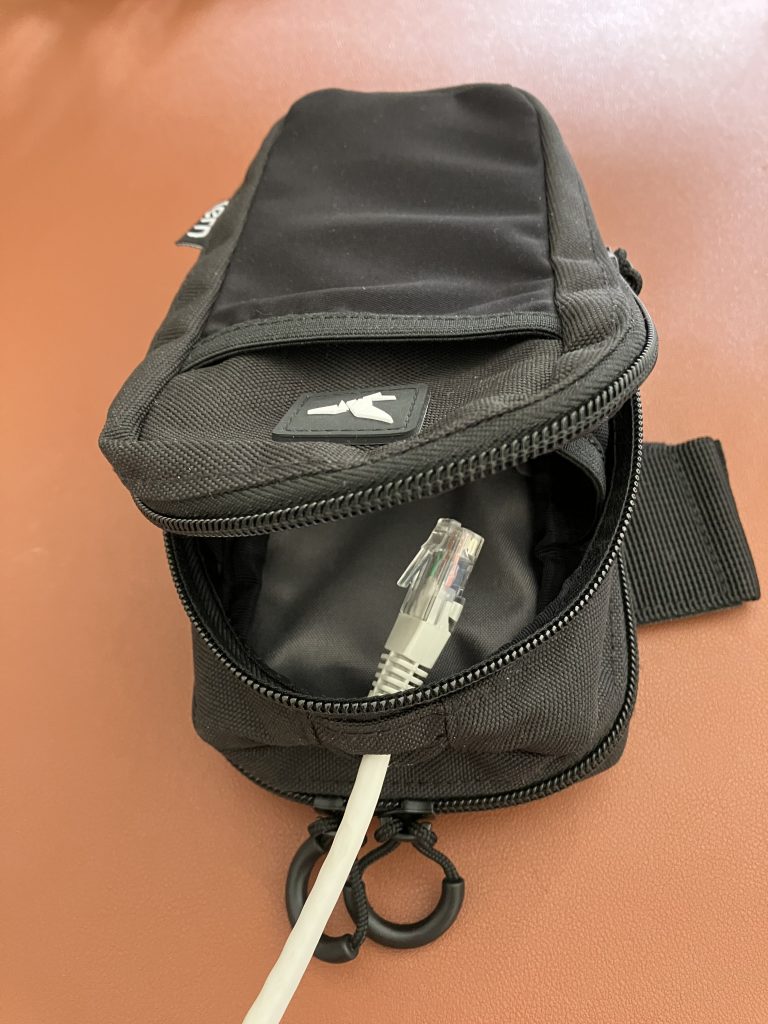
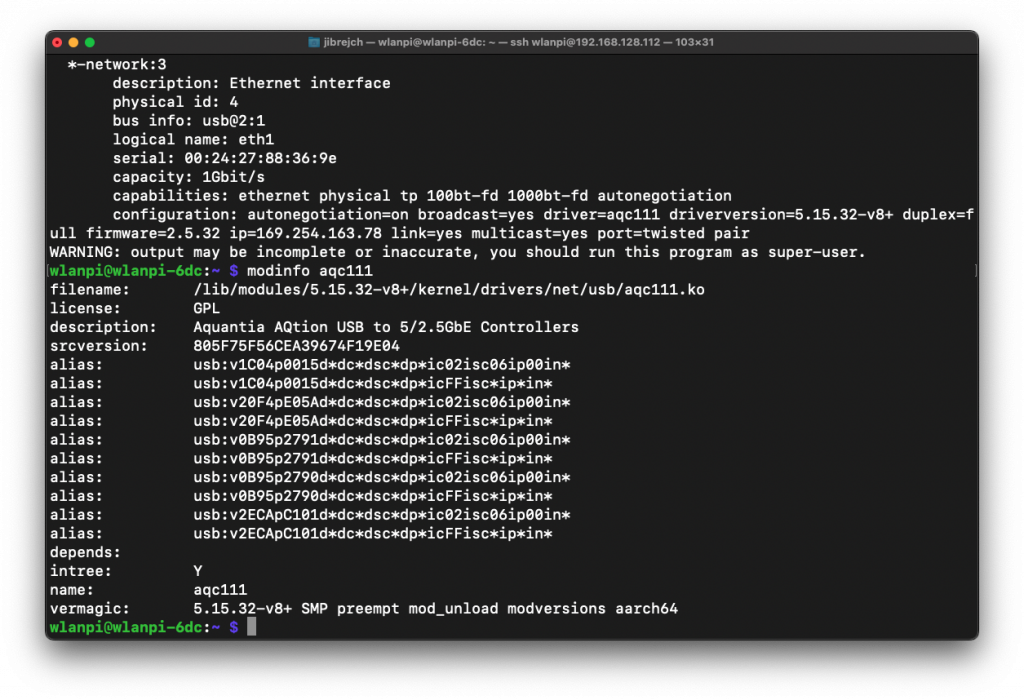
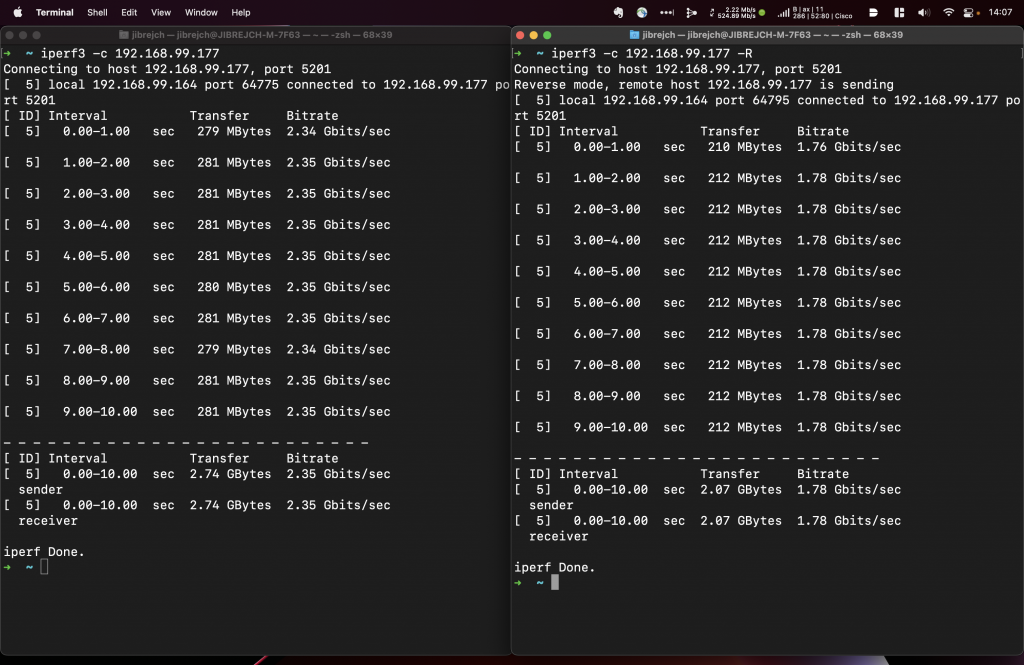
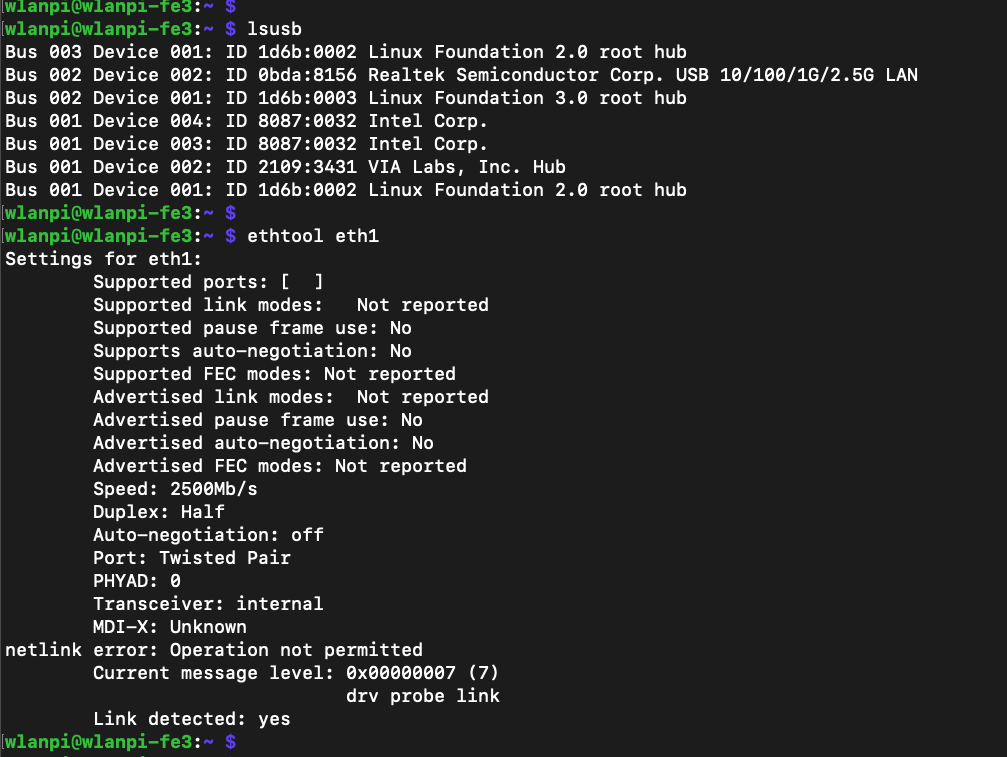
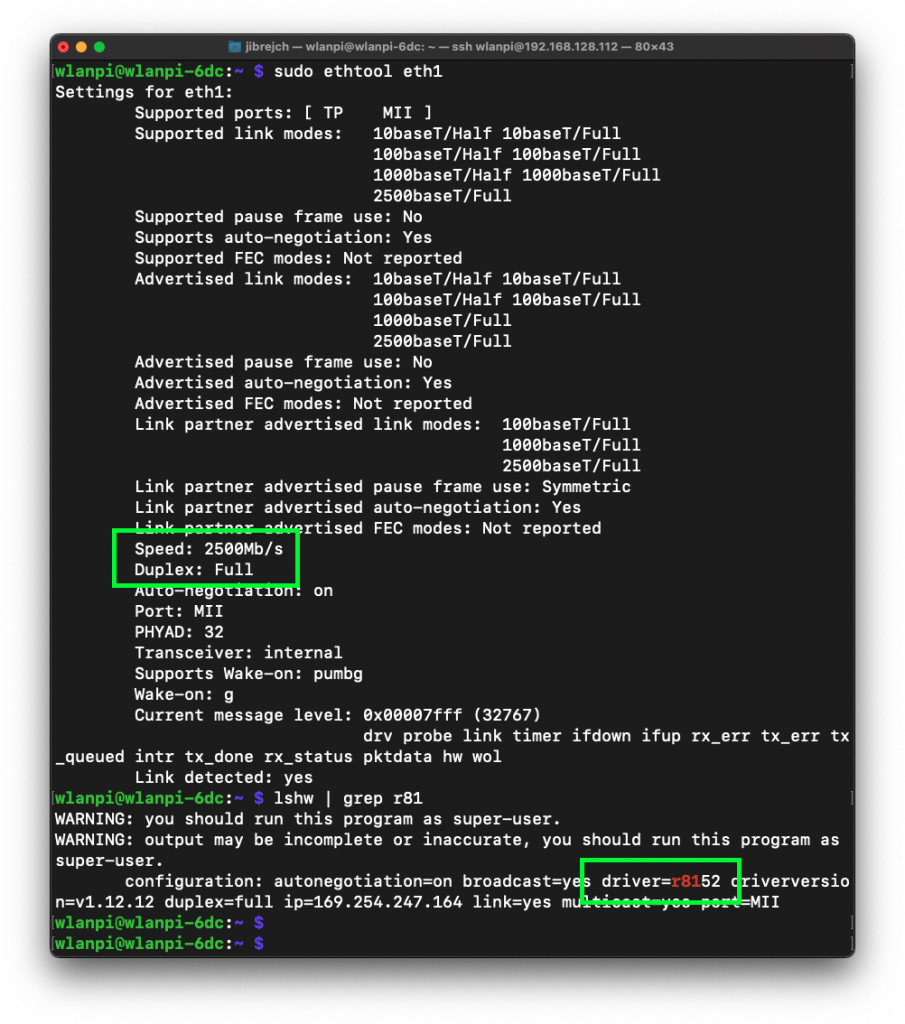
Are you wondering if the PoE splitter connected to my iperf3 server (the little black box with 3 Ethernet interfaces) actually negotiated 2.5 Gbps Full duplex with the switch? Yes, it did. But keep in mind that the PoE splitter is technically only rated for 1 GbE. So use as short patch cable as possible and ideally CAT6.

Still few things to tidy up and perhaps I could build this into a nice Pelican case

OWC Thunderbolt 3 to 10 Gbps Ethernet Adapter – The Fastest Multigigabit Adapter For Your Mac

When it comes to the fastest copper Ethernet adapter for your Mac, you have only 2 options:

  • If your other half approves, get yourself an M1 Mac Mini with built-in 10 GbE port. It doesn’t get much better than this.
  • Or you can consider an add-on 10 Gigabit Ethernet Thunderbolt 3 adapter for your current Mac.

We will focus on the latter today.

Thunderbolt 3, not USB

While the USB-C connector might temp you to connect these adapters to a standard USB port, these adapters don’t support USB protocol. They use Thunderbolt 3 and they happen to use the same USB-C connector as USB. That’s the only thing USB and Thunderbolt have in common. Before you order one of these adapters, double-check that your computer supports Thunderbolt 3. That should be most new MacBooks, Mac Minis, Intel NUCs and similar platforms.

Which 10 GbE adapter shall I buy?

I tested two of these Thunderbolt 10 GbE adapters. One made by Sabrent, and the other by OWC. They both look alike, both perform very well, both get quite warm, and both work out of the box on macOS. Yes, no driver installation required on your part on macOS! 🎉

Mainly because of the loose Sabrent cable issue explained below, I recommend the OWC adapter. It comes with great documentation, and even the Thunderbolt cable itself is thicker, feels premium, and most likely delivers better shielding.

OWC Thunderbolt 3 10G Ethernet Adapter OWCTB3ADP10GBE

From throughput perspective, I personally tested it up to 3 Gbps down and 3.3 Gbps up using iperf3 with default settings. The limitation is on my part, I just don’t have another 10 GbE computer I could test against.

I’ve seen reports of:

  • between 7 Gbps and 8.74 Gbps uplink speeds with default iperf3 settings
  • 9.5 Gbps uplink iperf3 speeds with Jumbo frames enabled

When I reviewed 2.5 GbE and 5 GbE adapters, this setup has become my reference I ran all iperf3 tests against.

OWC connected to an M1 MacBook Pro
Thunderbolt side
Ethernet side
Raspberry Pi 4 for scale
10 Gbps Full Duplex
It supports Jumbo frames including a custom MTU setting

VLAN tagging

The OWC adapter also supports VLAN tagging. Here is my Trunk port with Native VLAN 129:

Trunk port configured on the access switch

Let’s tag all traffic with VLAN 130:

Create VLAN interface on macOS

Verify that we are indeed in VLAN 130:

VLAN 130 is being used instead of the Native VLAN 129

If you only want to use VLAN 130 (without touching the Native VLAN 129), you can disable the adapter itself. VLAN 130 virtual interface will stay up and forward traffic.

Disable the Native VLAN 129 and only use VLAN 130 for all traffic

Sabrent Thunderbolt 3 to 10 Gbps Ethernet Adapter TH-S3EA

I won’t go into the detail, but my main challenge with the Sabrent adapter was its loose Thunderbolt cable. The connection between the USB-C socket on the adapter and the USB-C connector on the Thunderbolt cable is very loose and practically pulls out just by the tension of the cable itself. It might have been just my unit, but I can’t recommend it.

Sabrent Thunderbolt 3 to 10Gbps Ethernet Adapter on the left
It almost felt like it needed some hot glue to keep the Thunderbolt cable connected

What about Windows and Linux support?

I tested the Sabrent adapter on Windows 10. It required a Sabrent driver installation and then it worked just fine. I would assume the same for the OWC.

I don’t have a Linux computer with a Thunderbolt port, so I can’t share anything on that front.

How to mount WLAN Pi to a tripod

You might remember me saying something about designing a 3D printed WLAN Pi tripod mount. Yes, that was the plan… until I found a much better solution, which I had already owned.

Why tripod mounted? Well, occasionally I work on an outdoor Wi-Fi project. WLAN Pi can be a really useful for throughput testing, or it can share your phone’s cellular internet connectivity with your access point. This is really useful in cloud-managed surveys, labs, and projects.

Tern RidePocket Handlebar Bag

I present to you this small, well designed, and weatherproof Tern RidePocket bag. It is a fantastic bicycle bag, and as good bag for your WLAN Pi. You can purchase one in many countries around the globe and made by a big bike company, which is here to stay.

WLAN Pi in the Tern RidePocket bag on a tripod
WLAN Pi powered by PoE using PoE splitter
Cable management works really well

If you wanted to, you can battery power your Pi. Just add a battery pack of your choice.

WLAN Pi powered by a USB battery pack

Outdoor surveys involve all kinds of weather, and that’s where this rain cover becomes really useful.

Rain cover

What makes it work better than other or cheaper bags? It mounts securely, and does not slide down the tripod thanks to its strap coated with a layer of anti-slip rubber material.

Anti-slip material on the strap and a hook towards the top
Attached to a tripod
Closer look at the cable hole

If you prefer a Raspberry Pi 4, or WLAN Pi Community Edition based on Raspberry Pi 4, it fits in this bag too including a PoE splitter with little effort.

It fits Raspberry Pi 4 and PoE splitter

Lenlun Bike bag set

Do you need to interact with your WLAN Pi while it is mounted? No problem. I’ve tested a handful of other bags and Lenlun Bike bag set is the best fit. It allows you to see the display and press buttons while it protects everything stored inside.

WLAN Pi in the Lenlun bag
Attachment to tripod is not as clean as Tern
Battery pack and WLAN Pi inside the bag

Finally, after you are done working, these bags can happily carry your keys, phone, battery pack, and wallet.

Brompton bike with Tern RidePocket

Sabrent 5 GbE Multigigabit Ethernet Adapter

Sabrent NT-SS5G is a 5 GbE USB adapter, which allows you to achieve higher throughput than 2.5 GbE adapters, and break the 2.35 Gbps barrier. It works great on Windows. If you are a macOS or Linux user, I recommend you consider other options like this instead.

The adapter itself is larger than 2.5 GbE adapters, it uses AQC111U chip, and ships with short 2 detachable USB-A and USB-C cables. USB-C port on its back connects the adapter to your computer. A metal shell protects it, serves as a heatsink, and also adds to its weight.

Windows 11

Install the driver from Sabrent’s website and you are good to go. In my tests with this Topton M6 Mini PC, I measured 2.93 Gbps down and 3.44 Gbps up with default iperf3 settings.

2.93 Gbps down and 3.44 Gbps up with default iperf3 settings

In adapter options, you can actually configure quite a few things including Jumbo frame support. Note that these are fixed values.

macOS

I can’t recommend this adapter for macOS users. It forces you to disable macOS System Integrity Protection (csrutil), otherwise it won’t work. It might be okay for a proof of concept or lab setup, but I would hesitate from using it in production.

This is how to install the driver if you were interested:

  1. Install the driver using the pkg file provided by Sabrent. It installs a Kernel Extension (kext), which drives this adapter.
  2. Enable the extension by going to System Preferences > Security & Privacy > enable the extension > Reboot.
  3. After reboot, unplug the adapter and plug it back in.
  4. It should work as long as you leave the System Integrity Protection disabled.

From throughput perspective, it saw download speeds of 3.30 Gbps, and upload of 3.45 Gbps. This was with default iperf3 settings, standard 1500-byte MTU and one stream. Great results considering that this adapter’s USB interface maximum theoretical throughput is 5 Gbps.

In my view, you might be better off buying a 2.5 GbE adapter, which can push 2.35 Gbps up and down consistently and with no driver installation needed. I tested one here. Alternatively, a 10GbE Thunderbolt Ethernet adapter is even faster choice, but more costly, and larger form factor. Or, if your other half approves, treat yourself to an M1 Mac Mini with built-in 10 GbE 😉

Linux

I tested this adapter on 64-bit Raspberry Pi OS running on Raspberry Pi 4. Although the default driver distributed in Linux Kernel 5.15 works, it doesn’t even deliver symmetric 1 Gbps.

Sabrent connected to Raspberry Pi 4
Upload speeds well below 1 Gbps
Default aqc111 driver details

Let’s download the latest driver from Sabrent’s website. Unfortunately that doesn’t seem to be able to compile for 64-bit OS. I tried compiling on 32-bit Raspberry OS, to no avail. If you have any ideas, please do let me know.

So, on Linux, a Realtek RTL8156B based 2.5 GbE adapter might be a better choice for you. Here is the one I tested.

Plugable 2.5 Gigabit Ethernet to USB 3.0 Multigigabit Adapter

Plugable makes this inexpensive 2.5 Gigabit Ethernet USBC-E2500 adapter. It is based on Realtek RTL8156B chip. On Windows and macOS it works out of the box. If you want to use it on a Linux machine like WLAN Pi Pro or Raspberry Pi 4, expect some troubles along the way, but good performance when you get there.

The USB-C to USB-A adapter is allows you to use it with a MacBook (USB-C) or Raspberry Pi 4 (USB-A)
The adapter itself has a plastic shell and is very lightweight

Windows 11

When they say “update the driver using Windows Update first”, they mean it. Windows 11 will recognise the adapter and you can start using it, but the default driver distributed with Windows 11 significantly reduces this adapter’s performance.

727 Mbps down and 2.34 Gbps up with default driver

Now, let’s use Windows Update to download the latest driver.

Don’t forget to update the driver using Windows Update

As you can see, download throughput (from iperf3 server to iperf3 client) has dramatically improved.

1.78 Gbps down and 2.35 Gbps up with updated driver

Although the box suggests Jumbo frame support, Windows driver settings don’t give me any option to edit the MTU size. So, I assume Jumbo frames are not supported.

MacOS Monterey

On macOS, this adapter works out of the box with no additional driver installation required. That’s a very nice surprise. And performance is great.

Symmetric 2.35 Gbps throughput on macOS

Auto-negotiation worked just fine. If you want to configure speed or MTU manually, you can, but Jumbo frames are not supported on macOS either.

Jumbo frames are not supported

Linux

Now the bad news. If you are considering to use this adapter on a Linux machine, the default driver cdc_ncm is a trouble as it only supports 2.5 Gbps Half duplex. Setting Full duplex manually using ethtool command doesn’t work either.

Default driver only supports Half duplex

As you might expect, with the default driver and Half duplex, throughput is very poor.

1.22 Gbps down and 704 Mbps up with the default cdc_ncm driver on WLAN Pi Pro

On WLAN Pi Pro and Raspberry Pi 4 running 5.15 Linux Kernel I managed to fix the duplex issue by the steps listed below. But I hit new auto-negotiation issue between the Plugable adapter and Cisco Catalyst WS-C3560CX-8XPD switch. It took the adapter to eventually negotiate 2.5 Gbps Full duplex around 15 minutes of constantly flapping the interface. Forcing speed and duplex on the Plugable adapter by ethtool did not work. Certainly not ideal, and definitely worth testing before you commit to the Plugable adapter. With other multigigabit adapters, the Plugable had no negotiation issues.

1.7 Gbps down and 2.09 Gbps up with r8156 driver on WLAN Pi Pro
1.91 Gbps down and 2.06 Gbps up on Raspberry Pi 4 using the correct r8156 driver
Raspberry Pi 4 also known as WLAN Pi Community Edition

How to force Linux to use the right driver

To enable Full duplex capability, we need to tell Linux to use Realtek r8156 driver instead of the default cdc-ncm.

  1. Download the latest driver from Realtek’s website
  2. Unzip it and copy the 50-usb-realtek-net.rules file to your Linux machine
  3. On the Linux machine copy this file here sudo cp 50-usb-realtek-net.rules /etc/udev/rules.d/
  4. Reboot by sudo reboot
  5. Verify that the adapter negotiated 2.5 Gbps Full duplex and is using the Realtek r8156 driver.

Hot-swappable tripod adapter for Cisco Aironet 1560 outdoor access points

If you have followed my hot-swappable series, my goal was to find a solution to swapping multiple outdoor AP + antenna combinations and a variety of AP models on the same tripod. What is the use case? I only wanted to carry a single tripod on the site survey day while still having the flexibility to survey with variety of antennas and different AP models.

After making the adapter for MR86 and MA-ANT-20 dipoles and MR86 with two MA-ANT-25 directional antennas, I realised I needed one for Aironet 1560, which, at the time of the writing, is my go-to outdoor AP.

Please excuse the DYI approach. I did this during UK’s second COVID-19 lockdown. Shops were closed, access to tools was limited and I had no access to my lab.

How it turned out?

It went surprisingly well this time as I’ve already built a similar adapter for Cisco Meraki MR APs and this time it was even easier. Same as last time, the alu tube slides inside the top tripod tube and we are ready to roll.

The actual steps

I stocked up on M6 x 30 mm bolts, cut the 16 mm aluminium tube to the right length and reused the last bit of decking from a different project.

M6 x 30 mm bolt

I thought I will try making a template, which I then transferred onto the wood. That wasn’t the best idea and it seems to work best when you watch someone using this “trick” on YouTube. Next time I will go for an analog pencil and ruler, lesson learned;-)

That trick did not go as well as I thought :)

The decking is quite thick so I ended up shaving few millimeters off it. And here is the final adapter.

Ready to go on a tripod

Did you say tripod?

Yes, here is more about this 4-meter tripod I use.

How to achieve down tilt?

Thanks to Alan Wang, who suggested I use the official articulating pole mount AIR-ACC1530PMK2 and attach it to my “back board”. Obviously azimuth you can adjust by rotating the tripod, and this allow you to change the elevation angle.

Articulating pole mount

Tripod mounting adapter for Cisco Meraki MR outdoor access points

I needed to find a solution to swapping multiple outdoor AP and antenna combinations on the same tripod. Specifically MR86 with MA-ANT-20 dipoles and MR86 with two MA-ANT-25 directional antennas. Quick swapping was a key requirement. Some coverage areas required directional pattern while other locations with low traffic and low client density would really benefit from omnidirectional coverage.

MRs ship with standard pole mounting hardware, which is great for permanent installation, but it didn’t allow fast swapping of the AP and antenna sets. Also, pole mounting kit requires tools, which is not practical as it add additional weight to your survey backpack.

Please excuse the DYI approach. I did this during UK’s second COVID-19 lockdown. Shops were closed, tools were limited and I had no access to my lab.

You are smart people, so I don’t need to stress this point, but please don’t take this write-up as Cisco’s official guide or recommendation. This is just me trying to find a solution to a problem.

So, what’s the solution?

Let me show you the final adapter and we can then look into the detail.

MR86 with MA-ANT-20 dipoles and we also had some snow here down south;-)
MR86 with MA-ANT-25 antennas

Under the hood

It all started when I spotted my wife’s aluminium 16 mm gardening tubes;-) I realised they were perfect fit for my tripod. They slide nicely inside the top tripod tube about a couple of inches (5 cm) or so.

16 mm aluminium tube
Tripod and mounting adapter with the standard AP bracket
Grooves in the decking board helped me align the tube
Two drill bits later: Directional adapter with AP mounted on the back for stability

What would I improve?

If I were to build a second iteration of this adapter, I would add a safety wire and attach the AP mounting bracket to the tripod. I would call this mandatory, especially if you are not the only user of these adapters or if there is going to be a person stood underneath the tripod.

Safety wire

Apart from that, it works really well, it is rock-solid, and allows me to swap the MR with omnis and MR with directional antennas in less than 10 seconds.

Apple AirTag from iPhone SE user’s perspective

Many people are talking about the Ultra Wide Band (UWB) precision finding supported by AirTags and the last two generations of iPhones. It is possible thanks to Apple’s U1 chip. This feature on its own might quite likely be a good enough reason for many users to upgrade to the latest iPhone.

Since I don’t own iPhone 11 or 12, I was curious what the experience was from iPhone SE or XR user’s perspective. Due to the lack of the U1 chip, these phones don’t support UWB and “Precision Finding”. Instead, they use Bluetooth and “Proximity Finding”.

“With You” Bluetooth accuracy and audible alarm

When the tag is “With You”, that means that your iPhone or macOS device can hear the Bluetooth signal beaconed by the AirTag. In this mode, location accuracy seems to be around 10 meters (depending on where it is and if indoors or outdoors). The lack of the UWB support means that the SE or XR can’t detect the direction you or the AirTag is moving in.

Since the AirTags is “With You” (shown in the screenshot above) and is reachable via Bluetooth, you can activate the audible alarm and find its exact location this way.

Active Bluetooth connection to the tag is required to activate Play Sound

Detached mode accuracy and refresh rate

When the AirTag becomes detached from your iPhone or macOS device (tag’s Bluetooth signal is lost), the tag then relies on other people’s iPhones and macOS devices. As soon as their device hears the Bluetooth signal of your lost AirTag, it relays (or reports if you will) the tag location to iCloud. Thanks to the crown-sourced relayed location, you will be able to see your tag’s current location in the Find My app although you are not anywhere the tag. The AirTag does not even have to be in the Lost Mode. Location finding works in its standard mode.

Location in the Find My does not update instantly. Based on my tests, it refreshes every 5 to 15 minutes.

When it comes to location accuracy relayed by other people’s iPhones and macOS devices, it ranges from approximately 10 meters to 110 meters.

Relayed location – accuracy around 10 meters
Relayed location – accuracy around 110 meters

Can Wi-Fi-only iPads relay location?

No, they can’t. I tested a couple of iPads connected to Wi-Fi with Bluetooth enabled and placed them in close proximity of the AirTag. They did not relay location. As far as I can tell, only iPhones and macOS devices can relay location of a tag.

Can cellular iPads relay location?

I don’t know. Please test it if you have one and tell me;-)

Lost mode

In the unfortunate event of losing your item, you can switch the tag to the “Lost mode” and receive a push notification whenever the AirTags gets automatically reported by someone’s iPhone or macOS device.

Activate Lost Mode and push notification

When that happens location, you receive a notification. Currently, there seems to be a cosmetic bug as the text of the notification does not show the latest location of the tag, but its previous location. When you open “Find My” app, you will see the correct and latest location though.

Item found notification received on Apple Watch

My test setup

  • iPhone SE 2nd generation running iOS 14.5
  • MacBook Pro running Big Sur 11.3.1
  • iPad Mini 5th generation running iOS 14.5
  • iPad Air 2nd generation running iOS 14.5

What is your experience with AirTags?

I am curious what your experience was. Have you tested any other scenarios? Have I missed anything. Please do let me know in the comments and I will update the post.