Apple developed a diagnostics profile that allows you to monitor and troubleshoot Wi-Fi connectivity. Unfortunately, it is only available for 7 days after installation. After that, it get automatically removed. If you are a Wi-Fi professional, that means that you need to reinstall it every few days. Yes, it always disables when you are on site and need it the most :)
Manual installation of the profile – the hard way
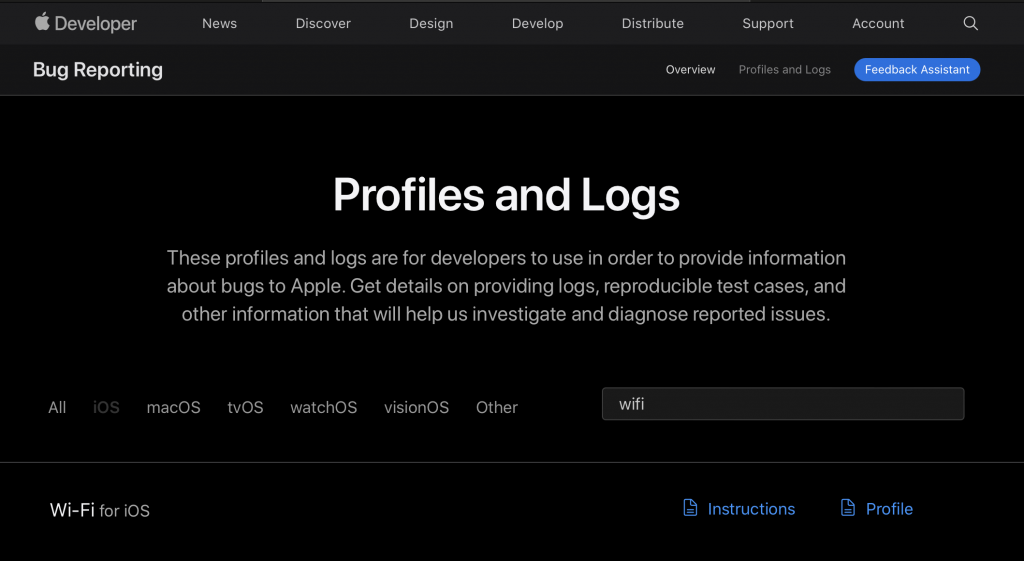
Normally, I would google something along the lines of “Apple Wi-Fi diagnostics profile”, eventually I find the right link, log in, search for the iOS Wi-Fi profile on the Apple Developer website, download the profile, go to Settings > General > Profiles section, and I install it from there.
Wi-Fi diagnostics profile for iOS devices
What if there was a little tool that did most of the above for you?
The easy way
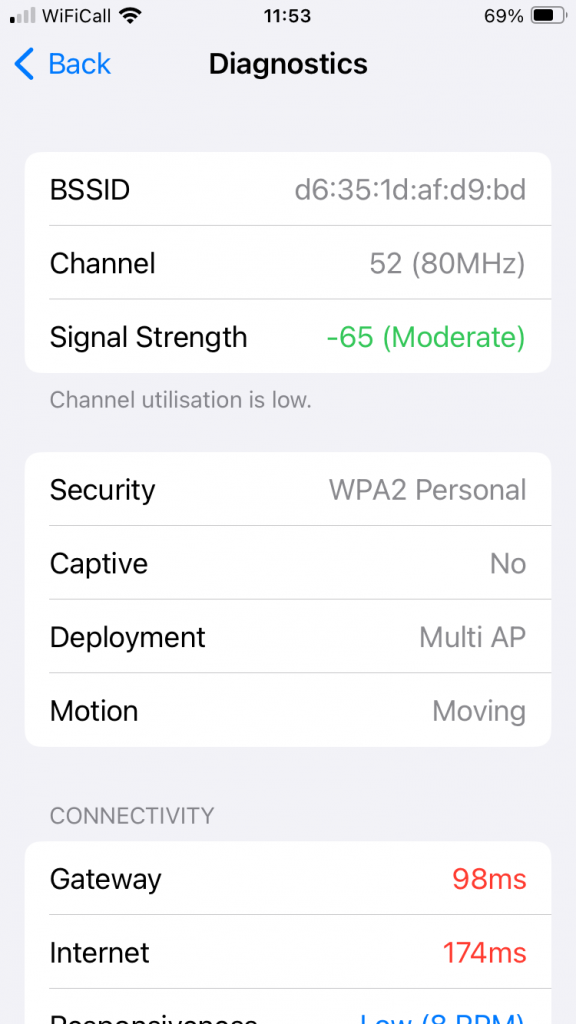
I put together a quick “Wi-Fi Profile” Apple Shortcut that removes some of these steps. Install the shortcut on your phone and it will guide you through the diagnostics profile installation every time you need it. It downloads the profile to your iPhone, lets you approve the installation and voilà, you open Wi-Fi settings and get RSSI measurements, channel details, BSSID and other useful info.
I wrote few other Shortcuts. Perhaps you are connected to a someone’s guest network, and would like to see who their access point vendor is? Your iPhone can tell you.
Let me give you one more reason why you should explore the Shortcuts framework on your iOS or macOS device.
Remind me to charge my test phone
I mainly use my primary iPhone, but for testing I use an older iPhone running iOS Beta. Up until now, I struggled to keep the test phone charged. Typically I would pull it out of the bag and … you know the rest of this story, right?
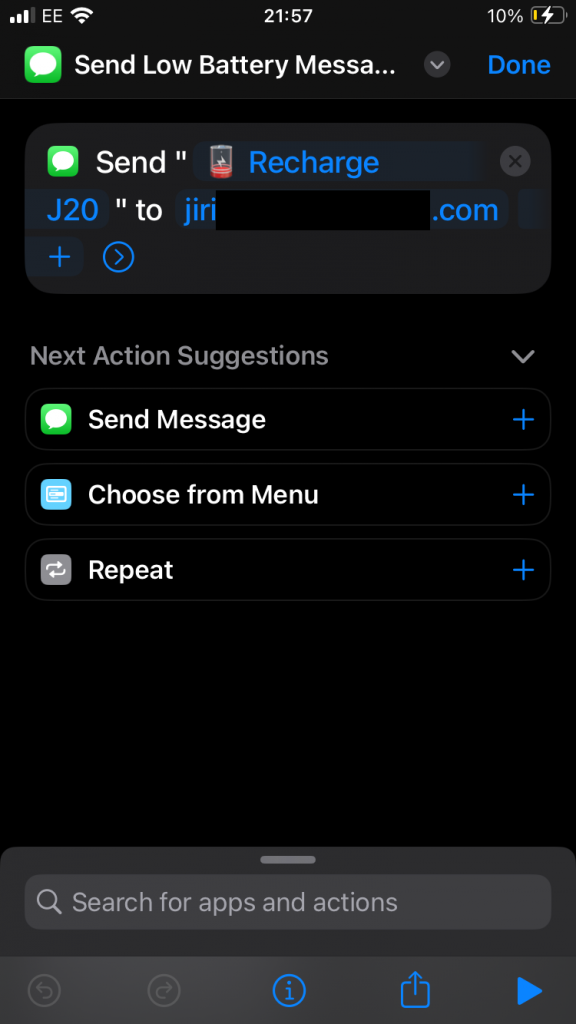
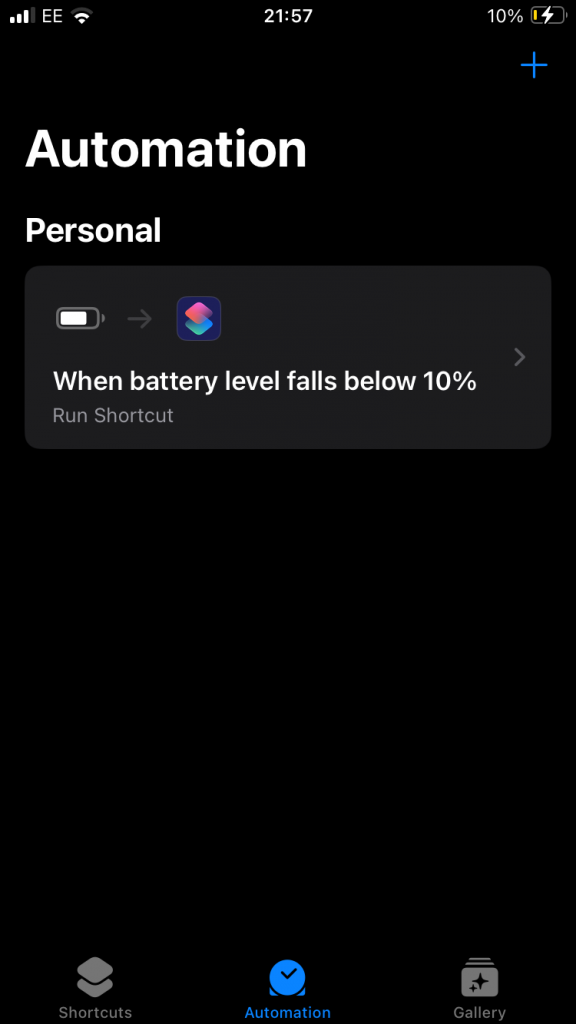
I put together this quick but very useful shortcut. Whenever charge level drops below 10 %, the secondary phone will automatically send me an iMessage with a reminder. That’s it. Simple. Useful.
Recharge reminder automatically sent to me via iMessage from the secondary device
How does it work
Simply create a new Shortcut on the secondary iOS device, using the Shortcuts app. Select Send Message action and enter your iMessage details.
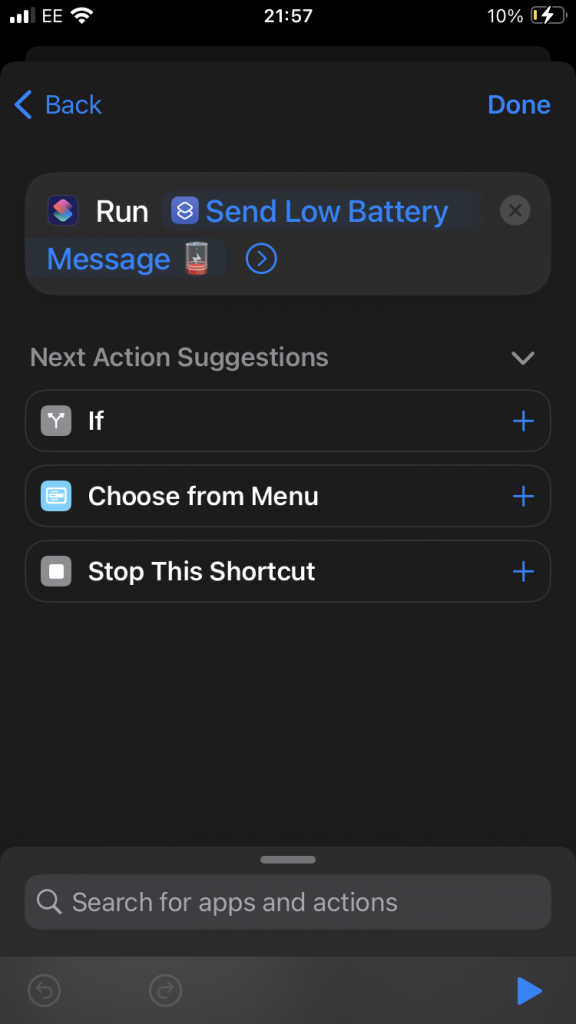
Now, in the Automation section, configure the trigger that executes this action. Set it to run whenever battery level drops below 10 %.
Many of us walk into buildings and we immediately start looking for access points 🙃 Often times, the access points are not visibly installed. But how can you tell what vendor is your favourite coffee shop using, or what APs did your customer deploy?
Now, would it be cool if you could use your iPhone or iPad to find out what vendor is your customer, public venue, favourite football club, or train provider using?
Wi-Fi Vendor iOS Shortcut
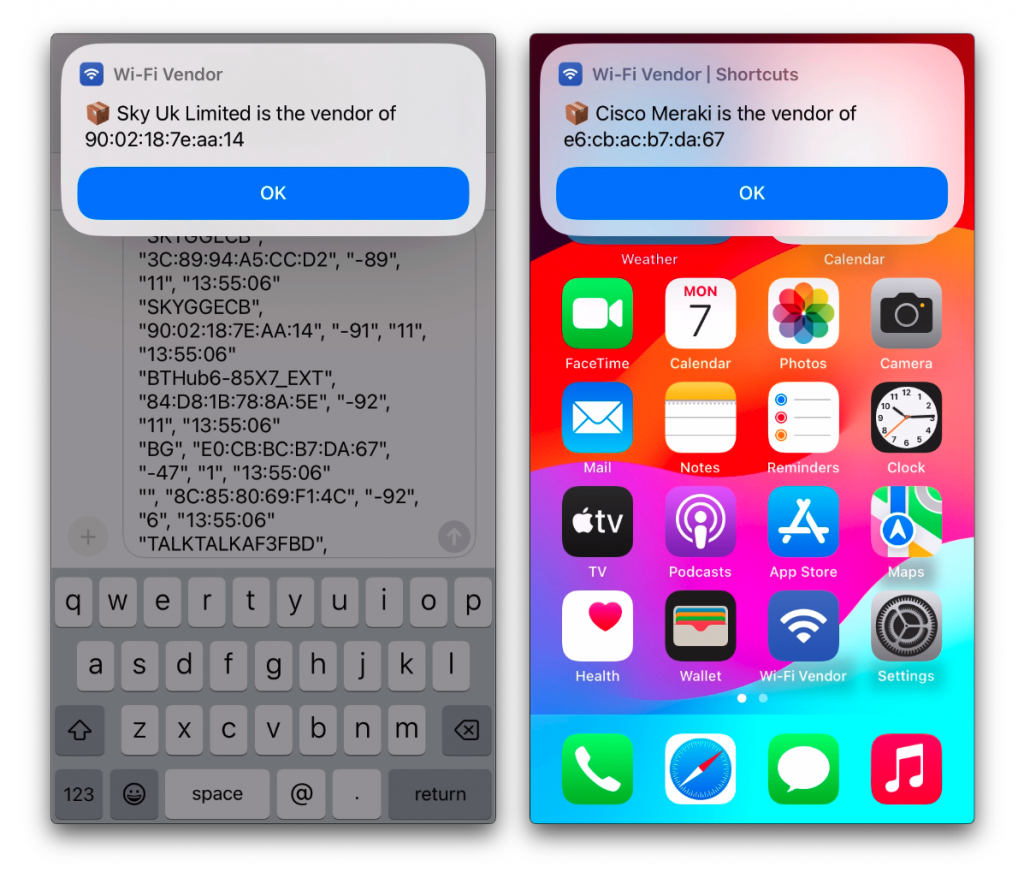
I created a Shortcut for iOS, which does exactly that.
Simply connect to a Wi-Fi network and open the shortcut. We will automatically populate the input field with the BSSID of the AP you are currently connected to:
Simply connect to a Wi-Fi network and tap on the Wi-Fi Vendor icon
If you don’t want to connect to an AP, use Airport Utility to get the BSSID (aka the “wireless MAC address” of the AP) of the access points around you, and let Wi-Fi Vendor shortcut do its magic:
Scan for BSSIDs around you and detect vendor
Or you can even use the good old Copy & Paste method. Let’s say you saved the OUI to your Notes app. Copy it to clipboard and paste into Wi-Fi Vendor:
Benefits of this solution
iPhone or iPad is all you need. No need to open your laptop or other professional Wi-Fi tool.
All data stays on your iPhone and iPad. No data, not even the BSSID, is sent to a cloud service.
Our OUI <-> Vendor database is Wi-Fi centric, open to additions of the new records by Wi-Fi professionals, it has extra entries from vendor documentation, and BSSIDs captured in the field
It is community-driven and customisable. Contribute new OUIs, or fork our repository and create your own tool.
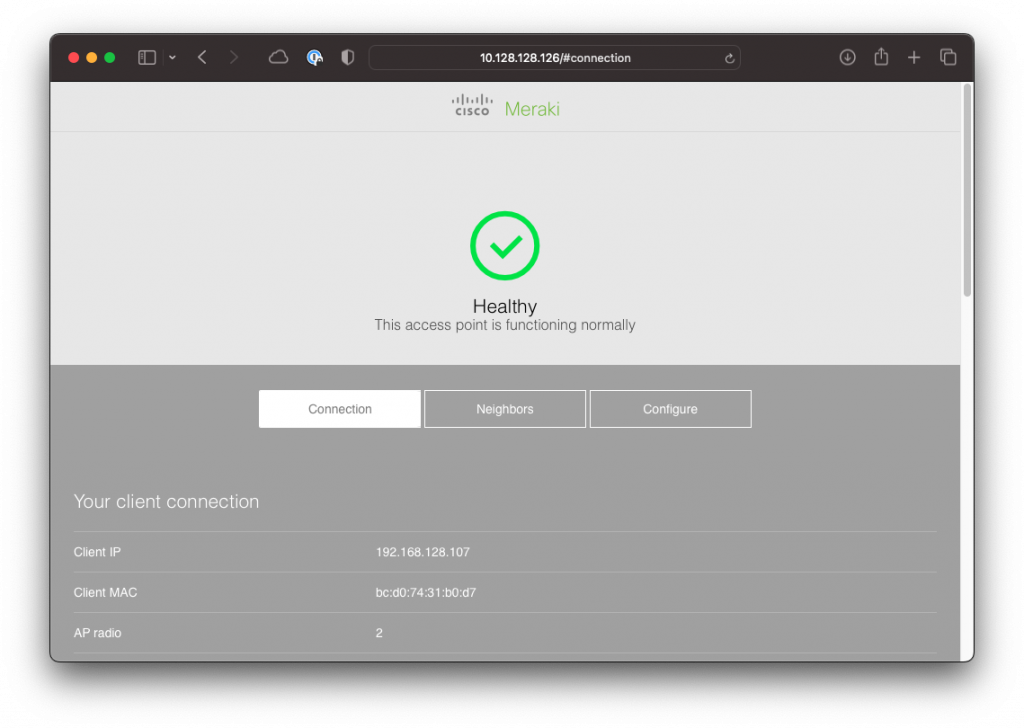
For Cisco Meraki APs, I use an active detection method – more about this below
Cisco Meraki active vendor detection method
When there is no match based on the access point’s OUI, Wi-Fi Vendor shortcut performs an active check. Make sure you are connected to the AP, then open Wi-Fi Vendor. It will attempt to browse to the Local Status Page of the AP and if it find Cisco Meraki logo in the source code, that’s a match.
Supported iOS releases
I’ve tested Wi-Fi Vendor on these devices. Use iOS 17 or newer for the best results and all features.
iPad Air 2, iOS 15.7.7 – no Cisco Meraki active check, doesn’t detect BSSID you are currently connected to
iPhone SE 2nd gen, iOS 16.6 – no Cisco Meraki active check, doesn’t detect BSSID you are currently connected to
iPhone SE 2nd generation, iOS 17.0 – all features are supported
iPhone SE 3rd generation, iOS 17.0 – all features are supported
This tool is provided as is. If you spot anything that needs to be fixed, let us know, or even better submit a Pull Request including the fix. Blame Jiri for anything that needs to be fixed, not Cisco 😉
Many people are talking about the Ultra Wide Band (UWB) precision finding supported by AirTags and the last two generations of iPhones. It is possible thanks to Apple’s U1 chip. This feature on its own might quite likely be a good enough reason for many users to upgrade to the latest iPhone.
Since I don’t own iPhone 11 or 12, I was curious what the experience was from iPhone SE or XR user’s perspective. Due to the lack of the U1 chip, these phones don’t support UWB and “Precision Finding”. Instead, they use Bluetooth and “Proximity Finding”.
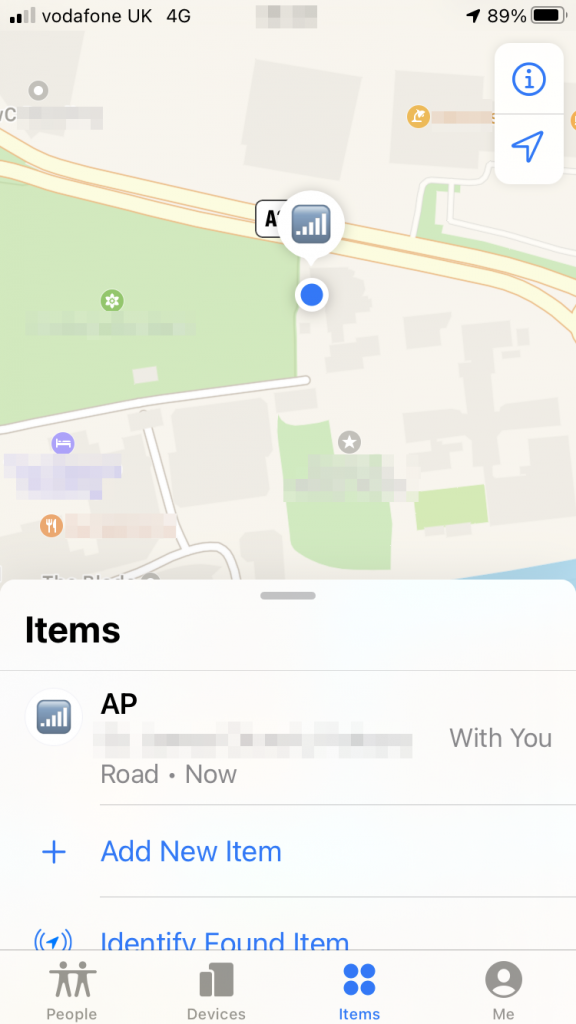
“With You” Bluetooth accuracy and audible alarm
When the tag is “With You”, that means that your iPhone or macOS device can hear the Bluetooth signal beaconed by the AirTag. In this mode, location accuracy seems to be around 10 meters (depending on where it is and if indoors or outdoors). The lack of the UWB support means that the SE or XR can’t detect the direction you or the AirTag is moving in.
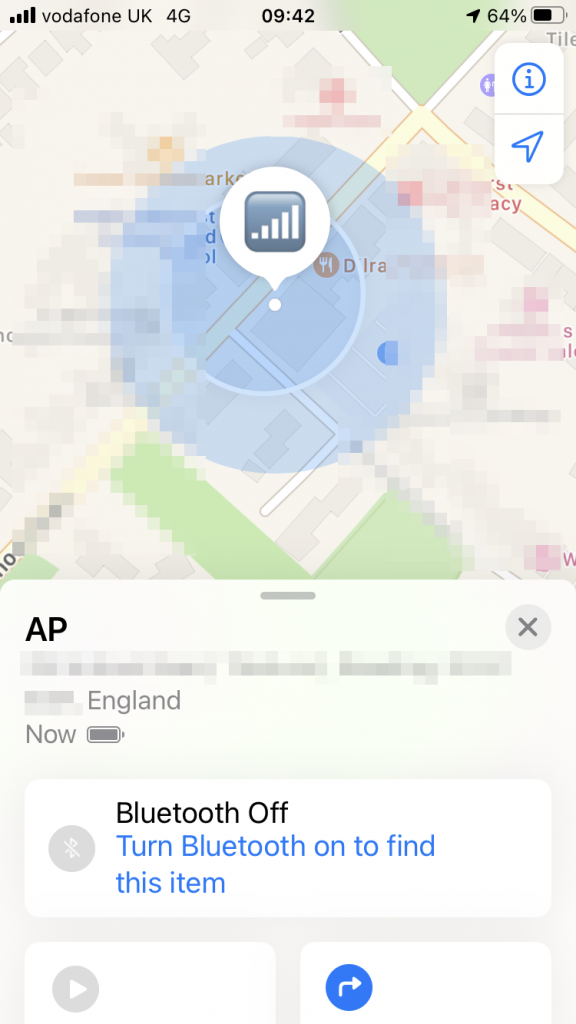
Since the AirTags is “With You” (shown in the screenshot above) and is reachable via Bluetooth, you can activate the audible alarm and find its exact location this way.
Active Bluetooth connection to the tag is required to activate Play Sound
Detached mode accuracy and refresh rate
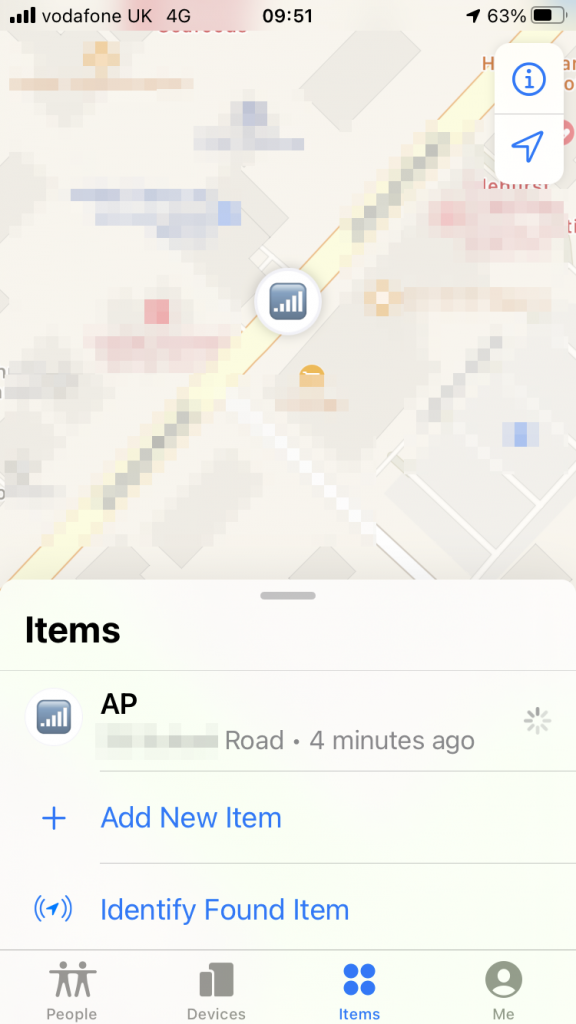
When the AirTag becomes detached from your iPhone or macOS device (tag’s Bluetooth signal is lost), the tag then relies on other people’s iPhones and macOS devices. As soon as their device hears the Bluetooth signal of your lost AirTag, it relays (or reports if you will) the tag location to iCloud. Thanks to the crown-sourced relayed location, you will be able to see your tag’s current location in the Find My app although you are not anywhere the tag. The AirTag does not even have to be in the Lost Mode. Location finding works in its standard mode.
Location in the Find My does not update instantly. Based on my tests, it refreshes every 5 to 15 minutes.
When it comes to location accuracy relayed by other people’s iPhones and macOS devices, it ranges from approximately 10 meters to 110 meters.
Relayed location – accuracy around 10 metersRelayed location – accuracy around 110 meters
Can Wi-Fi-only iPads relay location?
No, they can’t. I tested a couple of iPads connected to Wi-Fi with Bluetooth enabled and placed them in close proximity of the AirTag. They did not relay location. As far as I can tell, only iPhones and macOS devices can relay location of a tag.
Can cellular iPads relay location?
I don’t know. Please test it if you have one and tell me;-)
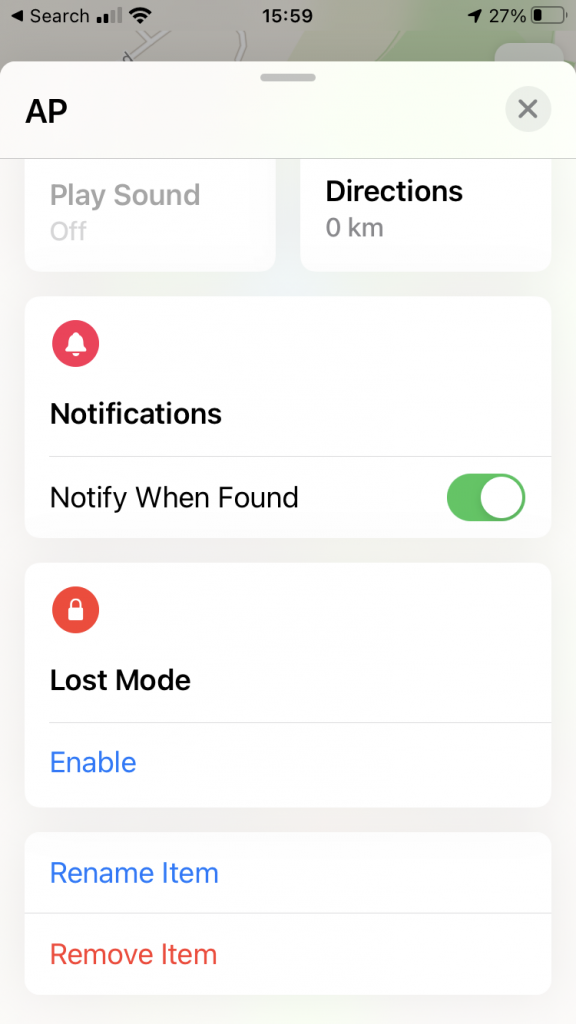
Lost mode
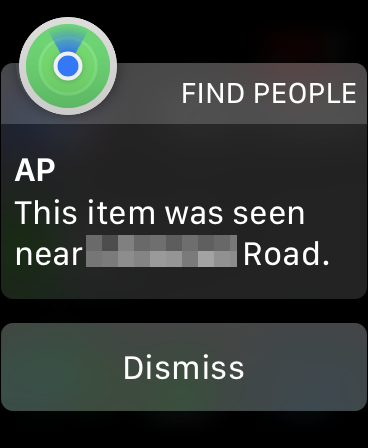
In the unfortunate event of losing your item, you can switch the tag to the “Lost mode” and receive a push notification whenever the AirTags gets automatically reported by someone’s iPhone or macOS device.
Activate Lost Mode and push notification
When that happens location, you receive a notification. Currently, there seems to be a cosmetic bug as the text of the notification does not show the latest location of the tag, but its previous location. When you open “Find My” app, you will see the correct and latest location though.
Item found notification received on Apple Watch
My test setup
iPhone SE 2nd generation running iOS 14.5
MacBook Pro running Big Sur 11.3.1
iPad Mini 5th generation running iOS 14.5
iPad Air 2nd generation running iOS 14.5
What is your experience with AirTags?
I am curious what your experience was. Have you tested any other scenarios? Have I missed anything. Please do let me know in the comments and I will update the post.
V domnění, že kupuji originální nabíječku a USB kabel pro iPhone jsem si z jednoho českého obchodu objednal toto přislušenství. Příště už to neudělám a nedoporučuji to ani vám.
Proč se vyhnout kopii?
kopie nabíječky se nepříjemně přehřívá!
při zaklepání na neoriginální nabíječku uvnitř cosi drnčí, některý z dílů je tam špatně uchycen
USB kabel má větší rozměry plastové základny okolo 30ti pinového konektoru
máte-li telefon v bumperu, musíte ho nejprv z obalu vyndat, až potom se vám povede USB kabel do přístroje zastrčit
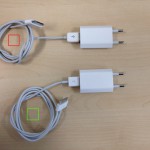
Jak poznat originál?
V galerii si prohlédněte, jak od sebe odlišíte originál od Applua jeho levnější kopii z Číny. Vodítkem pro zakoupení originálu může být cena, která je zpravidla o dost vyšší než u kopie. Ale nebral bych to jako svaté pravidlo, viděl jsem i zadraho prodávané neoriginální příslušenství.
Znaky originálního příslušenství:
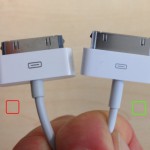
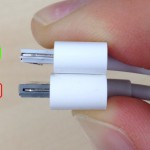
plastová základna obklopující 30ti pinový konektor USB kabelu je menší než u “baculatější” kopie
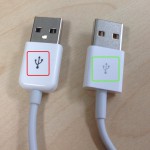
piktogramy na USB kabelu jsou šedivé nikoliv černé
bužírka je na obou koncích USB kabelu delší
kabel je tužší
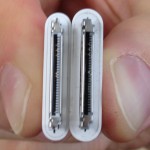
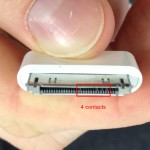
má v 30ti pinovém konektoru zapojených 6 kontaktů narozdíl od 4 u kopie
při pohledu do USB portu nabíječky uvidíte její alfanumerické označení (že by sériové číslo?)
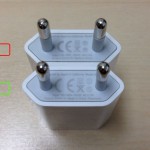
znak CE na spodní straně nabíječky má na kopii chybné proporce, písmena CE jsou blíže k sobě, než je předepsáno, takže spíše než o evropskou shodu půjde o neslavný “China Export”
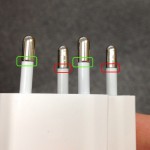
kovový díl vidlice nabíječky je na konci viditelně zkosený – v místě kde končí pokovená část vidlice a přechází v plast
nabíječku dostanete zabalenou v originální krabičce od Applu, kopie vám obvykle dorazí pouze v obálce
Originál od Applu najdete pod zelenou barvou, kopii jsem zvýraznil červeně.
Popisek v ČR nehraje roli
Ani sebedůvěryhodnější popisek zboží negarantuje, že se při výběru nespálíte. V případě této přehřívající se nabíječky to berte doslova:) Na českých aukčních portálech i e-shopech prodejci podobného zboží běžně udávají jako výrobce “Apple”, což má daleko k pravdě.